Move the rack cabinet

Follow the instructions in this section to move the rack cabinet to the designated site.

S037
mechanical lift required
CAUTION
The weight of this part or unit is more than 55 kg (121.2 lb). It takes specially trained persons, a lifting device, or both to safely lift this part or unit.


Attention - Tip hazard.
Important
  • The task in this section requires more than two people.

  • The cabinet could be easily tipped. Move it with extreme caution.

WARNING: Failure to follow these instructions could result in equipment damage, severe injuries, or death.

Before moving the rack cabinet, complete the following steps:

  1. Remove the screws that secure the bolt-down brackets on the front and rear side of the cabinet with the 13-mm socket wrench.
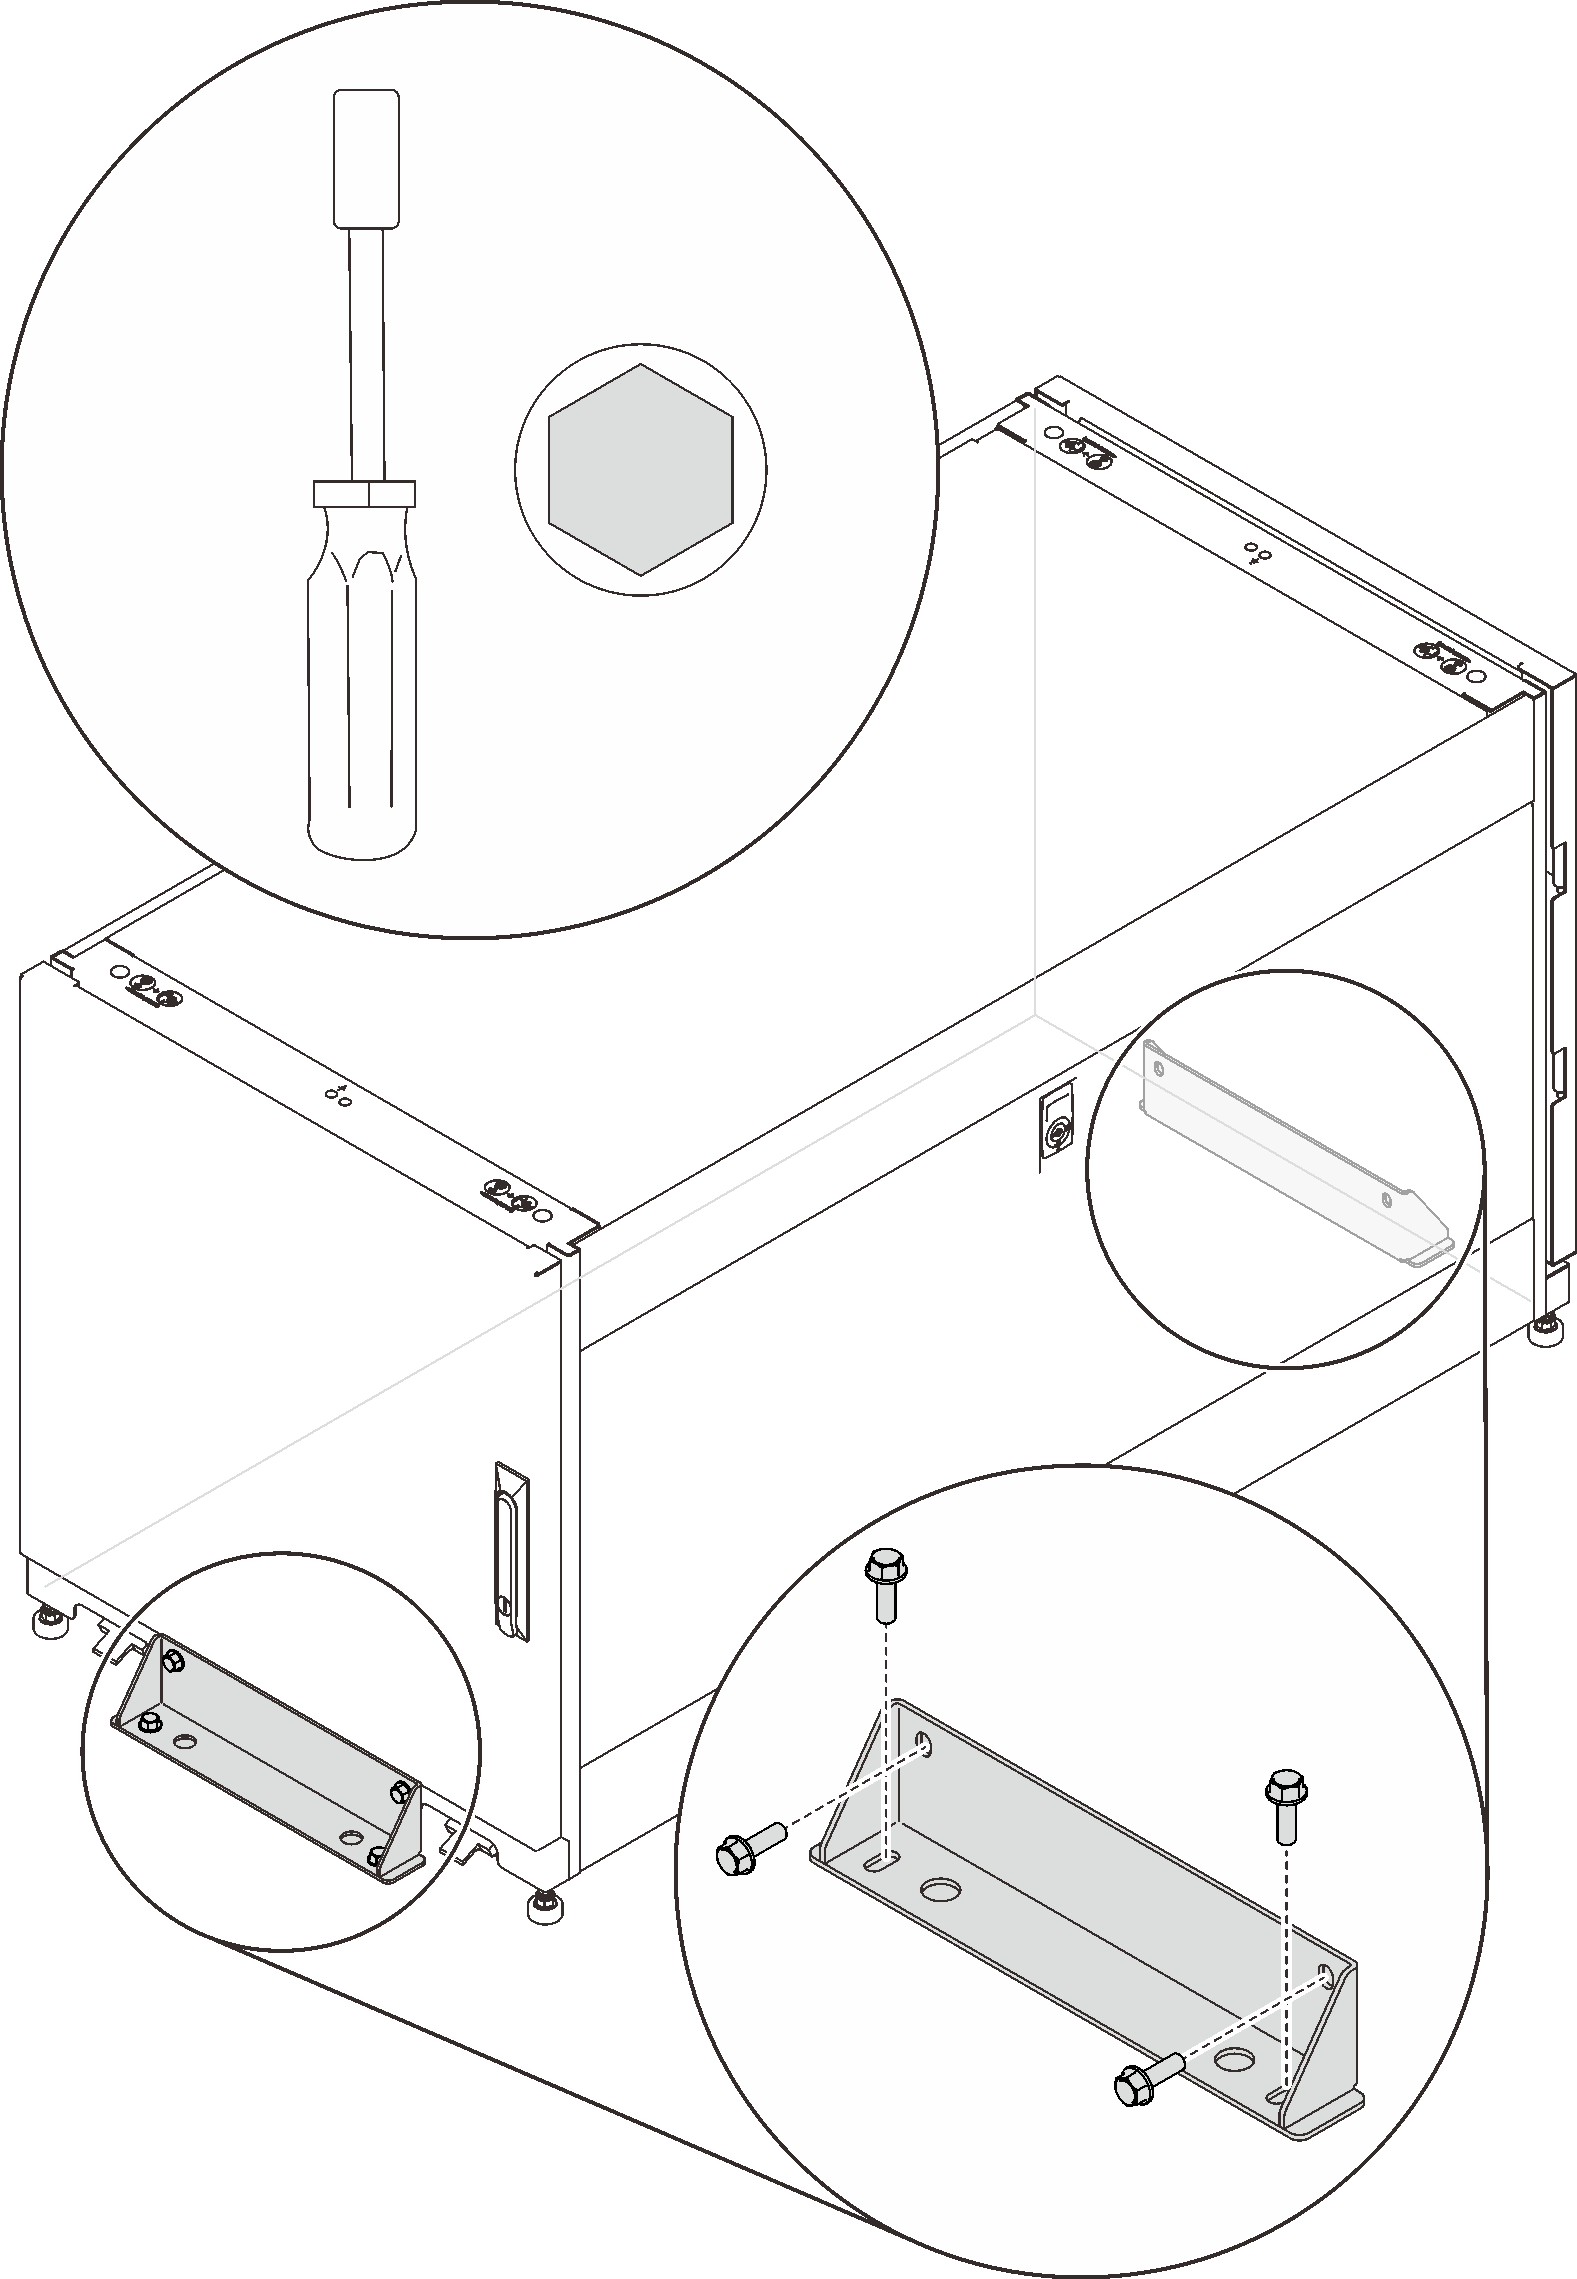
Figure 1. Removing the bolt-down brackets

Two options are available when moving the cabinet:

Casters

S037
mechanical lift required
CAUTION
The weight of this part or unit is more than 55 kg (121.2 lb). It takes specially trained persons, a lifting device, or both to safely lift this part or unit.

Complete the following steps to lift and move the cabinet to the designated site:

  1. Remove the ramps from the box that is shipped with the cabinet, and install them on the front side of the pallet.
    Figure 2. Installing the ramps

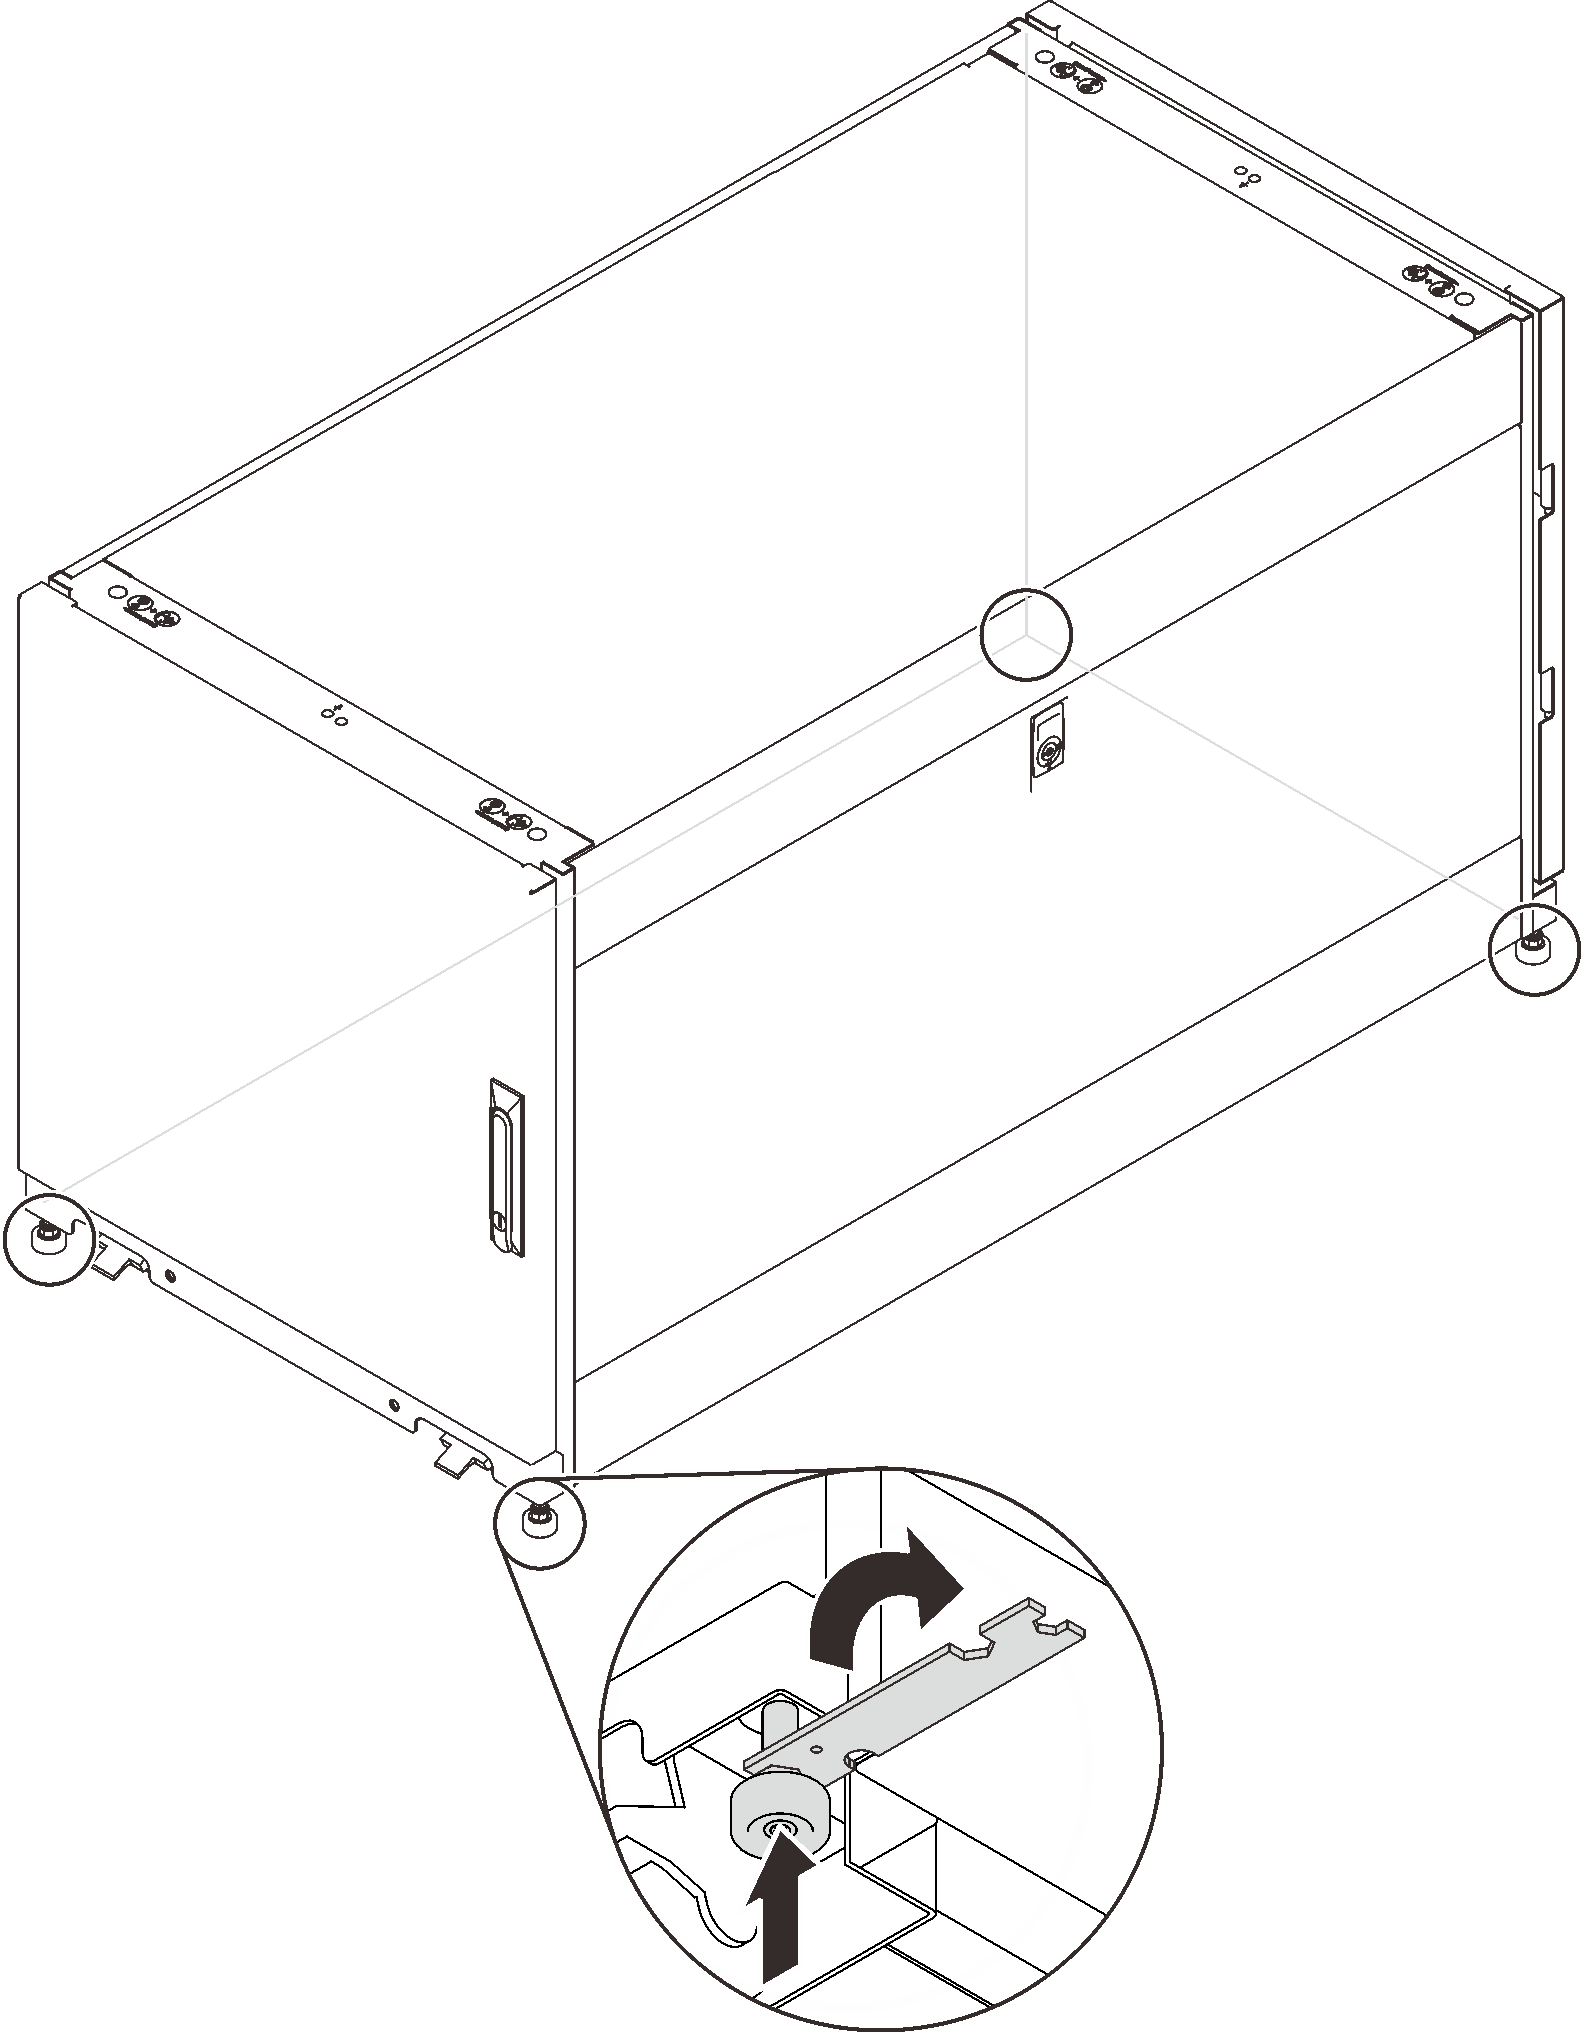
  2. Make sure the leveling feet are up. If not, insert a 13-mm open-ended wrench into the screw above one of the feet, and turn it counterclockwise until it no longer makes firm contact with the floor. Then, repeat this procedure on the other three feet.
    Figure 3. Adjusting the rack cabinet feet

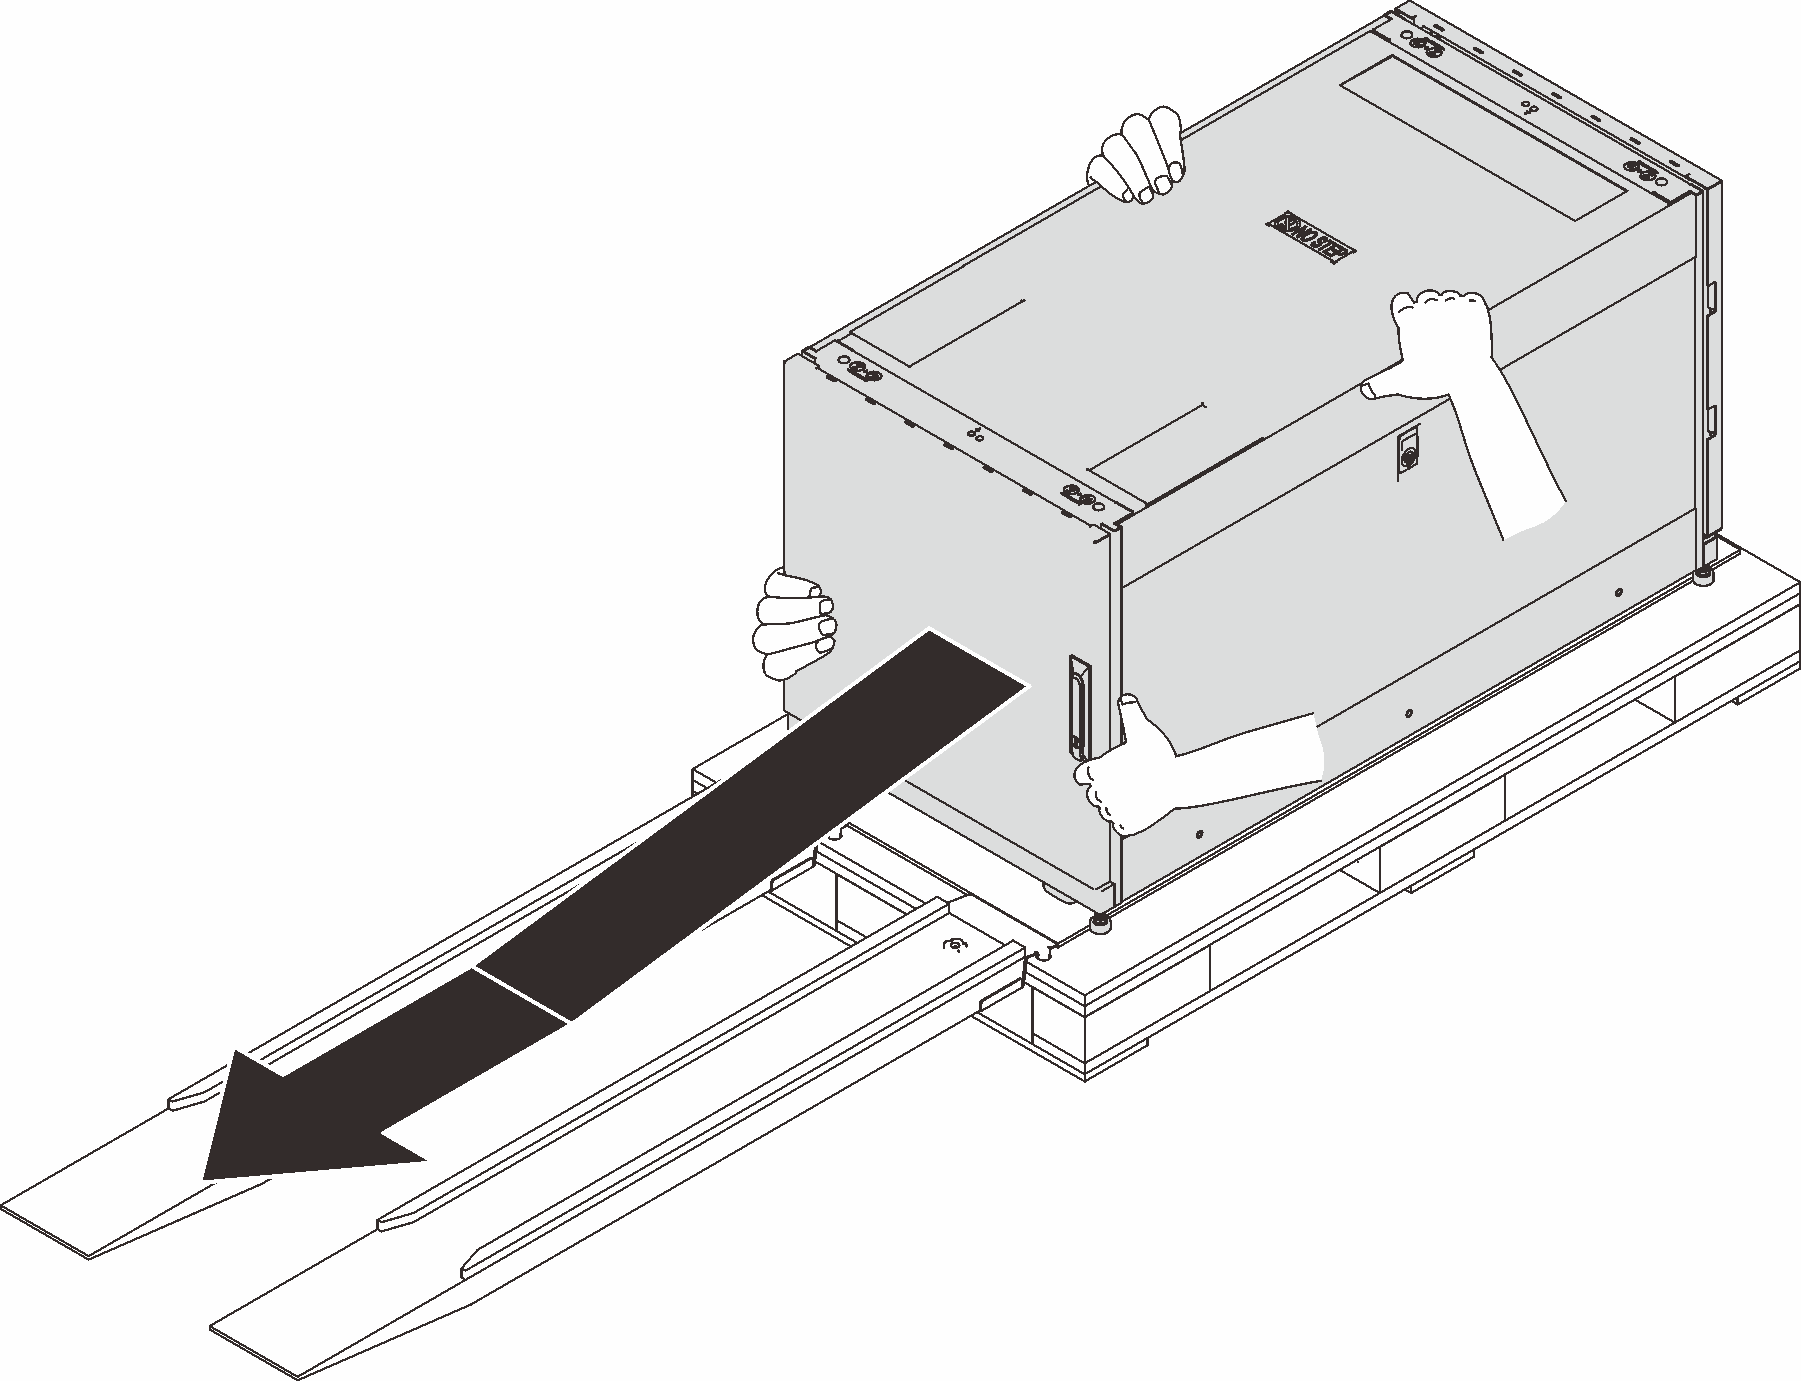
  3. Push the cabinet from either the front or the rear until it reaches the designated site.
    Figure 4. Sliding the cabinet down from the pallet

    Note
    • Make sure that more than two people are handling the cabinet while sliding it down from the ramps.

    • Do not stand in the path of the rack.

Crane lifter


Attention - Drop hazard.

Complete the following steps to lift and move the cabinet to the designated site:

  1. Remove the four plugs from the four corners on the top of the cabinet frame.
    Figure 5. Lifting the rack cabinet

  2. Install one M10 eye bolt to each hole, and make sure they stay solidly connected to the cabinet.
  3. Connect the four eye bolts to the hook of a crane lifter, and make sure the cord length allows an angle more than 75˚.
  4. Lift the cabinet and place it to the designated site.

After moving the cabinet to the designated site, complete the following steps:

  1. Make sure the leveling feet are down and make firm contact to the ground. If not, insert a 13-mm open-ended wrench into the screw above one of the feet, and turn it clockwise until the foot makes firm contact with the floor.

    Figure 6. Adjusting rack cabinet feet
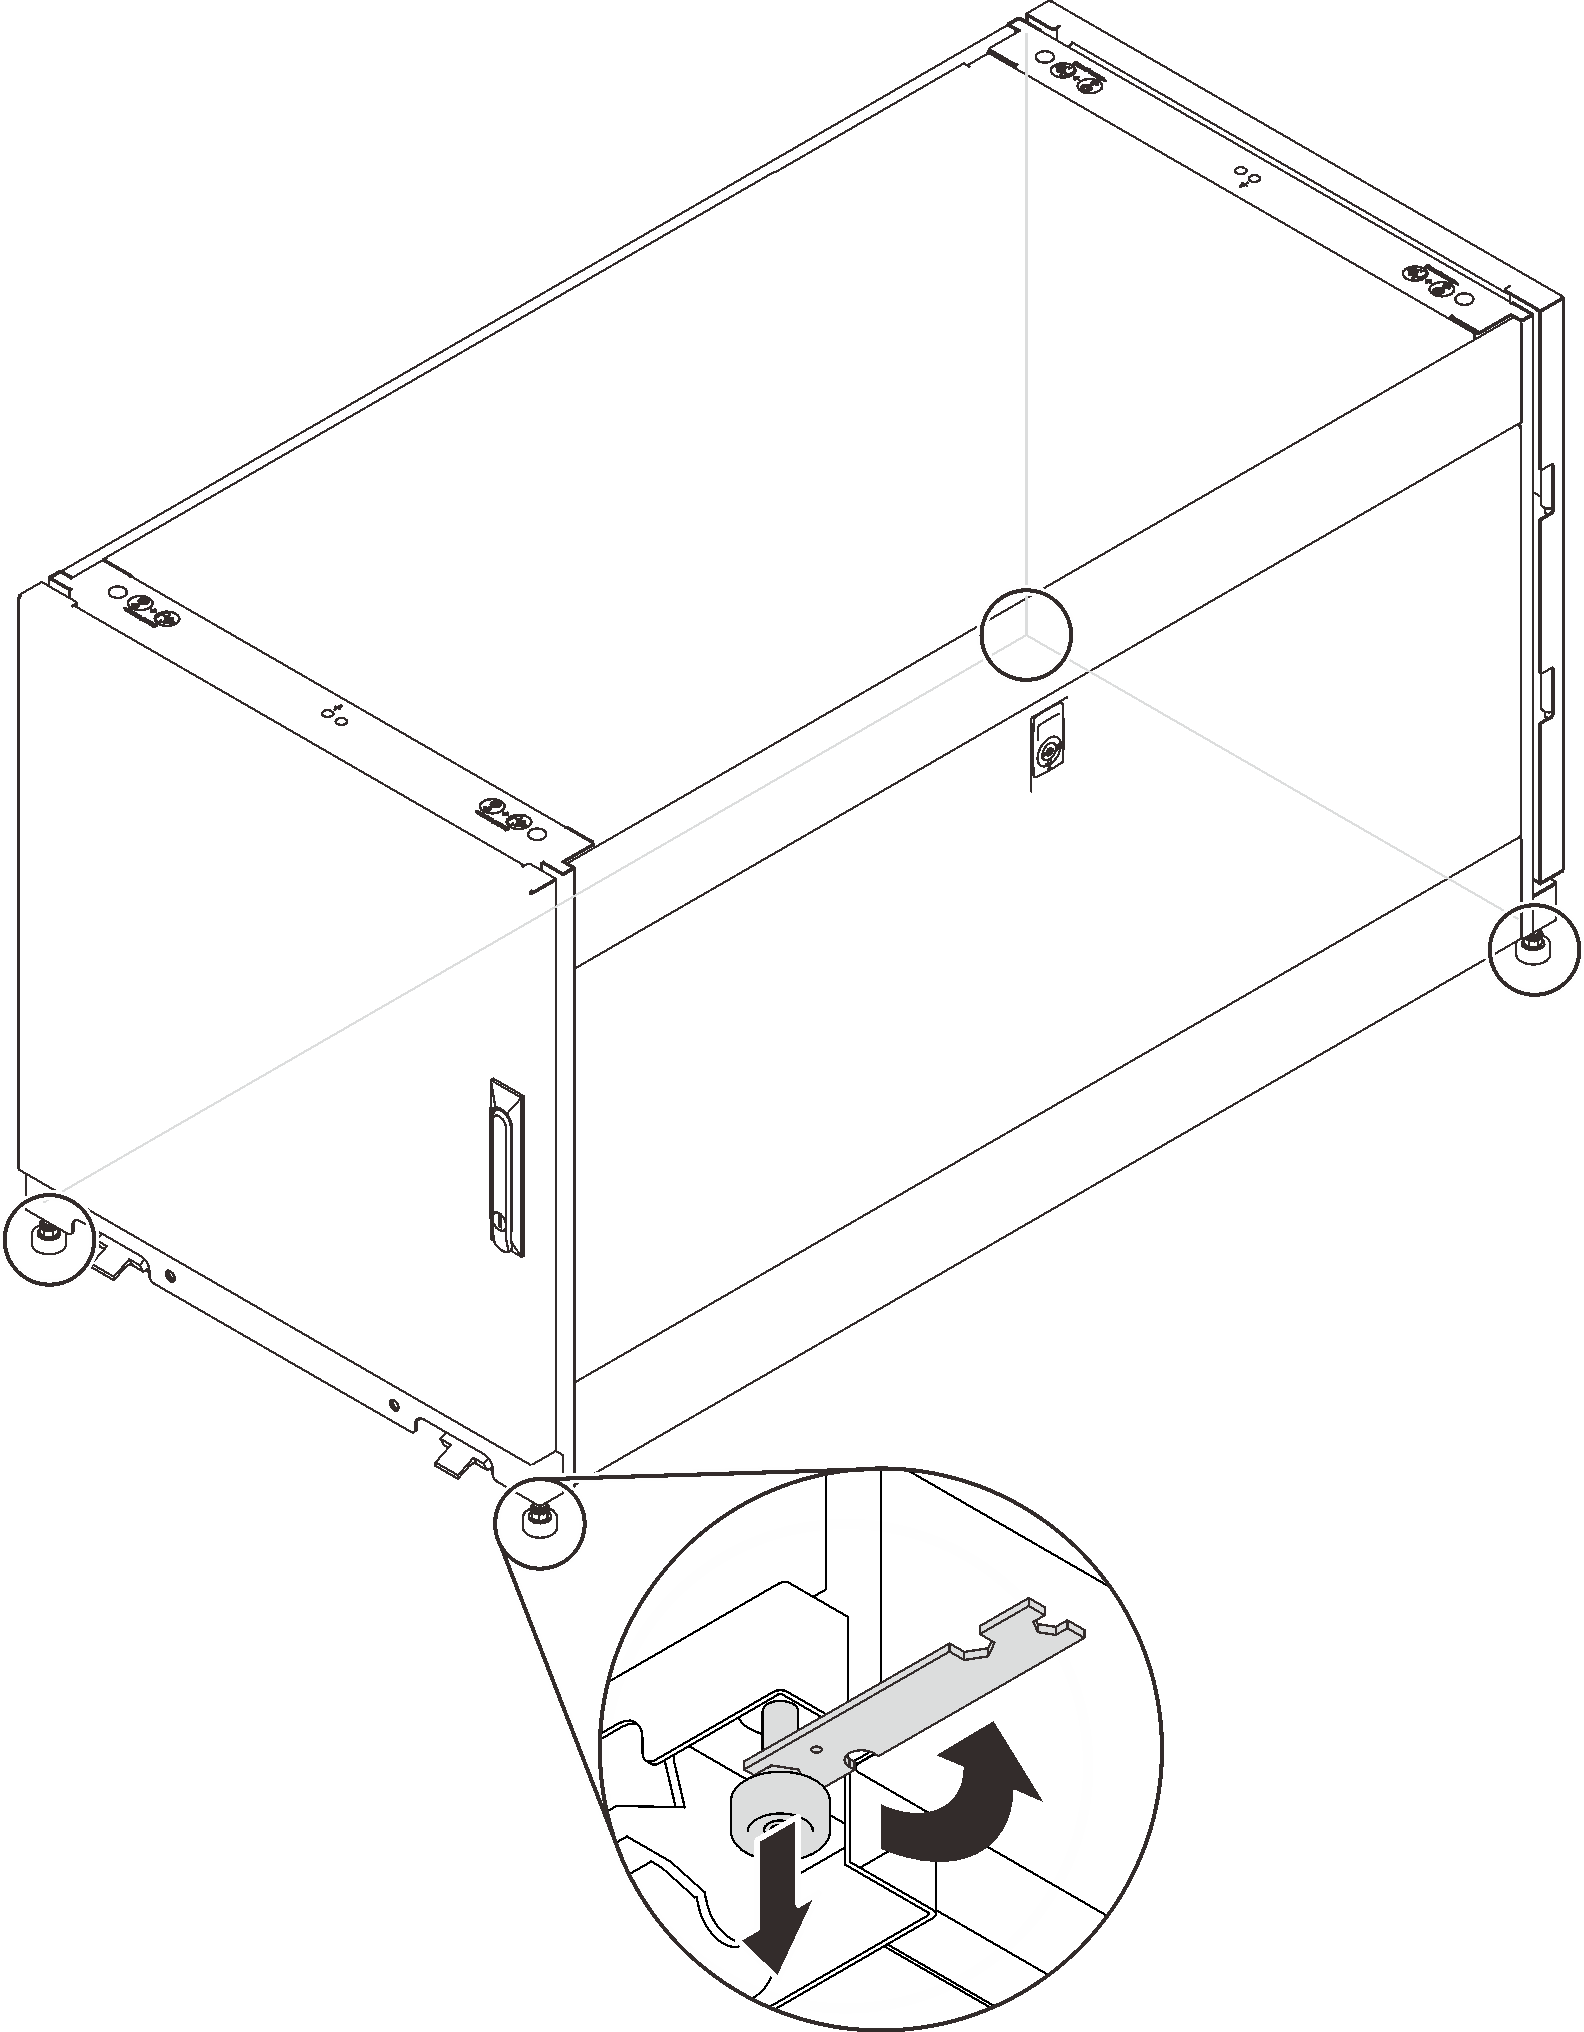
  2. Repeat the same procedure on the other three feet until the cabinet is levelled with balance. To make sure the cabinet is balanced, slightly push the cabinet and make sure it does not shake or tilt.

    Note
    The leveling feet provide a stable base if the floor is slightly uneven, but they cannot compensate for a badly sloped surface.
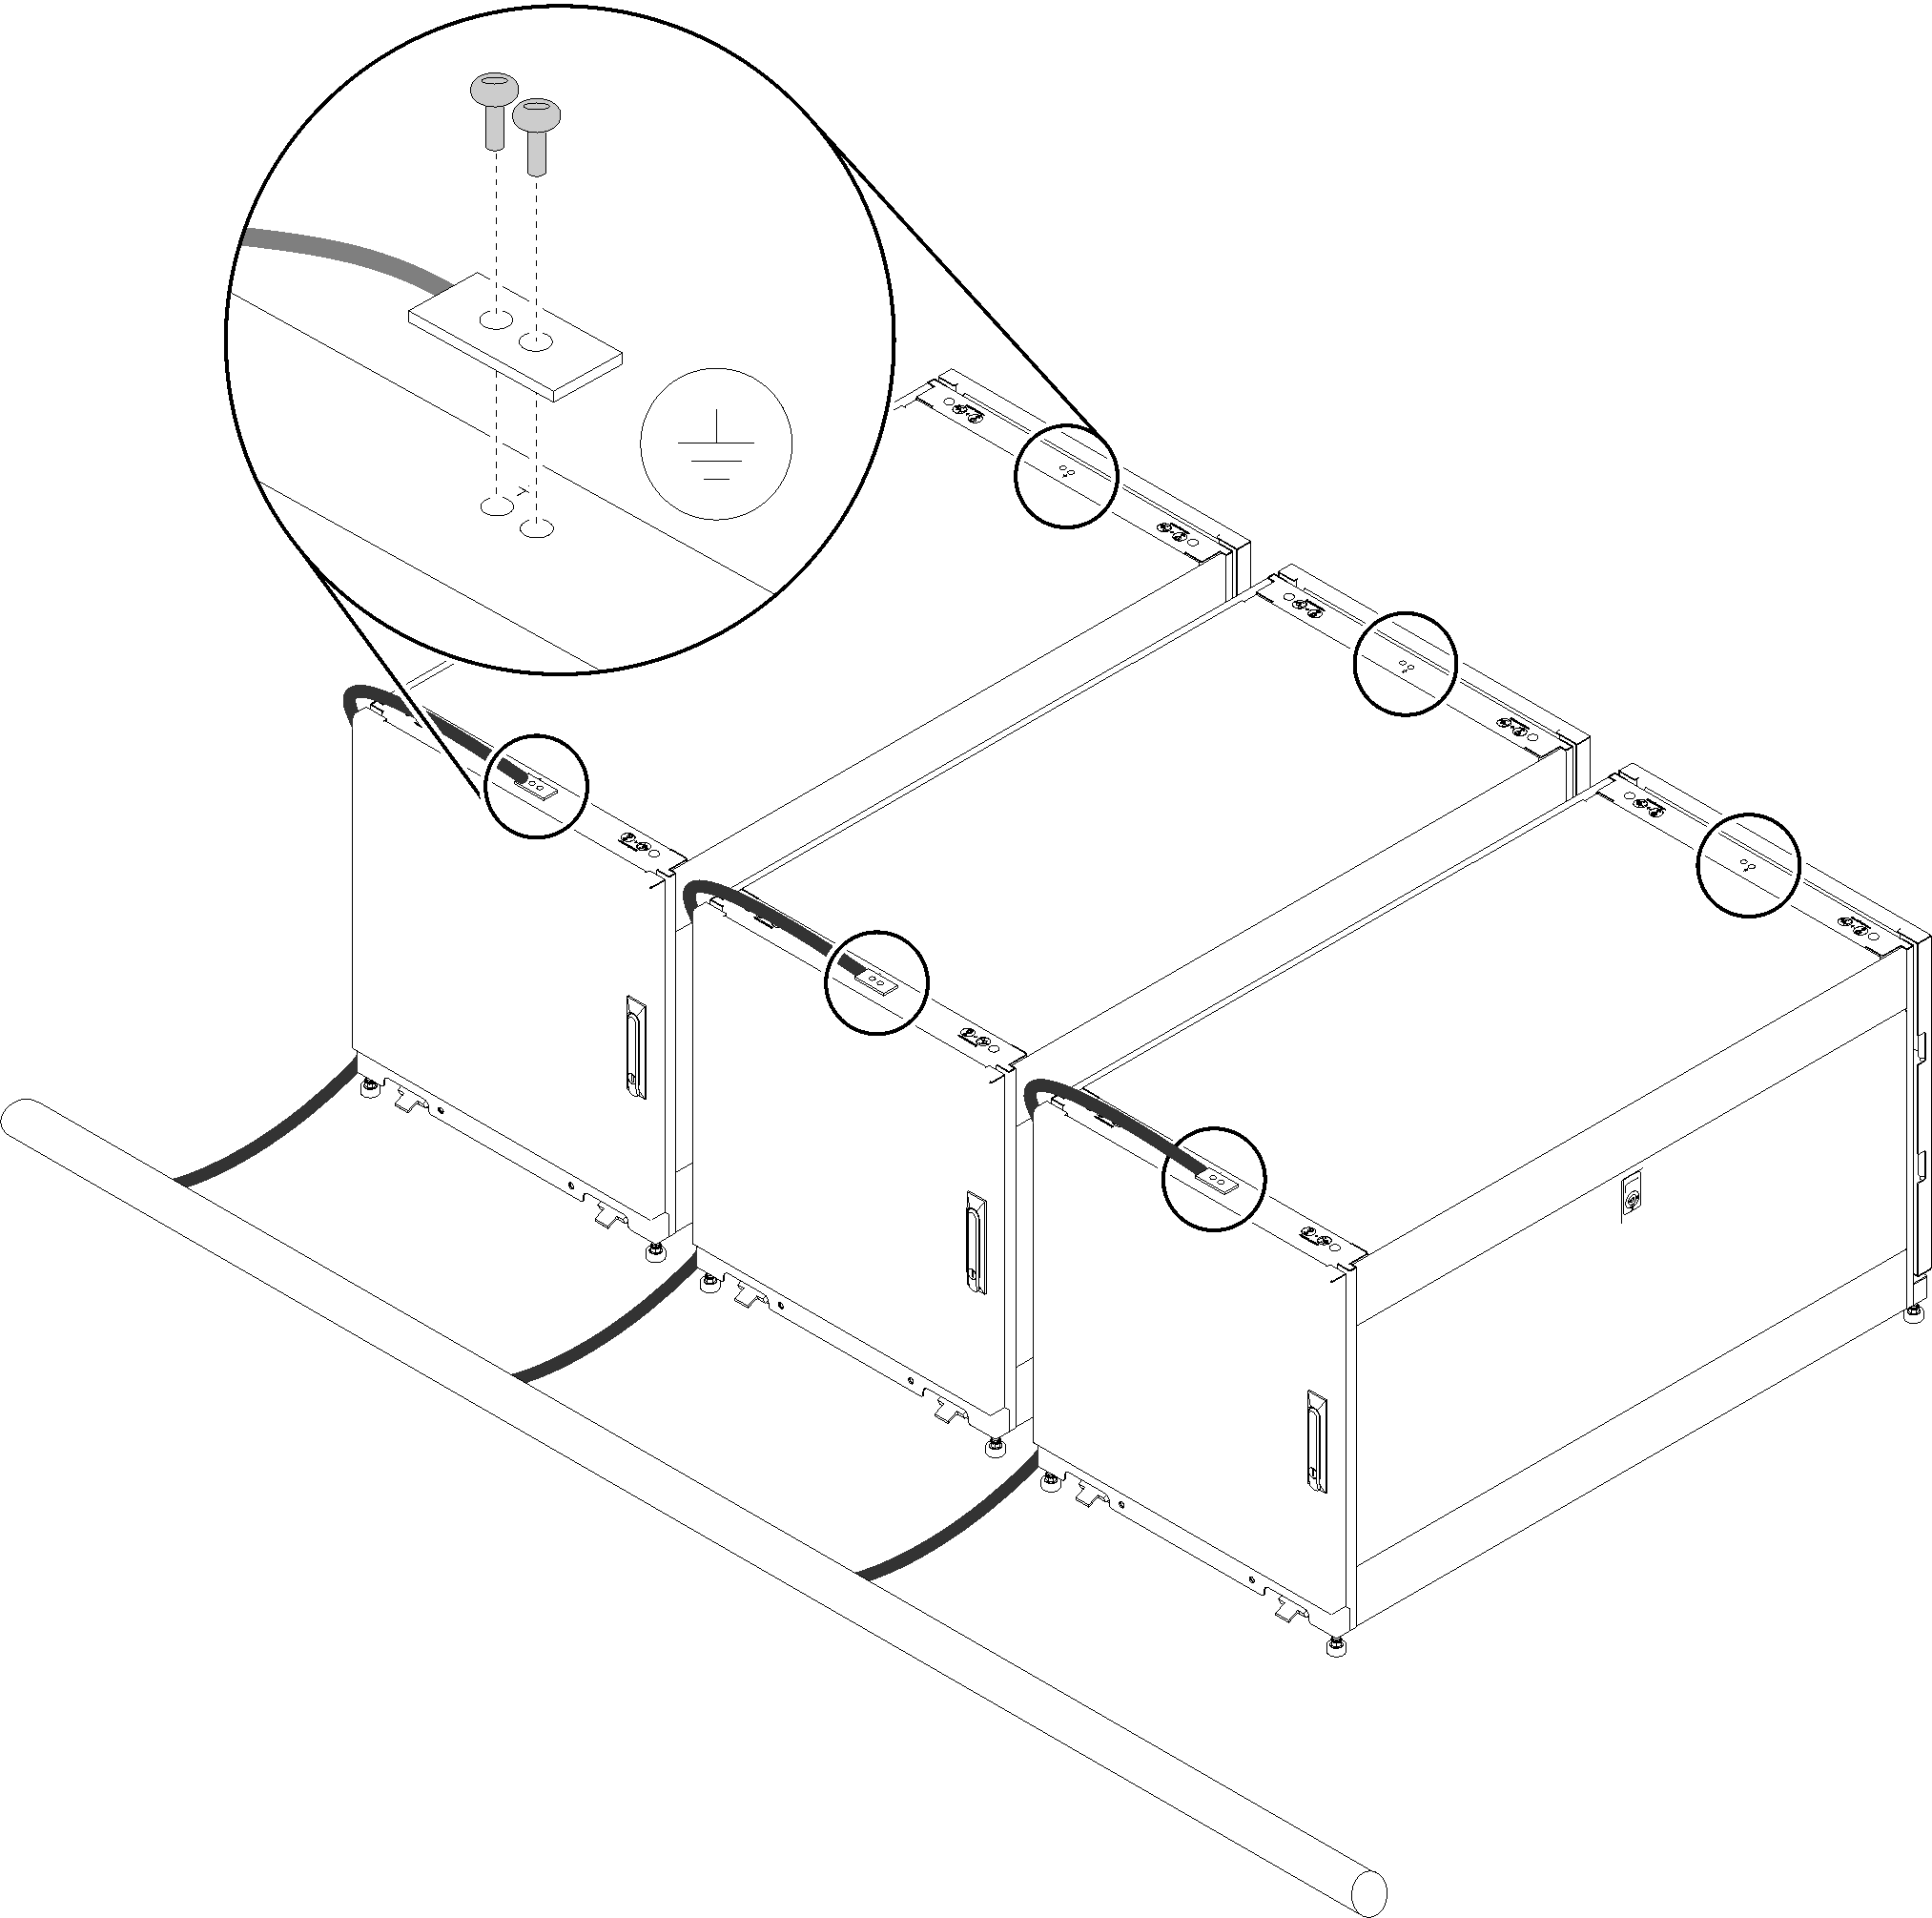
  3. Connect the grounding cable.

    Figure 7. Connecting the grounding cable
  4. To secure the cabinet to the ground, you can reinstall the bolt-down brackets that were removed earlier.

    Figure 8. Installing the bolt-down brackets
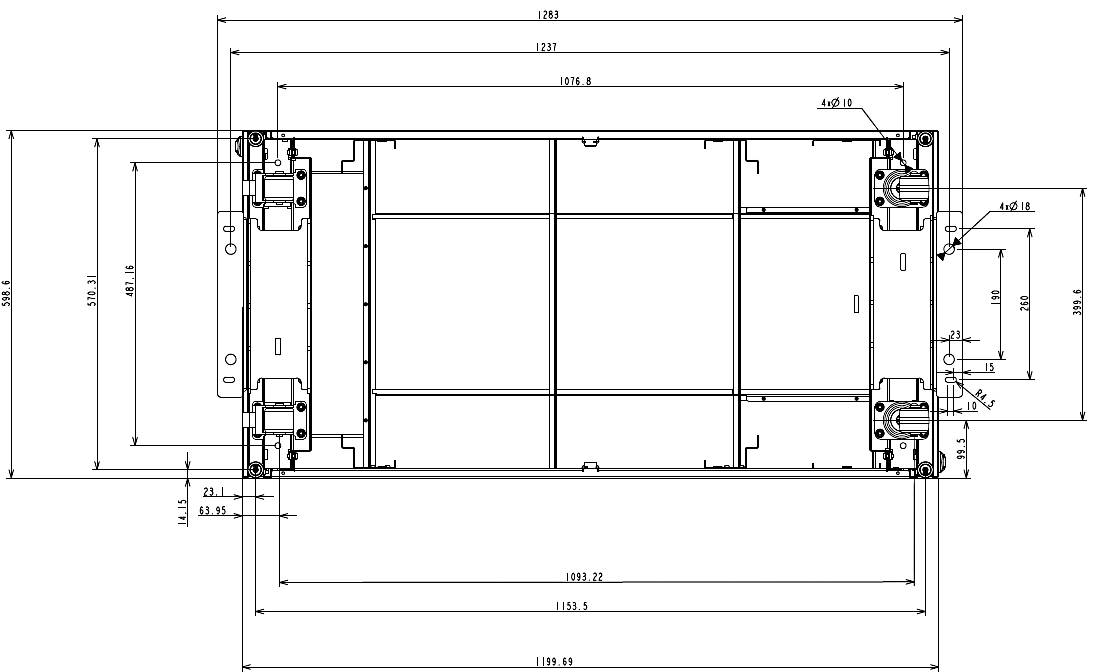
Figure 9. Rack cabinet with bolt-down brackets installed
Rack cabinet with bolt-down brackets installed