Install an OCP module
Follow instructions in this section to install an OCP module.
About this task
To avoid potential danger, make sure to read and follow the safety information.
Read Installation Guidelines and Safety inspection checklist to make sure that you work safely.
Touch the static-protective package that contains the component to any unpainted metal surface on the node and chassis; then, take the component out of the package and place it on a static-protective surface.
- Firmware and driver download: You might need to update the firmware or driver after replacing a component.
Go to Drivers and Software download website for ThinkSystem SD535 V3 to see the latest firmware and driver updates for your server.
Go to Update the firmware for more information on firmware updating tools.
To avoid throttling, make sure to adopt passive Direct Attach cables when network adapters with 100GbE or higher speed are installed.
Procedure
- If an OCP filler has been installed, remove it from the OCP slot.
- Install the OCP module.
 Insert and push the OCP module into the slot until it is fully seated.
 Tighten the thumbscrew to secure the OCP module. Use a screwdriver if necessary.NoteMake sure to fully install the OCP module and securely tighten the thumbscrew. Otherwise, the OCP module may not get full connection and may not function.Figure 1. Installation of rear OCP module
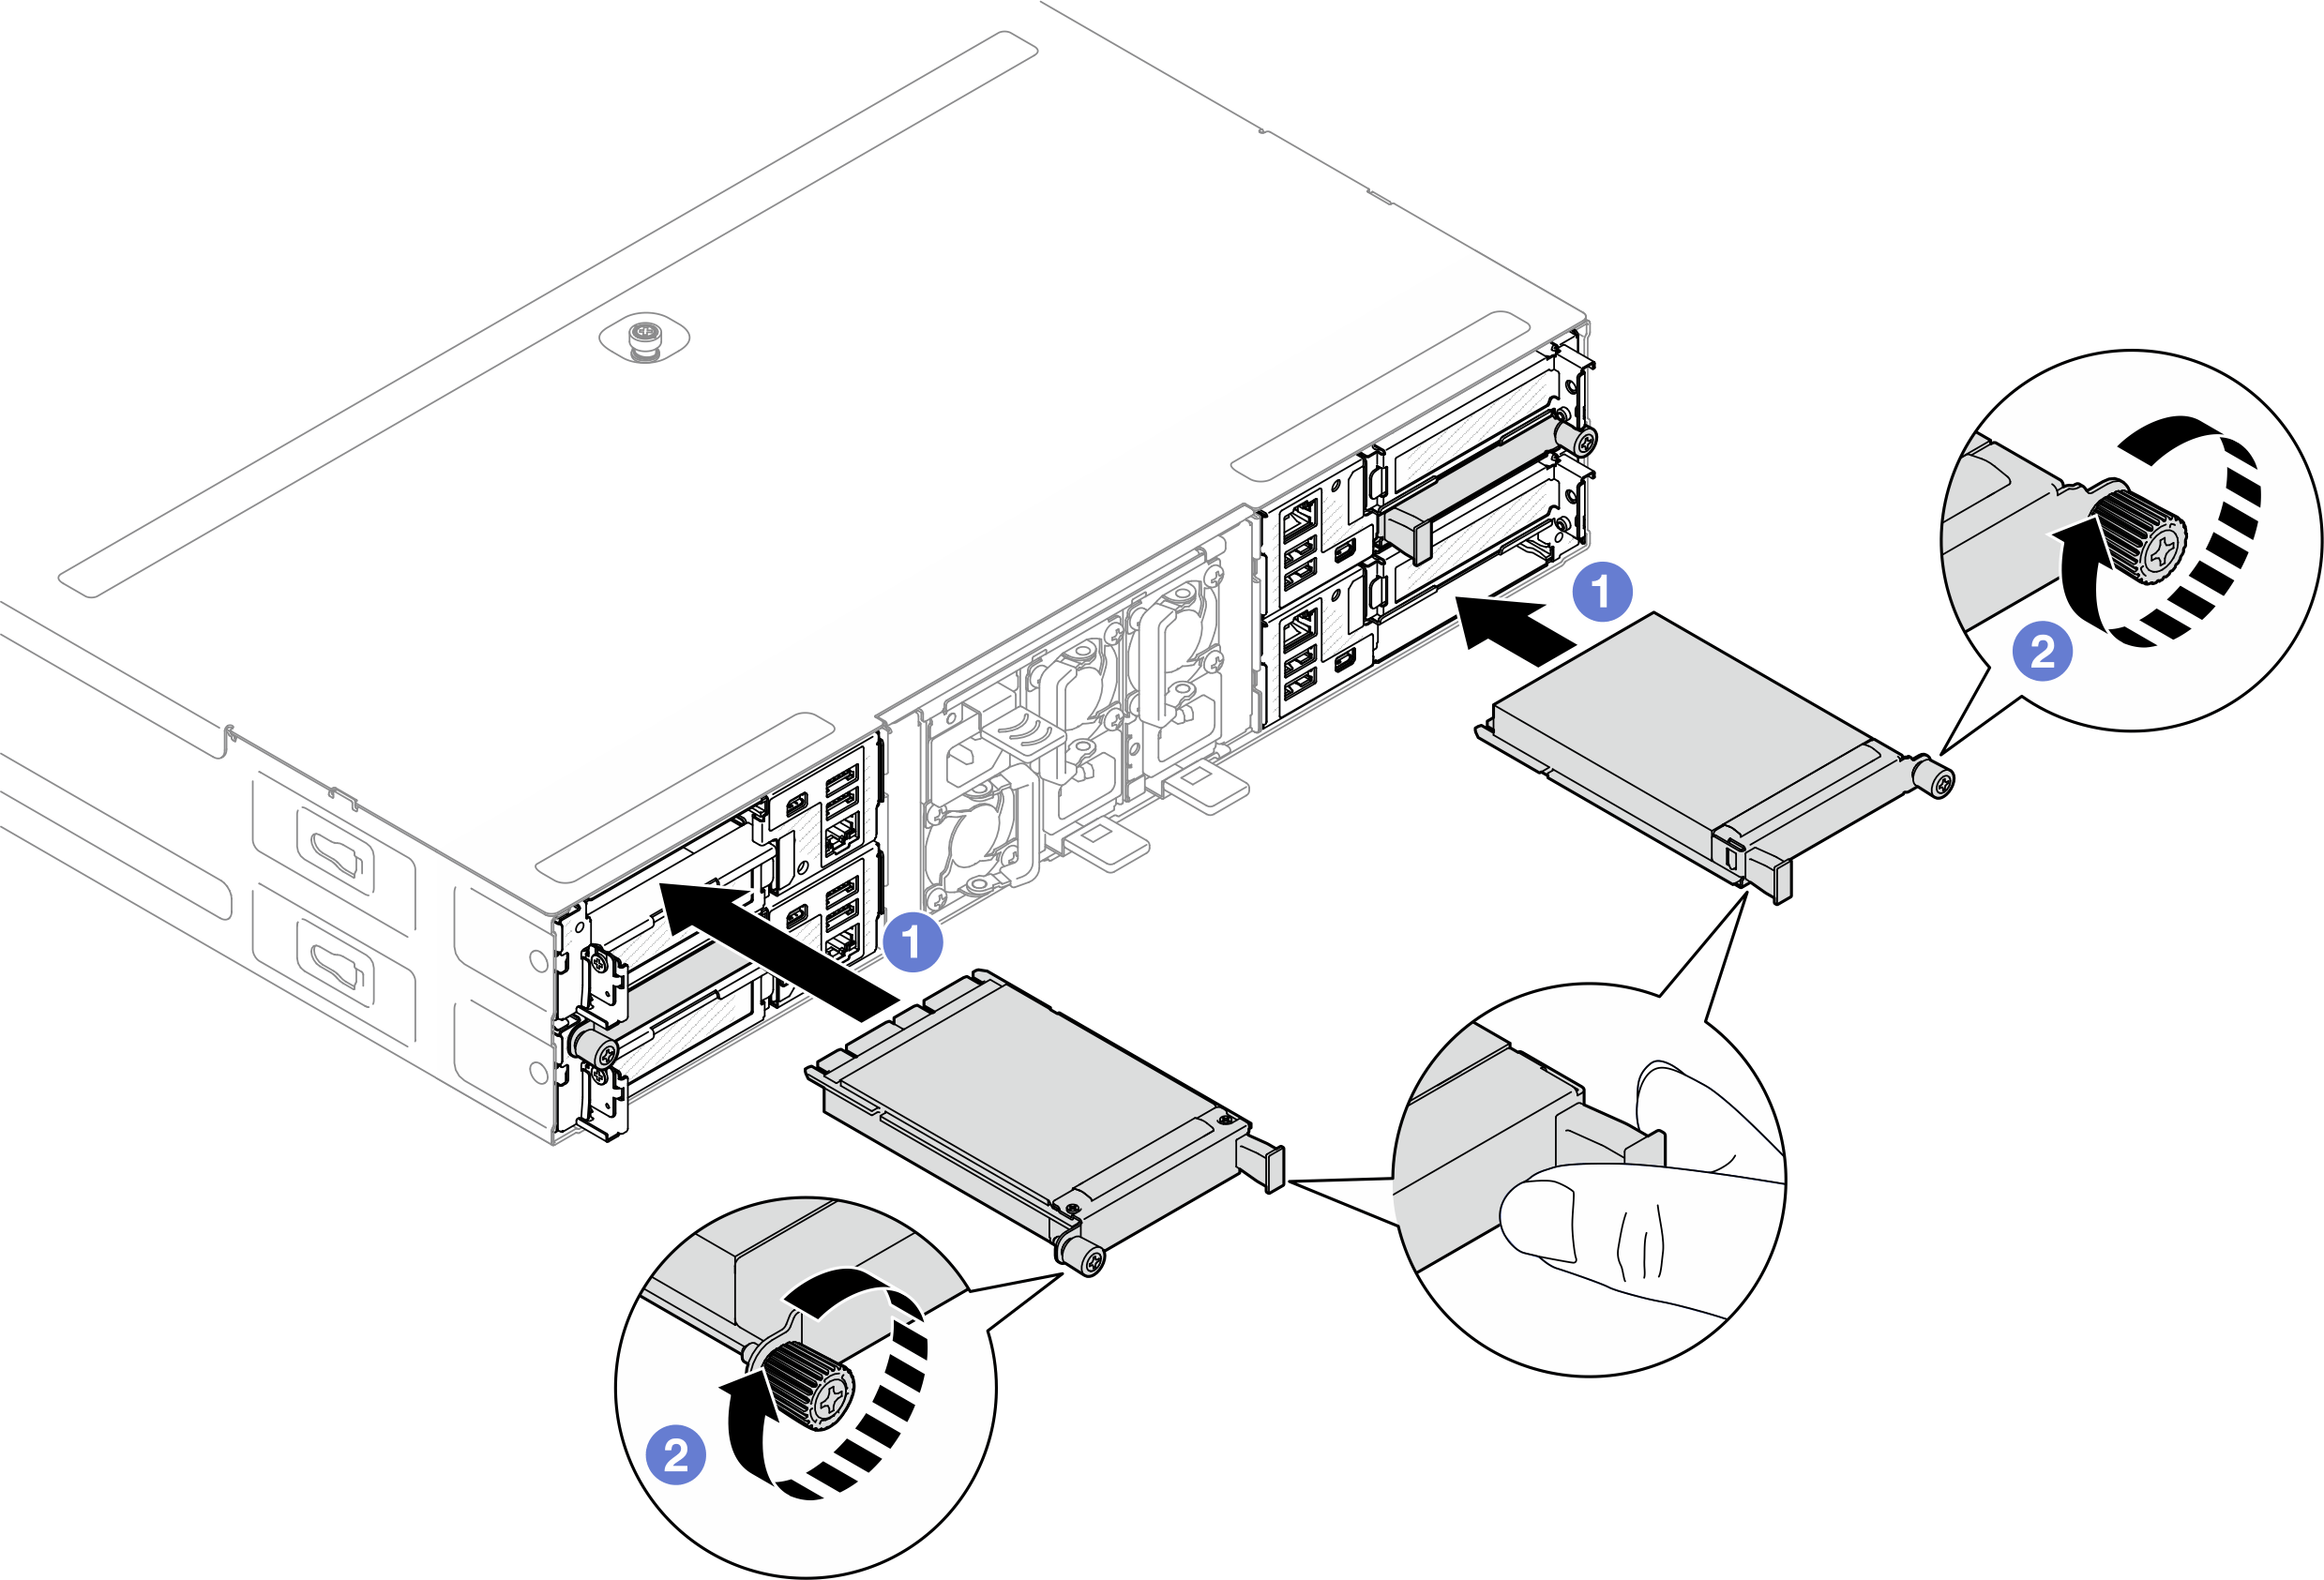
After you finish
- Power on the node (see Power on the node).
- Proceed to complete the parts replacement (see Complete the parts replacement).
Demo video