Installationsreihenfolge für Kabel
Mithilfe der Informationen in diesem Abschnitt können Sie die Kabel für SD650-N V2 Einbaurahmen verlegen.
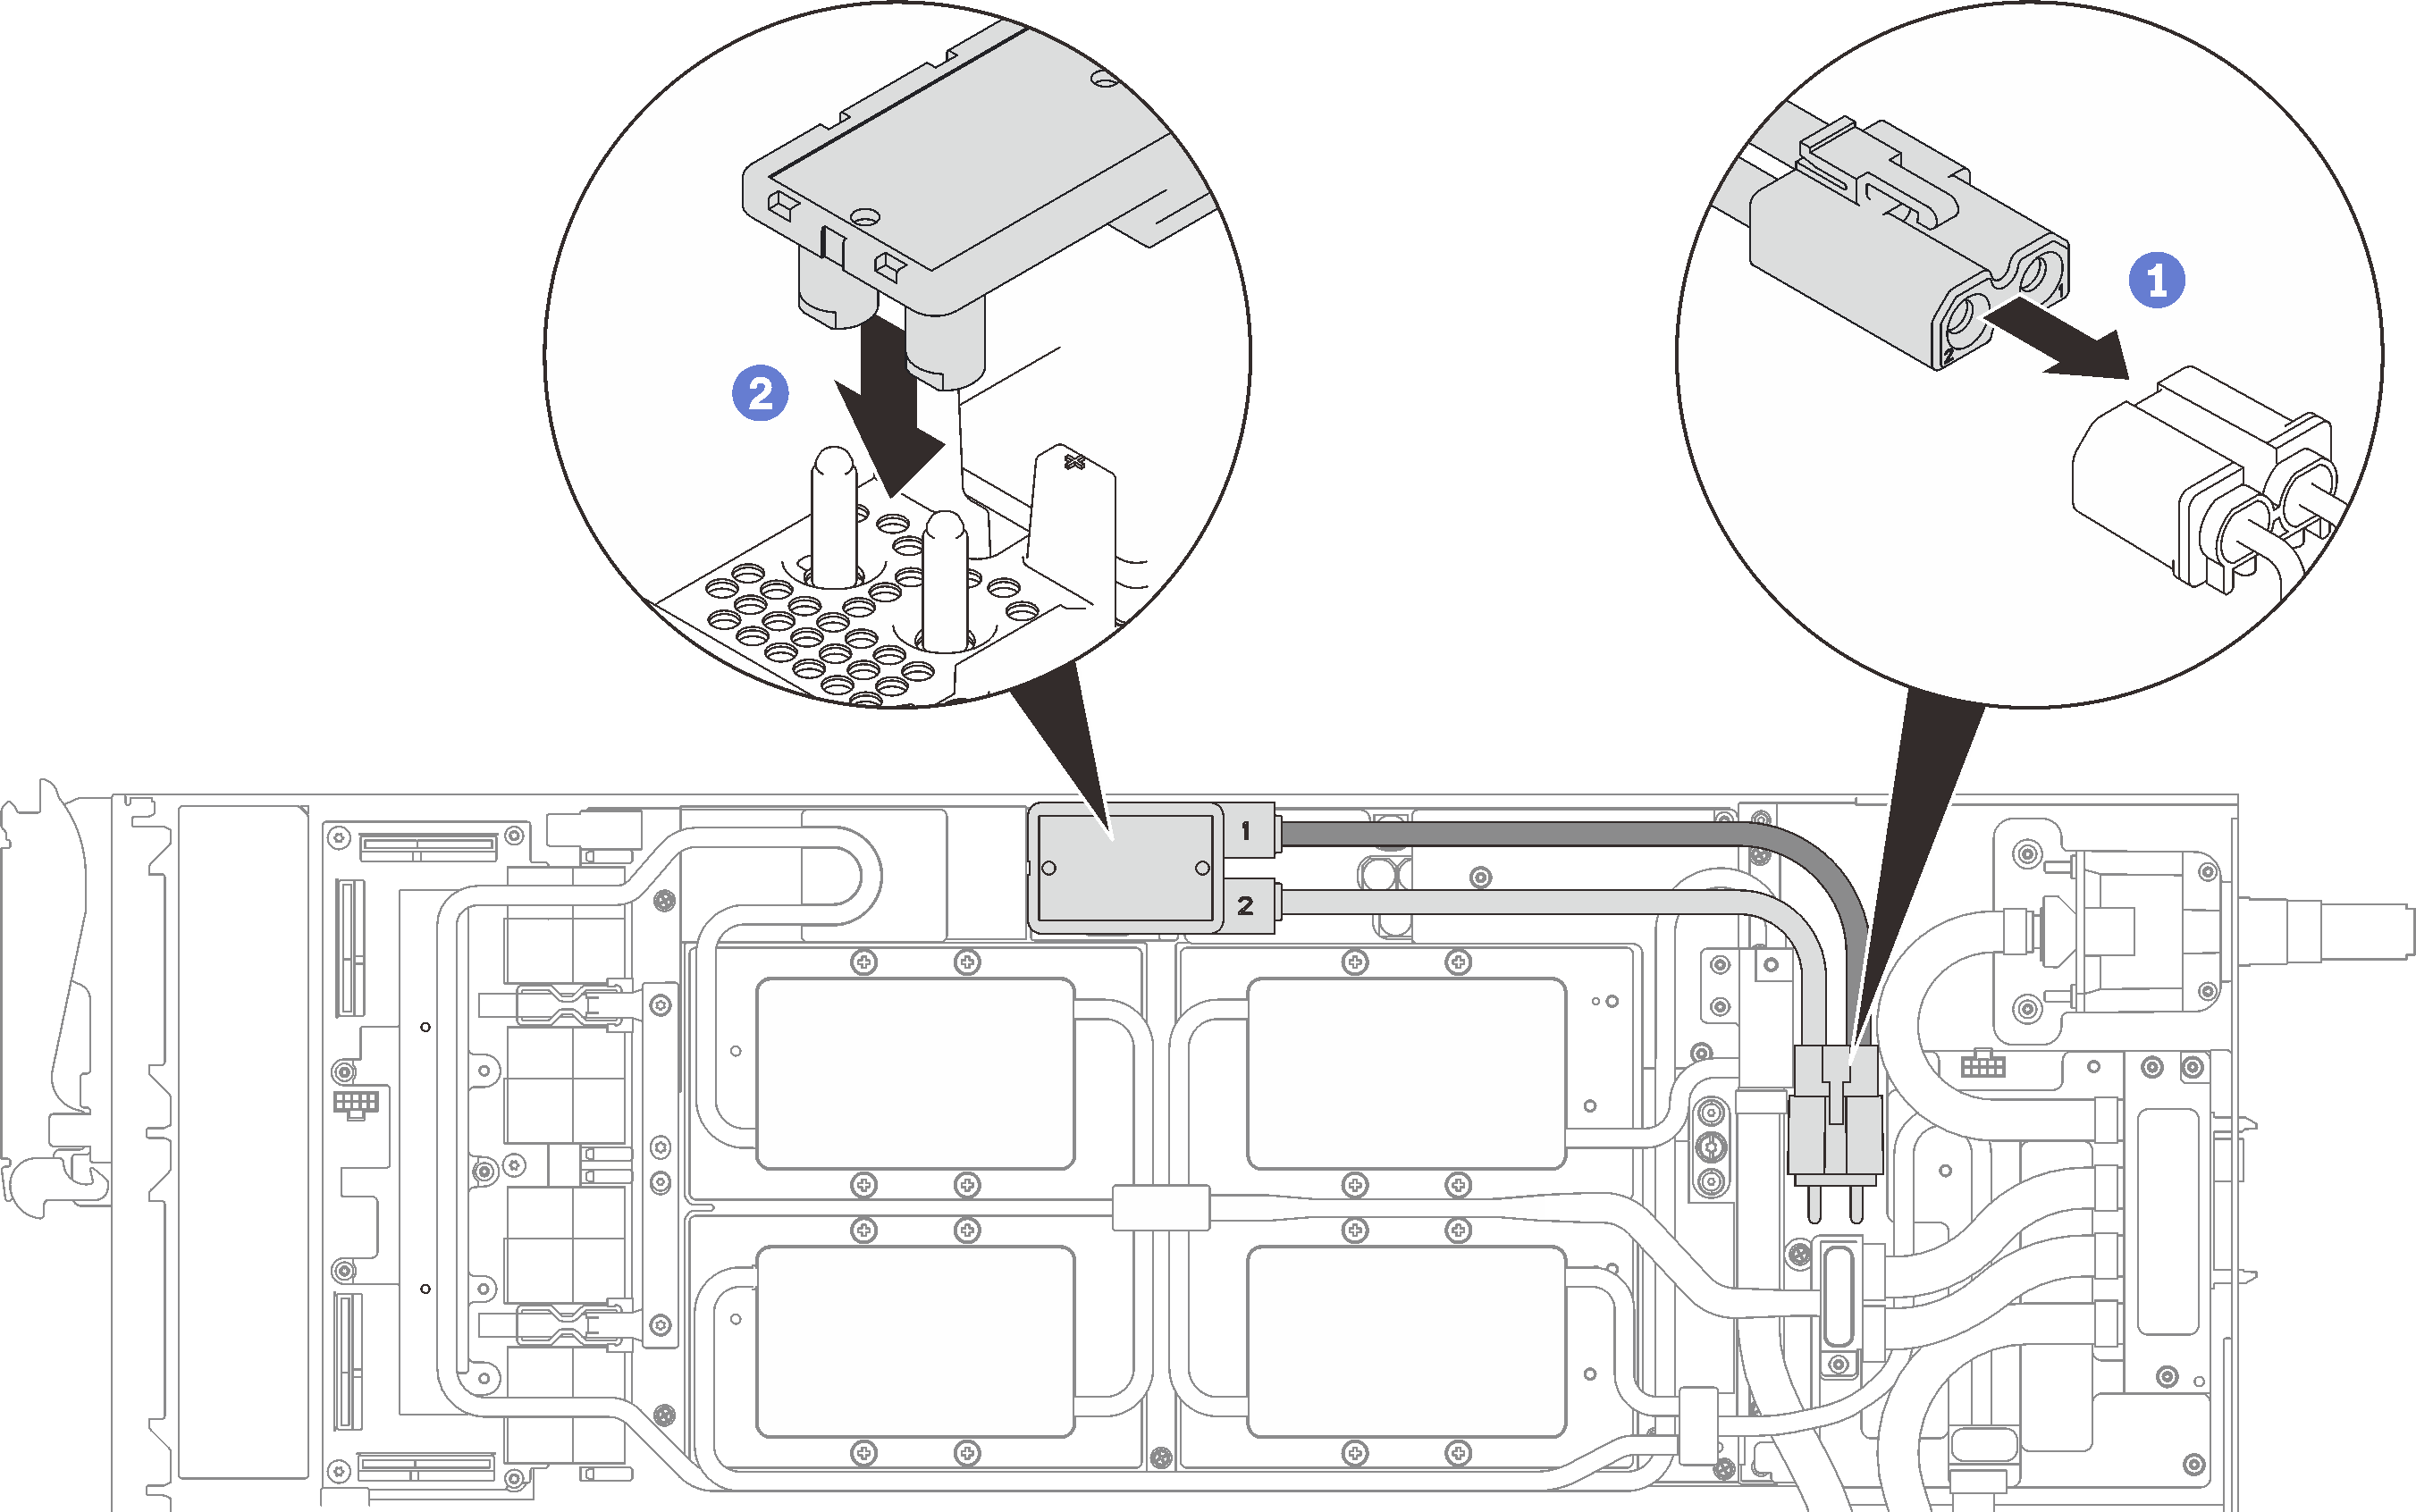
Installieren des GPU-Netzkabels
Abbildung 1. Installieren des GPU-Netzkabels
Konfiguration mit einem PCIe-Adapter
Wichtig
Verbinden Sie die Kabel gemäß der folgenden Reihenfolge.
Abbildung 2. Kabelführung für SD650-N V2 Einbaurahmen – Konfiguration mit einem PCIe-Adapter
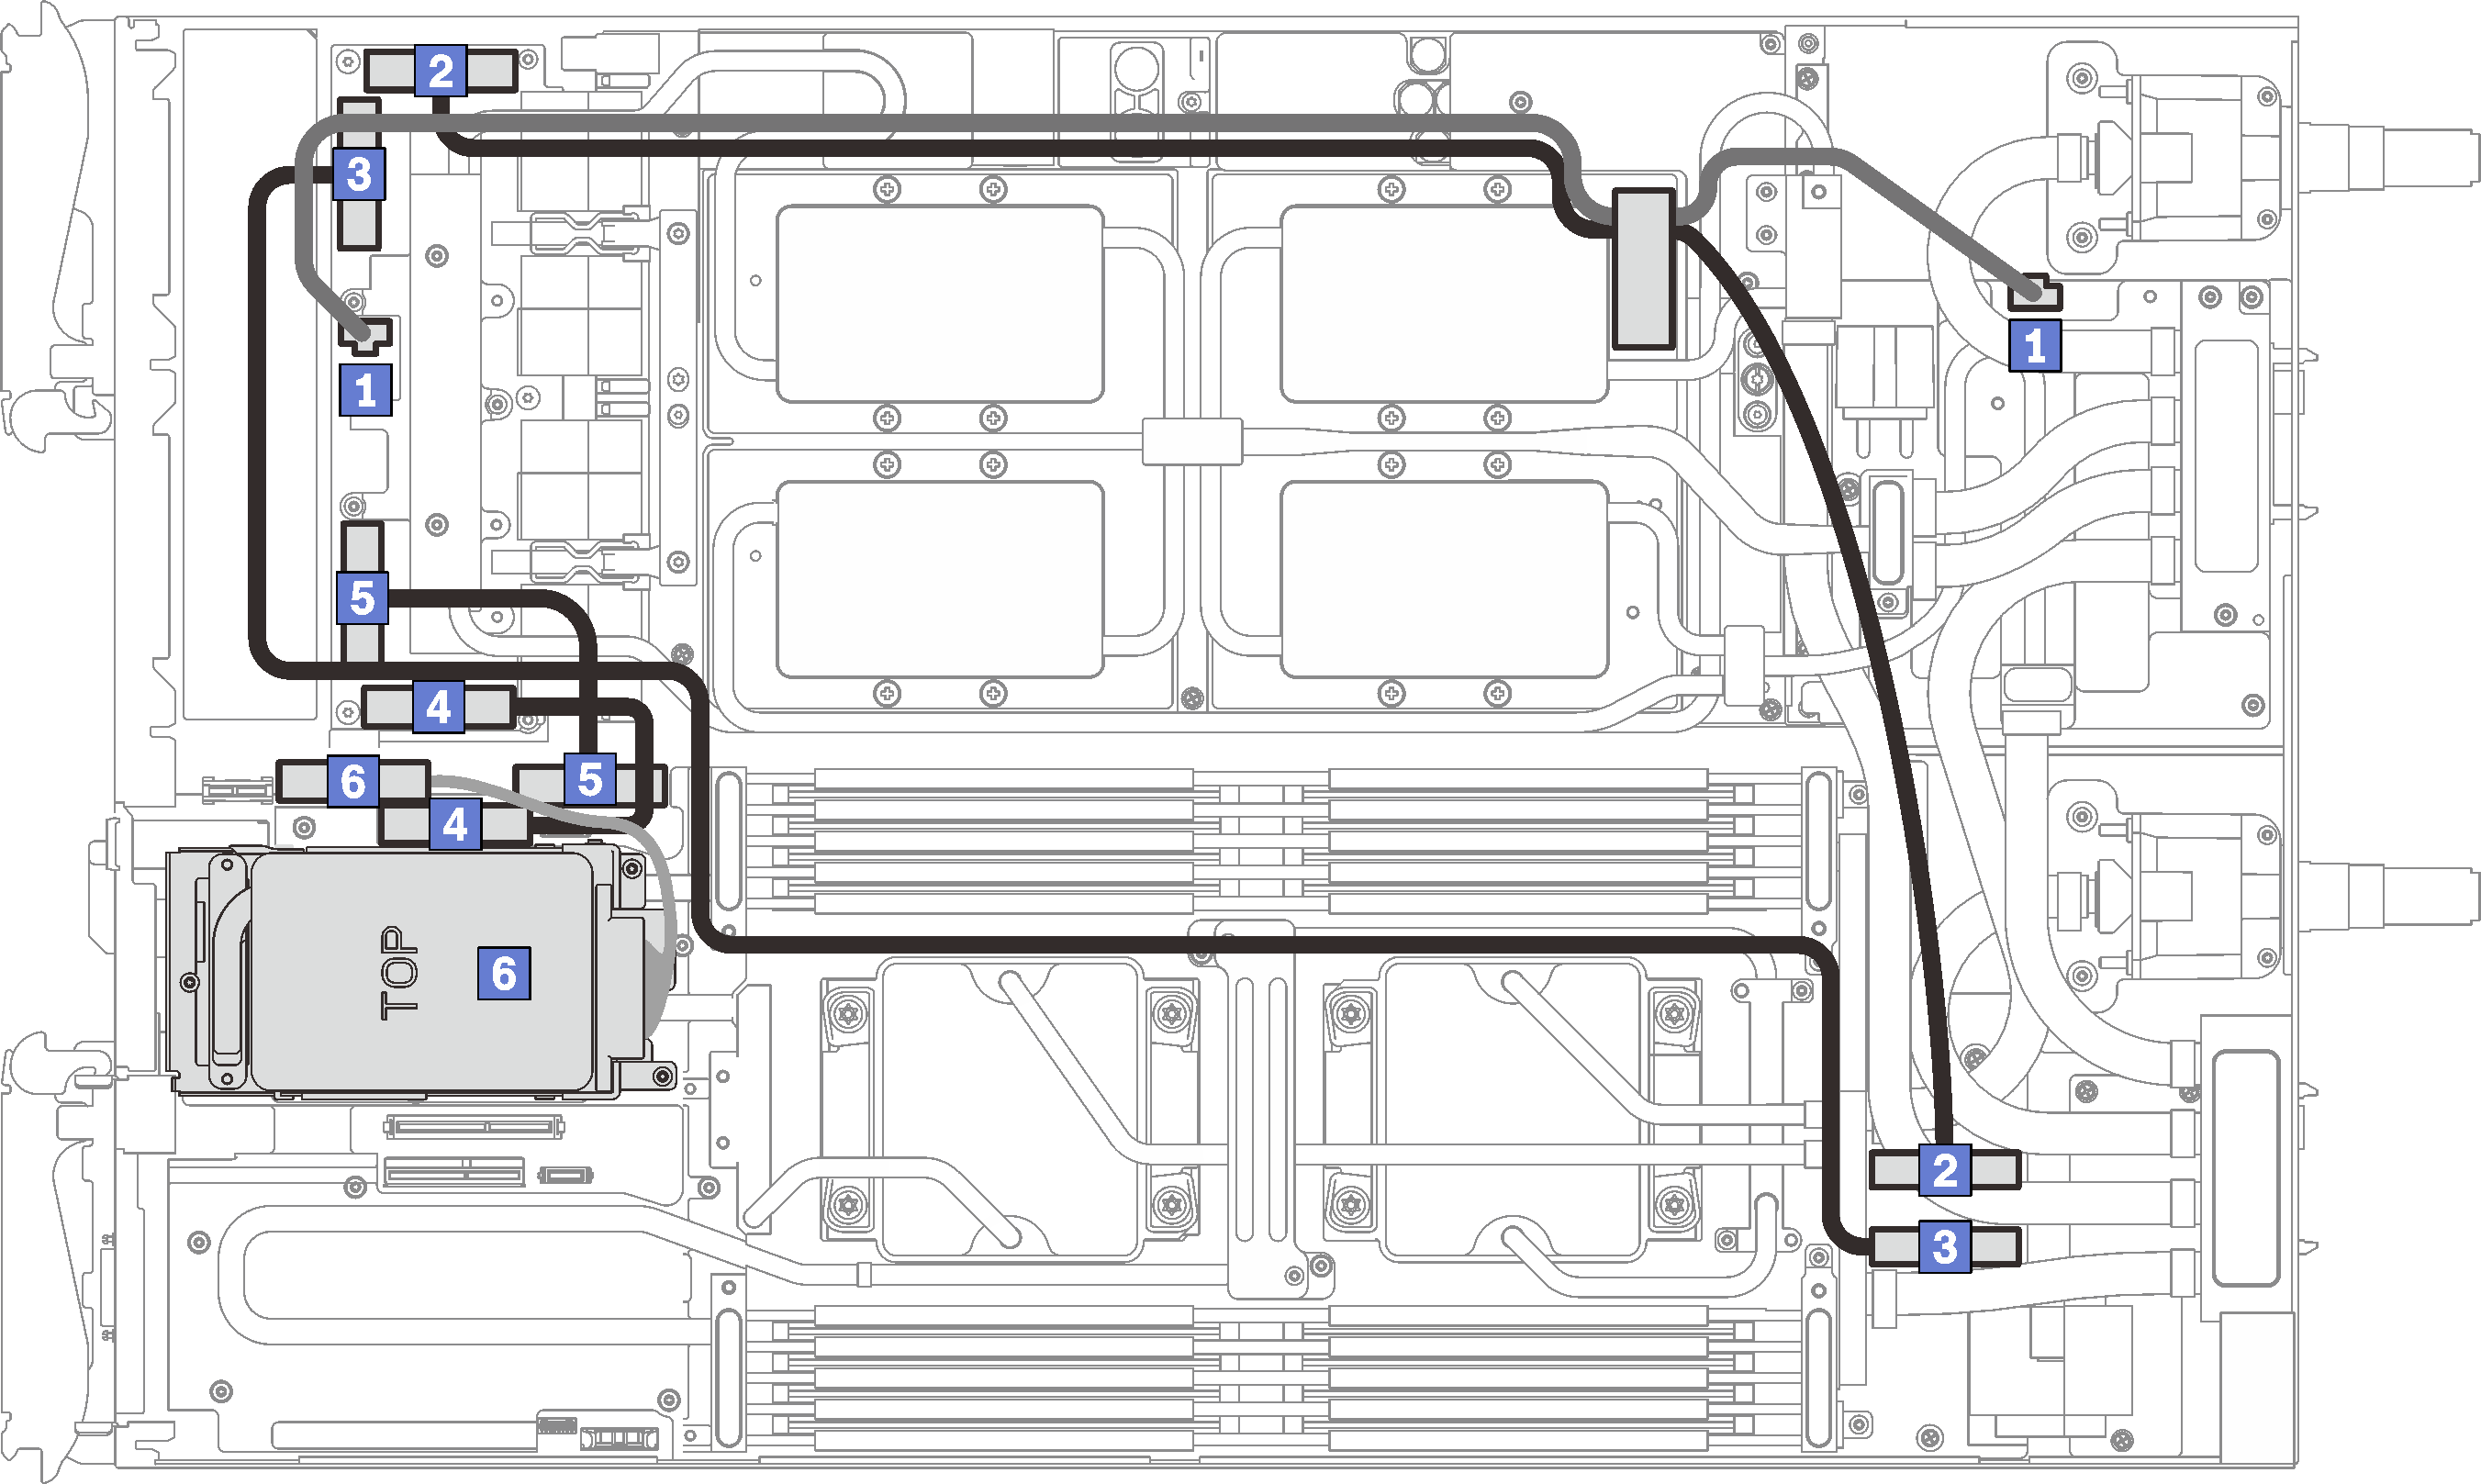
| 1 Netzkabel der Retimer-Platine | 4 PCIe-Adaptersteckplatz 2 MCIO-Kabel |
| 2 PCIe-Adaptersteckplatz 4 MCIO-Kabel | 5 PCIe-Adaptersteckplatz 3 MCIO-Kabel |
| 3 PCIe-Adaptersteckplatz 5 MCIO-Kabel | 6 SATA/NVMe-Laufwerkskabel |
Konfiguration mit zwei PCIe-Adaptern
Wichtig
Verbinden Sie die Kabel gemäß der folgenden Reihenfolge.
Abbildung 3. Kabelführung für SD650-N V2 Einbaurahmen – Konfiguration mit zwei PCIe-Adaptern
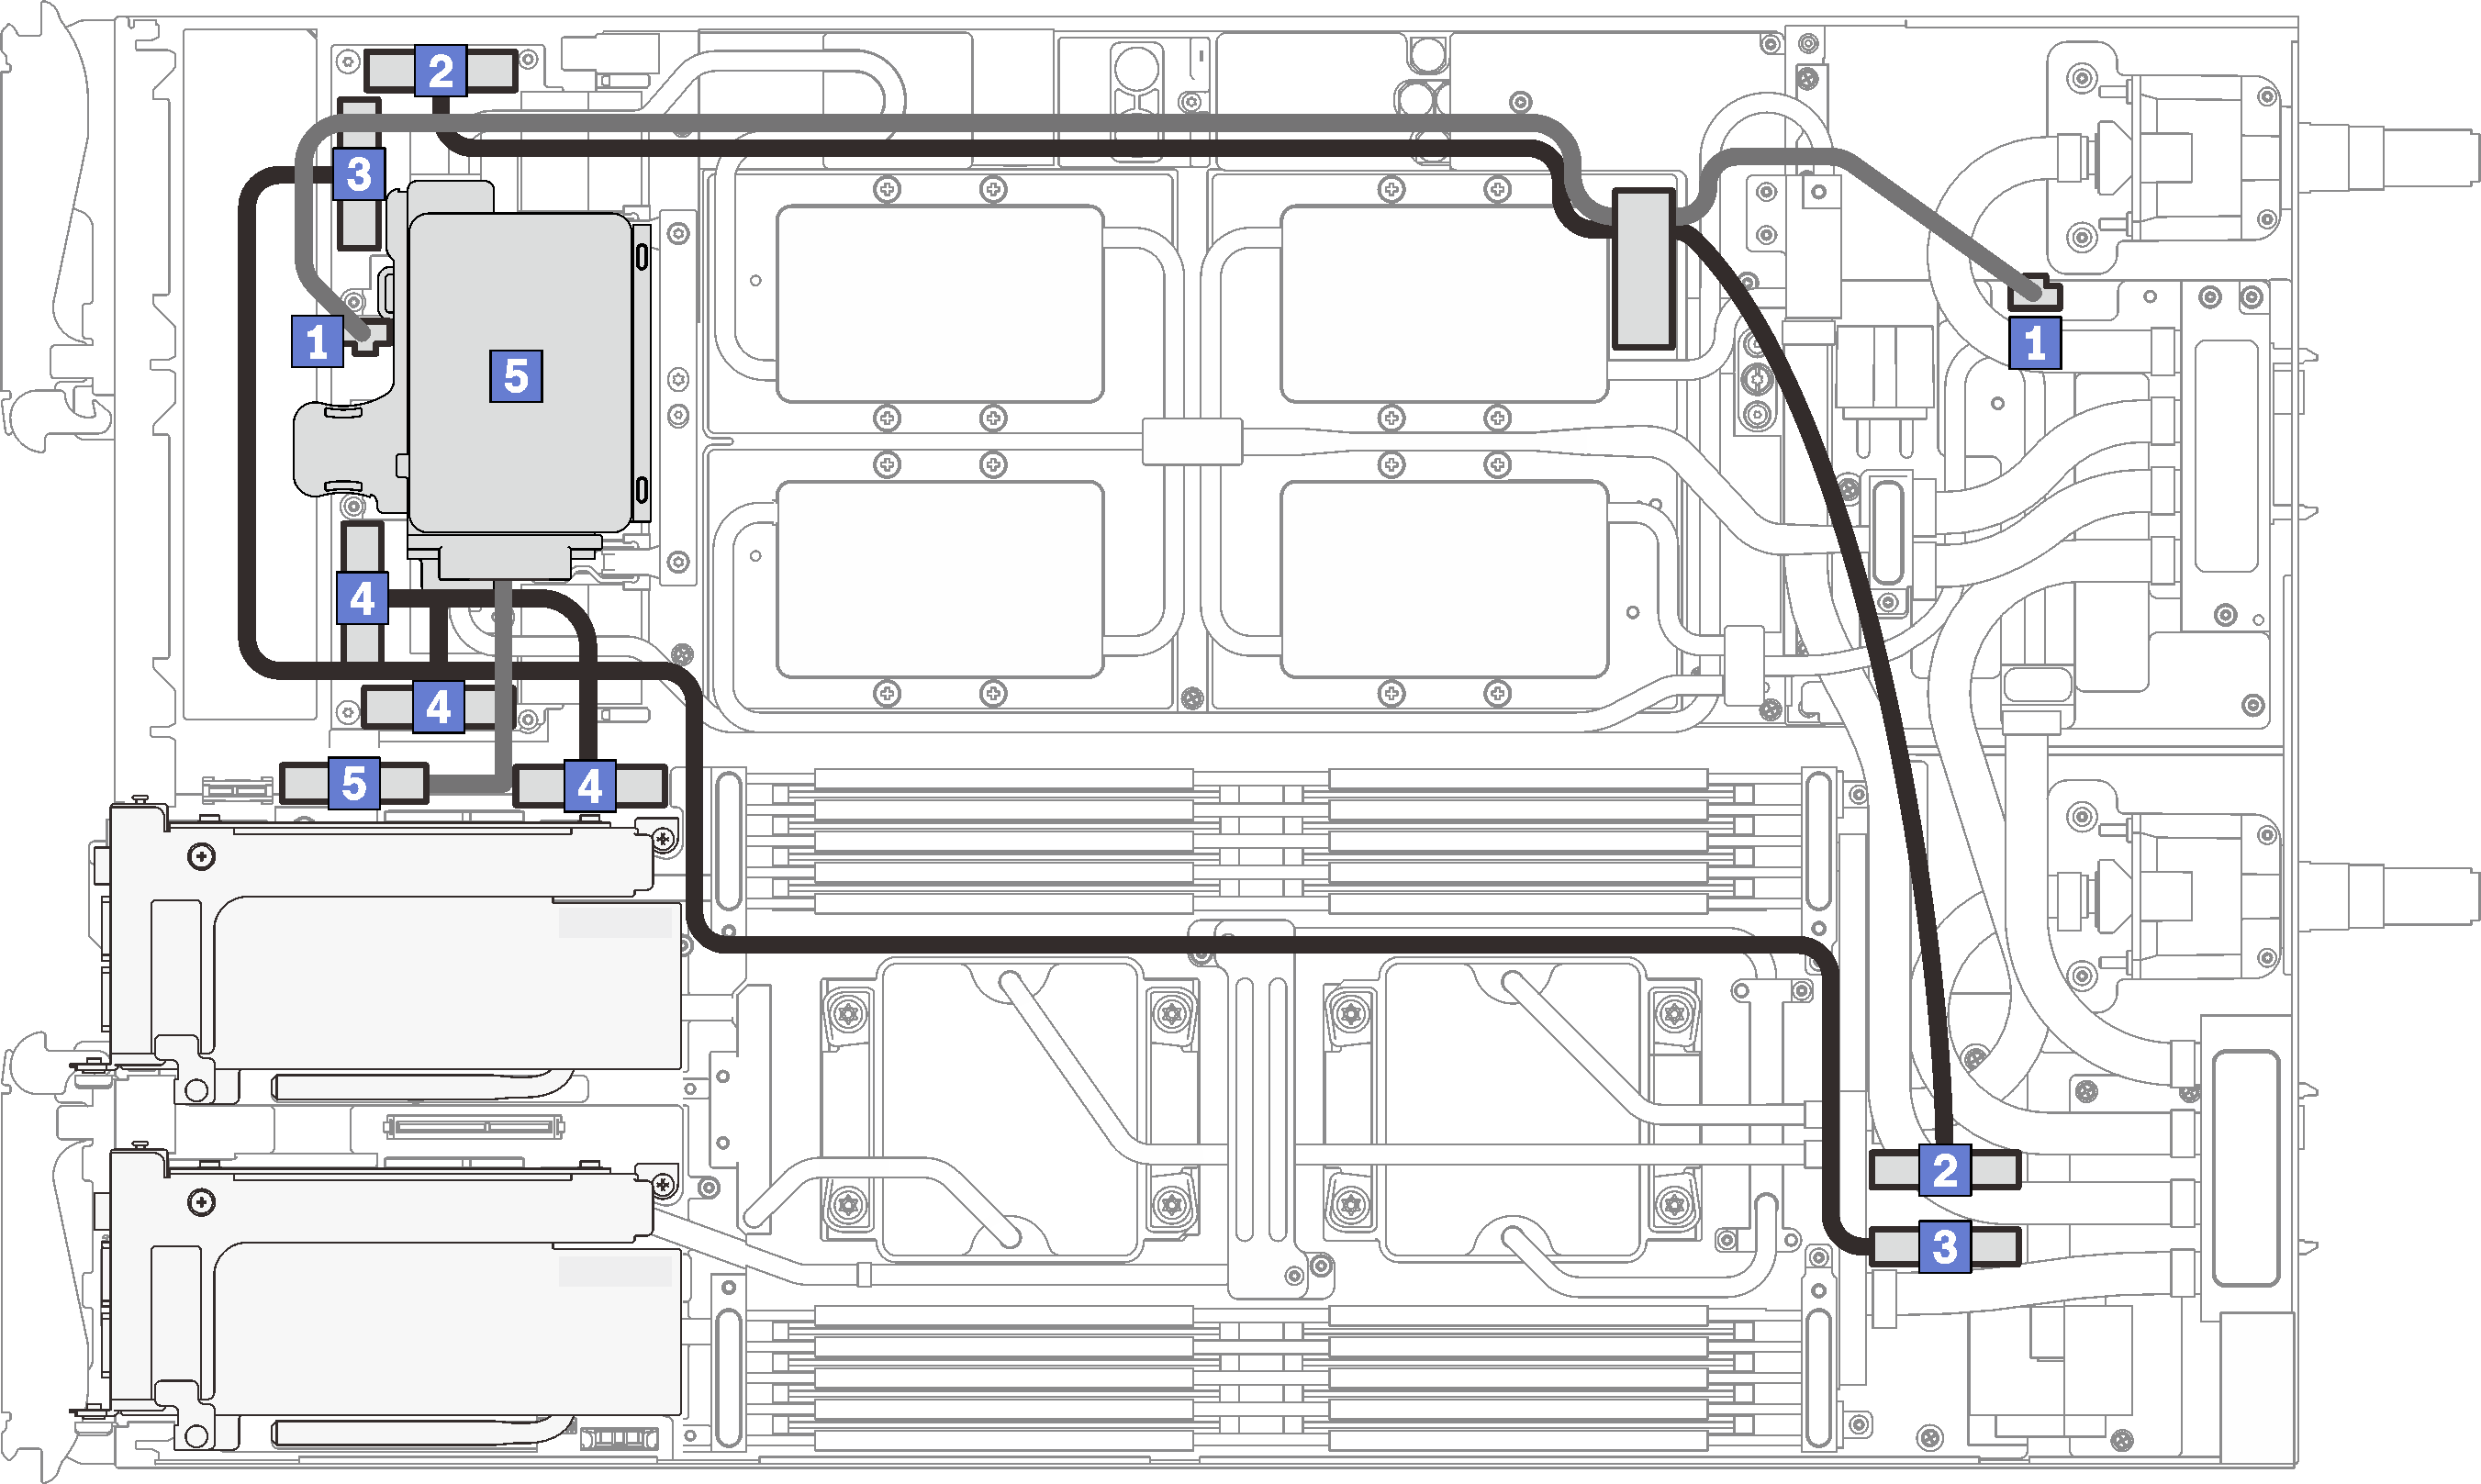
| 1 Netzkabel der Retimer-Platine | 4 PCIe-Adaptersteckplatz 3 Y-Kabel |
| 2 PCIe-Adaptersteckplatz 4 MCIO-Kabel | 5 SATA/NVMe-Laufwerkskabel |
| 3 PCIe-Adaptersteckplatz 5 MCIO-Kabel |
Feedback geben