Install the SMM2
Use this information to install the SMM2.
About this task
S002


CAUTION
The power-control button on the device and the power switch on the power supply do not turn off the electrical current supplied to the device. The device also might have more than one power cord. To remove all electrical current from the device, ensure that all power cords are disconnected from the power source.
S038


CAUTION
Eye protection should be worn for this procedure.
Attention
- Read the following sections to ensure that you work safely.
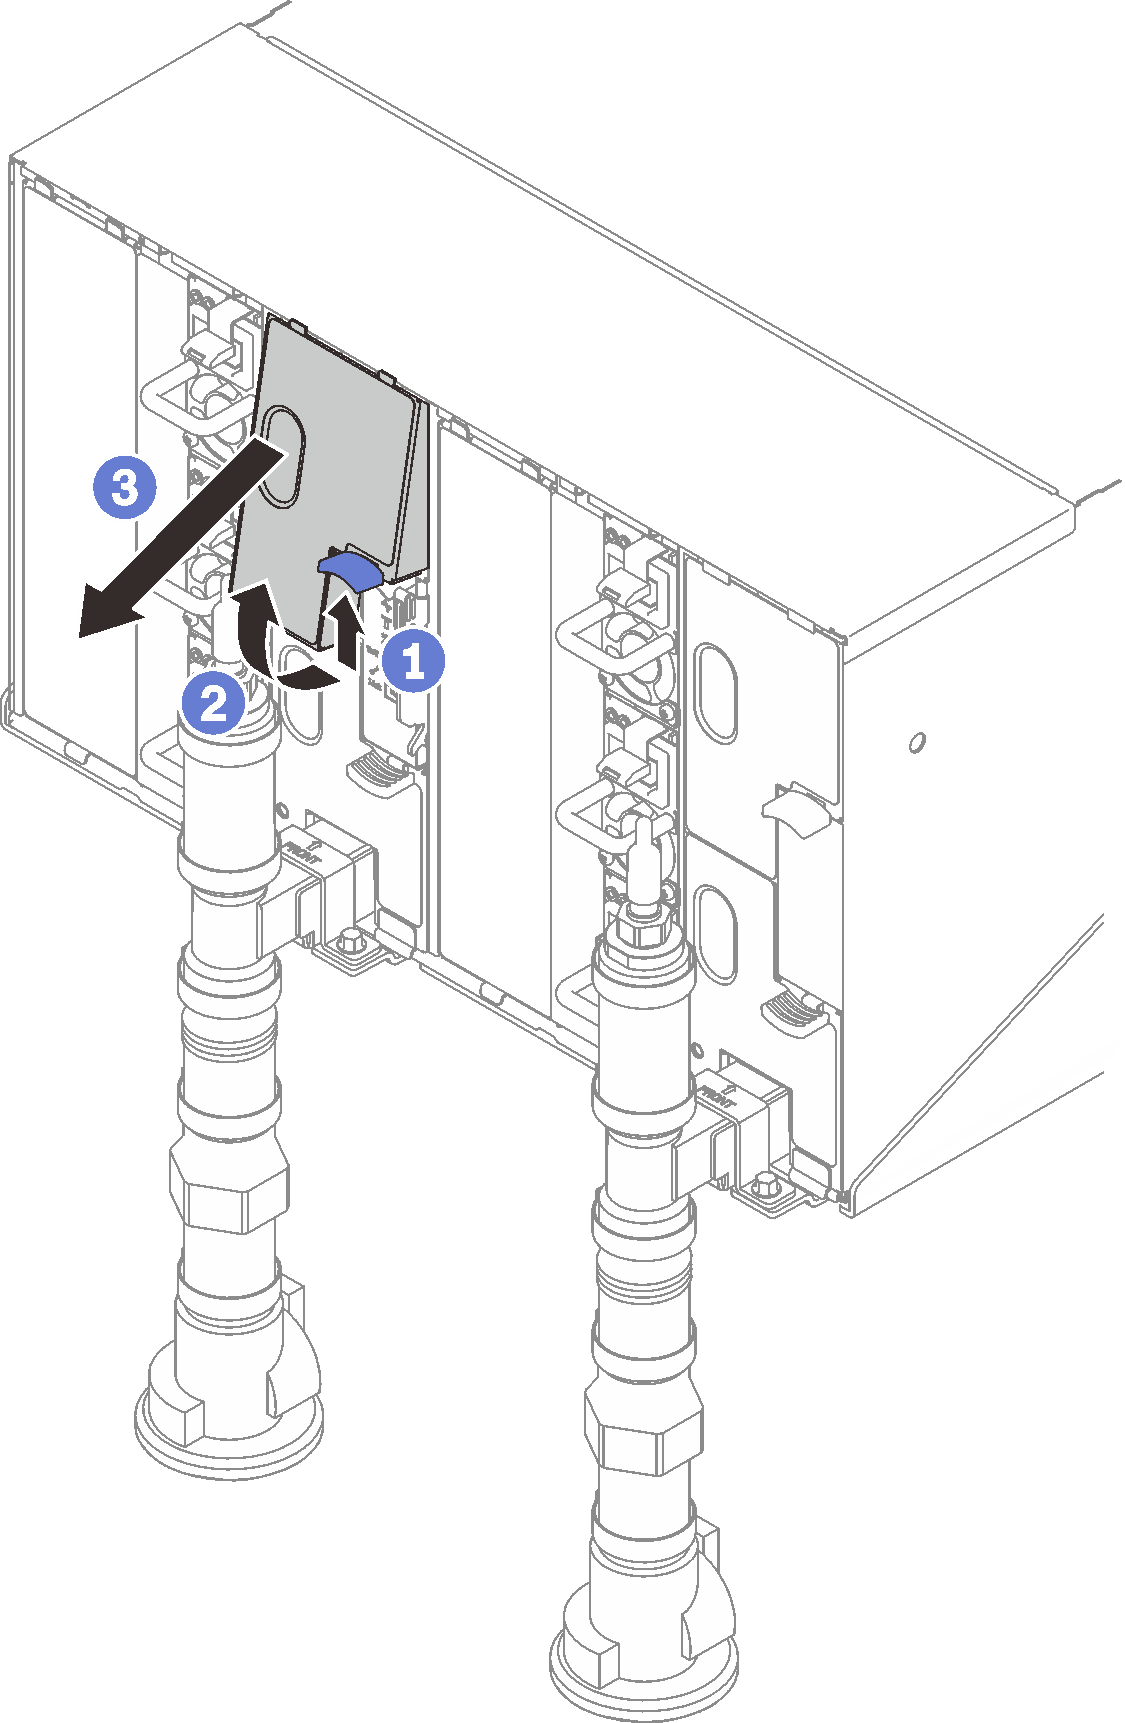
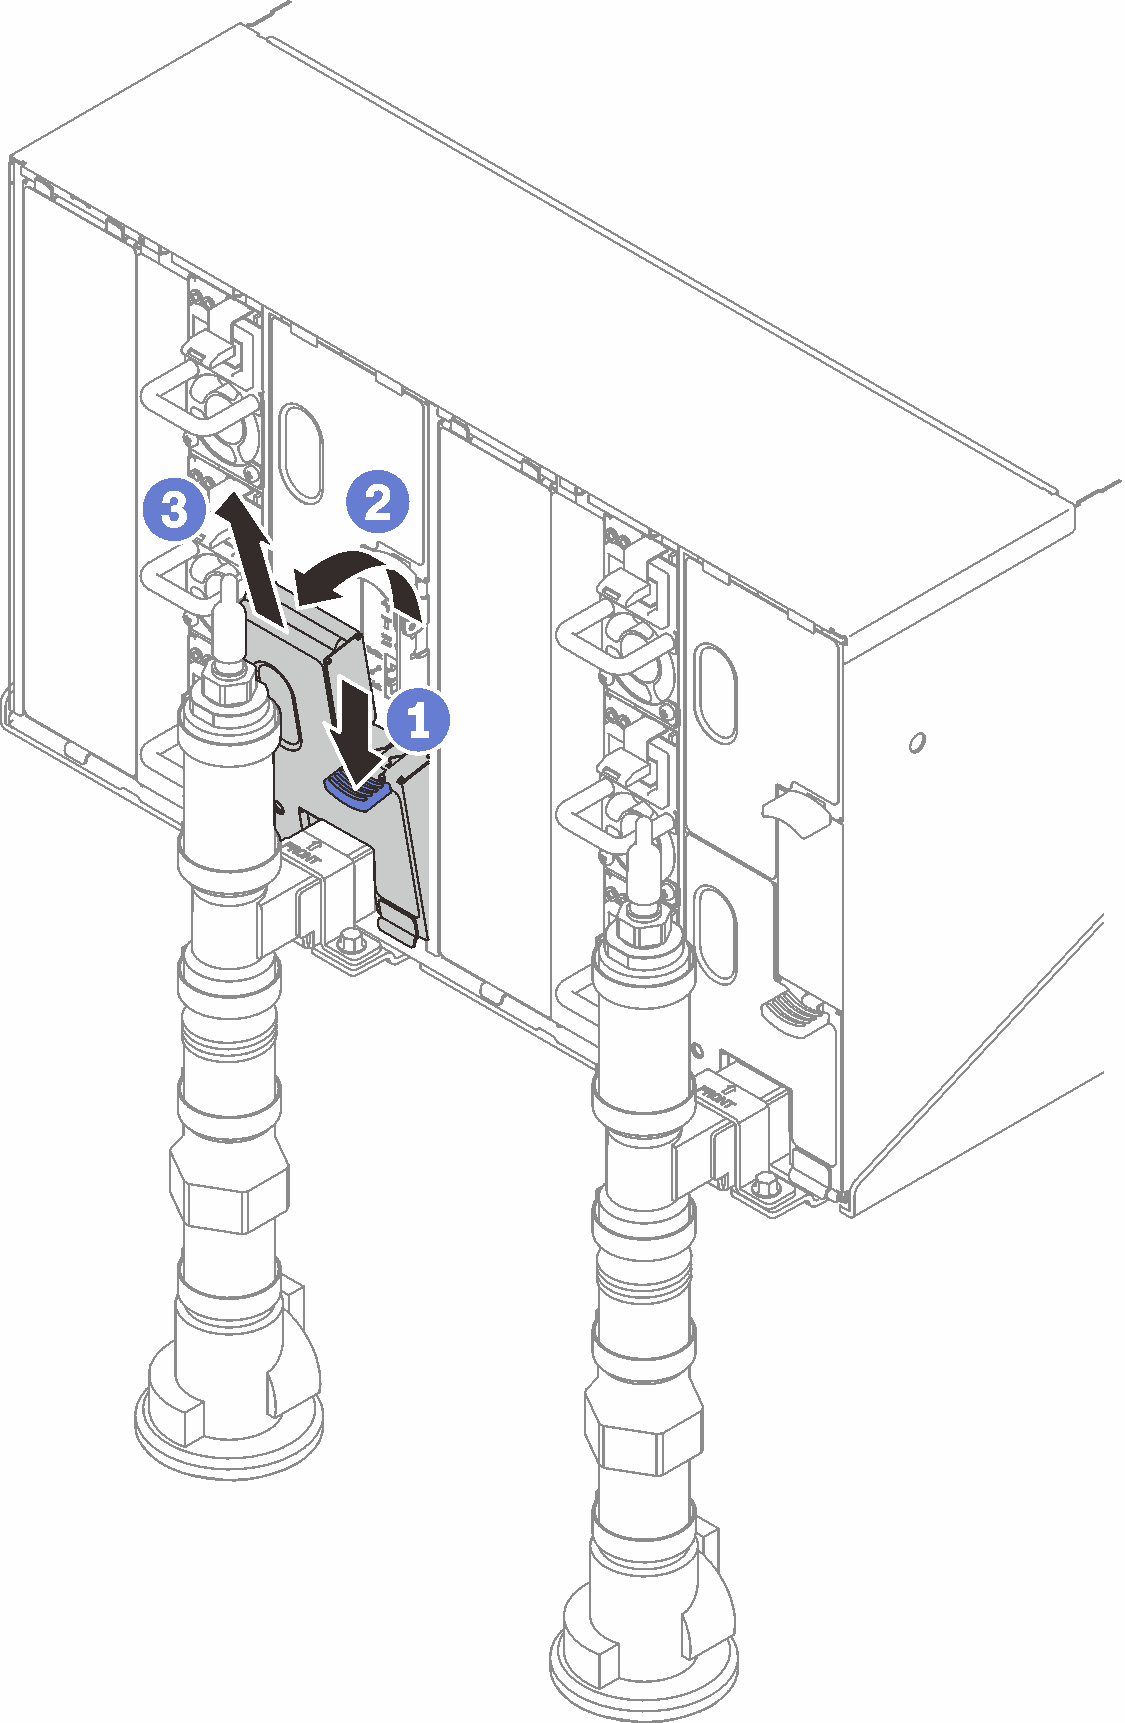
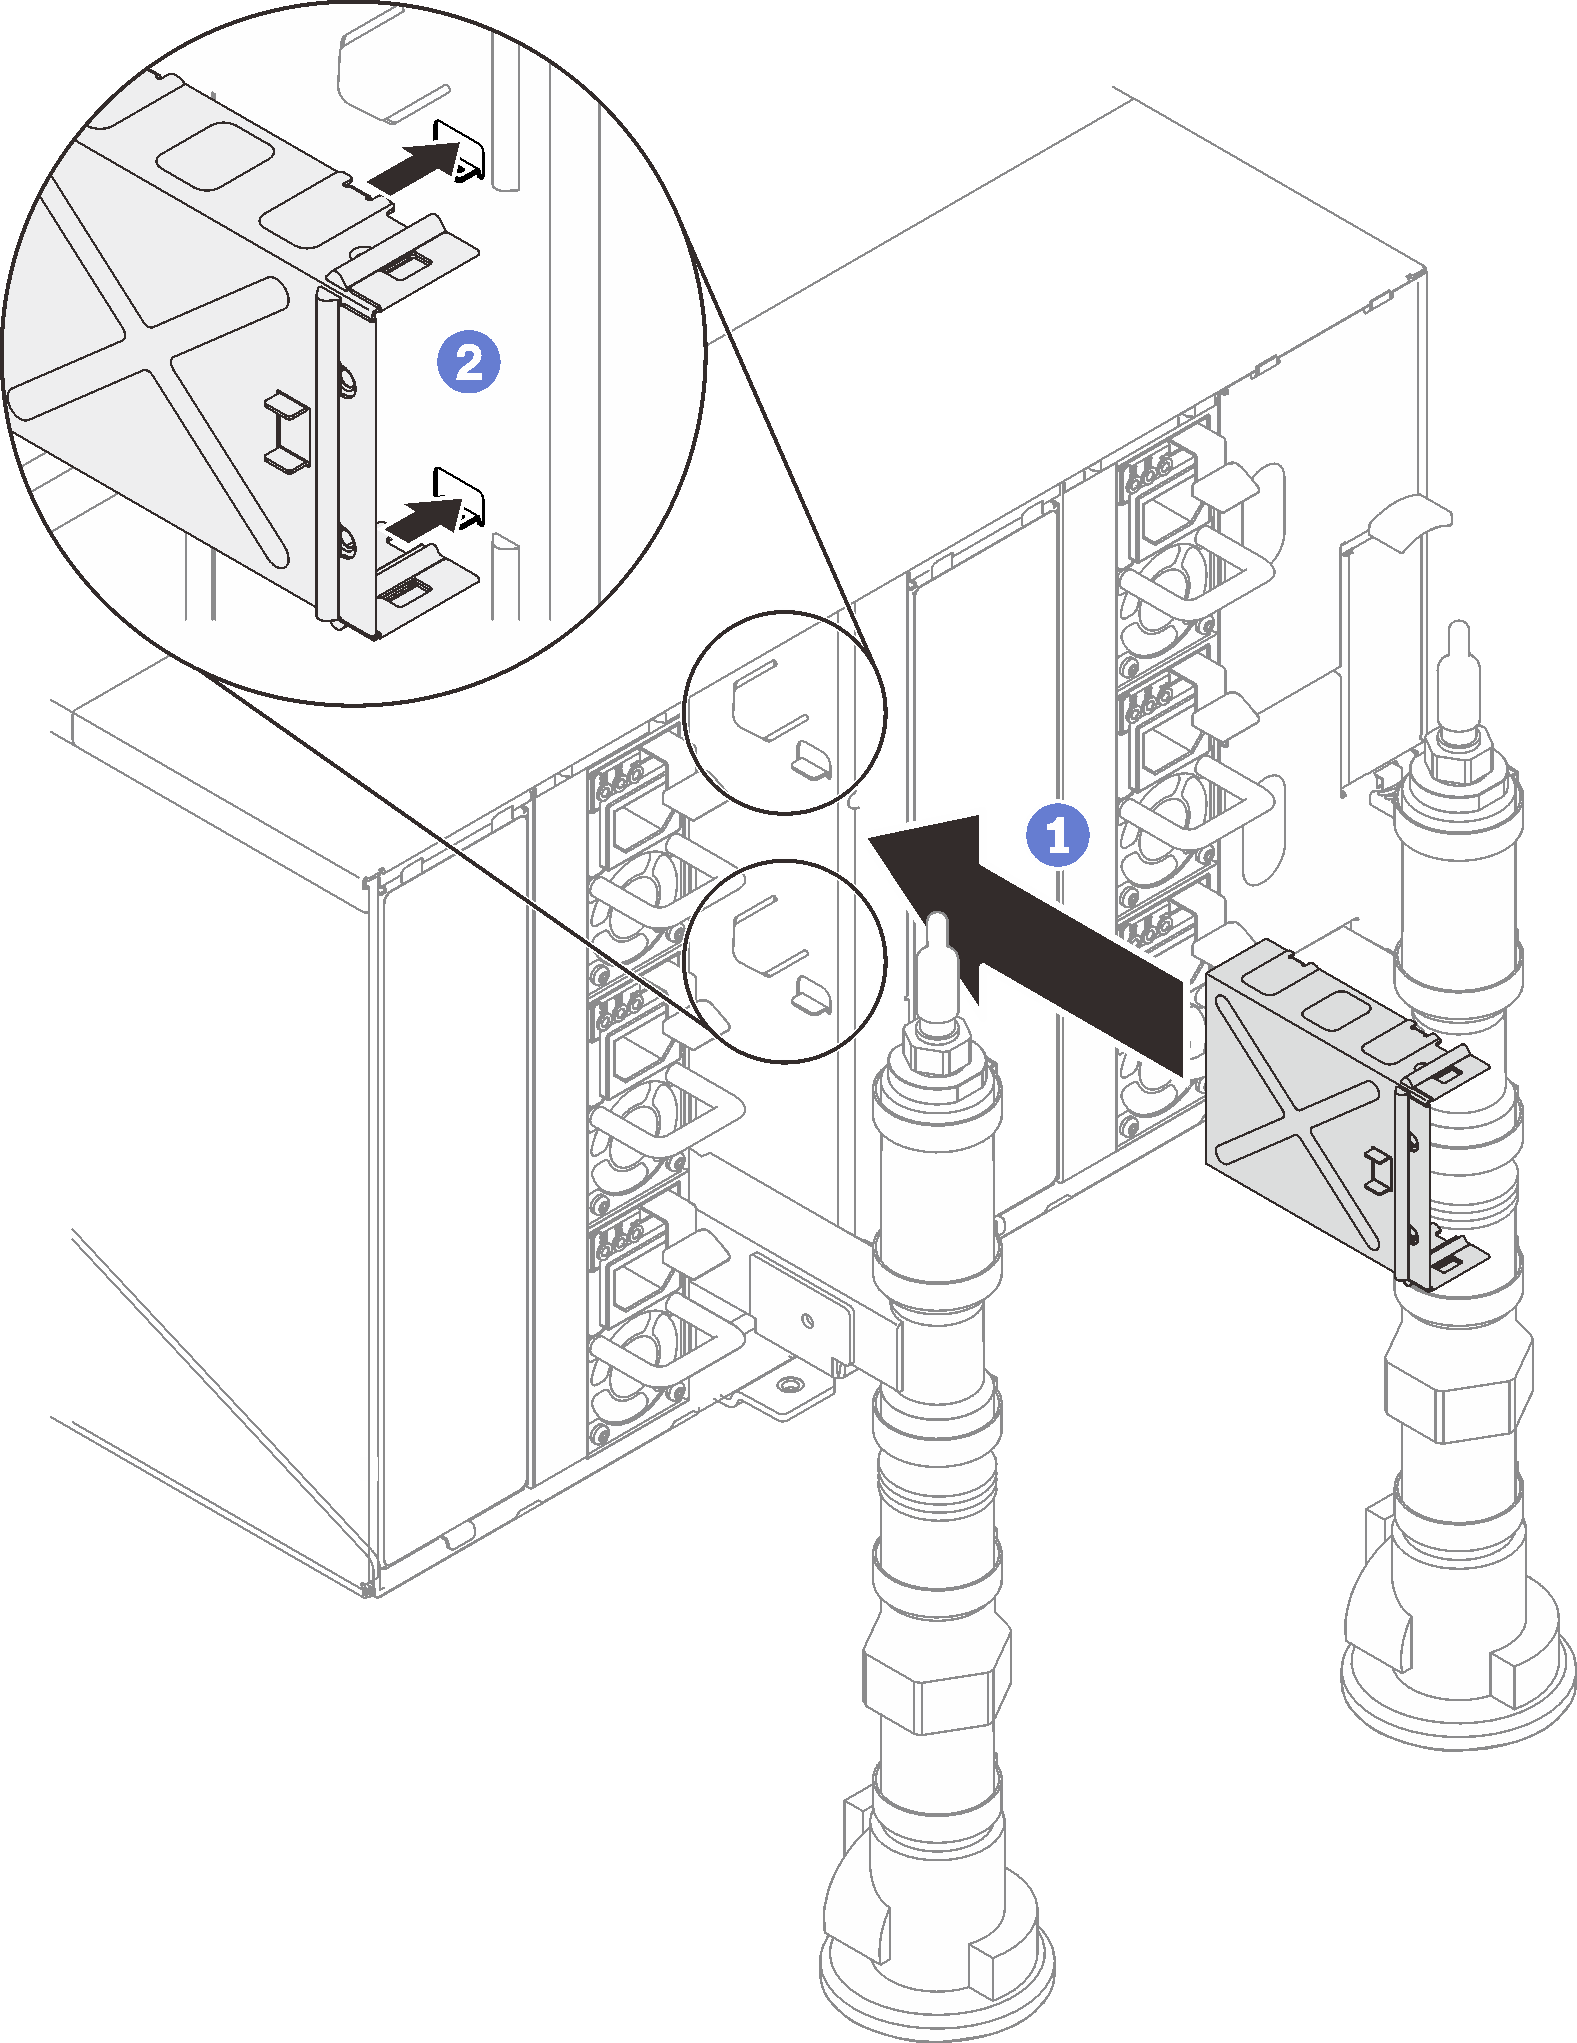
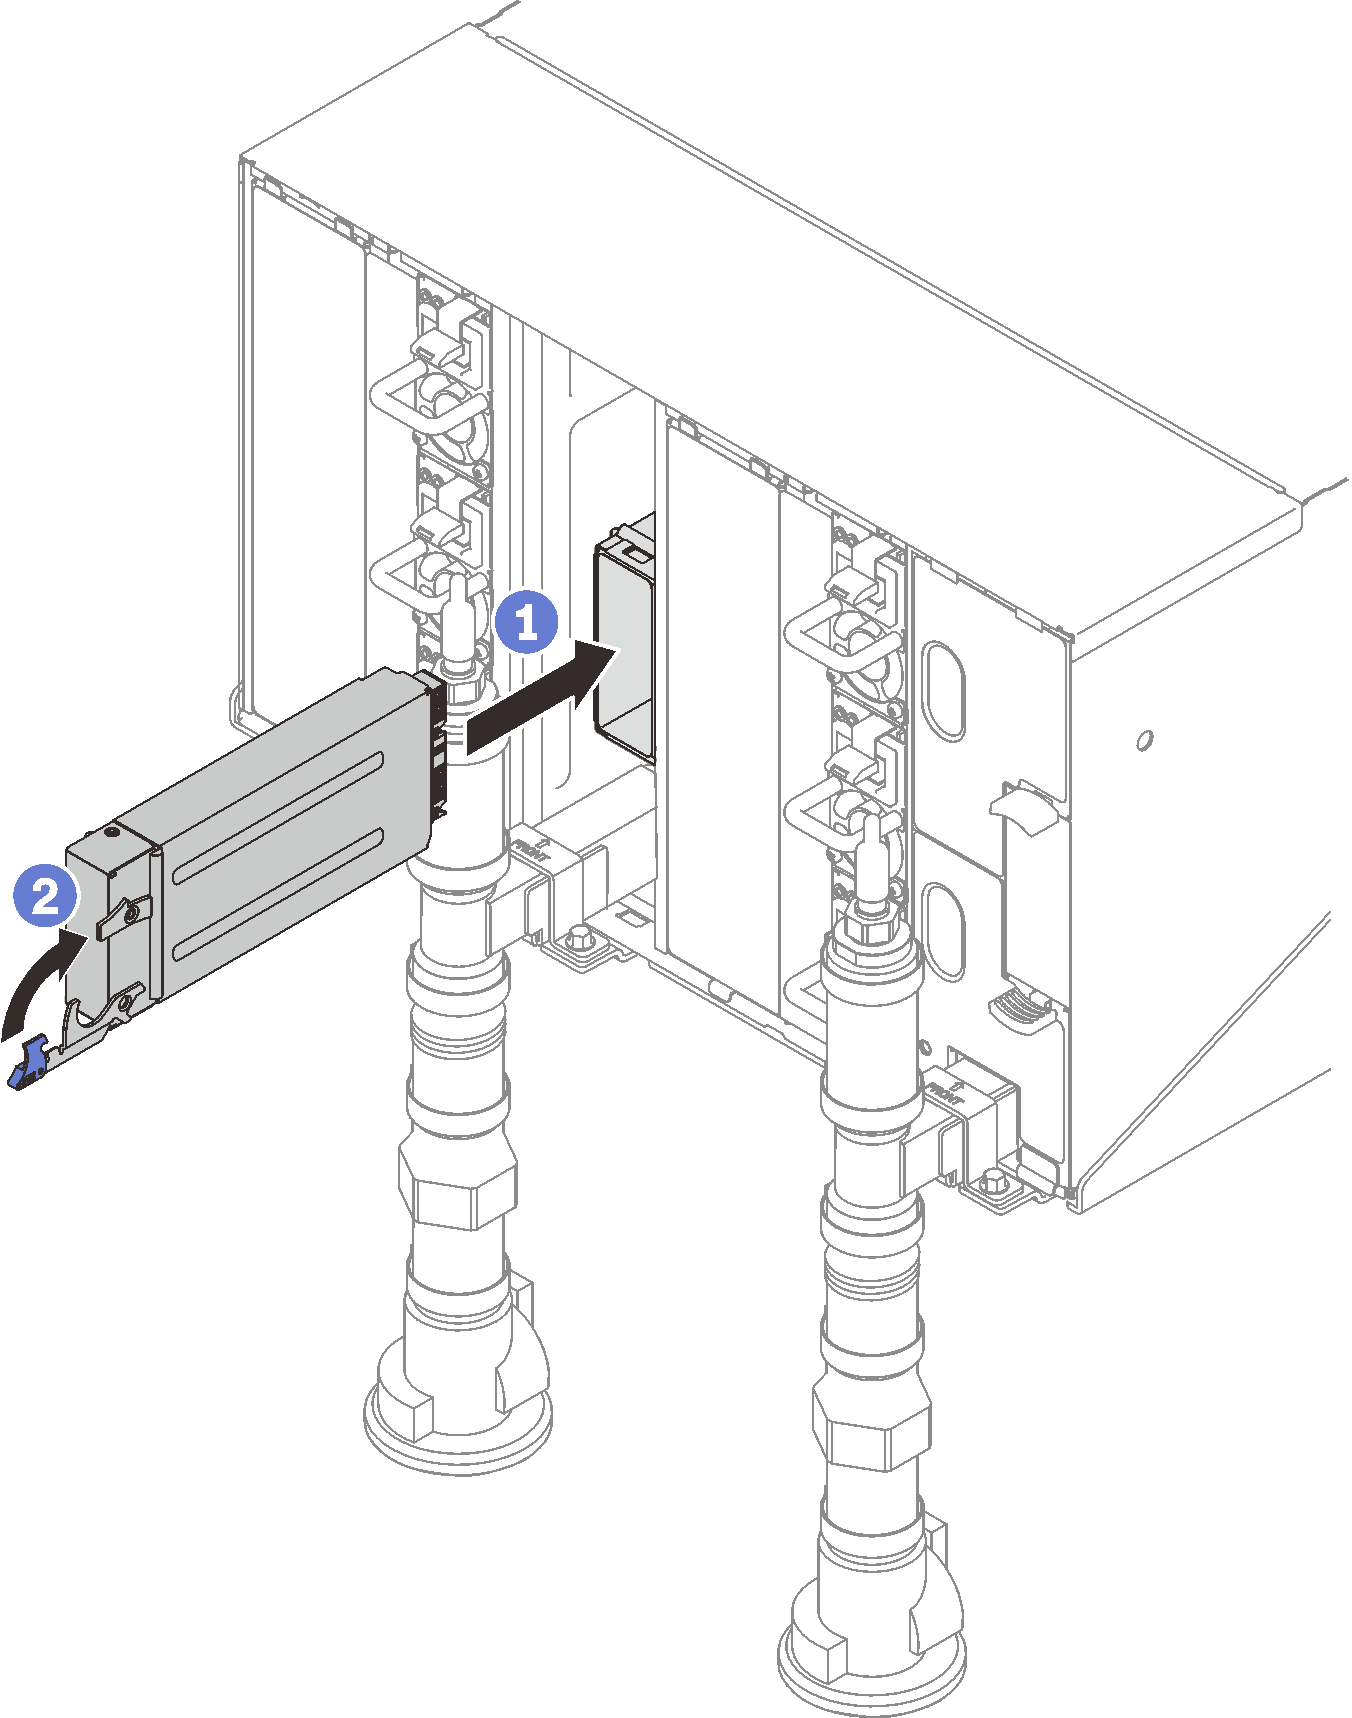
Procedure
After you finish
When the status LED on the SMM2 goes from fast blinking to slow blinking, it indicates the SMM2 is ready to work. However, if the status LED is off or continuously lit, it indicates the SMM2 has encountered one or more problems.
- Check the power LED on each node to make sure it is on.
- If shared I/O adapters are installed, complete the following steps to make sure the enclosure supports shared I/O.
- Enable SMM2 IPMI interface via XCC with the following command (Default setting is network enabled but IPMI disabled).
ipmitool -I lanplus -H [XCC_IP] -U [USERID] -P [PASSWD] raw
0x3A 0xF1 0x04 - Query the current enclosure mode with the following command:
ipmitool -I lanplus -H $SMM2_IP -U $USERID -P $PASSWORD raw 0x32 0xC5 0x01

response data
byte 1: current mode
01: Normal mode
02: Shared I/O mode - If the enclosure is in normal mode, configure the enclosure mode to Shared I/O mode with the following command:
ipmitool -I lanplus -H $SMM2_IP -U $USERID -P $PASSWORD raw 0x32 0xC5 0x00 0x02

response data
byte 1: previous mode
01: Normal mode
02: Shared I/O mode
byte 2: current mode
01: Normal mode
02: Shared I/O mode
- Enable SMM2 IPMI interface via XCC with the following command (Default setting is network enabled but IPMI disabled).
Make sure you follow the guidelines in PSU configuration.
- Reset SMM with the following command.
ipmitool -I lanplus -H $SMM2_IP -U $USERID -P $PASSWORD mc reset cold
Demo video
Give documentation feedback


