Install a DIMM
Use this information to install a DIMM.
See Memory module installation rules and order for detailed information about memory configuration and setup.
- Read the following sections to ensure that you work safely.
Turn off the server. Disconnect the power cords and all external cables (see Power off the server).
Touch the static-protective package that contains the component to any unpainted metal surface on the server; then, remove it from the package and place it on a static-protective surface.
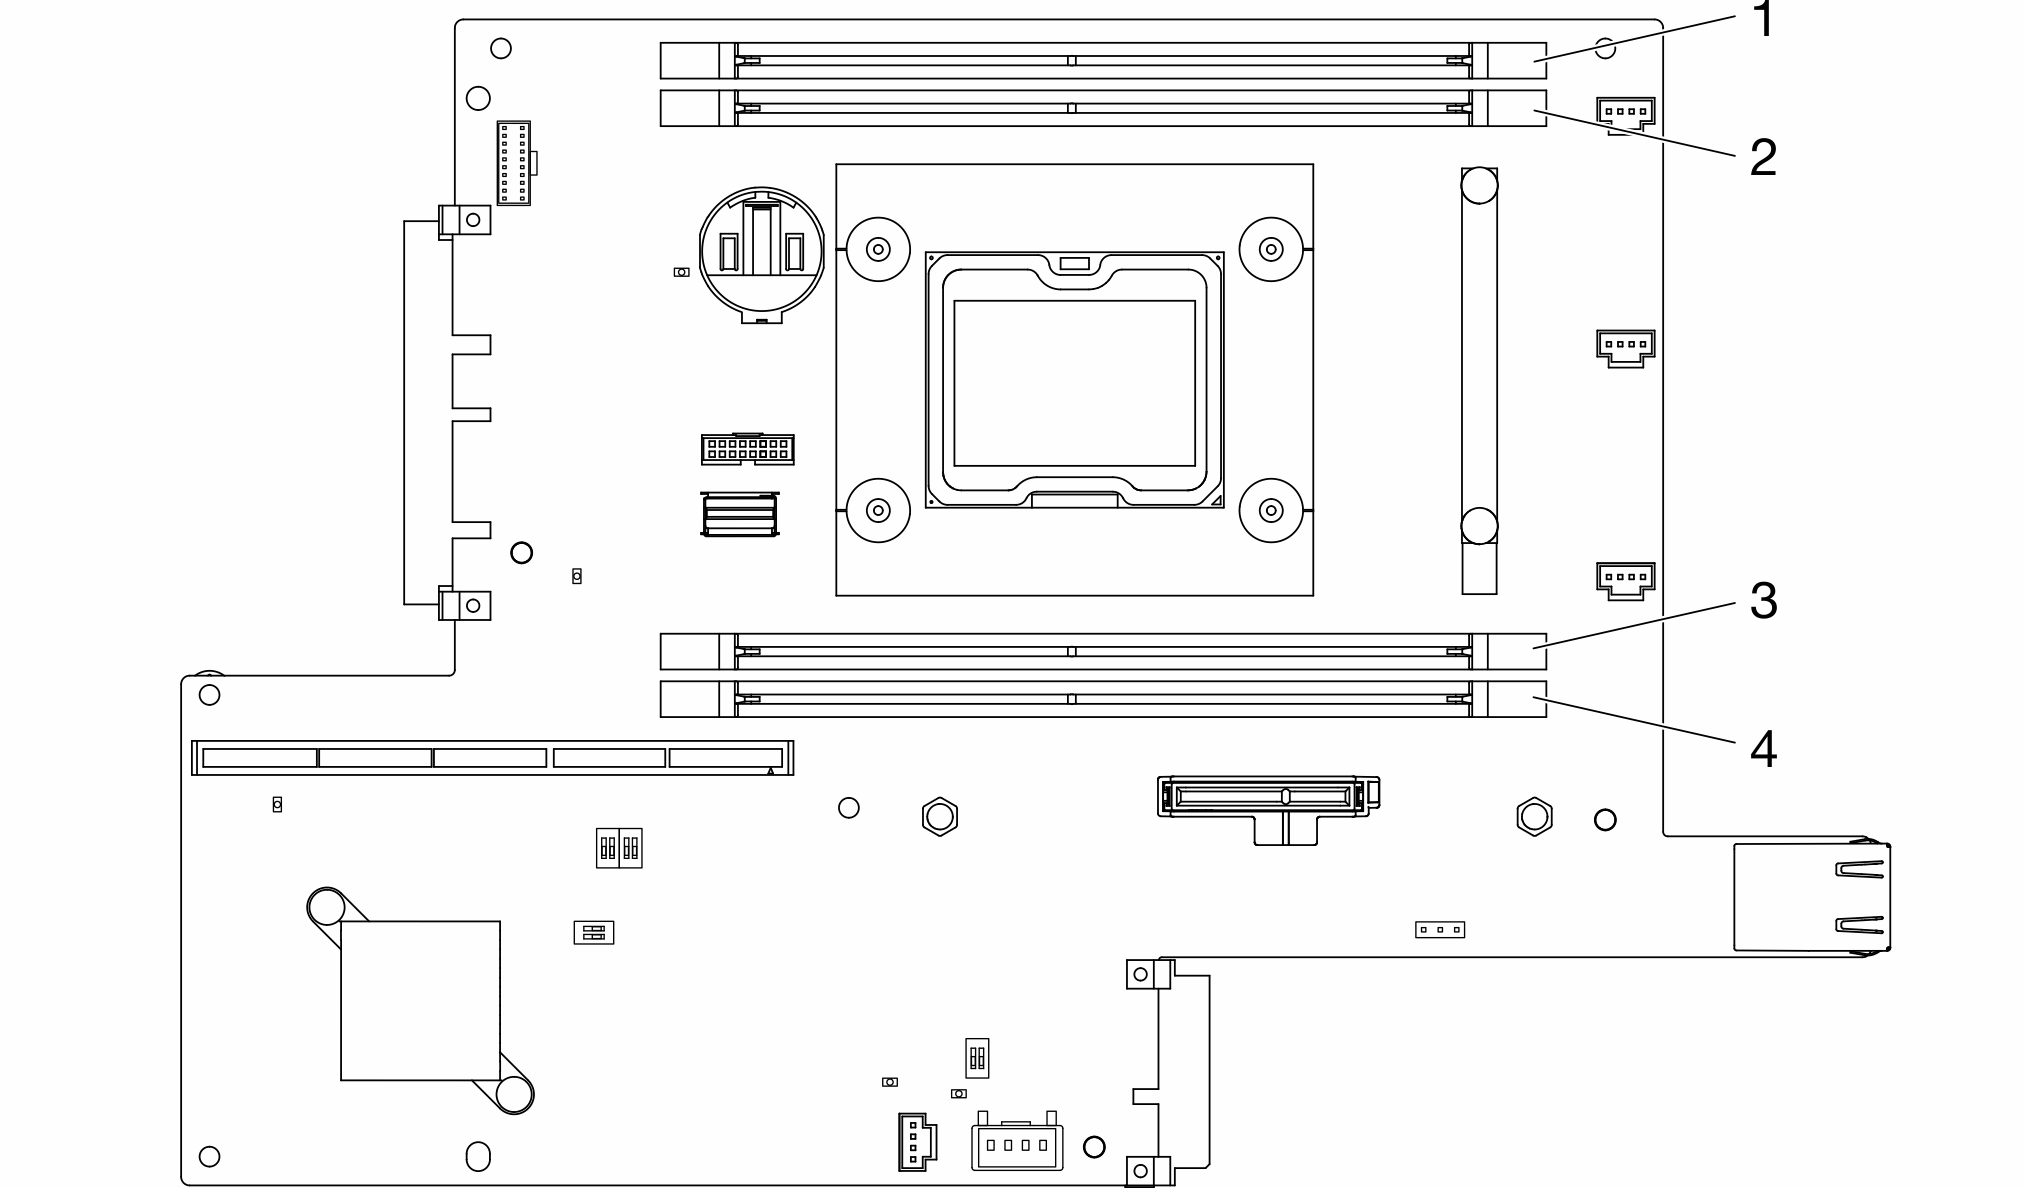
The following illustration shows the system-board components, including DIMM connectors.
To install a DIMM, complete the following steps:
Always wear an electrostatic-discharge strap when removing or installing memory modules. Electrostatic-discharge gloves can also be used.
Never hold two or more memory modules together so that they touch. Do not stack memory modules directly on top of each other during storage.
Never touch the gold memory module connector contacts or allow these contacts to touch the outside of the memory-module connector housing.
Handle memory modules with care: never bend, twist, or drop a memory module.
Procedure
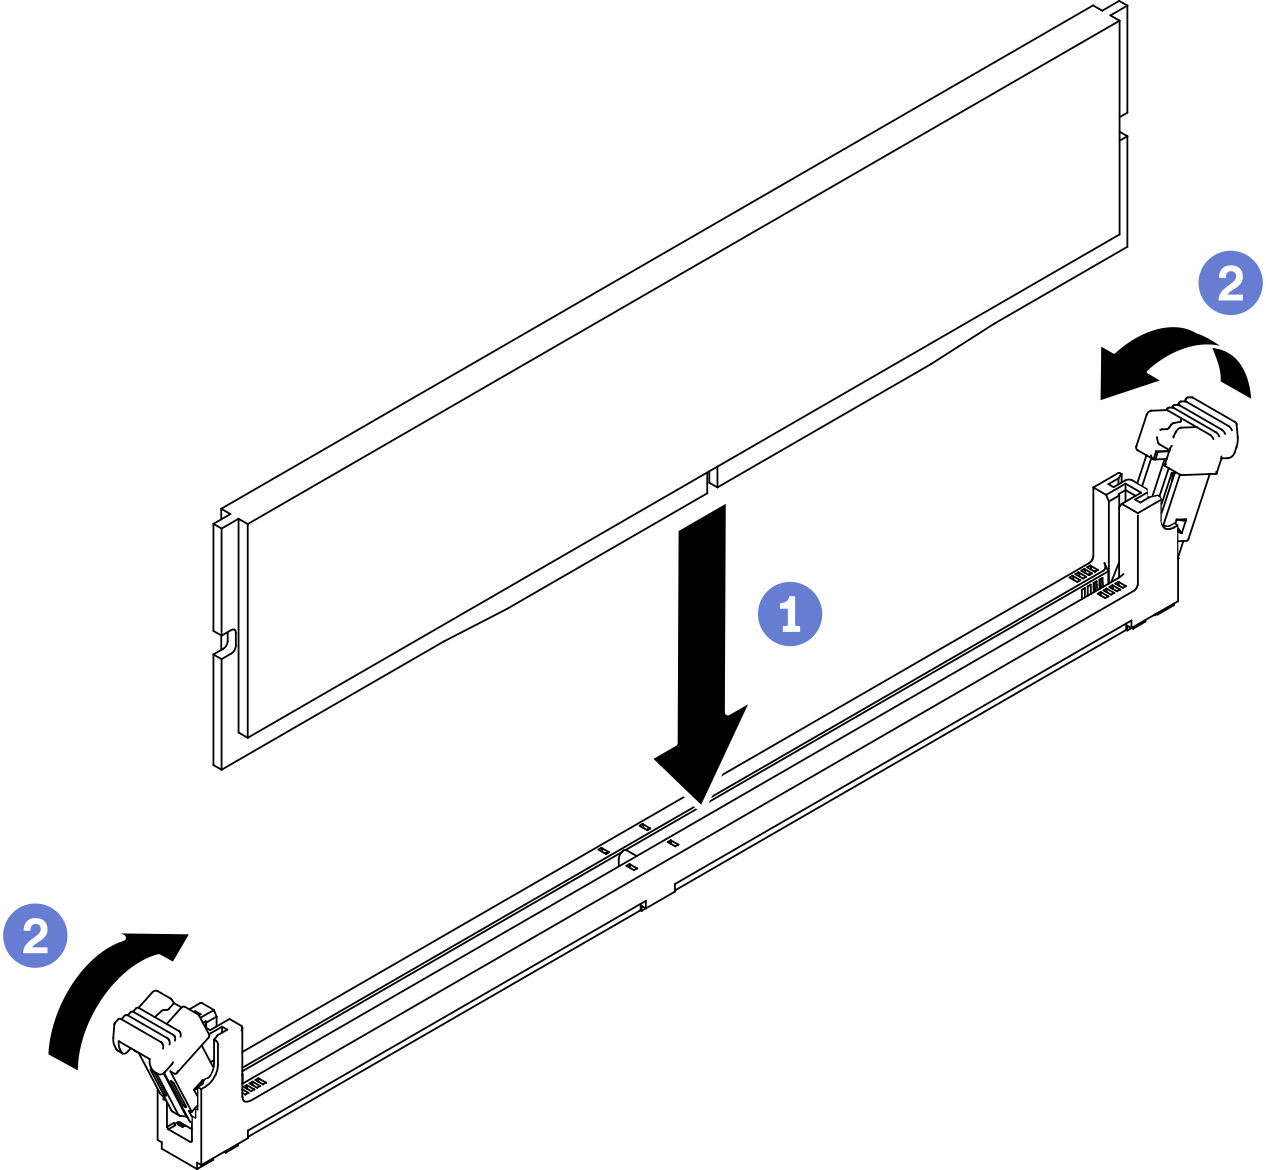
- Make sure the retaining clips are in the fully-open position; then, align the keys on the DIMM with the connector.
- Firmly press both ends of the DIMM straight down into the connector until the retaining clips snap into the locked position.
- If you are installing additional DIMMs, do so now.
Reinstall the air baffle if it is removed (see Install the air baffle).
Install the node if needed (see Install a node).
Reconnect power cords and all external cables.
Demo video