Install a node
Use this information to install a node.
Before you install a node, complete the following steps:
- Read the following sections to ensure that you work safely.
Make sure all the removed components are installed, and all the disconnected cables inside the server are reconnected.
Procedure
- To install the node into the node sleeve, complete the following steps.
- Align the node with the node sleeve and slide the node into place.
- Fasten the two thumbscrews.
NoteSeeConfiguration Installation Guide for the bookshelf configuration, DIN rail configuration and wall-mounted configuration installation details if necessary. Figure 1. Node installation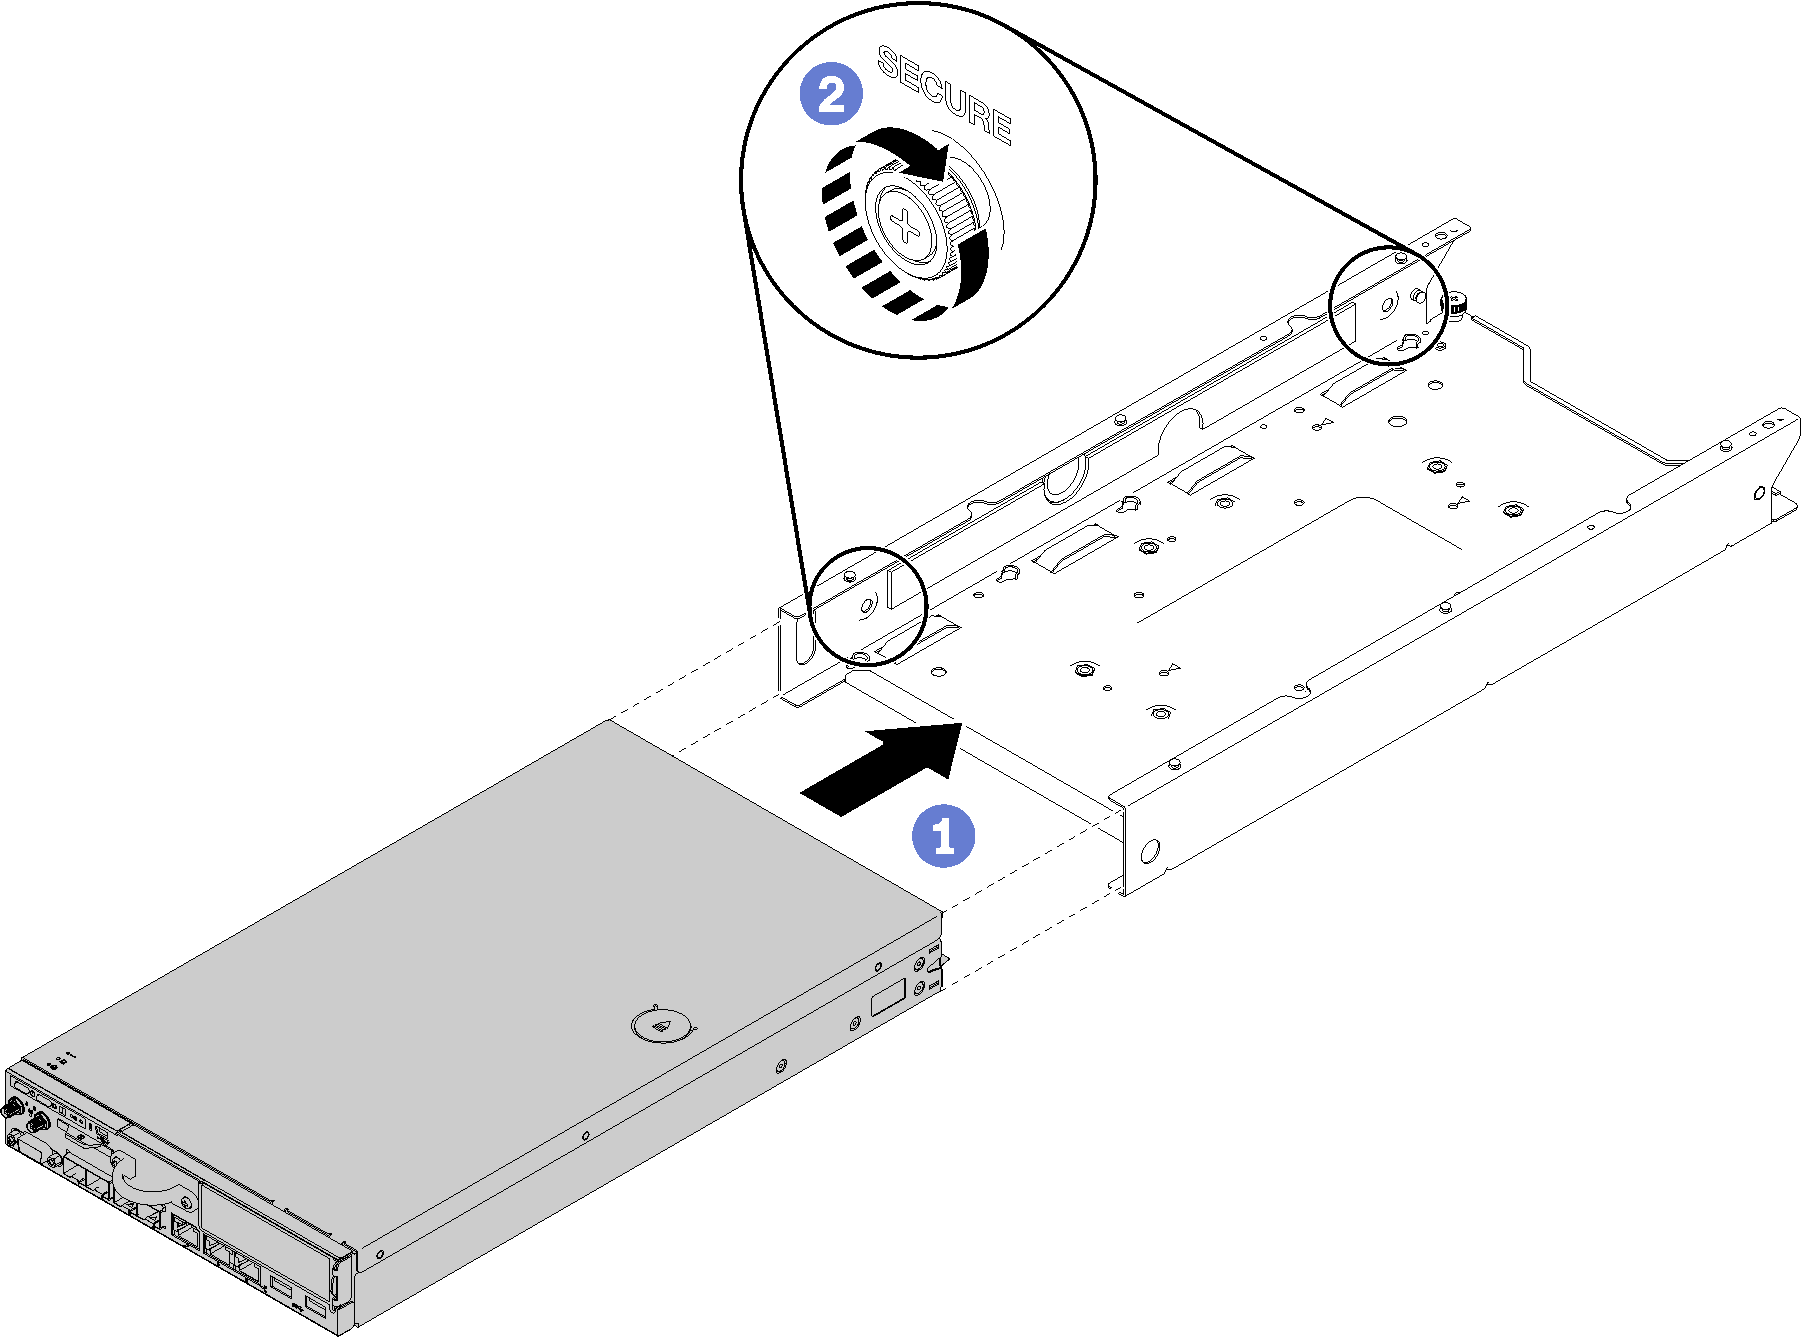
- To install the node into the enclosure, complete the following steps.AttentionIf the node is to be installed in an E1 Enclosure (1U 2-node), change the vital product data (VPD) for proper operation.See Change the VPD for E1 Enclosure configuration (trained technician only).
- Insert the node into the node bay until it stops.
E1 Enclosure (1U 2-node)
Figure 2. Node installation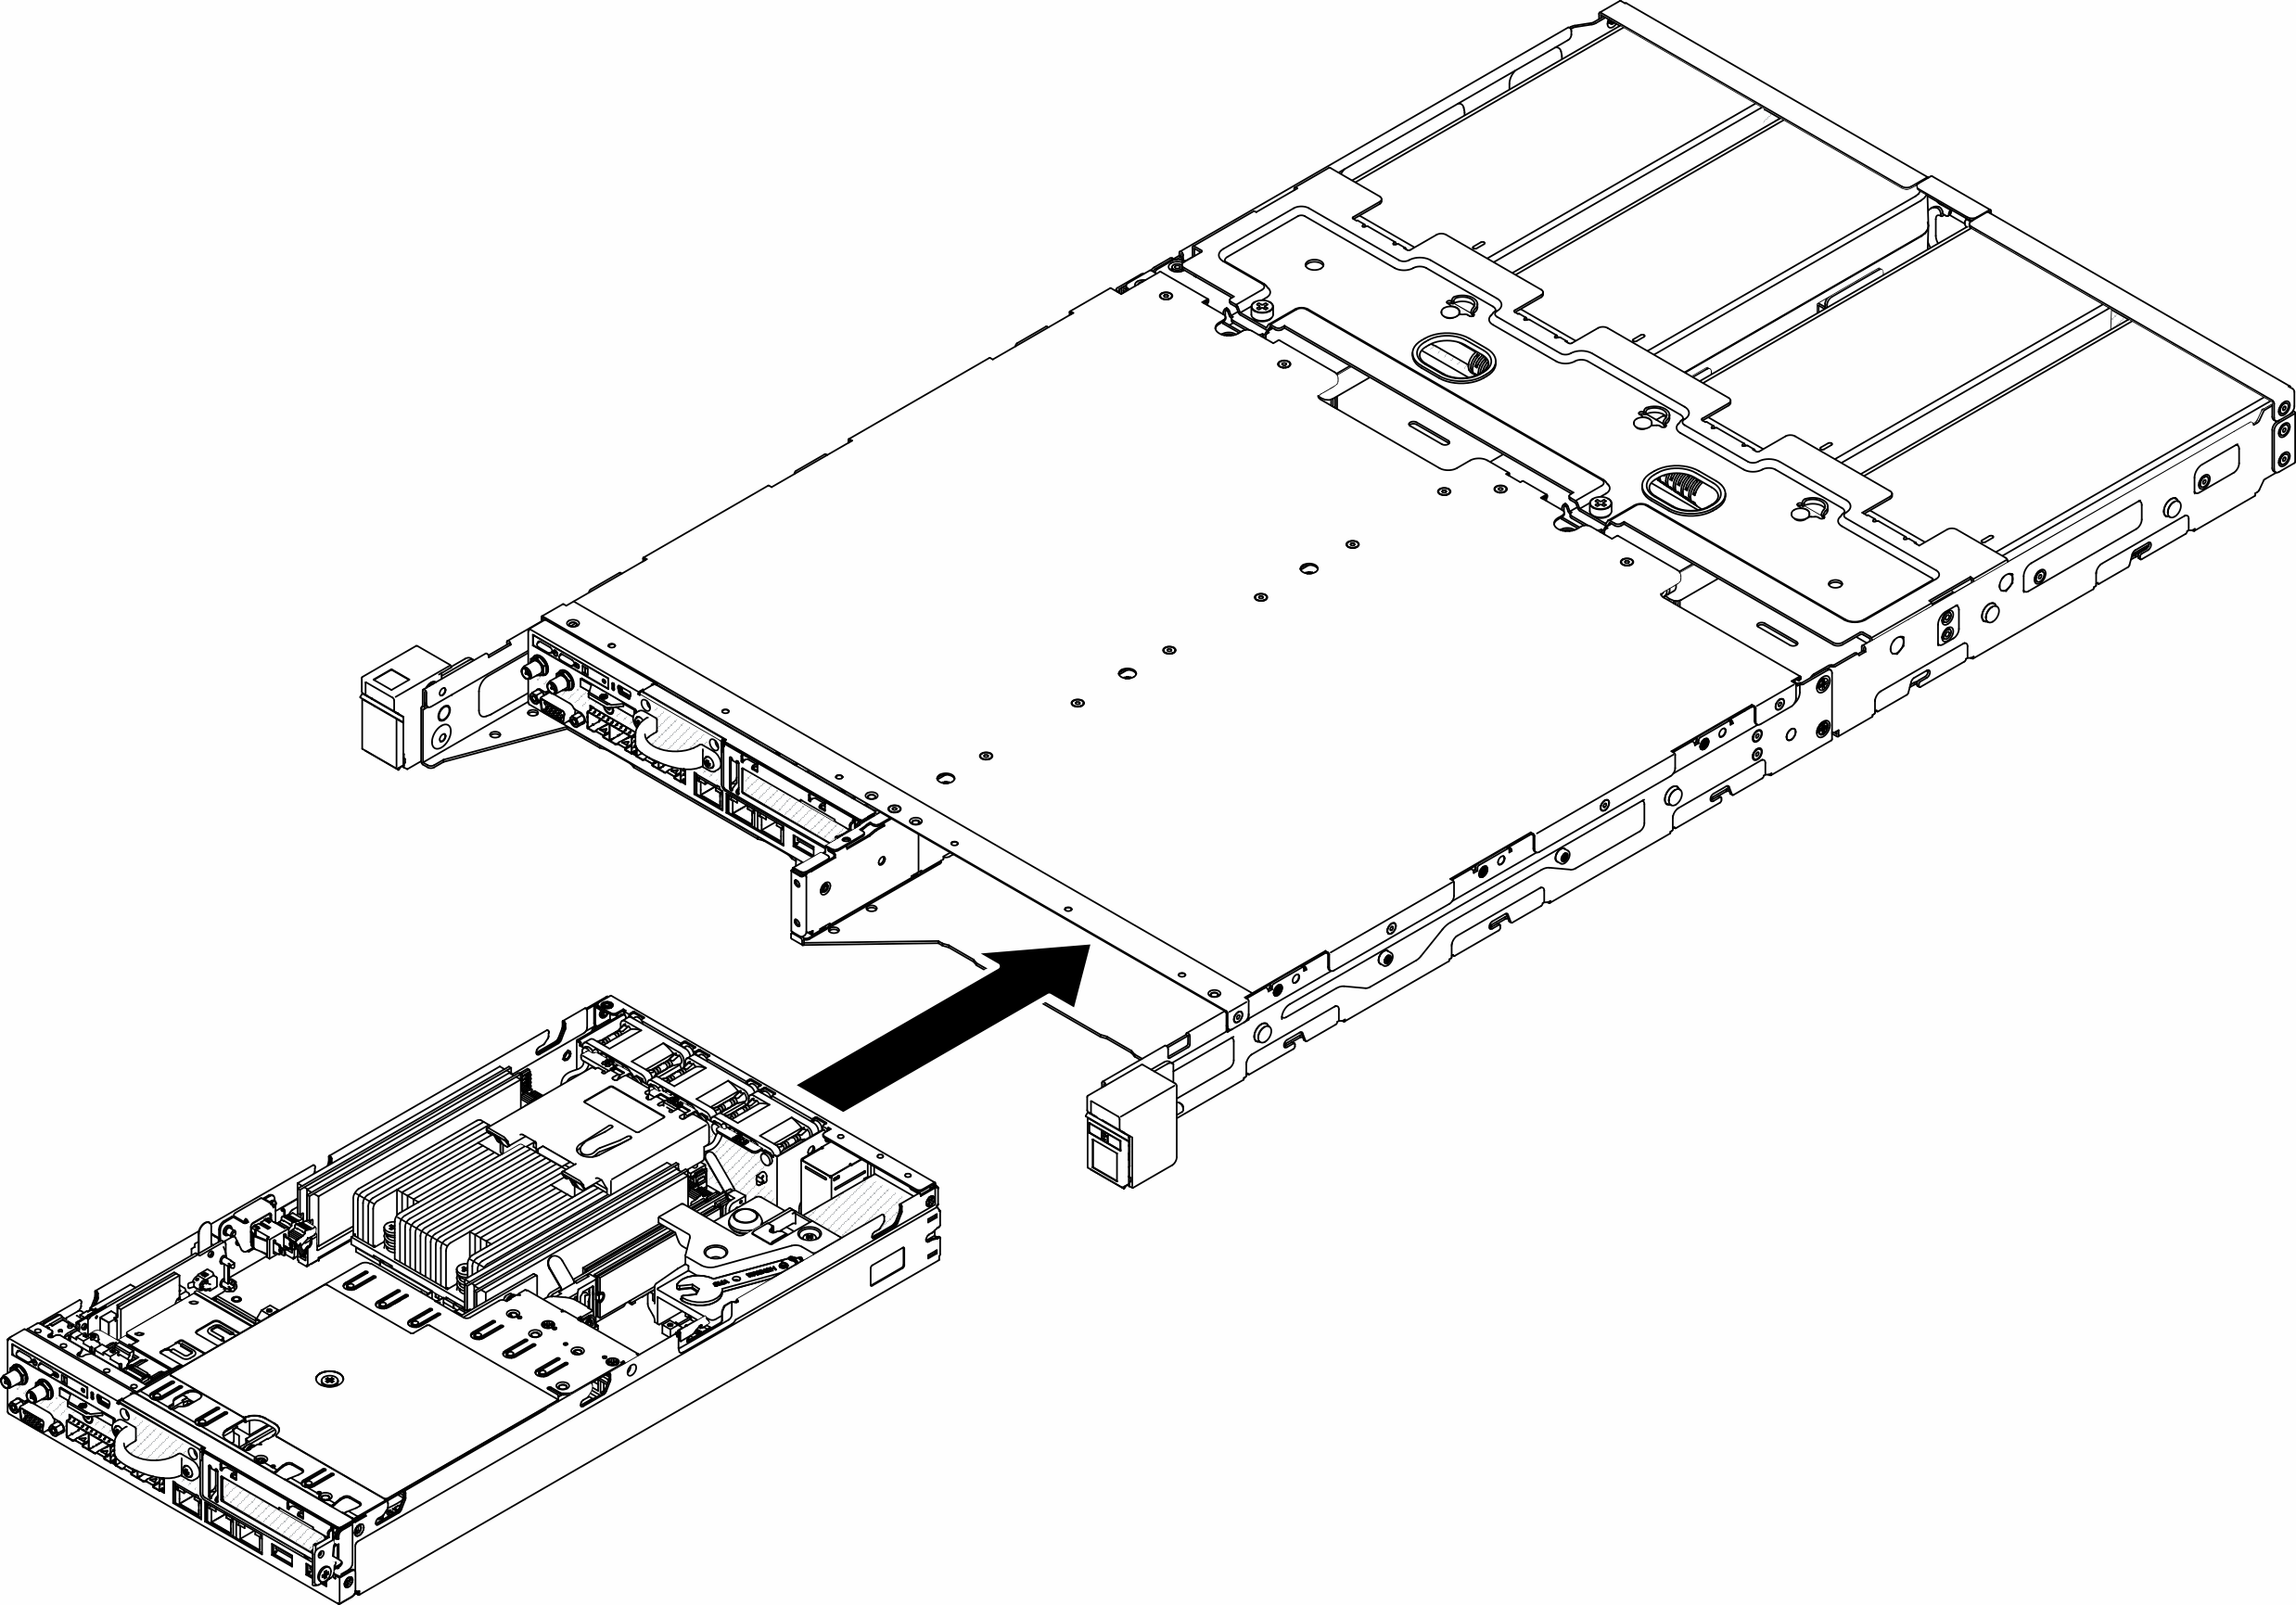
E2 Enclosure (2U 2-node)
Figure 3. Node installation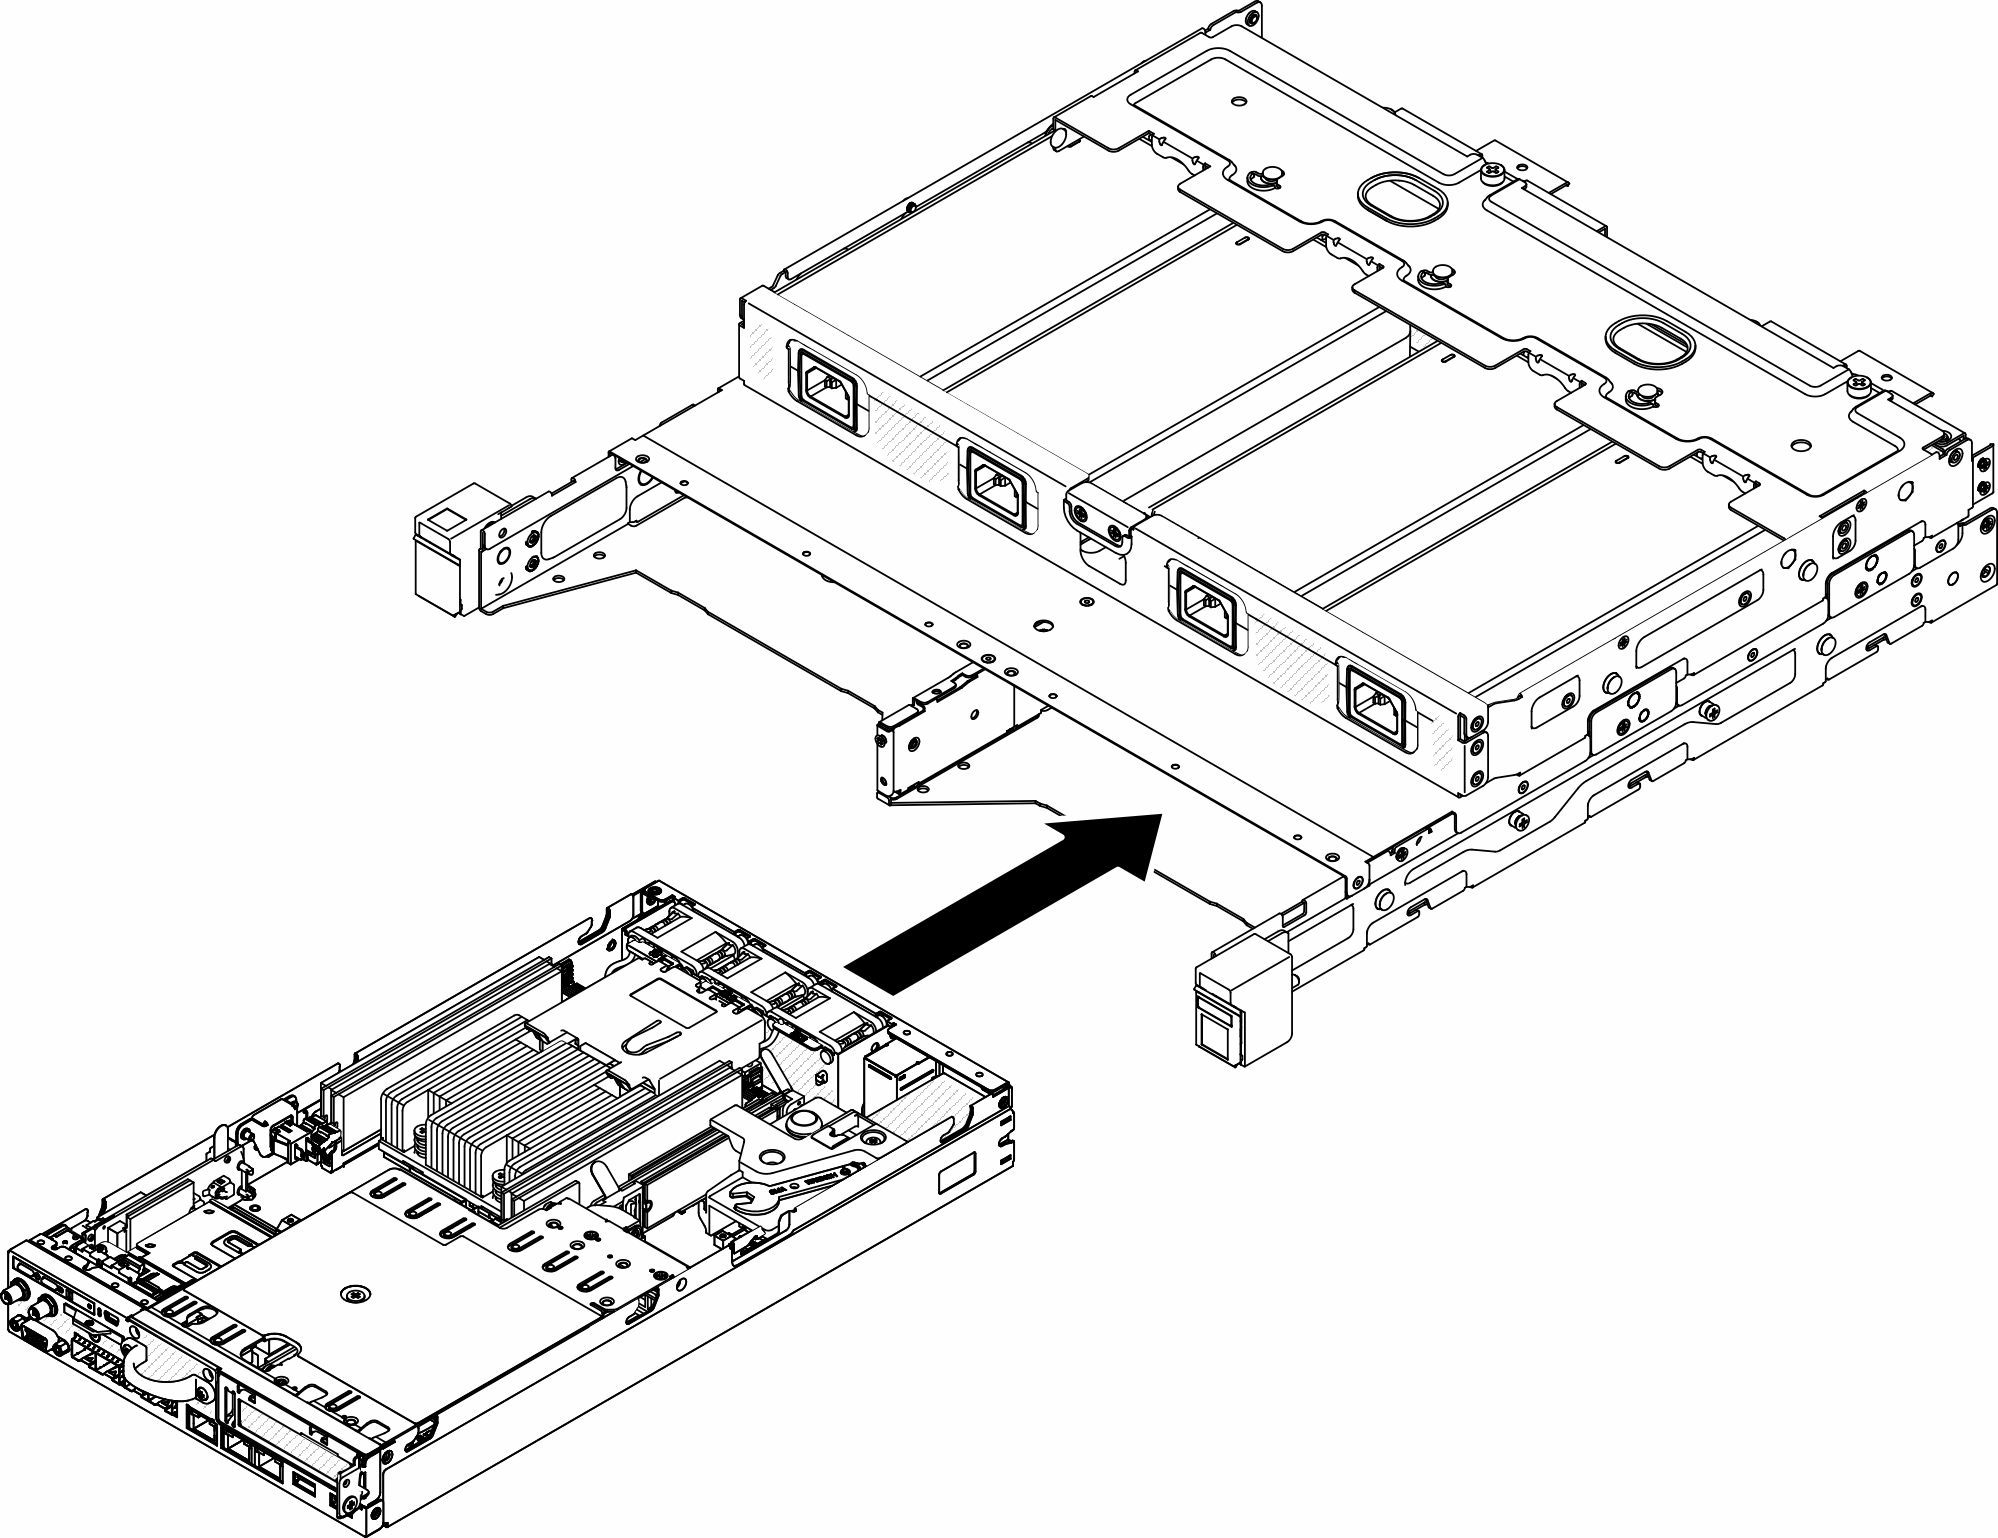
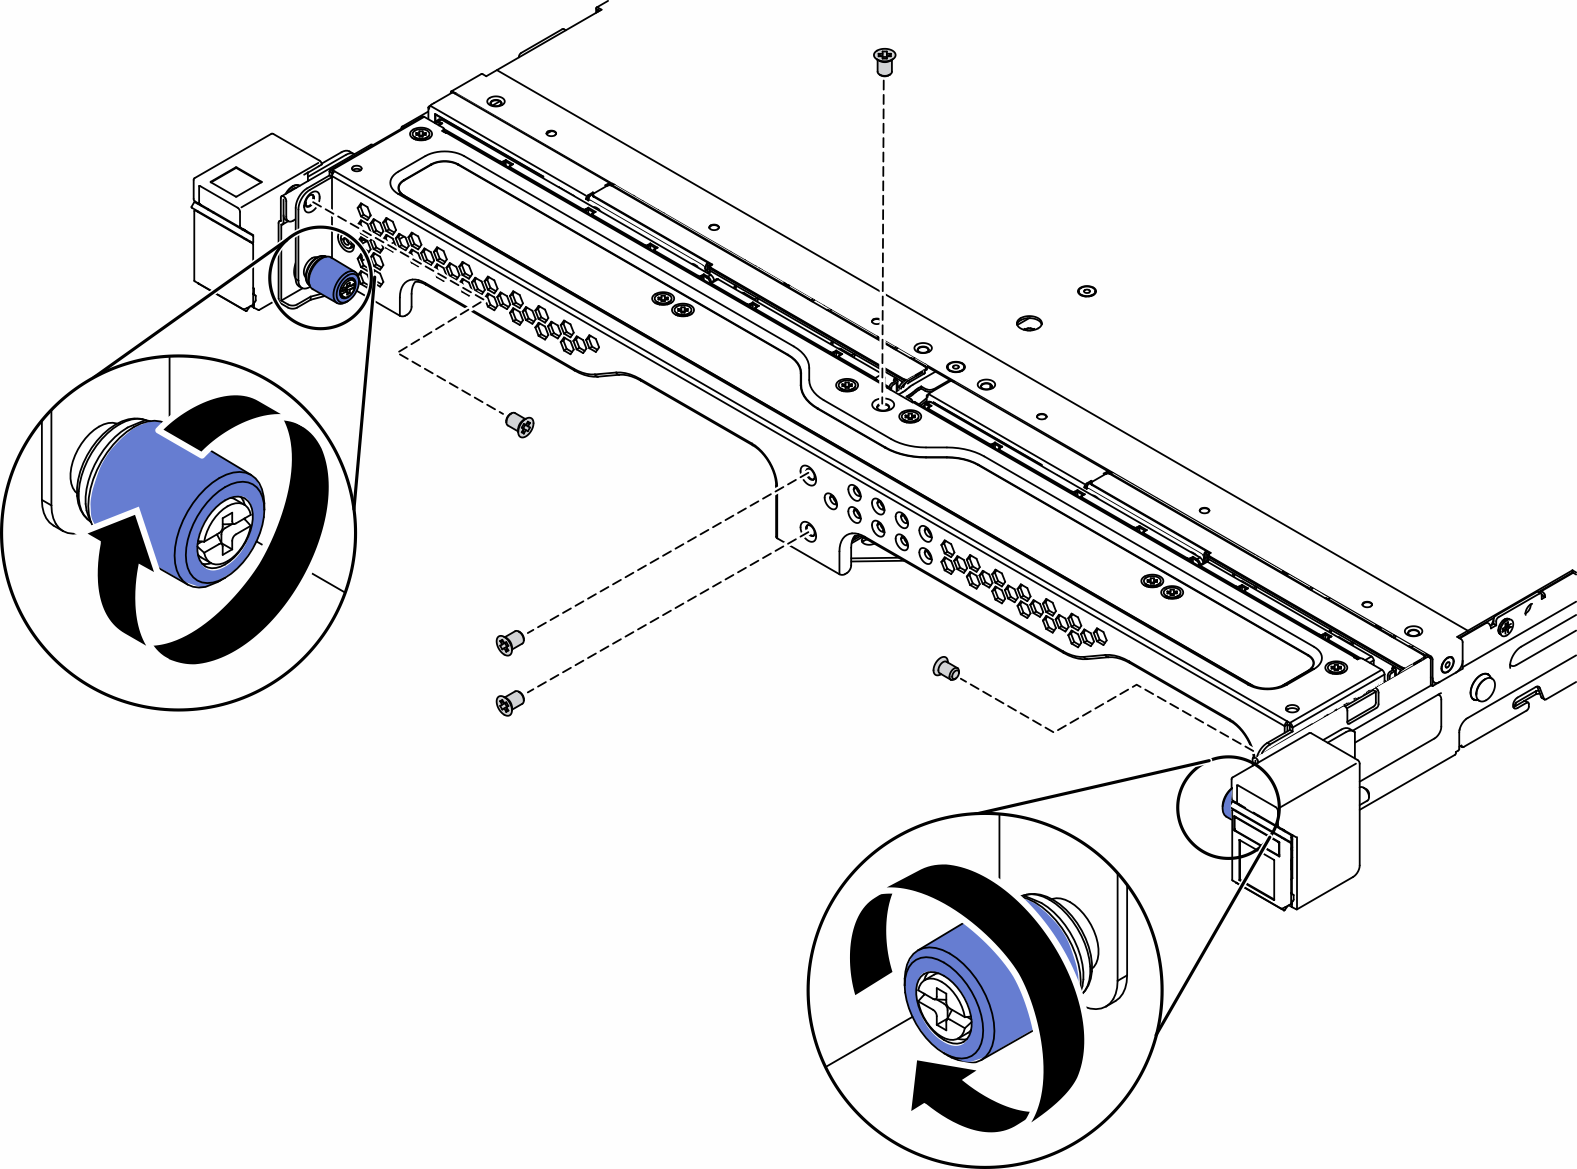
- Align and insert the shipping bracket onto the front of the enclosure.Figure 4. Node installation
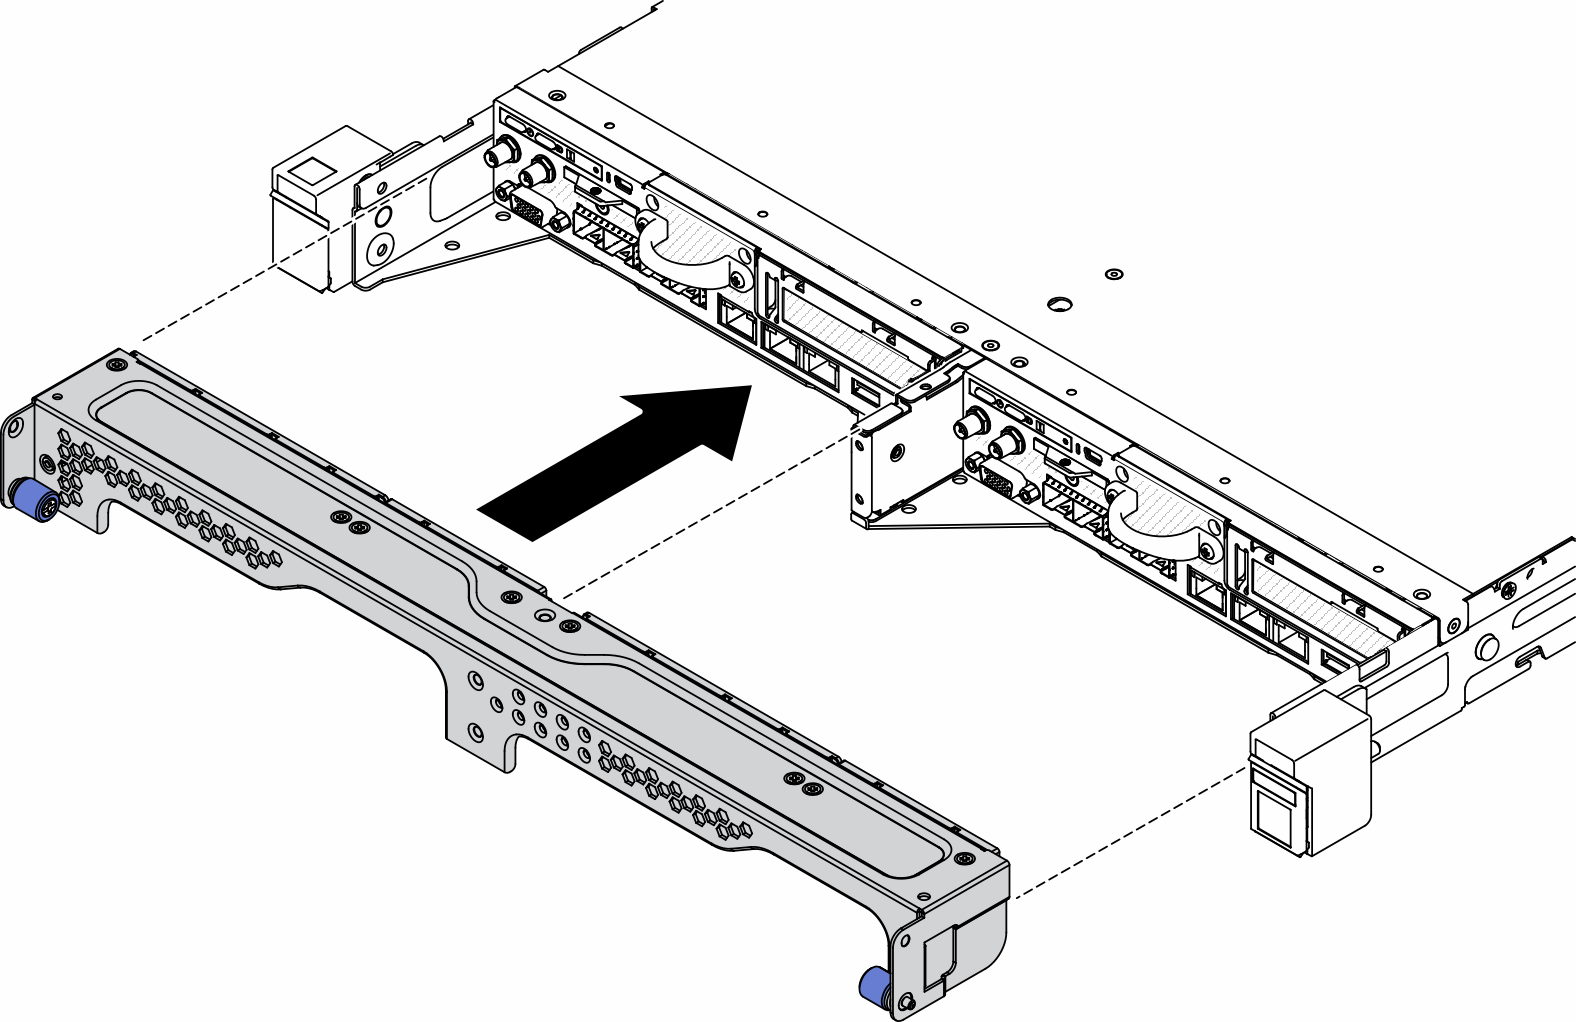
- Install the five screws and fasten the two thumb screws to secure the shipping bracket.Figure 5. Node installation
- Insert the node into the node bay until it stops.
After you install a node, complete the following steps:
Install the enclosure into rack if necessary.
Reconnect power cords and all external cables.
Turn on the server (see Power on the server).
Demo video
Give documentation feedback