Install the PCIe riser assembly
Use this information to install the PCIe riser assembly.
To avoid possible danger, read and follow the following safety statement.
- S012
 CAUTIONHot surface nearby.
Before you install the PCIe riser assembly, complete the following steps:
- Read the following sections to ensure that you work safely.
Turn off the server. Disconnect the power cords and all external cables (see Power off the server).
- Install the required adapters.
Remove the filler if it is installed.
Remove the three screws.
Grasp the filler by its edges and carefully lift it out of the server.
Figure 1. Filler removal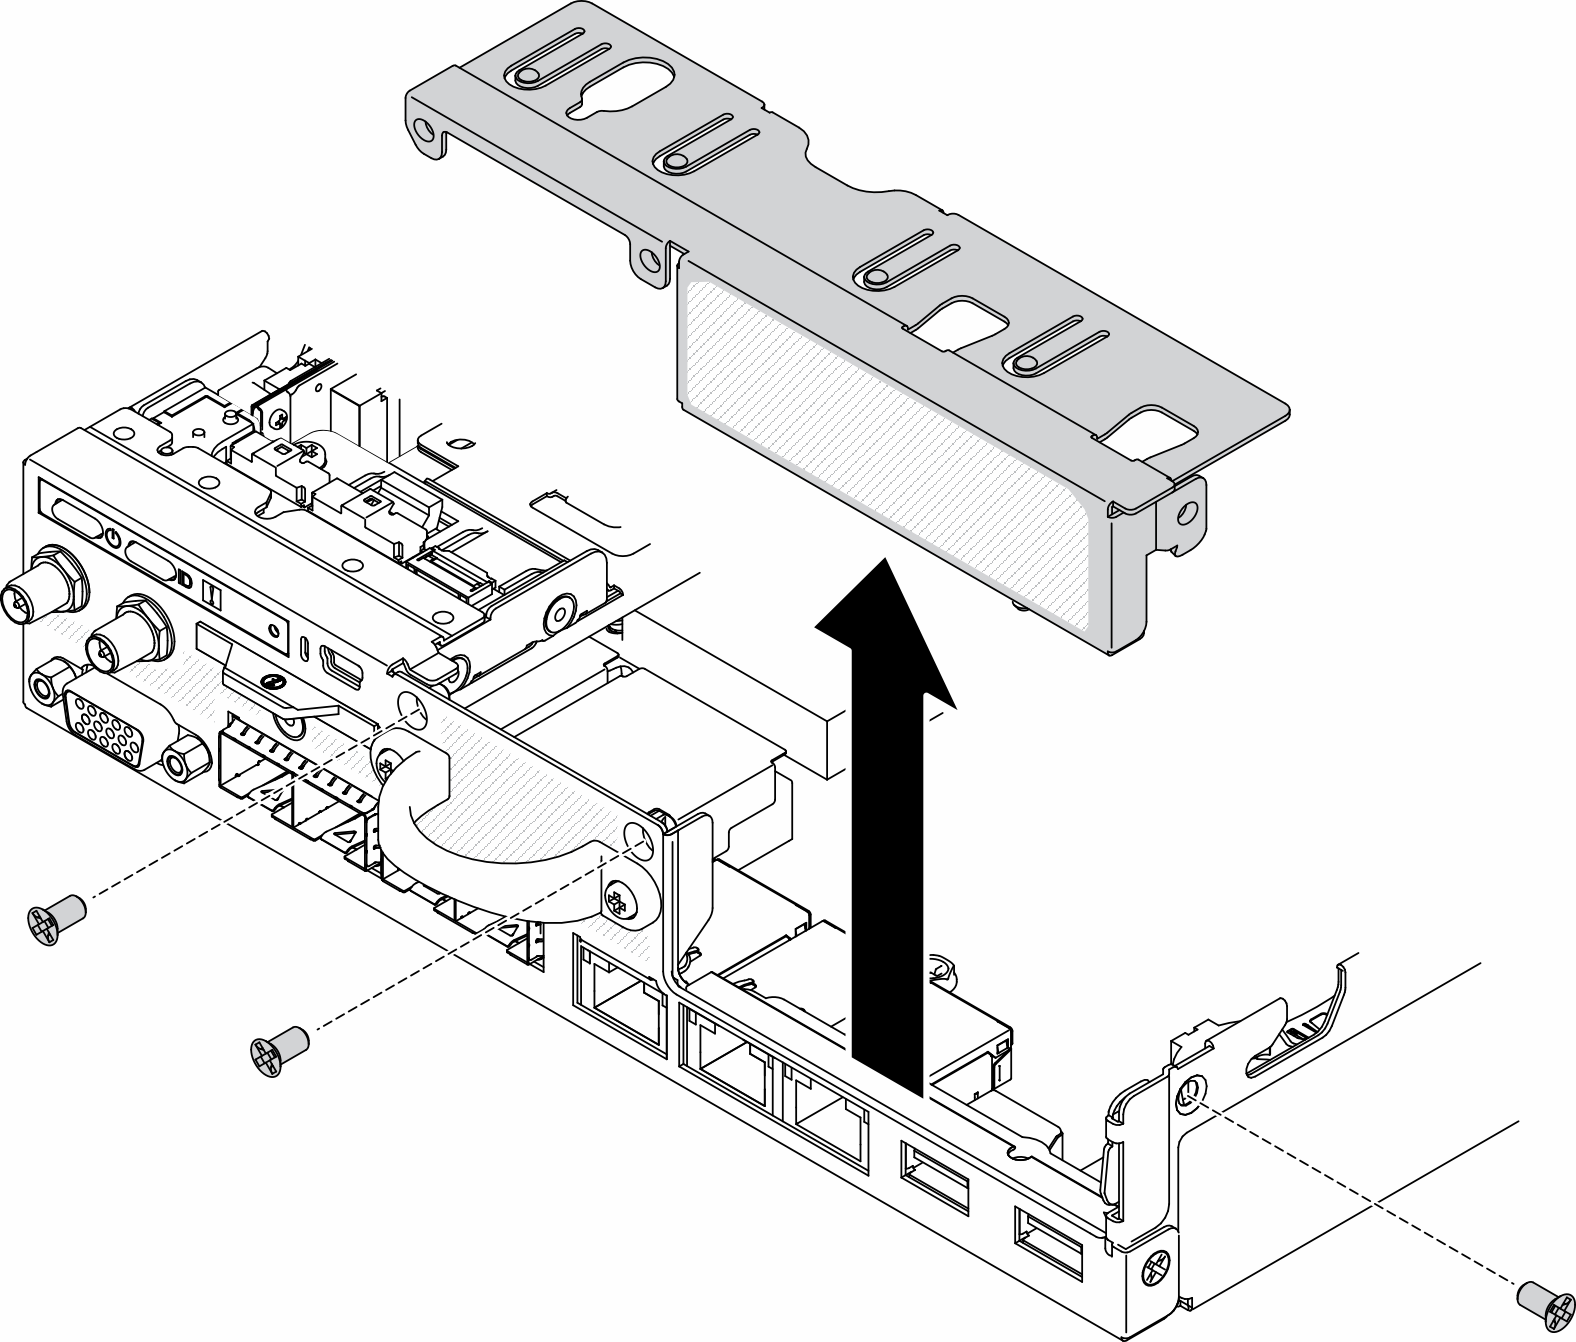
Procedure
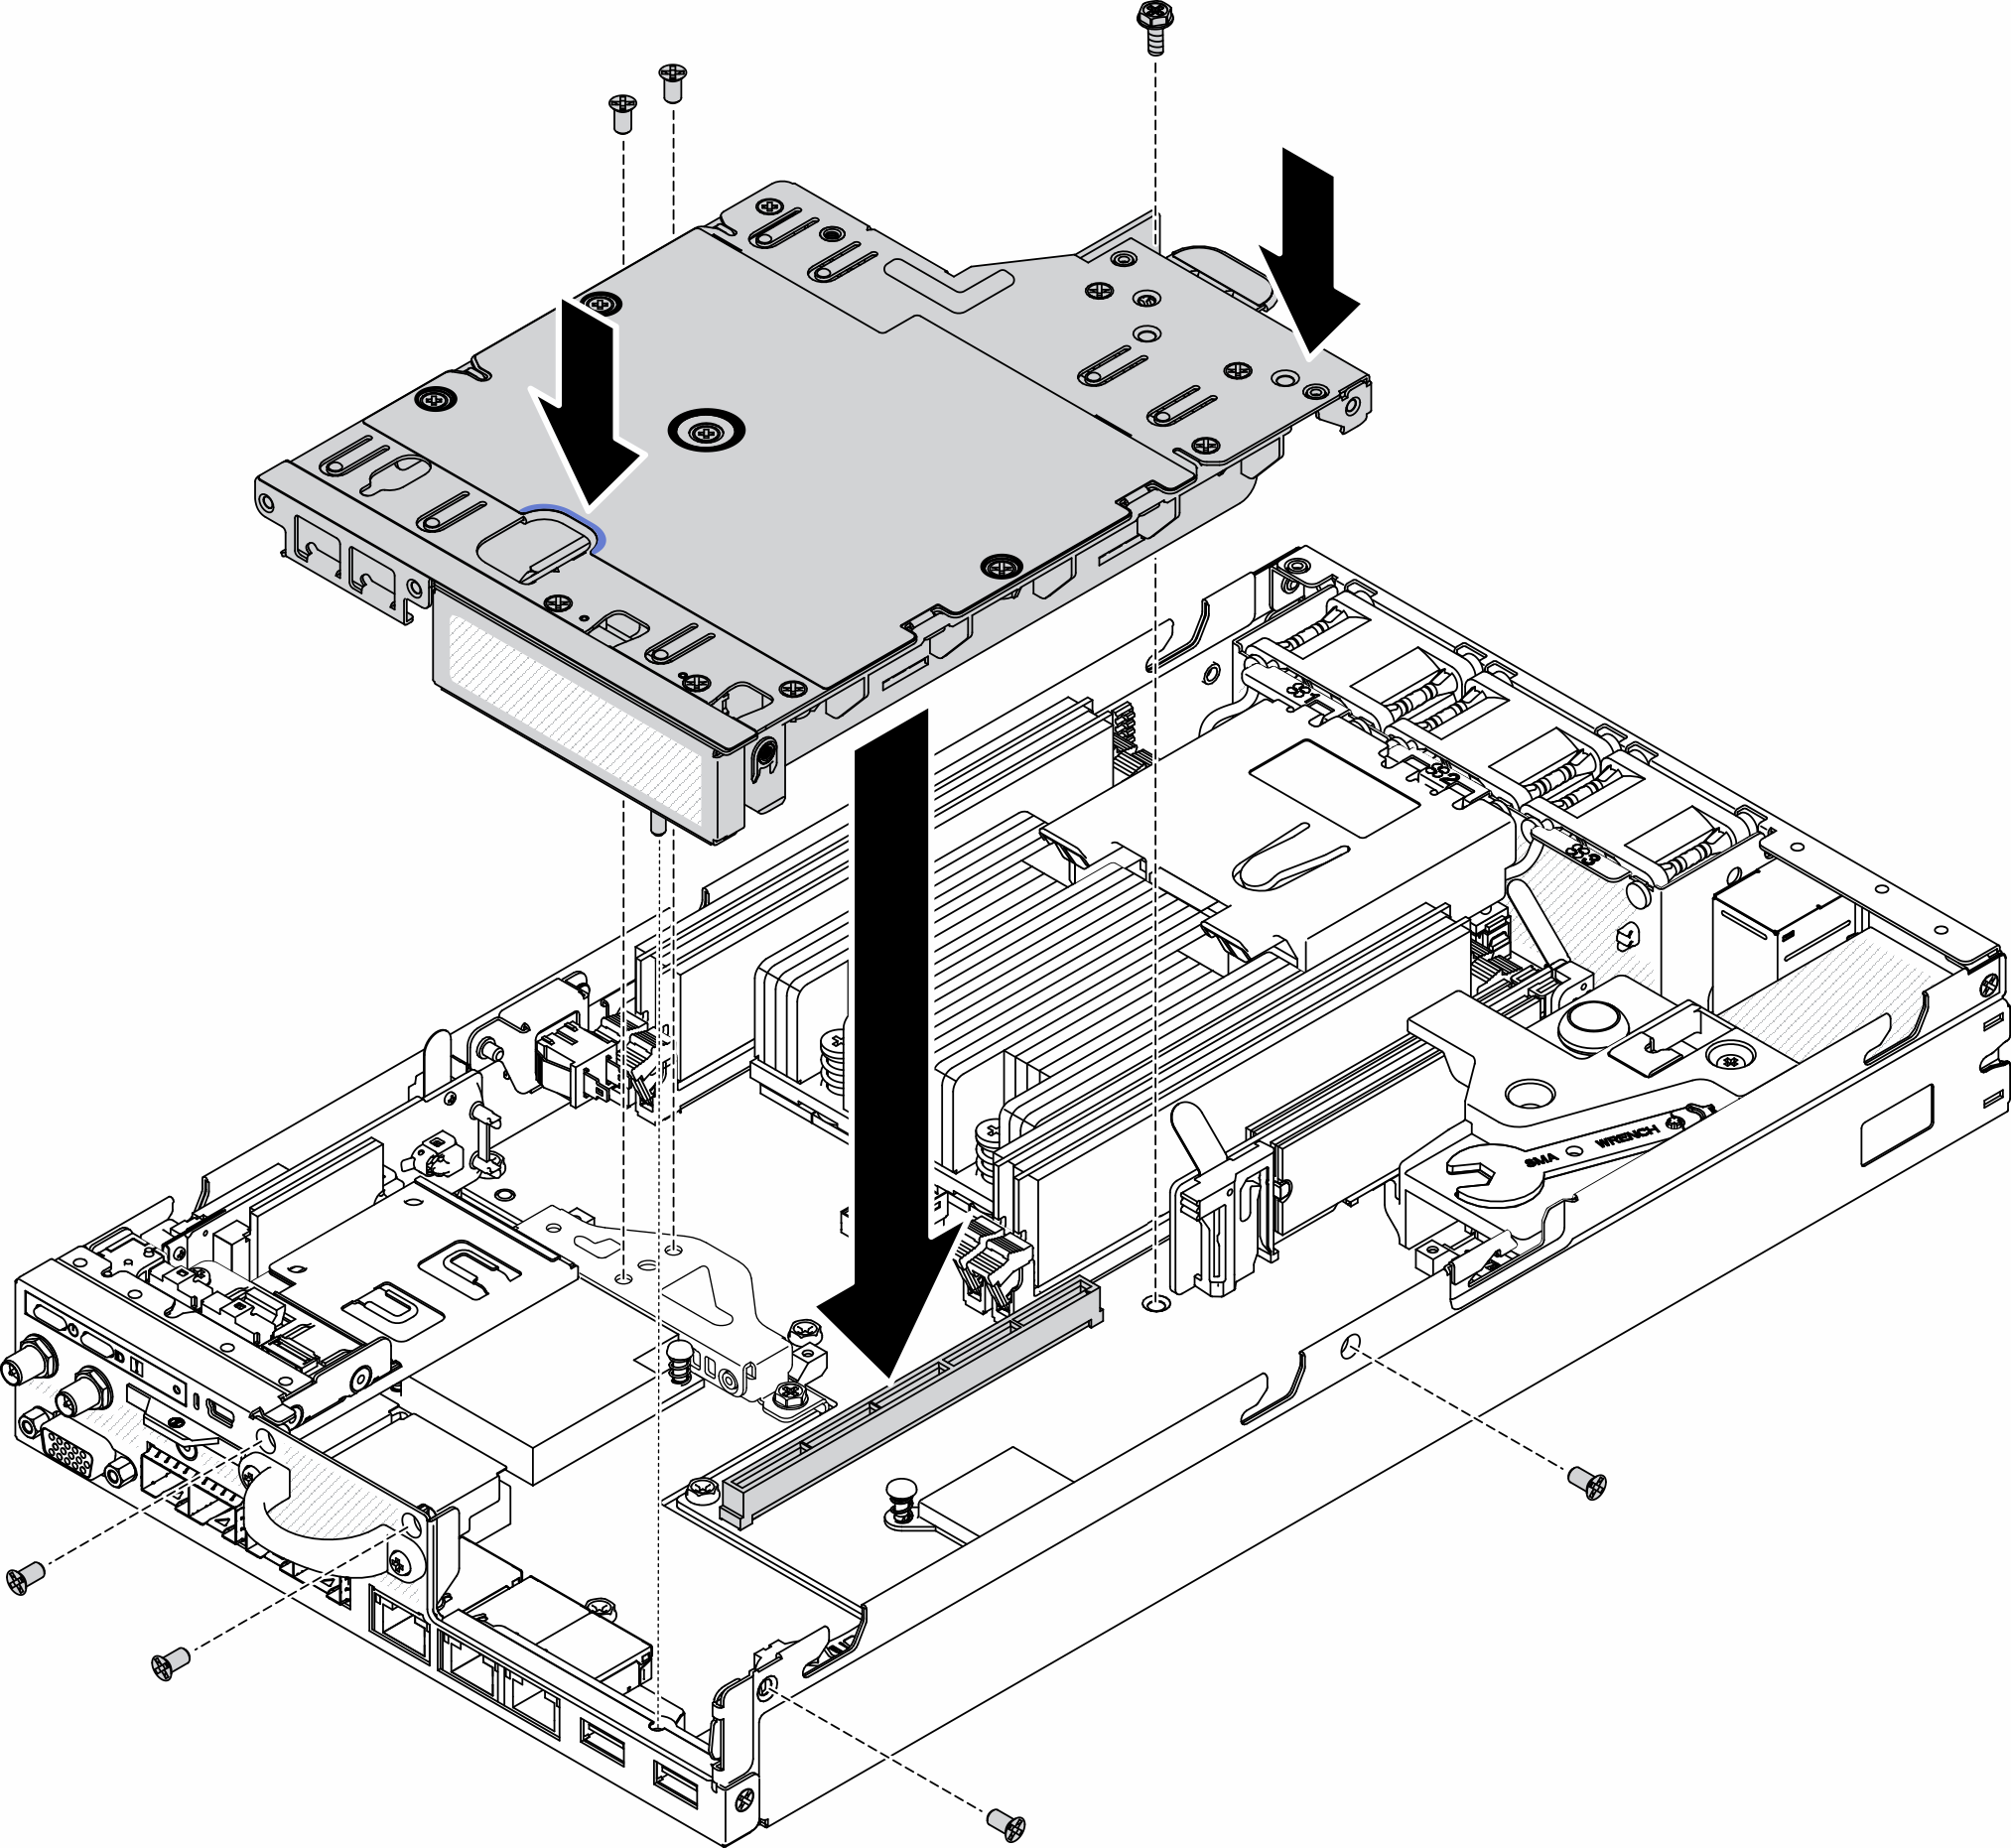
- If the adapter bracket is not installed, install it by fastening the two screws as shown.Figure 2. PCIe riser assembly installation

- Install the seven screws.Figure 3. PCIe riser assembly installation
After you install the PCIe riser assembly, complete the following steps:
Install the node if needed (see Install a node).
Reconnect power cords and all external cables.
Demo video
Give documentation feedback