Install a power adapter
Use this information to install a power adapter.
As required by COMMISSION REGULATION (EU) 2019/1782 of 1 October 2019 laying down ecodesign requirements for external power supplies pursuant to Directive 2009/125/EC of the European Parliament and of the Council and repealing Commission Regulation (EC) No 278/2009 (ErP Lot7) for the external power supply of the product.
Information published | Value and precision | Unit |
|---|---|---|
Manufacturer’s name | Lenovo | - |
Model identifier | FSP240-A12C14 | - |
Input voltage | 100-240 | V |
Input AC frequency | 50-60 | Hz |
Output voltage | 12.2 | V |
Output current | 20.0 | A |
Output power | 240.0 | W |
Average active efficiency | 92.73 | % |
Efficiency at low load (10 %) | 87.35 | % |
No-load power consumption | 0.13 | W |
Information published | Value and precision | Unit |
|---|---|---|
Manufacturer’s name | Lenovo | - |
Model identifier | GA240SD1-12020000 | - |
Input voltage | 100-240 | V |
Input AC frequency | 50-60 | Hz |
Output voltage | 12.2 | V |
Output current | 20.0 | A |
Output power | 240.0 | W |
Average active efficiency | 93.21 | % |
Efficiency at low load (10 %) | 79.0 | % |
No-load power consumption | 0.097 | W |
Before you install a power adapter, complete the following steps:
- Read the following sections to ensure that you work safely.
Turn off the server. Disconnect the power cords and all external cables (see Power off the server).
Remove the node from the enclosure if needed (see Remove a node).
Power adapters to the node must be with the same brand, power rating, wattage or efficiency level.
To distinguish the power adapters, check the size, the position of connector, and the label of the power adapters.
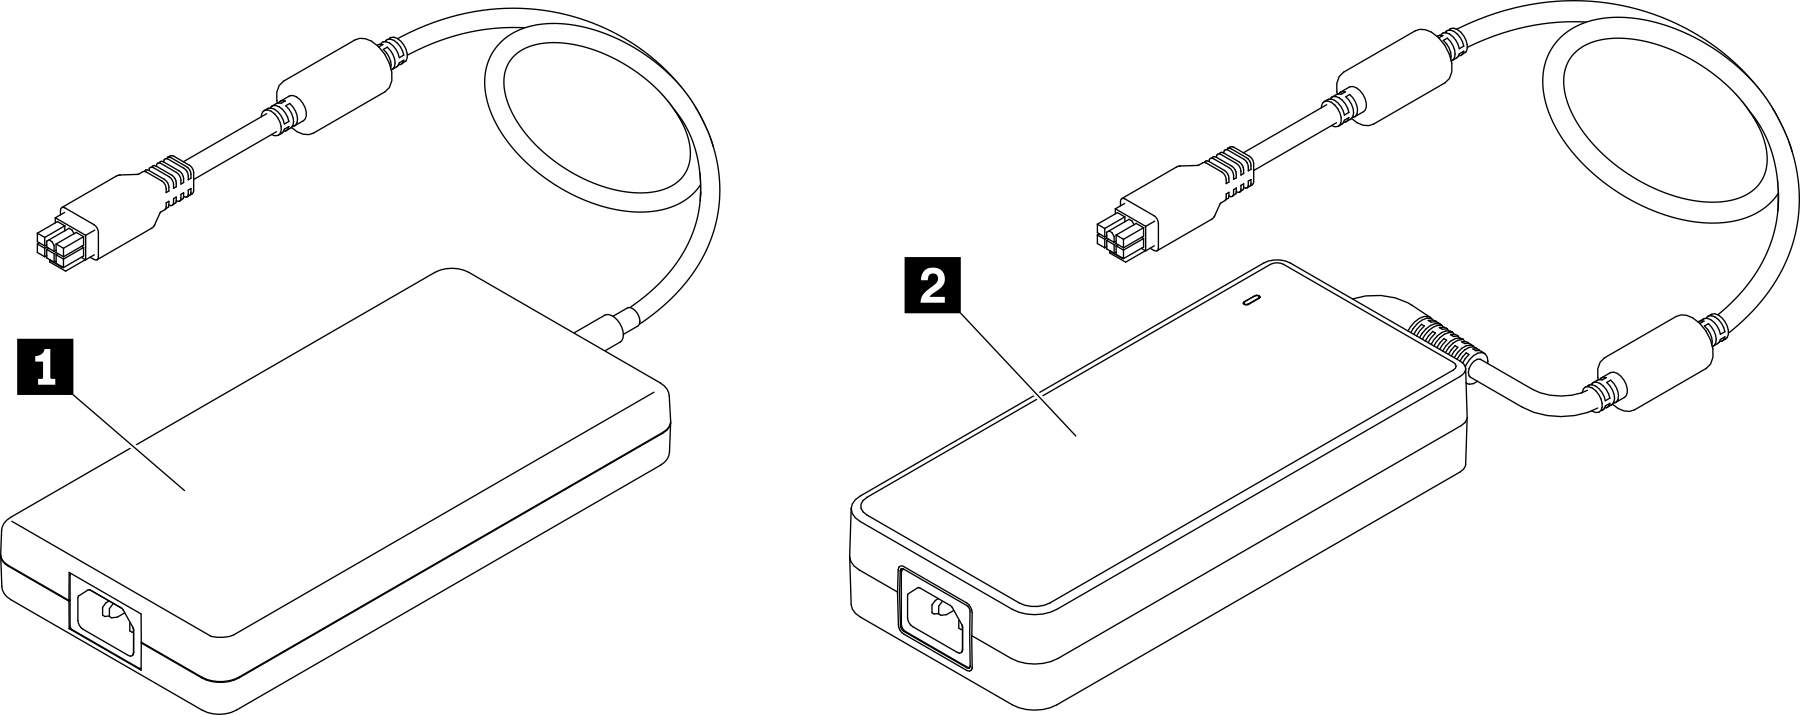
| 1 ThinkEdge 240W 230V/115V External Power Supply | 2 ThinkEdge 240W 230V/115V External Power Supply v2 |
Procedure
If you are installing a power adapter while a node is installed in an enclosure, complete the following steps.
Insert the power adapter into the cage.
E1 Enclosure (1U 2-node)
Figure 2. Power adapter installation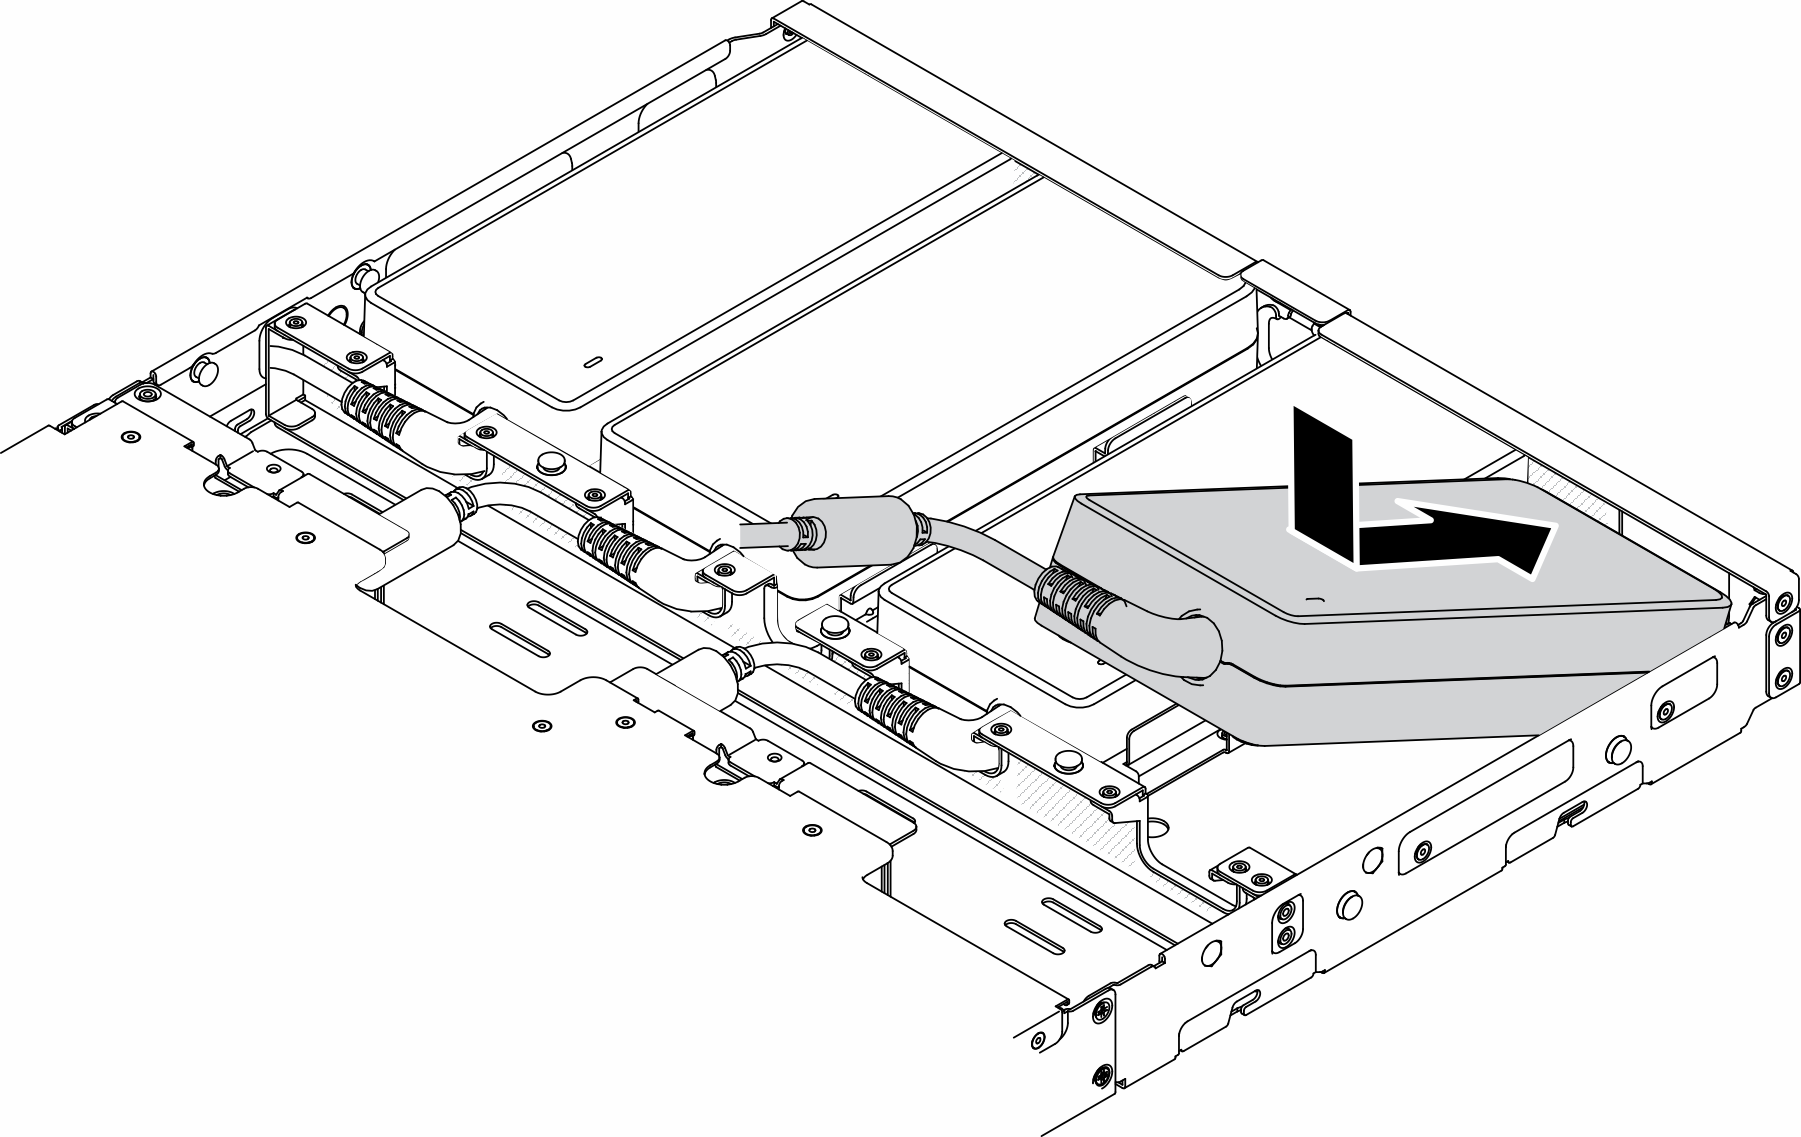
E2 Enclosure (2U 2-node)
Figure 3. Power adapter installation
Slightly push the bracket backward and install the bracket.
Install the two screws.
E1 Enclosure (1U 2-node)
Figure 4. Bracket installation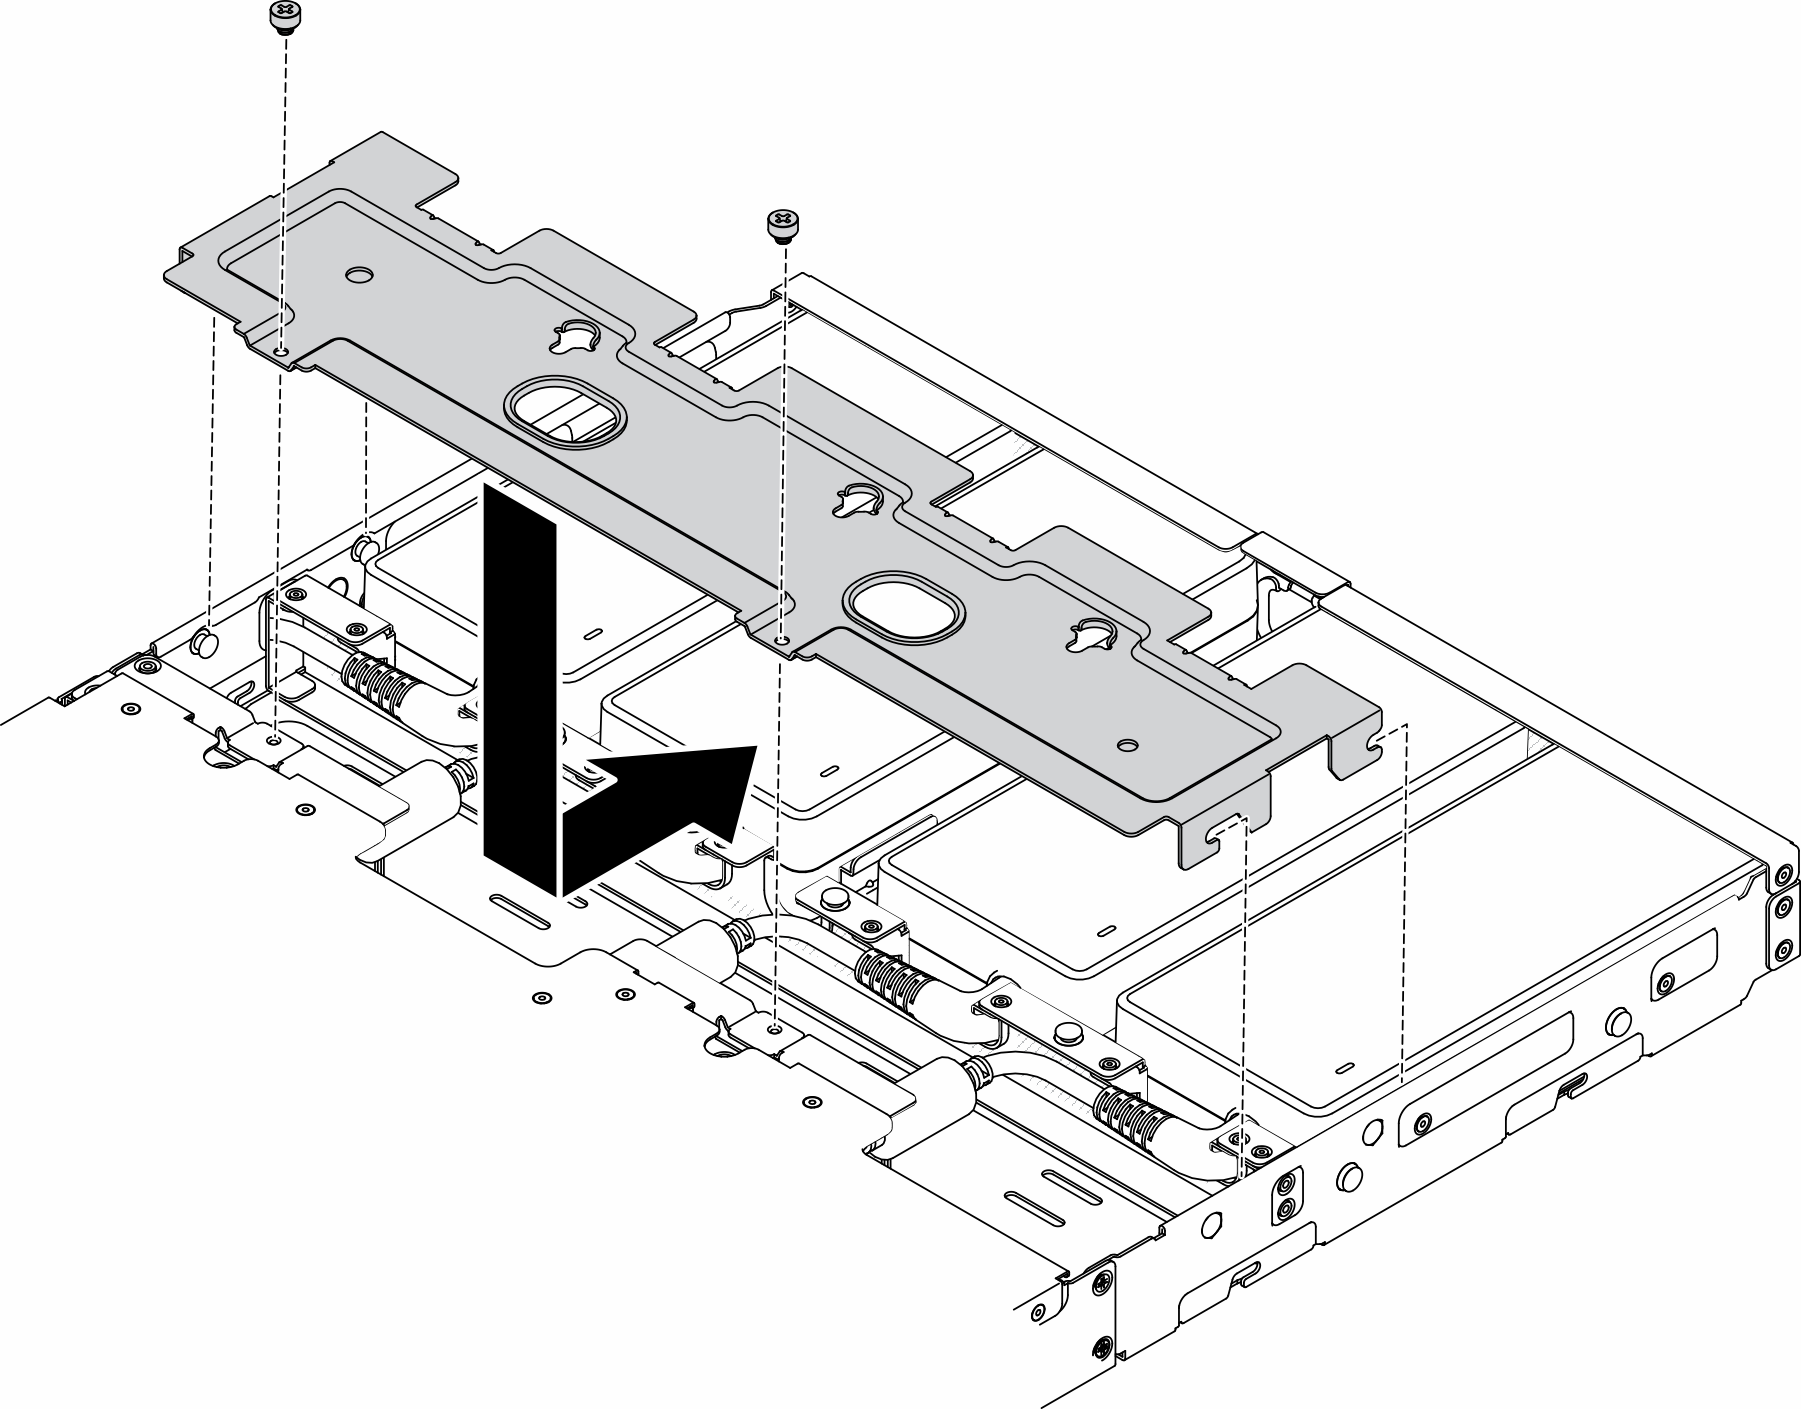
E2 Enclosure (2U 2-node)
Figure 5. Bracket installation
- If you are installing a power adapter into a power adapter bracket, complete the following steps.
Align the power adapter with the power adapter bracket; then, slide the power adapter into place.
Align the tab with the slot and carefully hook the tab into place.
Fasten the thumbscrew.
NoteSeeConfiguration Installation Guide for the DIN rail configuration and wall-mounted configuration installation details if necessary. Figure 6. Power adapter installation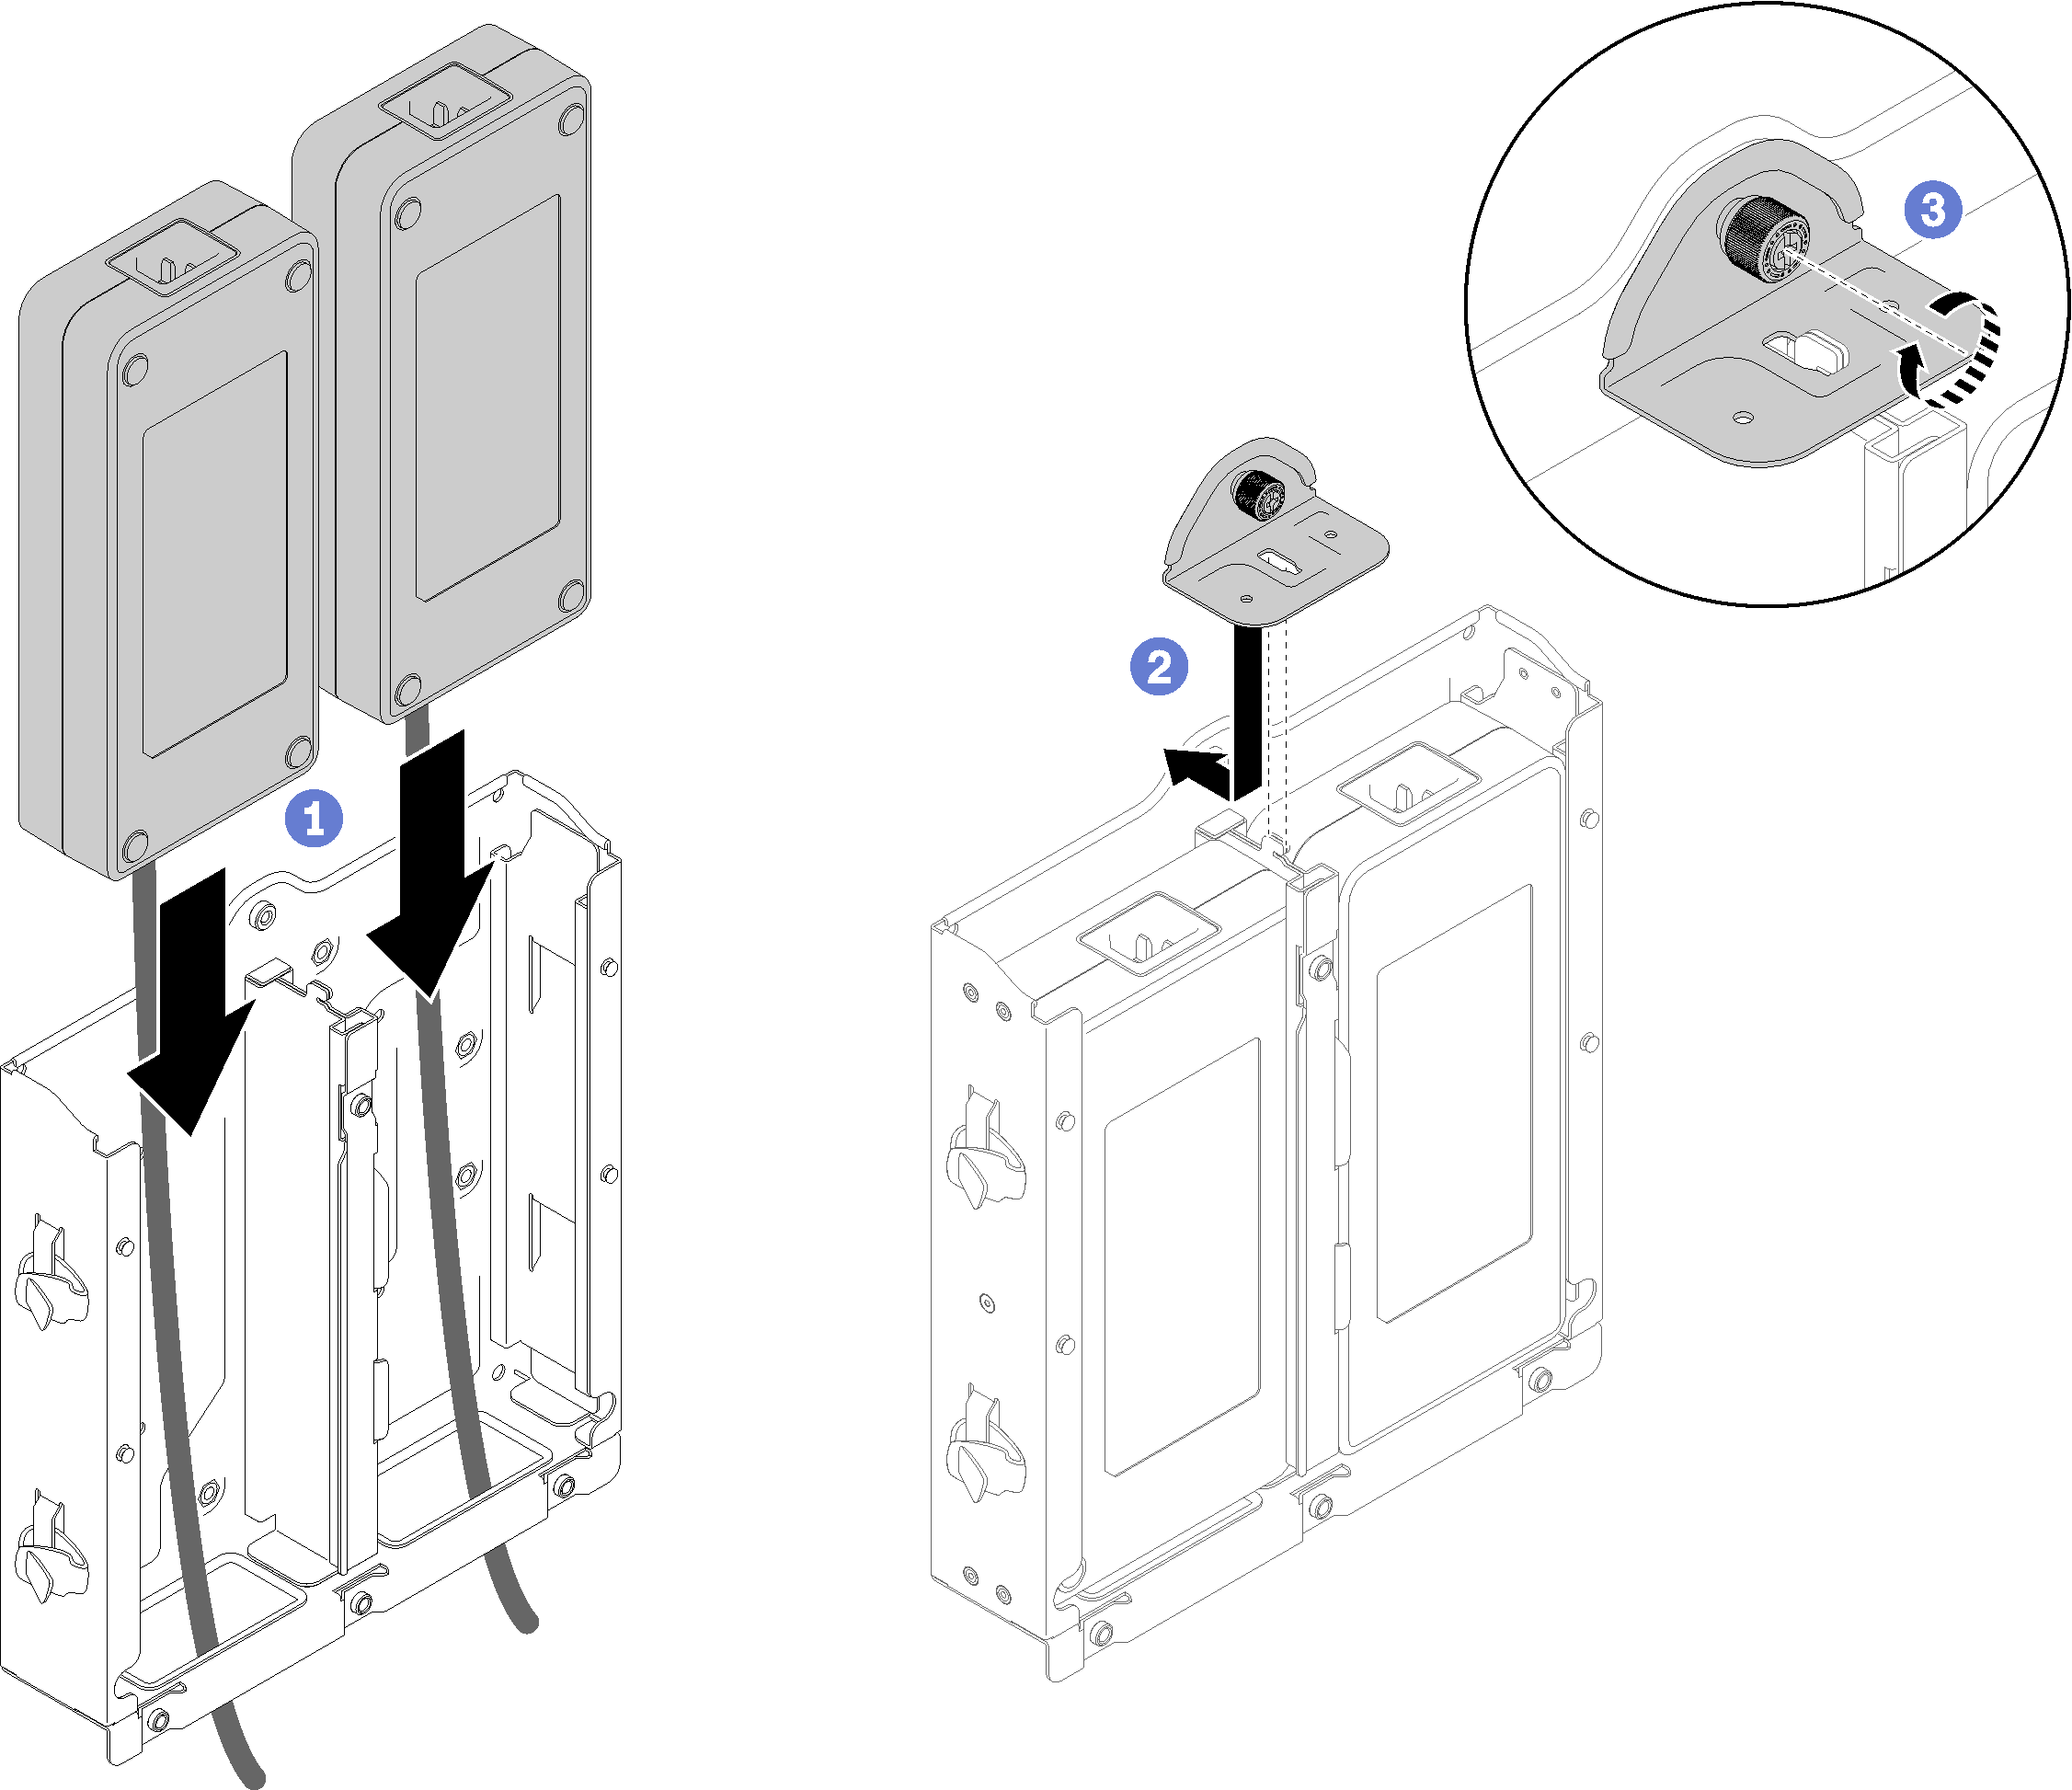
Install the enclosure into rack if necessary.
Refer to Configuration Installation Guide for the DIN rail configuration and wall-mounted configuration installation details if necessary.
Reconnect power cords and all external cables.
Turn on the server (see Power on the server).
Demo video