Install an I/O expansion adapter
Use this information to install an I/O expansion adapter.
About this task
Read Safety inspection checklist and Installation Guidelines to ensure that you work safely.
At least one I/O expansion adapter should be installed in the compute node.
The compute node supports one I/O expansion adapter when installed with one processor, and two I/O expansion adapters when installed with two processors. At least one I/O expansion adapter should be installed in the compute node.
When installing the I/O expansion adapter, start with I/O expansion adapter connector 1 on system board.
Connector 1 supports Ethernet I/O expansion adapter. Connector 2 supports Ethernet I/O expansion adapter and fiber channel I/O expansion adapter.
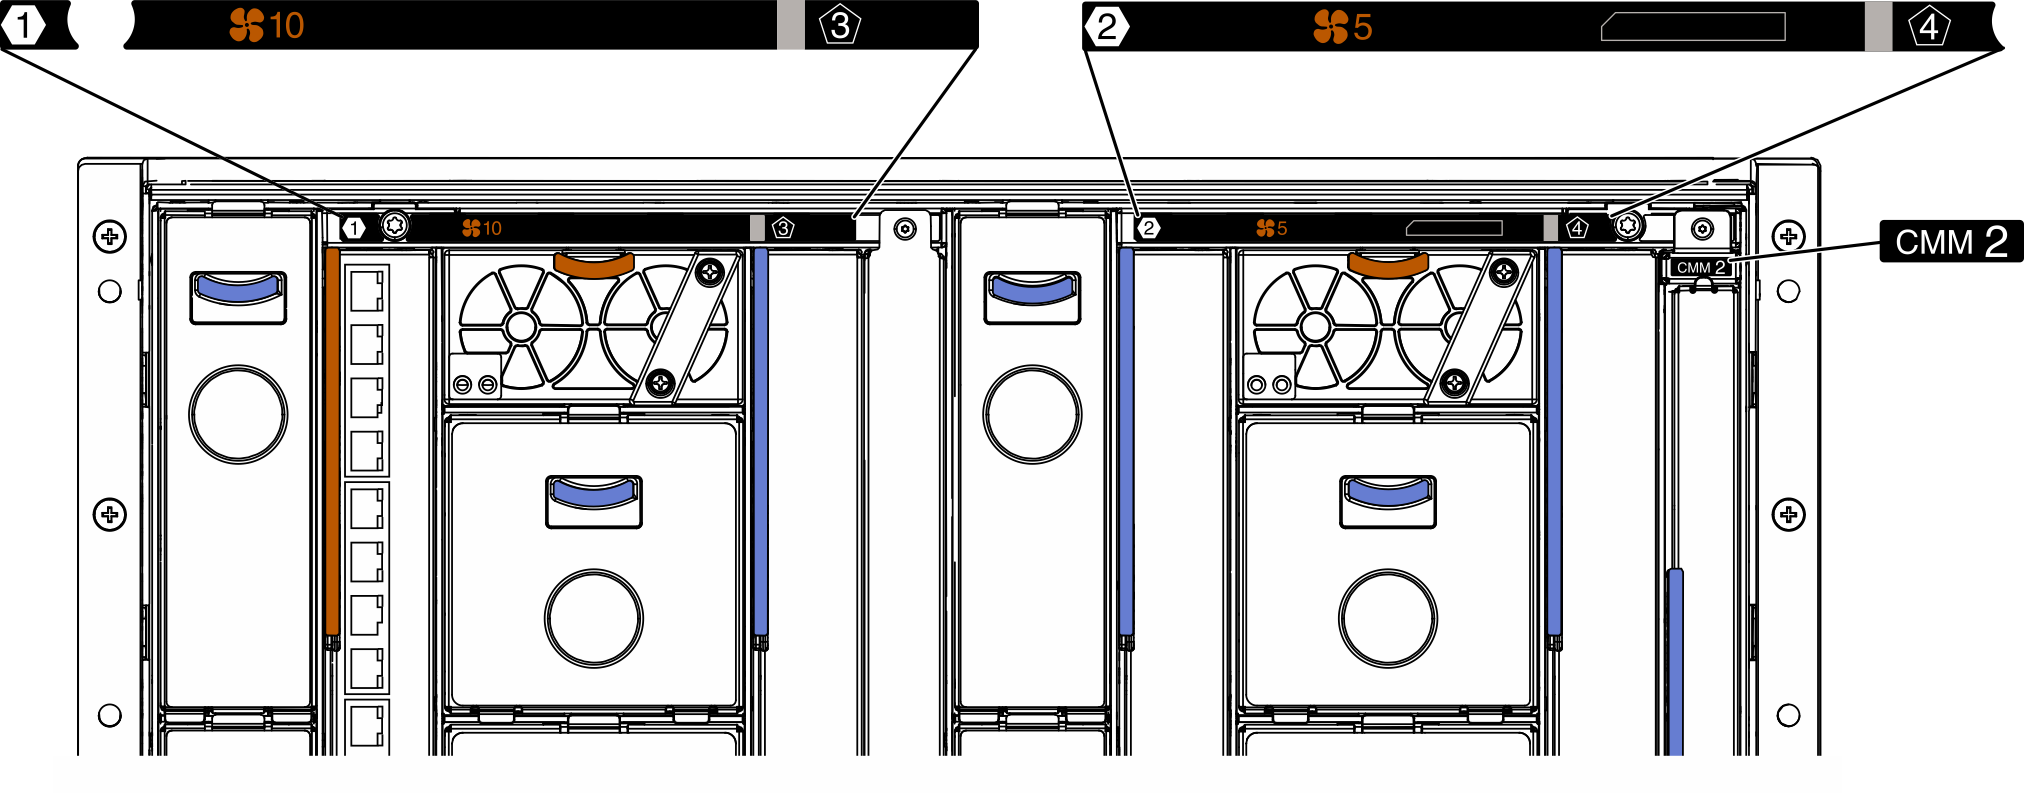
When installing an I/O expansion adapter, make sure the numbers in the Hexagon and Pentagon on the I/O expansion connectors correspond to the particular shape and numbering of the I/O module bay on the Lenovo Flex System Enterprise Chassis. If the correlation is incorrect, communication with the chassis may fail. See the service labeling on top of the compute node cover for details.
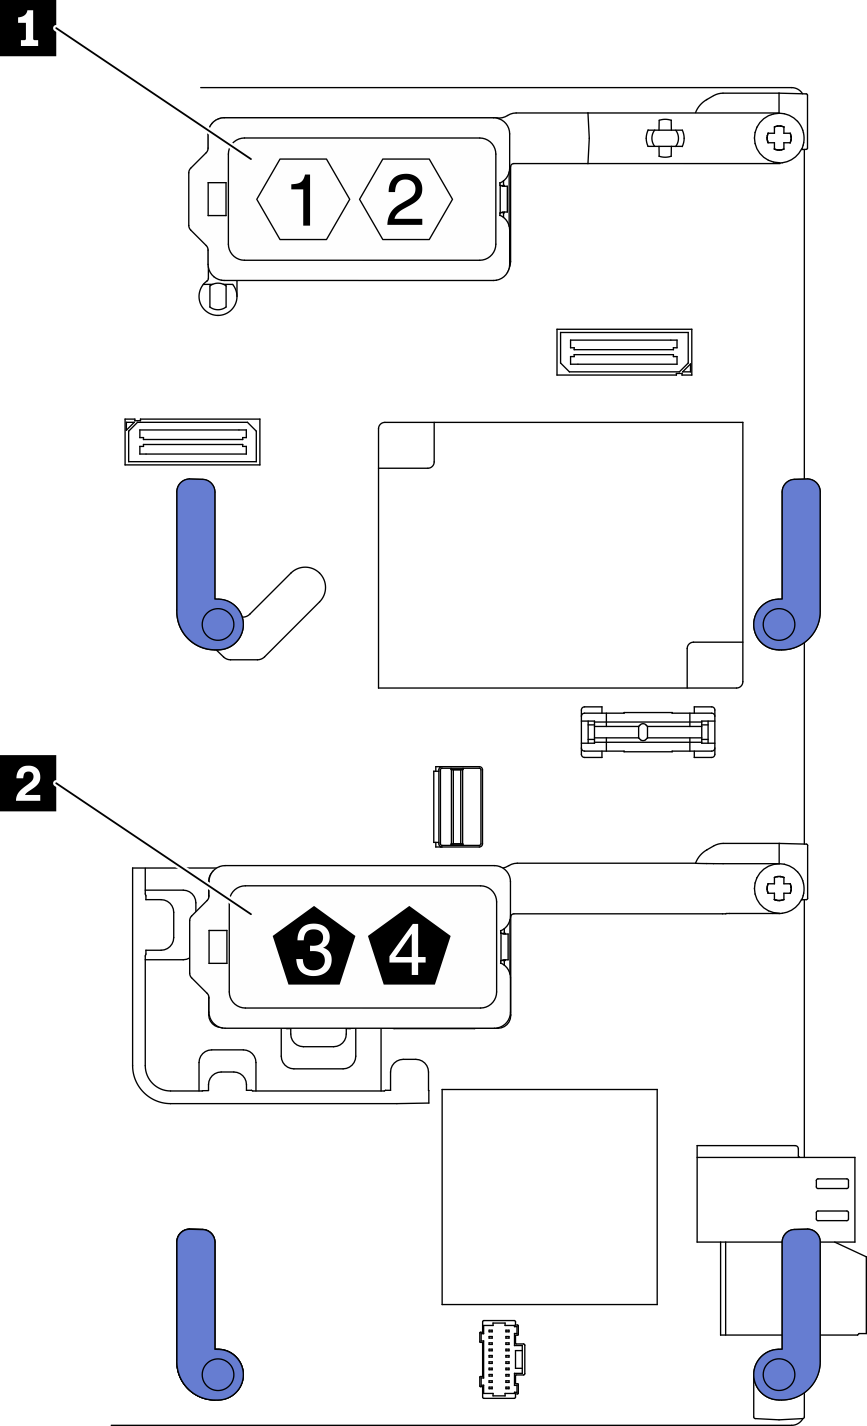
| 1 I/O expansion adapter 1 connector | 2 I/O expansion adapter 2 connector |
Procedure
- Install the I/O expansion adapter.
- Make sure the retention clips are rotated outward.
- Orient the connector on the expansion adapter with the I/O expansion connector and alignment pins on the system board; then, lower the I/O expansion adapter to system board.
- Press on the I/O expansion adapter so that it is firmly seated in the I/O expansion connector on system board.
- Rotate the retention clips inward to secure the I/O expansion adapter.
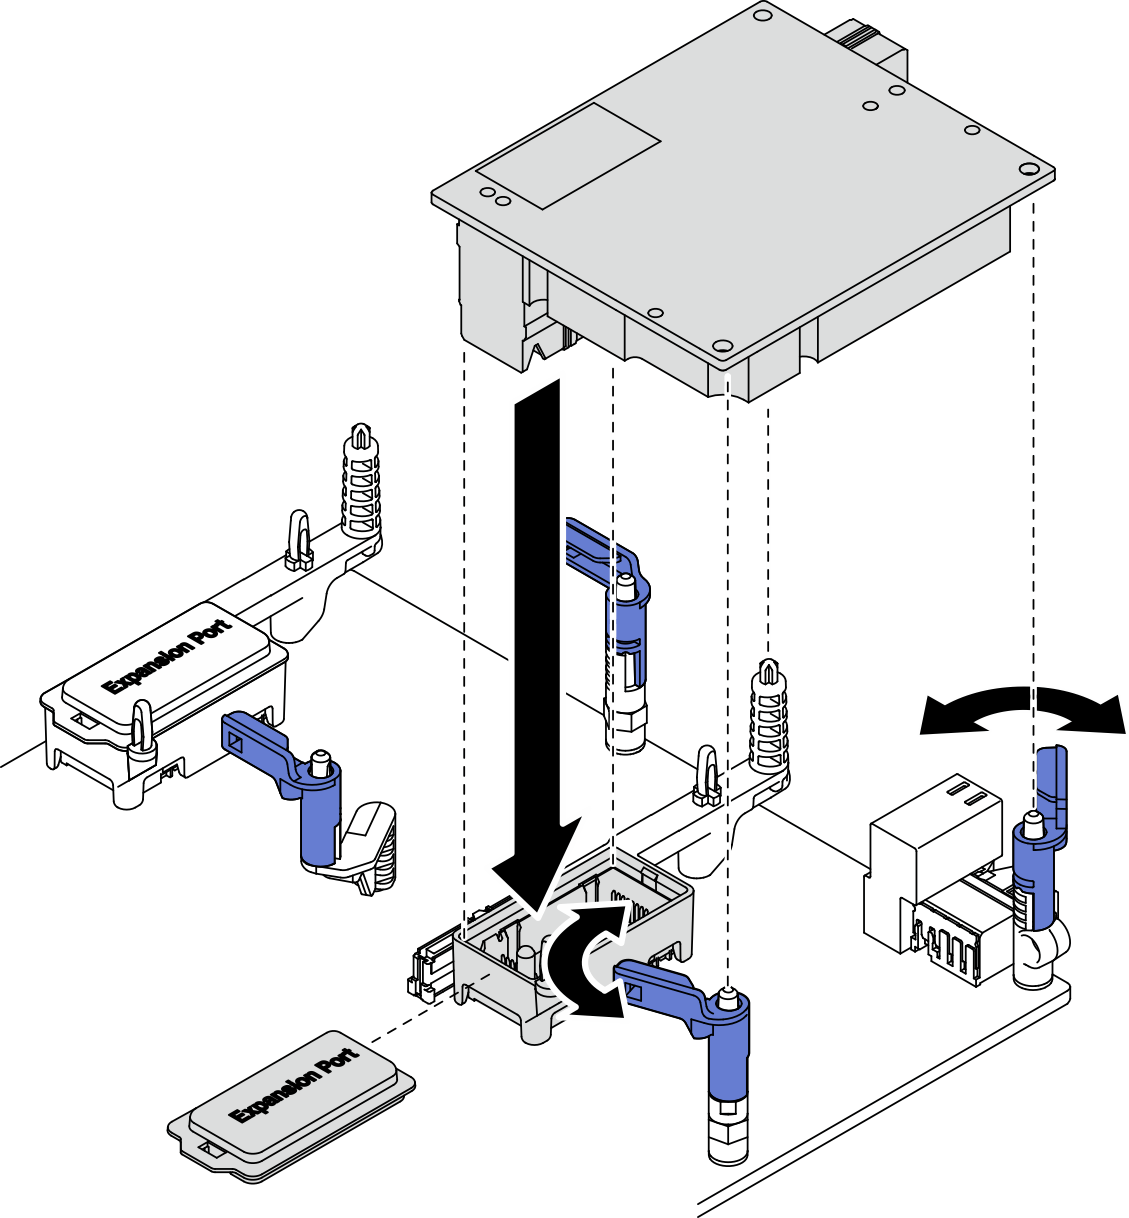
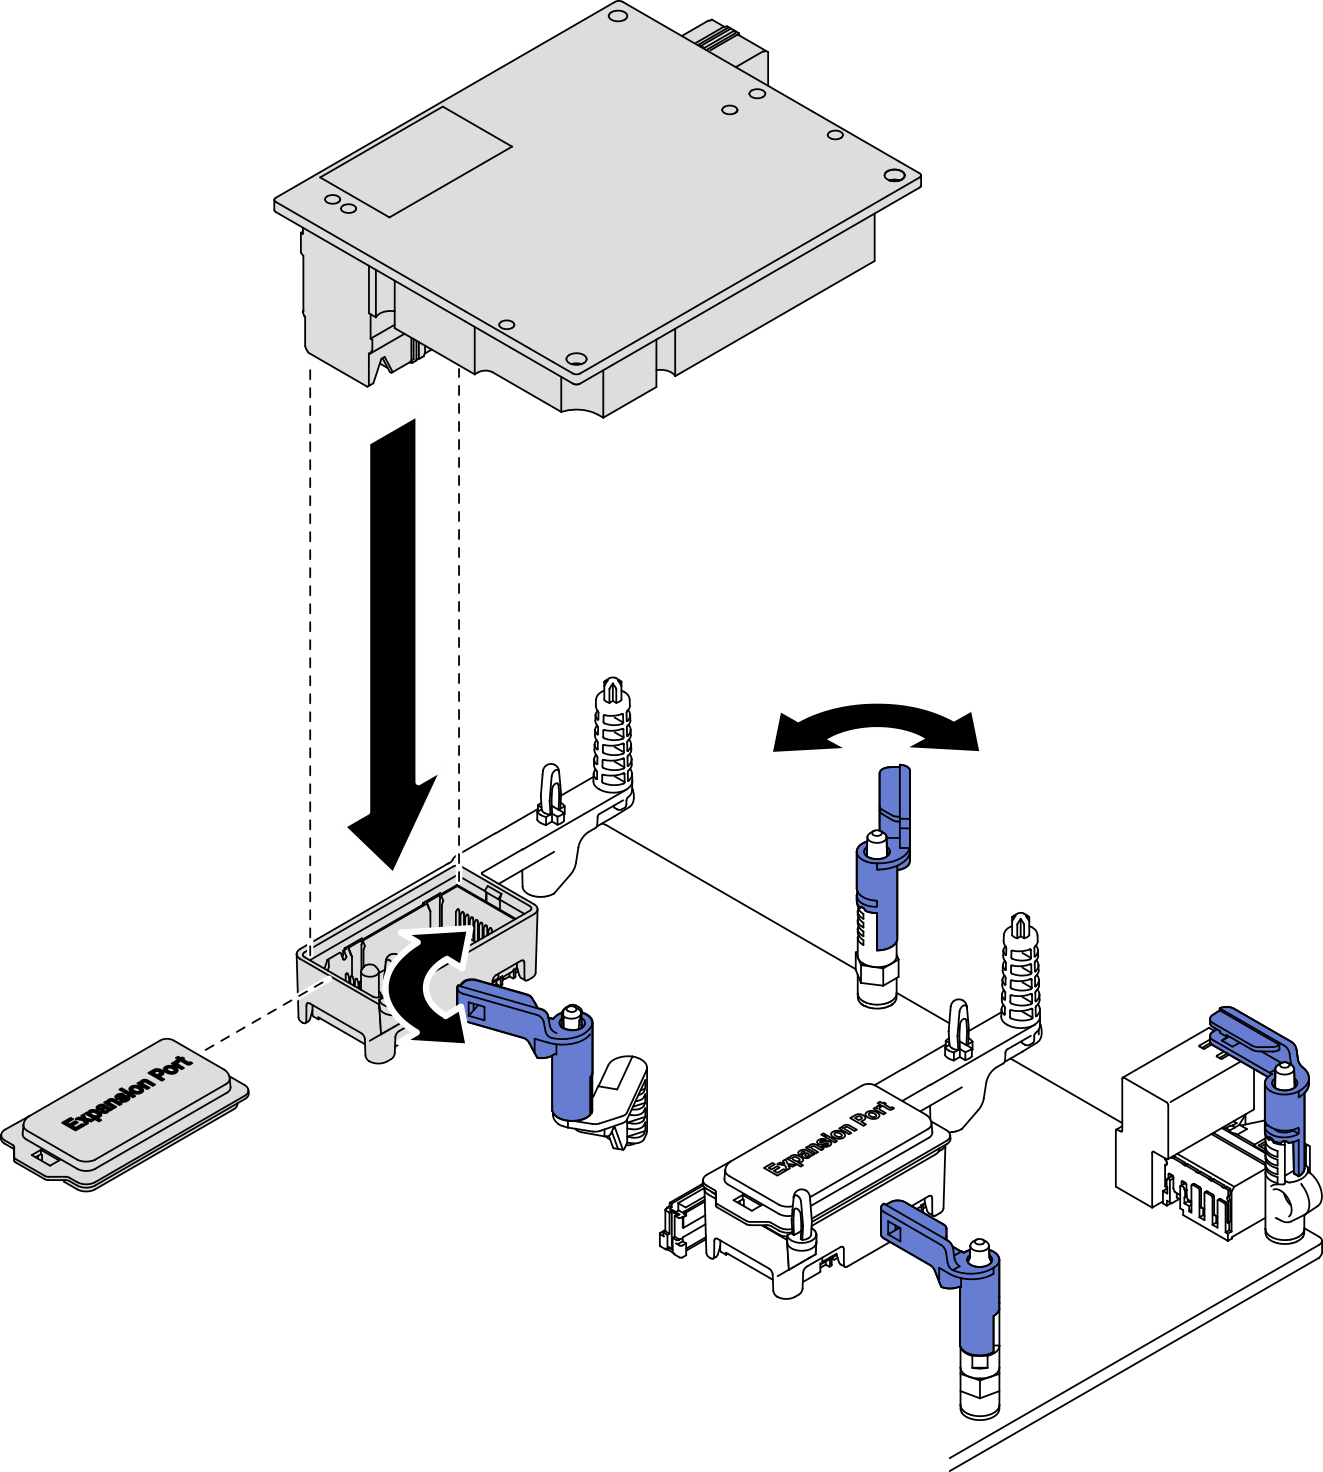 Figure 3. I/O expansion adapter installation
Proceed to complete the parts replacement. See Complete the parts replacement.
Demo video