Remove a heat sink Torx T30 nut
This task has instructions for removing a PEEK (Polyether ether ketone) Torx T30 nut on the heat sink.
About this task
Read Safety inspection checklist and Installation Guidelines to ensure that you work safely.
Power off the corresponding compute node that you are going to perform the task on.
Remove the compute node from the chassis. See Remove the compute node from chassis.
Carefully lay the compute node on a flat, static-protective surface, orienting the compute node with the bezel pointing toward you.
Prevent exposure to static electricity, which might lead to system halt and loss of data, by keeping static-sensitive components in their static-protective packages until installation, and handling these devices with an electrostatic-discharge wrist strap or other grounding system.
Do not touch the processor contacts. Contaminants on the processor contacts, such as oil from your skin, can cause connection failures.
Procedure
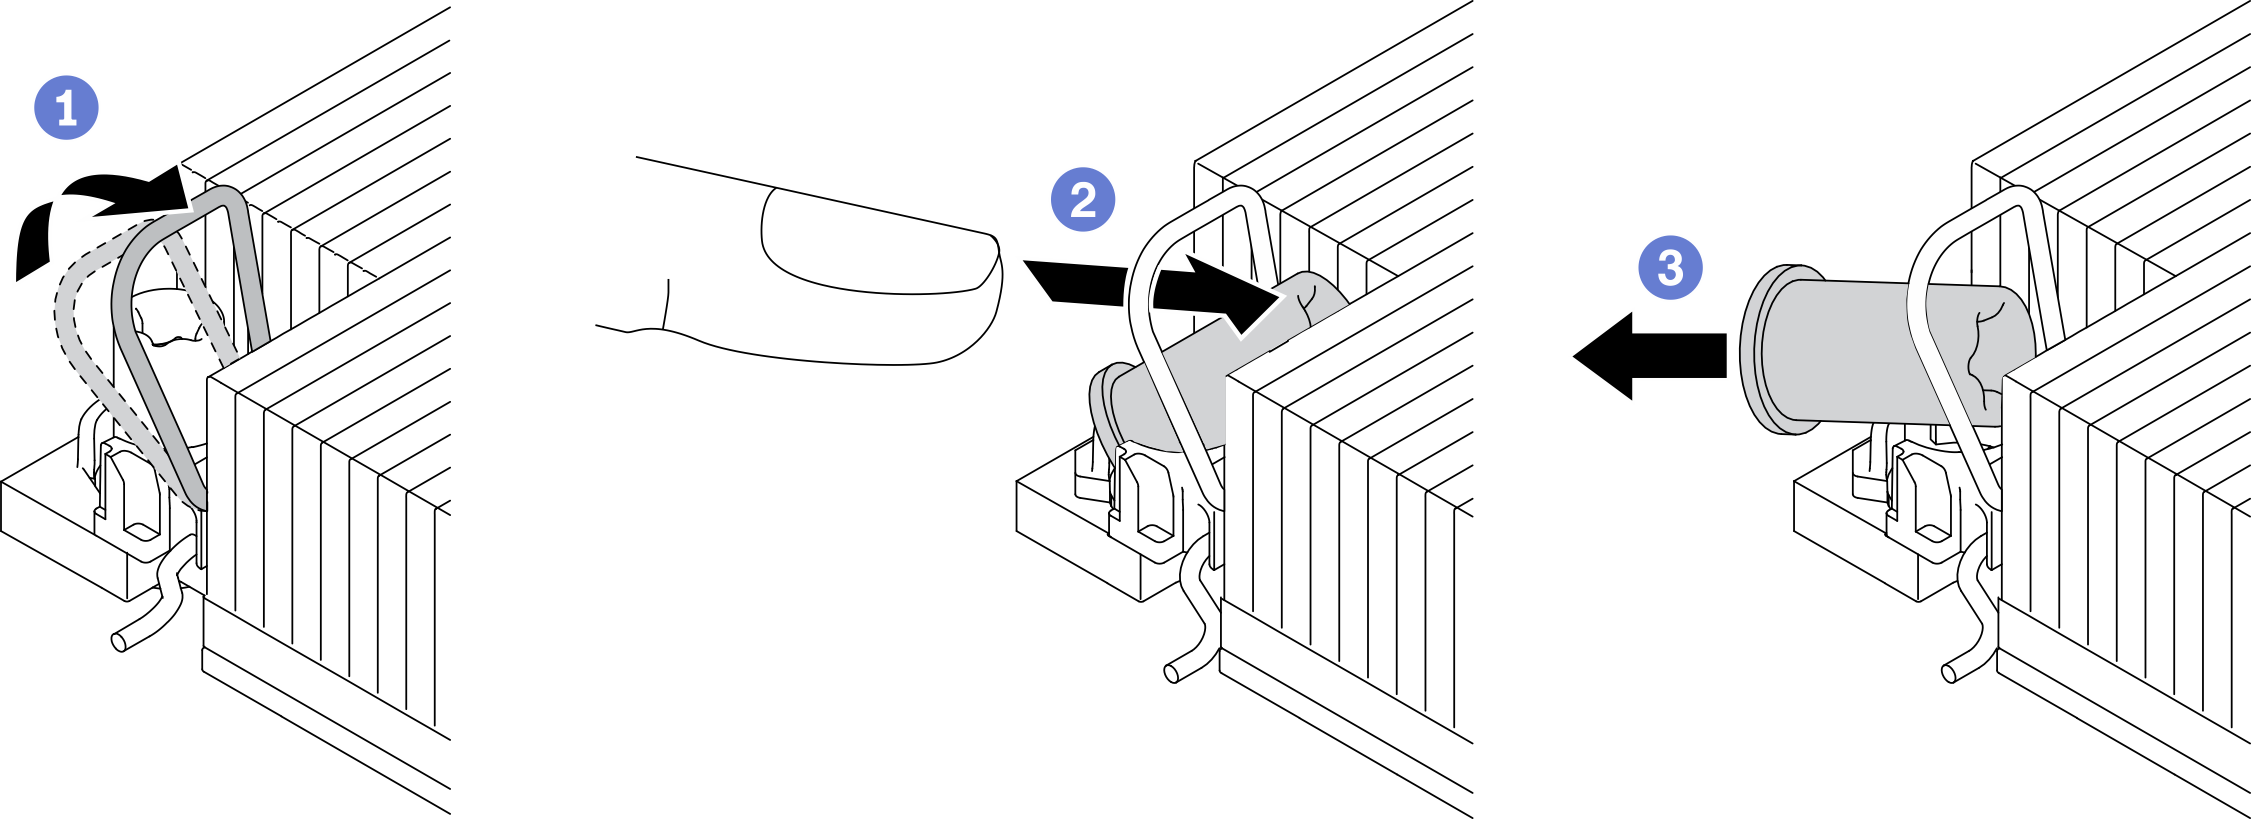
- Remove the Torx T30 nut.Figure 1. Removing a Torx T30 nut from the heat sink
 NoteDo not touch the gold contacts on the bottom of the processor.
 Rotate the anti-tilt wire bail inwards.
 Push the upper edge of the Torx T30 nut towards the center of the heat sink until it disengages.
 Remove the Torx T30 nut.AttentionVisually inspect the removed Torx T30 nut, if the nut is cracked or damaged, make sure no debris or broken pieces are left inside your server.
After you finish
Install a new Torx T30 nut. See Install a heat sink Torx T30 nut.
If you are instructed to return the defective component, please package the part to prevent any shipping damage. Reuse the packaging the new part arrived in and follow all packaging instructions.
Demo video