Separate the processor from carrier and heat sink
This task has instructions for separating a processor and its carrier from an assembled processor and heat sink, known as a processor-heat-sink module (PHM). This procedure must be executed by a trained technician.
About this task
Read Safety inspection checklist and Installation Guidelines to ensure that you work safely.
Prevent exposure to static electricity, which might lead to system halt and loss of data, by keeping static-sensitive components in their static-protective packages until installation, and handling these devices with an electrostatic-discharge wrist strap or other grounding system.
Do not touch the processor contacts. Contaminants on the processor contacts, such as oil from your skin, can cause connection failures.
Do not allow the thermal grease on the processor or heat sink to come in contact with anything. Contact with any surface can compromise the thermal grease, rendering it ineffective. Thermal grease can damage components, such as the electrical connectors in the processor socket.
Procedure
- Separate the processor from the heat sink and carrier.
 Lift the handle to release the processor from the carrier.
 Hold the processor by its edges; then, lift the processor from the heat sink and carrier.
 Without putting the processor down, wipe the thermal grease from the top of the processor with an alcohol cleaning pad; then, place the processor on a static protective surface with the processor-contact side up.
NoteDo not touch the contacts on the processor.Figure 1. Separating a processor from the heat sink and carrier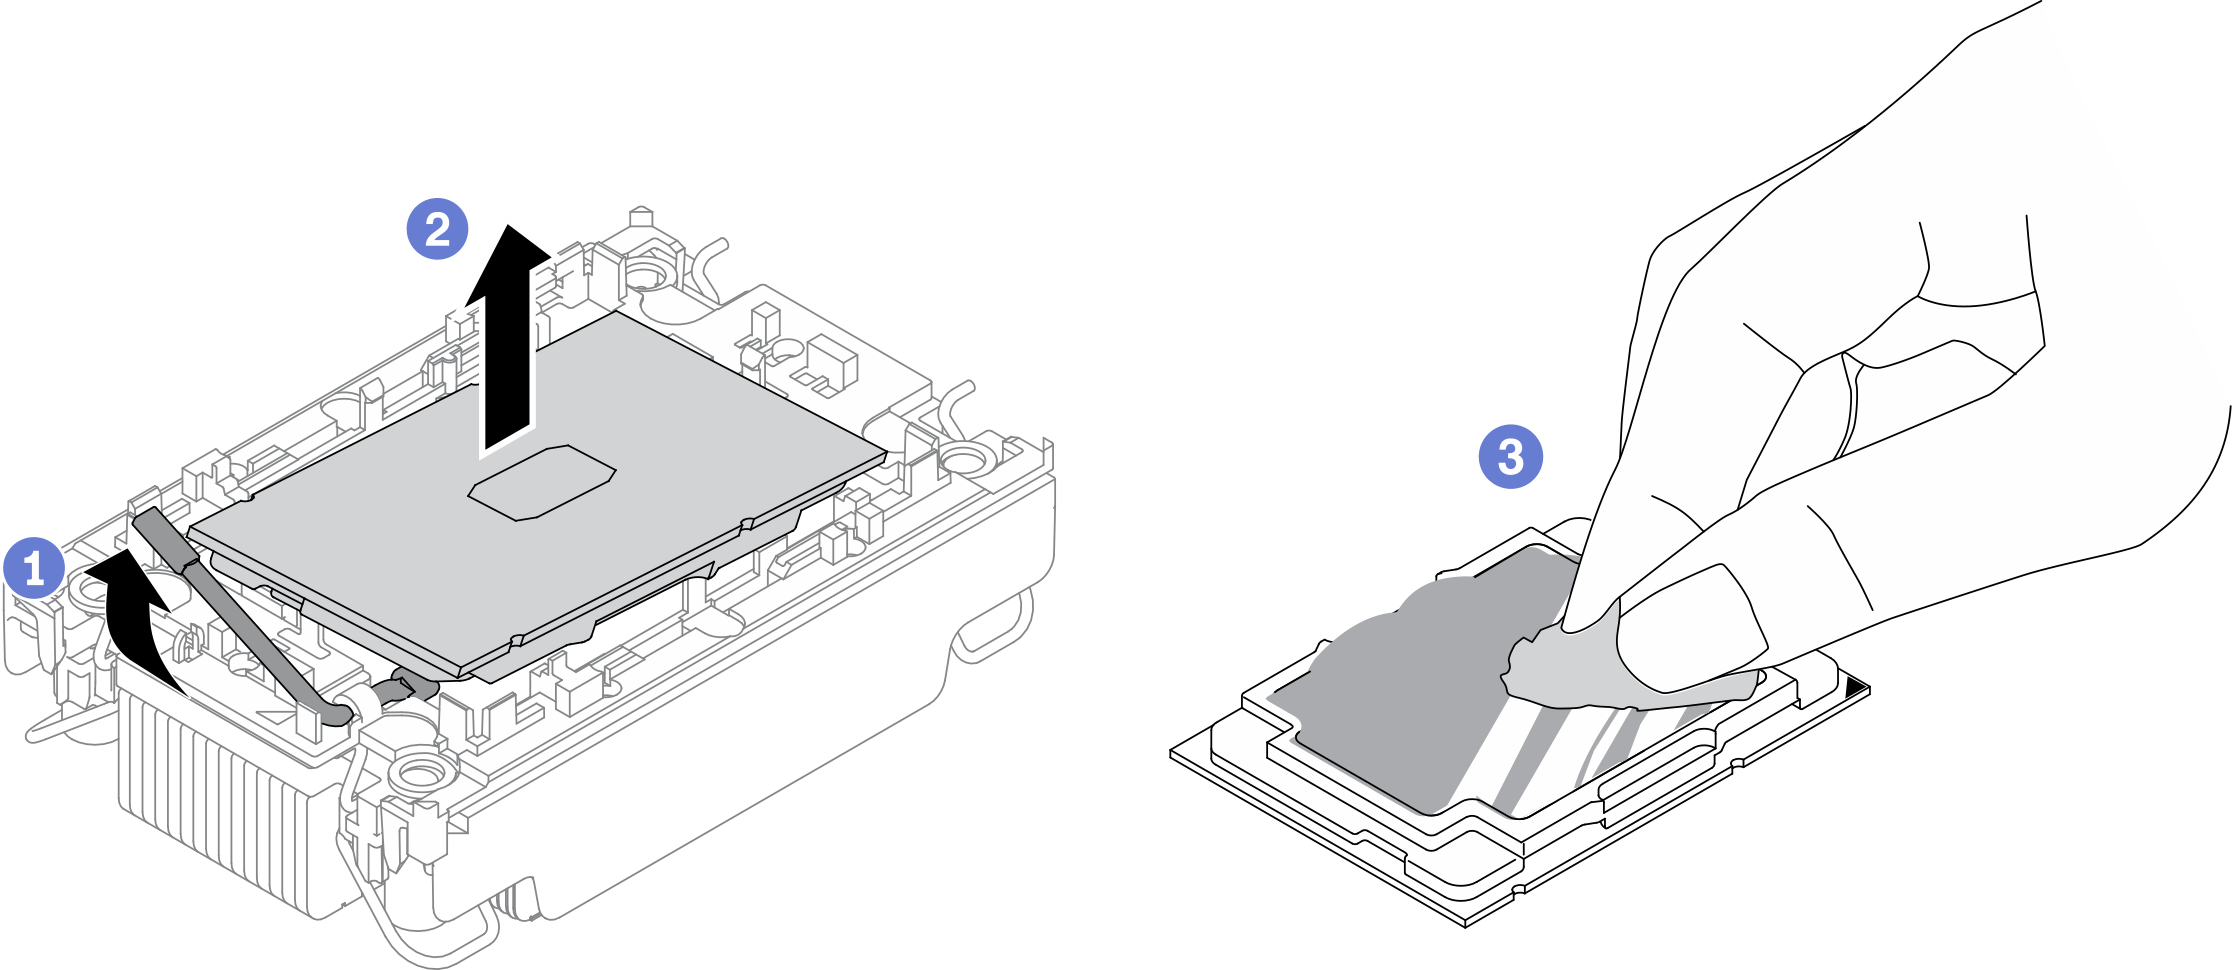
- Separate the processor carrier from the heat sink.
- Release the retaining clips from the heat sink.
- Lift the carrier from the heat sink.
- Wipe the thermal grease from the bottom of the heat sink with an alcohol cleaning pad.
NoteThe processor carrier will be discarded and replaced with a new one. Make note of the color of the discarded carrier since replacement carrier needs to be of the same color.Figure 2. Separating a processor carrier the from heat sink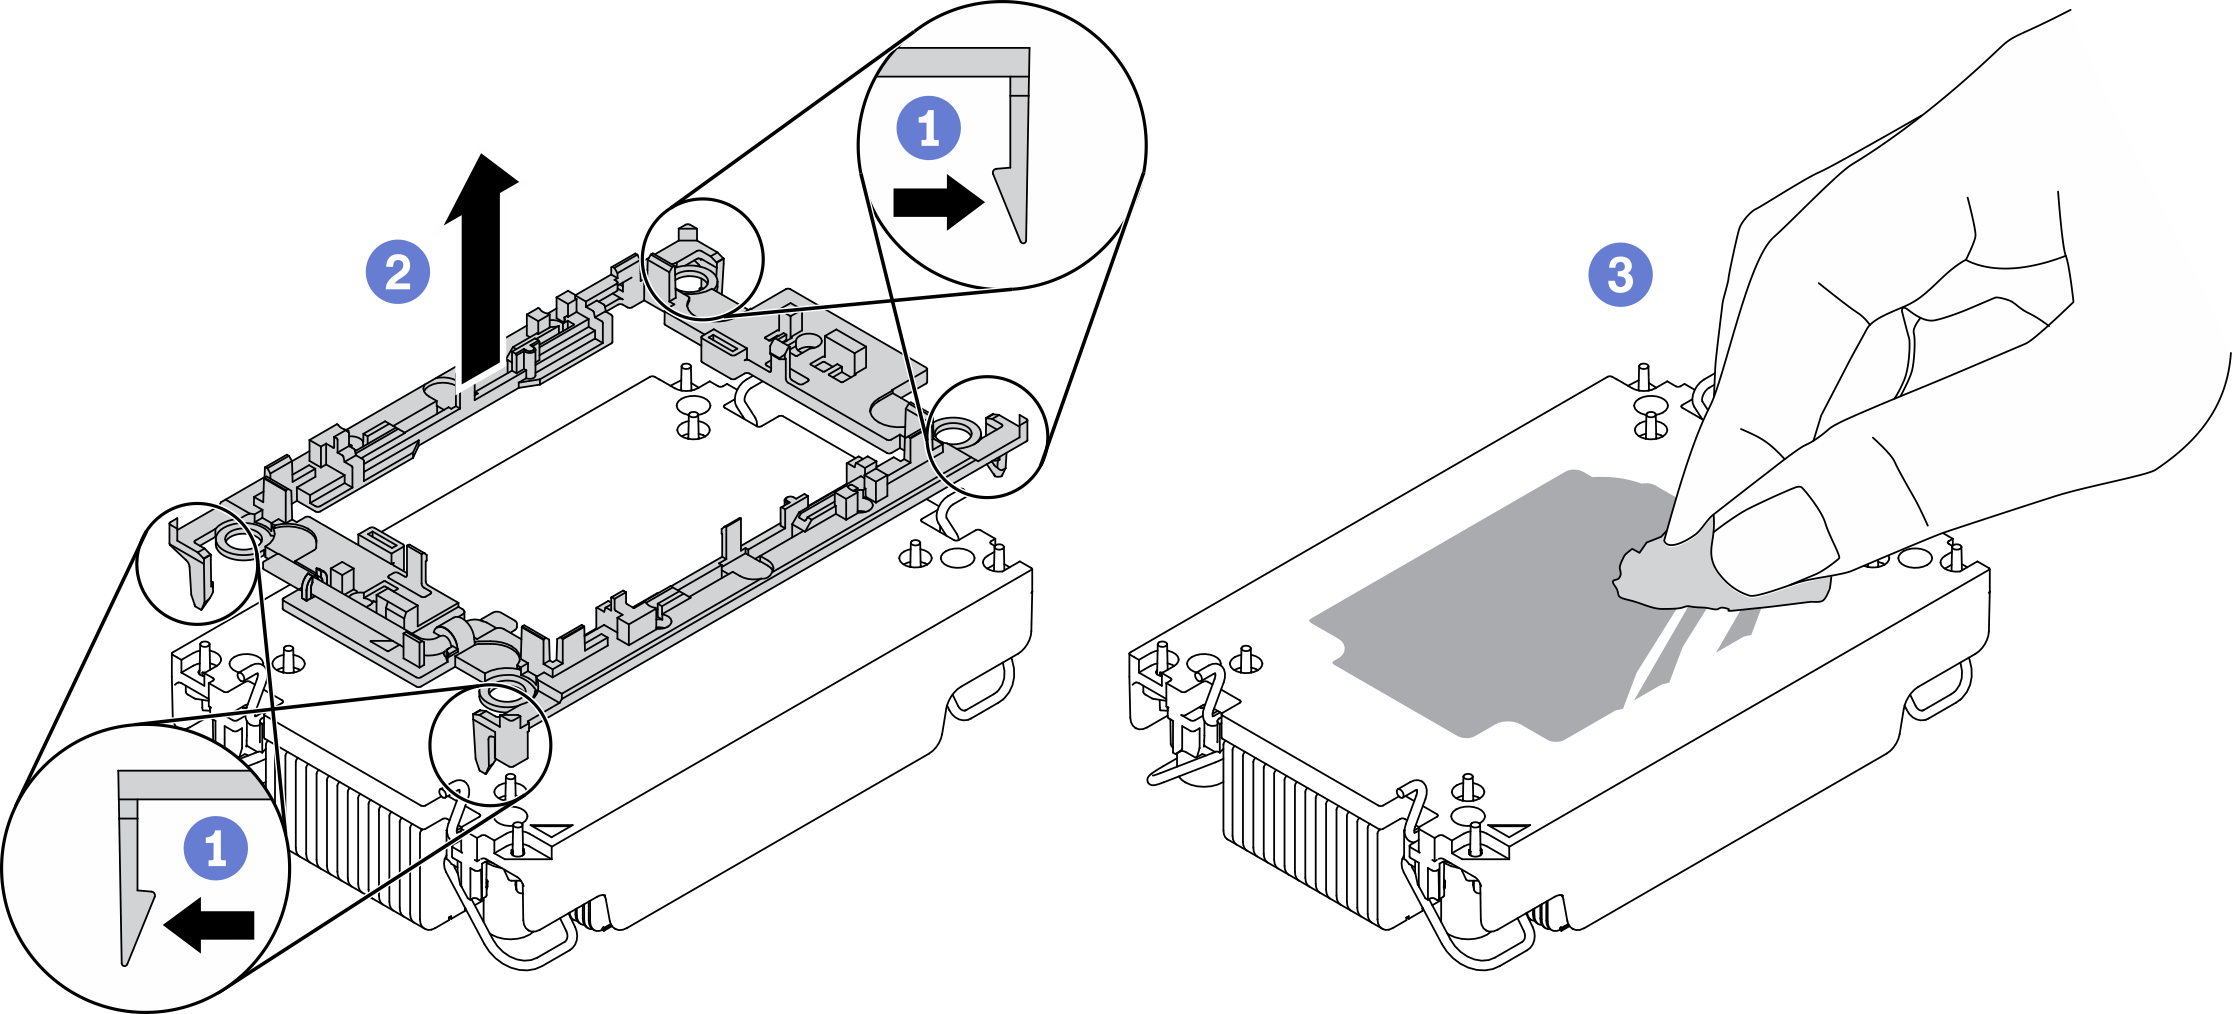
After you finish
Install a replacement processor or heat sink. See Install a processor and heat sink.
If you are instructed to return the defective component, package the part to prevent any shipping damage. Reuse the packaging the new part arrived in and follow all packaging instructions.
Demo video