Remove the M.2 drive
Use this information to remove the M.2 drive.
Before you remove the M.2 drive, complete the following steps:
Read Safety and Installation Guidelines to ensure that you work safely.
Turn off the server. Disconnect the power cords and all external cables (see Power off the server).
If server is installed in a rack, remove the server from the rack.
Remove the top cover (see Remove the top cover).
Require a #1 Phillips and Hex 4.5 mm screwdriver.
Note
There are two dimensions of M.2 drive supported by the server, each with different length. Both are removed and installed in a similar method.
Figure 1. M.2 drive location
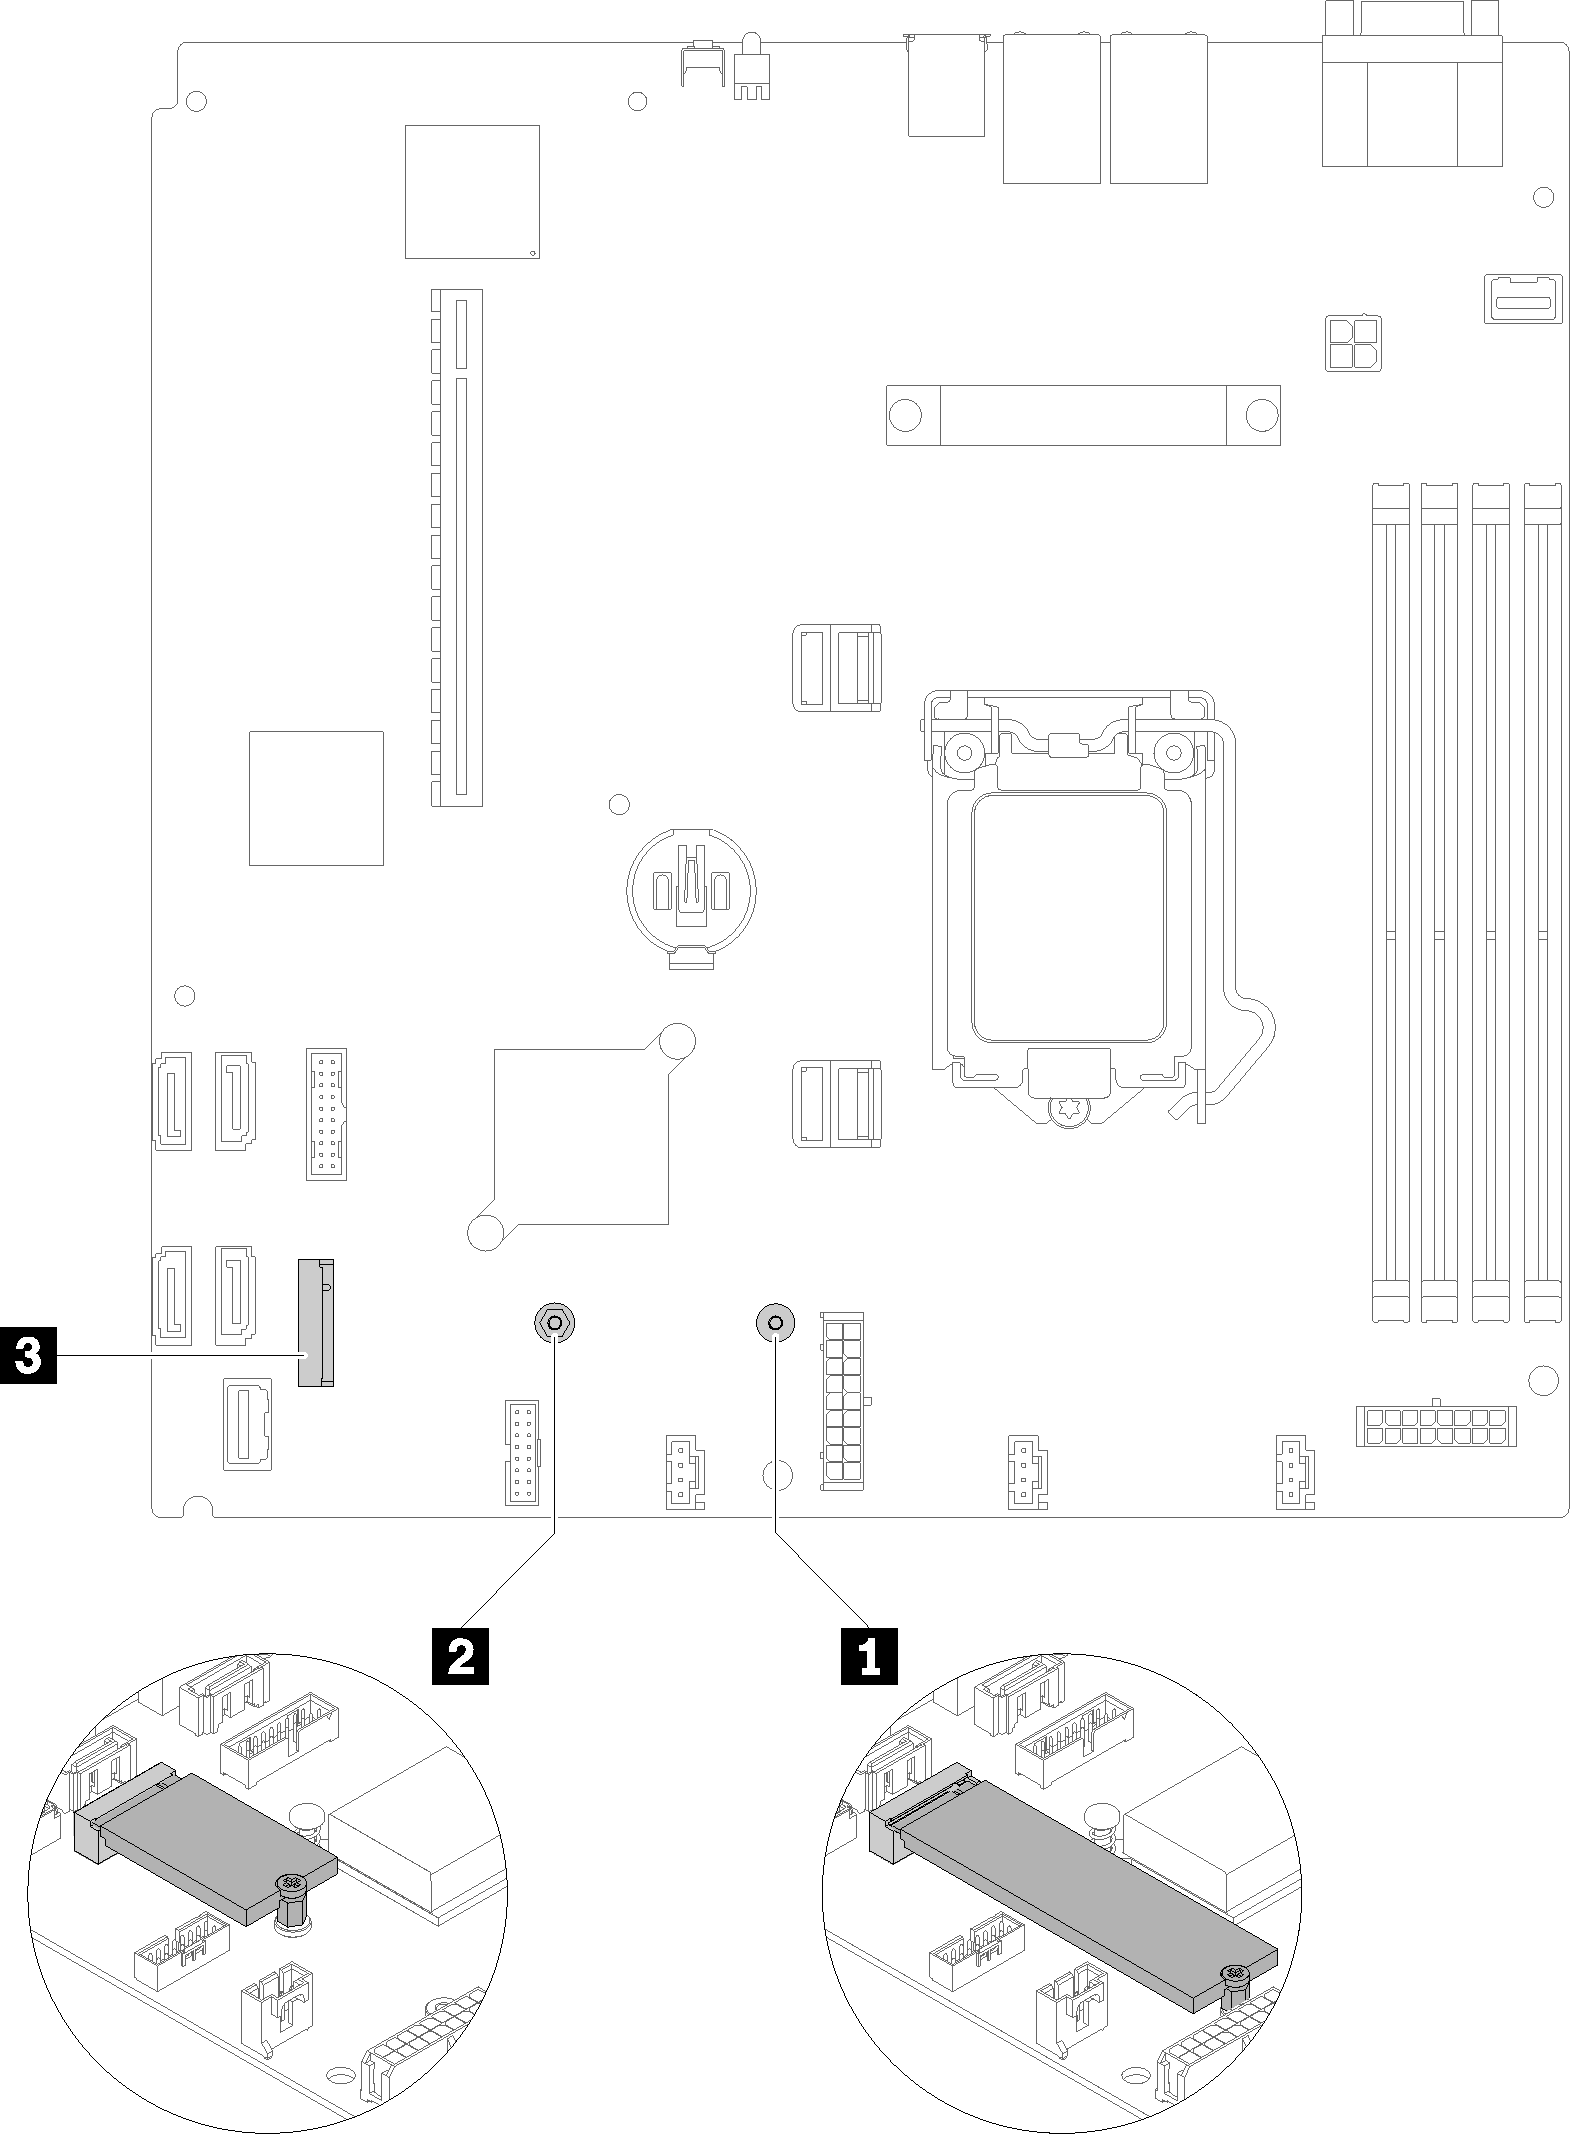
| 1 Screw for 80 mm M.2 drive (requires a #1 Phillips and Hex 4.5 mm screwdriver) | 3 M.2 connector |
| 2 Screw for 42 mm M.2 drive (requires a #1 Phillips and Hex 4.5 mm screwdriver) |
To remove the M.2 drive, complete the following steps:
Figure 2. M.2 drive removal
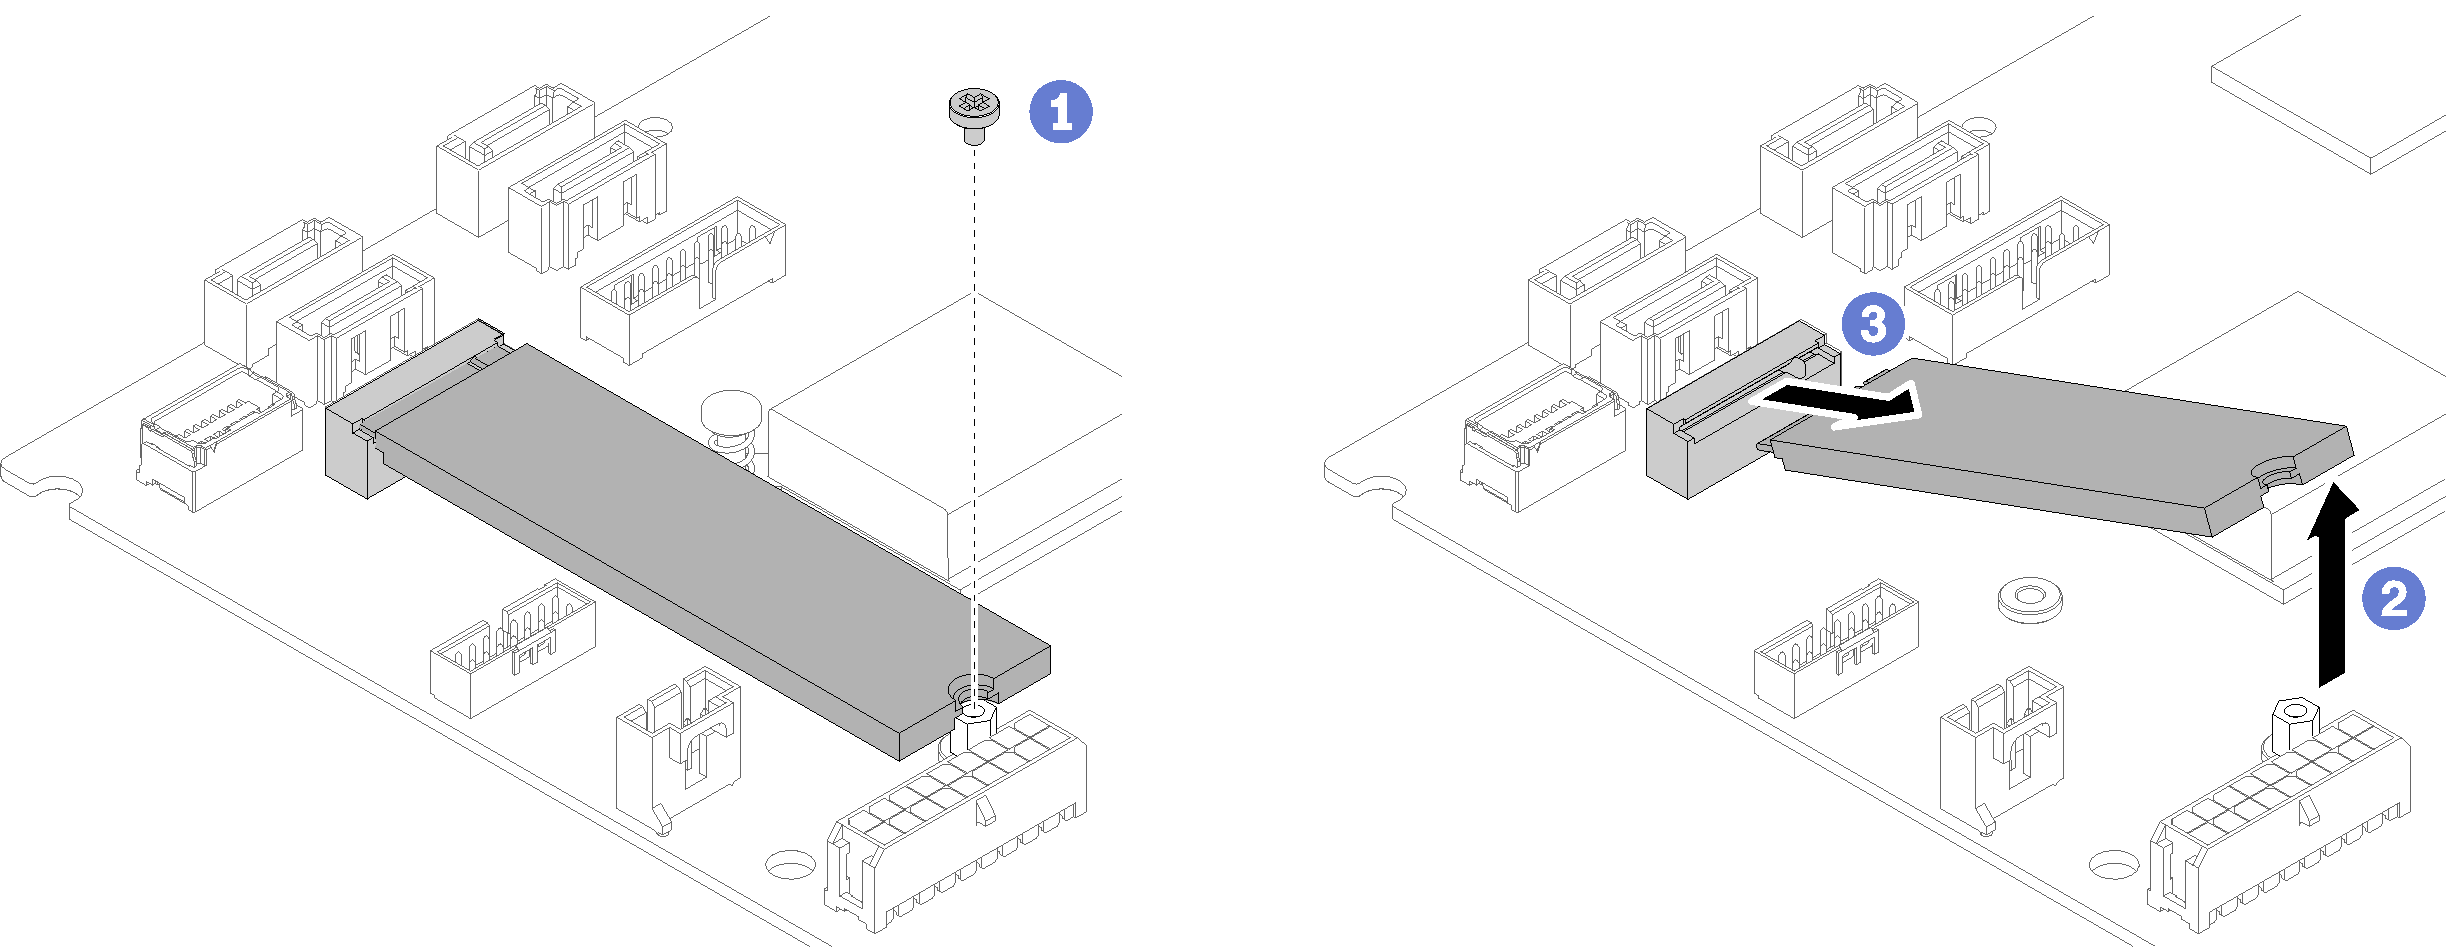
- Remove the screw that secures the M.2 drive.
- Lift the other side of the M.2 drive as shown.
- Remove the M.2 drive from the server.
If you are instructed to return the component or optional device, follow all packaging instructions, and use any packaging materials for shipping that are supplied to you.
Give documentation feedback