安裝熱抽換硬碟背板
使用此資訊來安裝熱抽換硬碟背板。
註
視配置而定,下圖和您的背板可能略有不同。
如果使用 95 W 處理器,伺服器不支援十個 2.5 吋熱抽換硬碟背板。
如果要安裝熱抽換硬碟背板,請完成下列步驟:
圖 1. 安裝 2.5 吋熱抽換硬碟背板
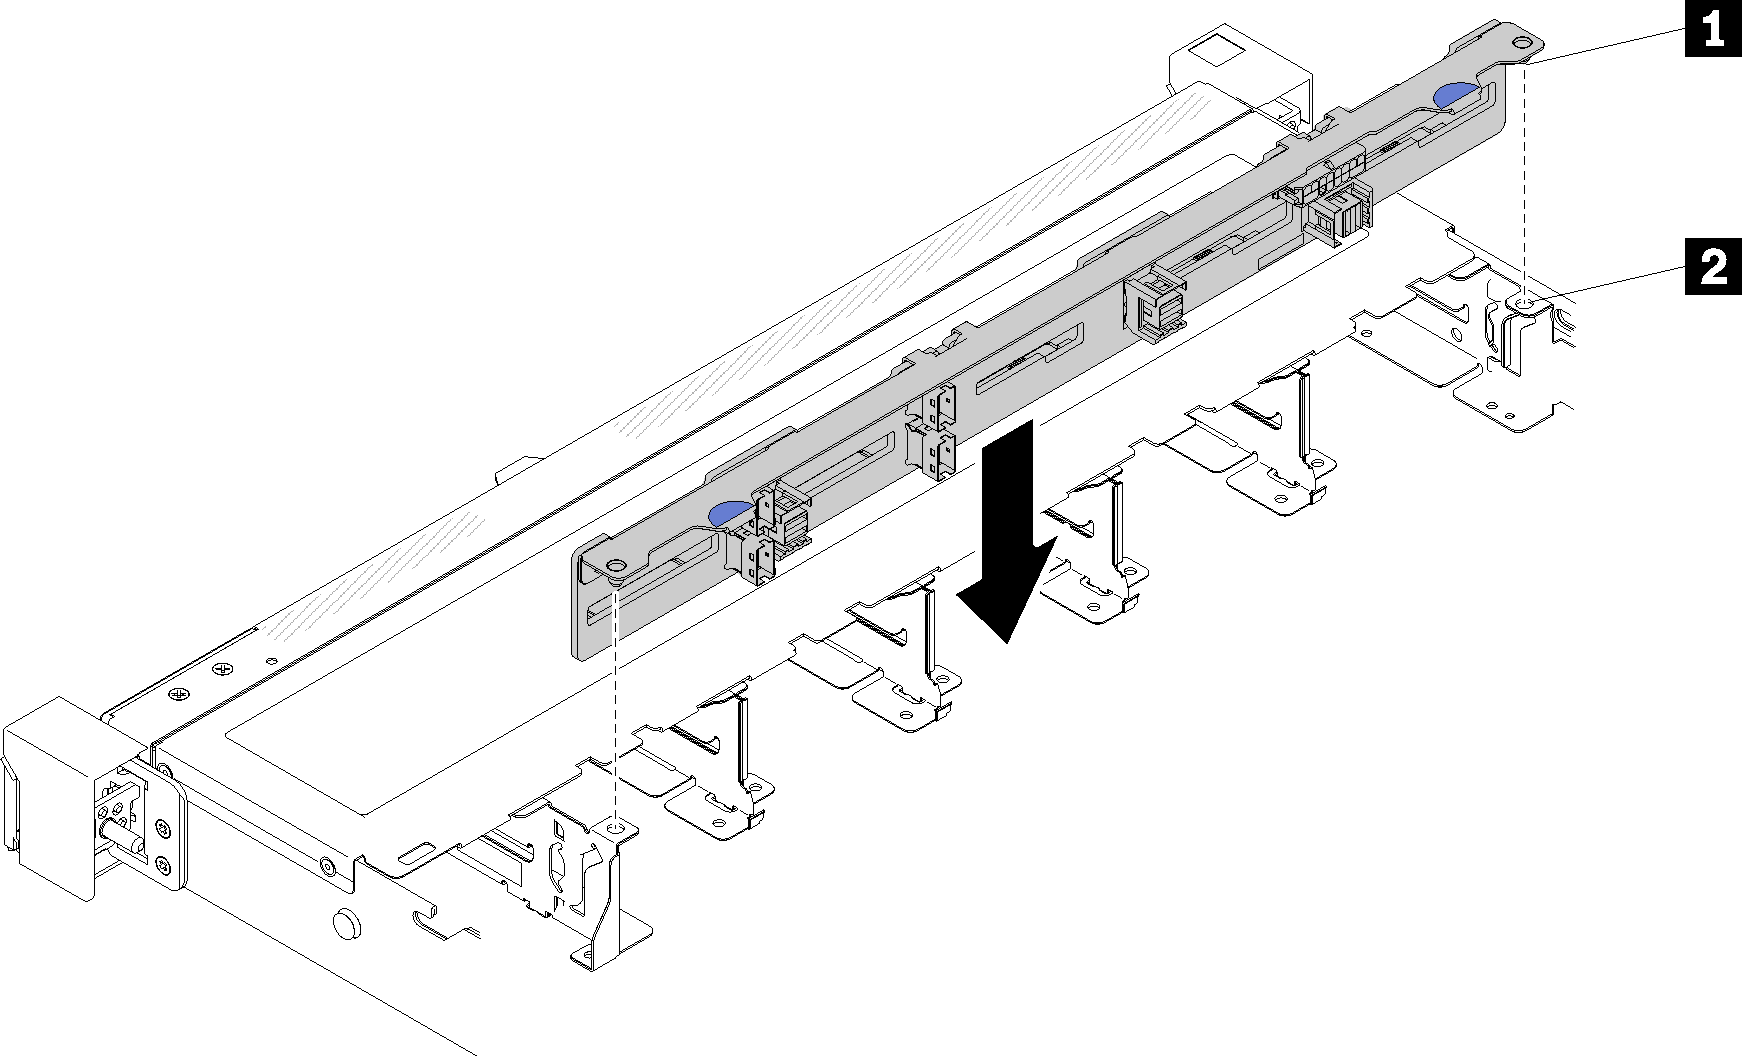
| 1 插腳 | 2 對應孔 |
圖 2. 安裝 3.5 吋熱抽換硬碟背板
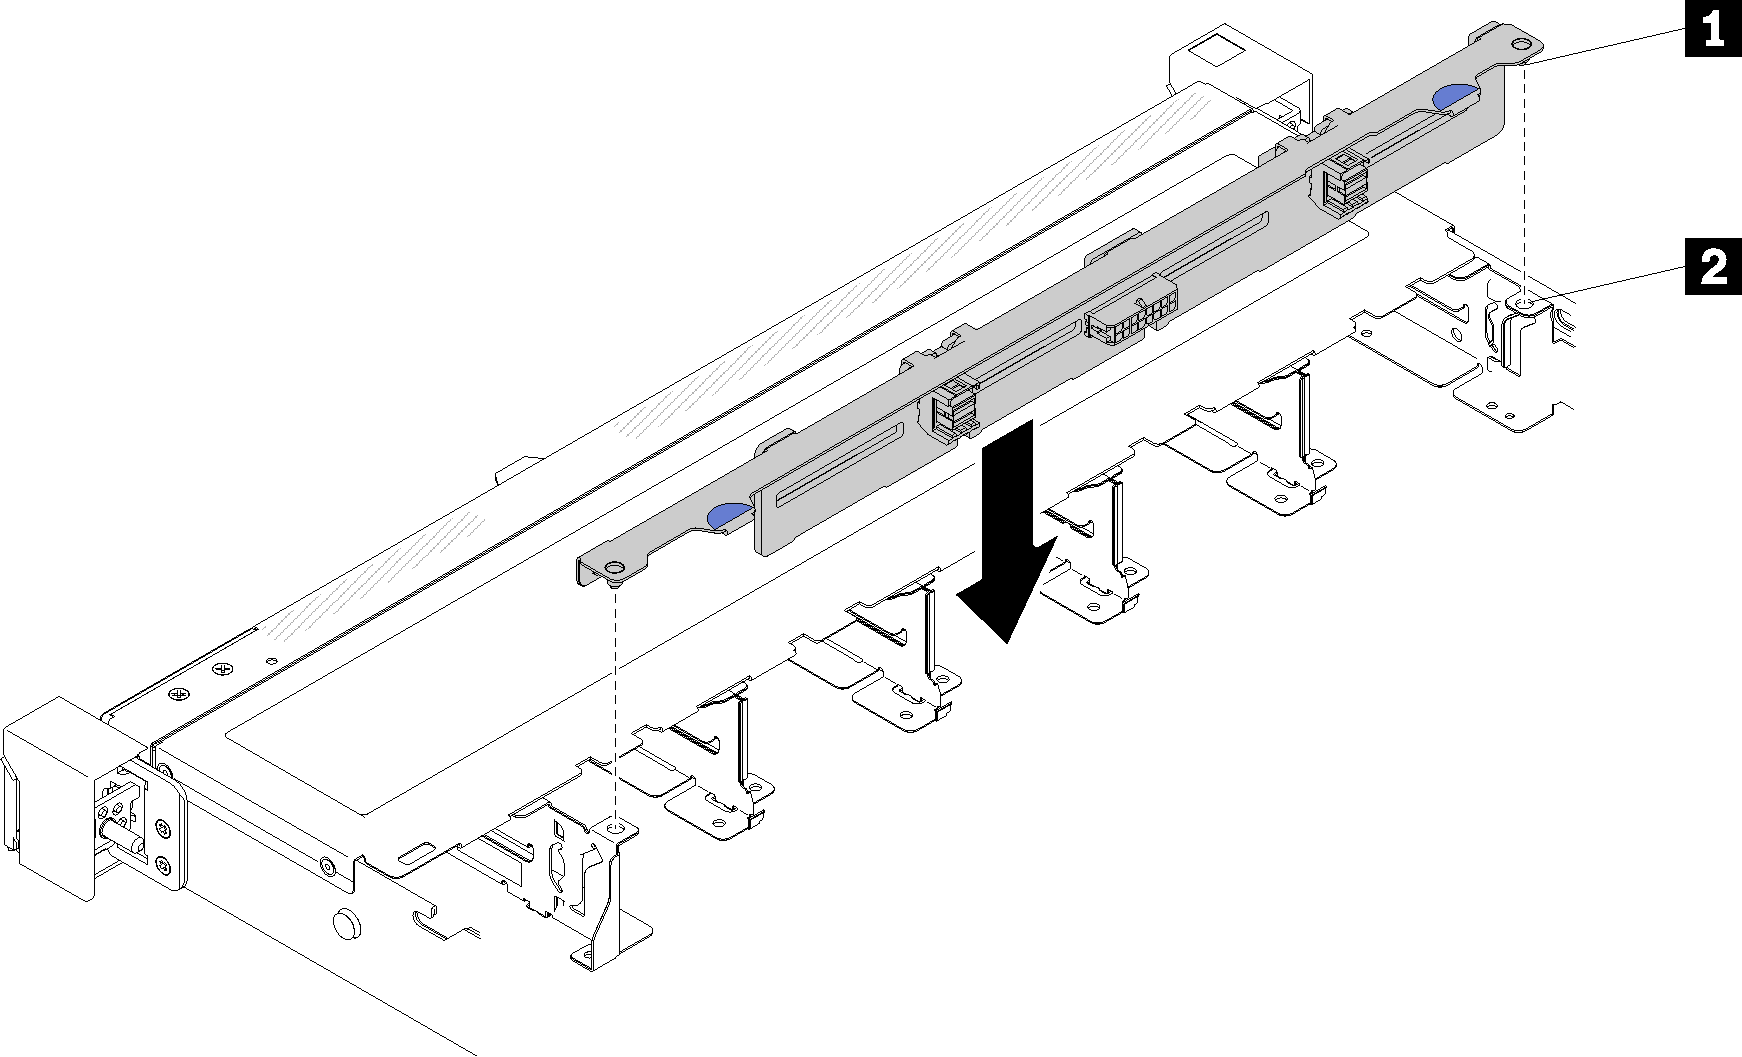
| 1 插腳 | 2 對應孔 |
- 將背板上的兩個插腳與機箱的對應孔對齊。
- 放低背板至機箱內。確定插腳穿過孔洞,且背板完全固定就位。
提供意見回饋
使用此資訊來安裝熱抽換硬碟背板。
視配置而定,下圖和您的背板可能略有不同。
如果使用 95 W 處理器,伺服器不支援十個 2.5 吋熱抽換硬碟背板。
如果要安裝熱抽換硬碟背板,請完成下列步驟:
| 1 插腳 | 2 對應孔 |
| 1 插腳 | 2 對應孔 |