Install the system board
Use this information to install the system board.


Touch the static-protective package that contains the new system board to any unpainted surface on the outside of the server. Then, take the new system board out of the package and place it on a static-protective surface.
Remove the cable holder as shown.
Figure 1. Cable holder removal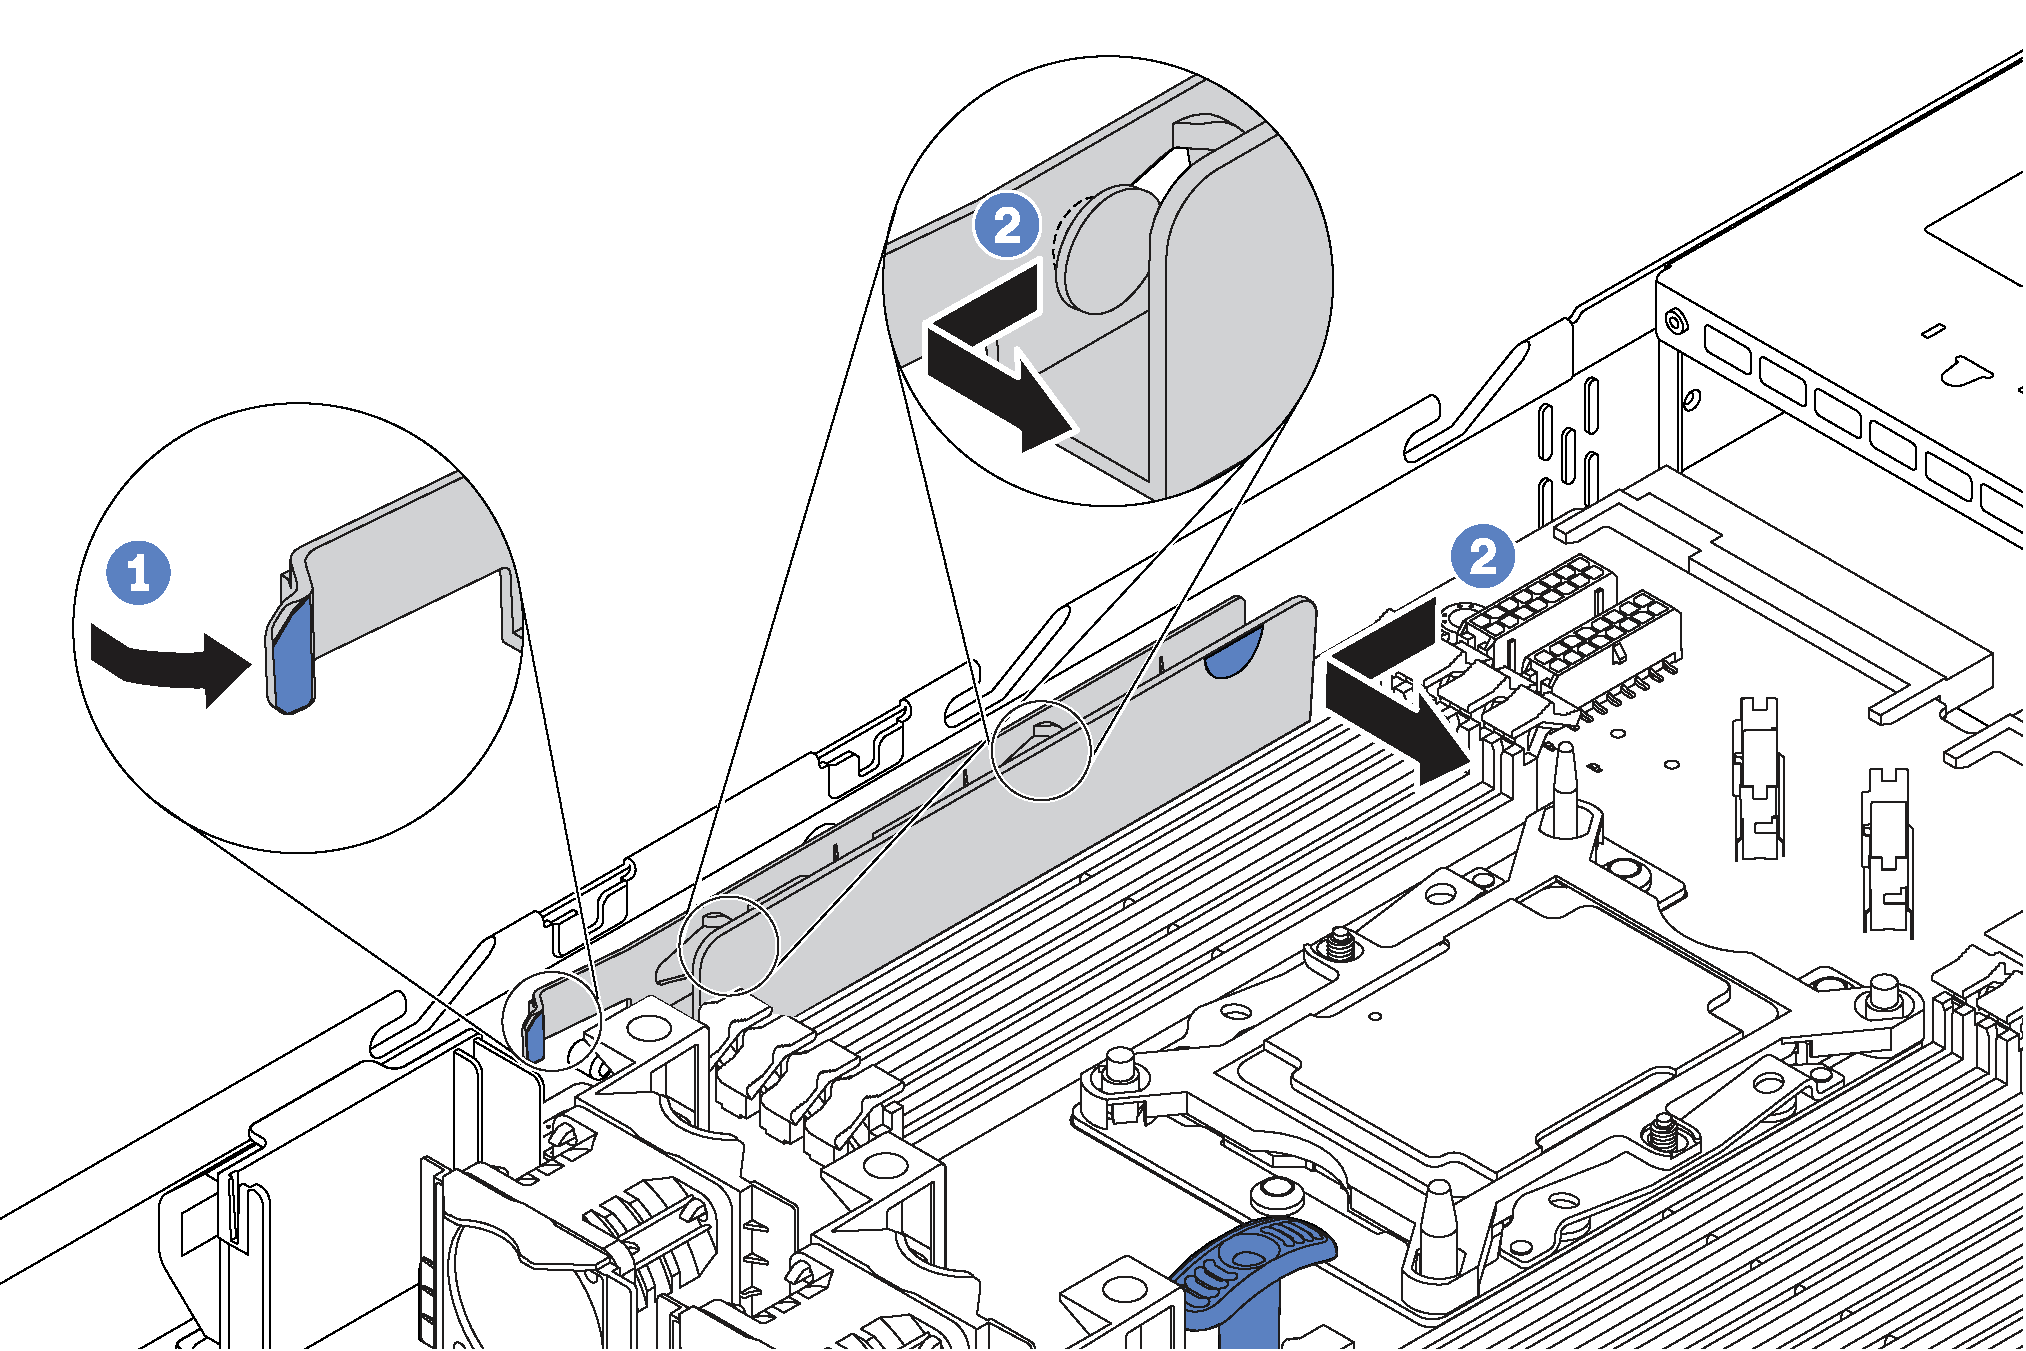
To install the system board, complete the following steps:
Watch the procedure
A video of this procedure is available at YouTube.
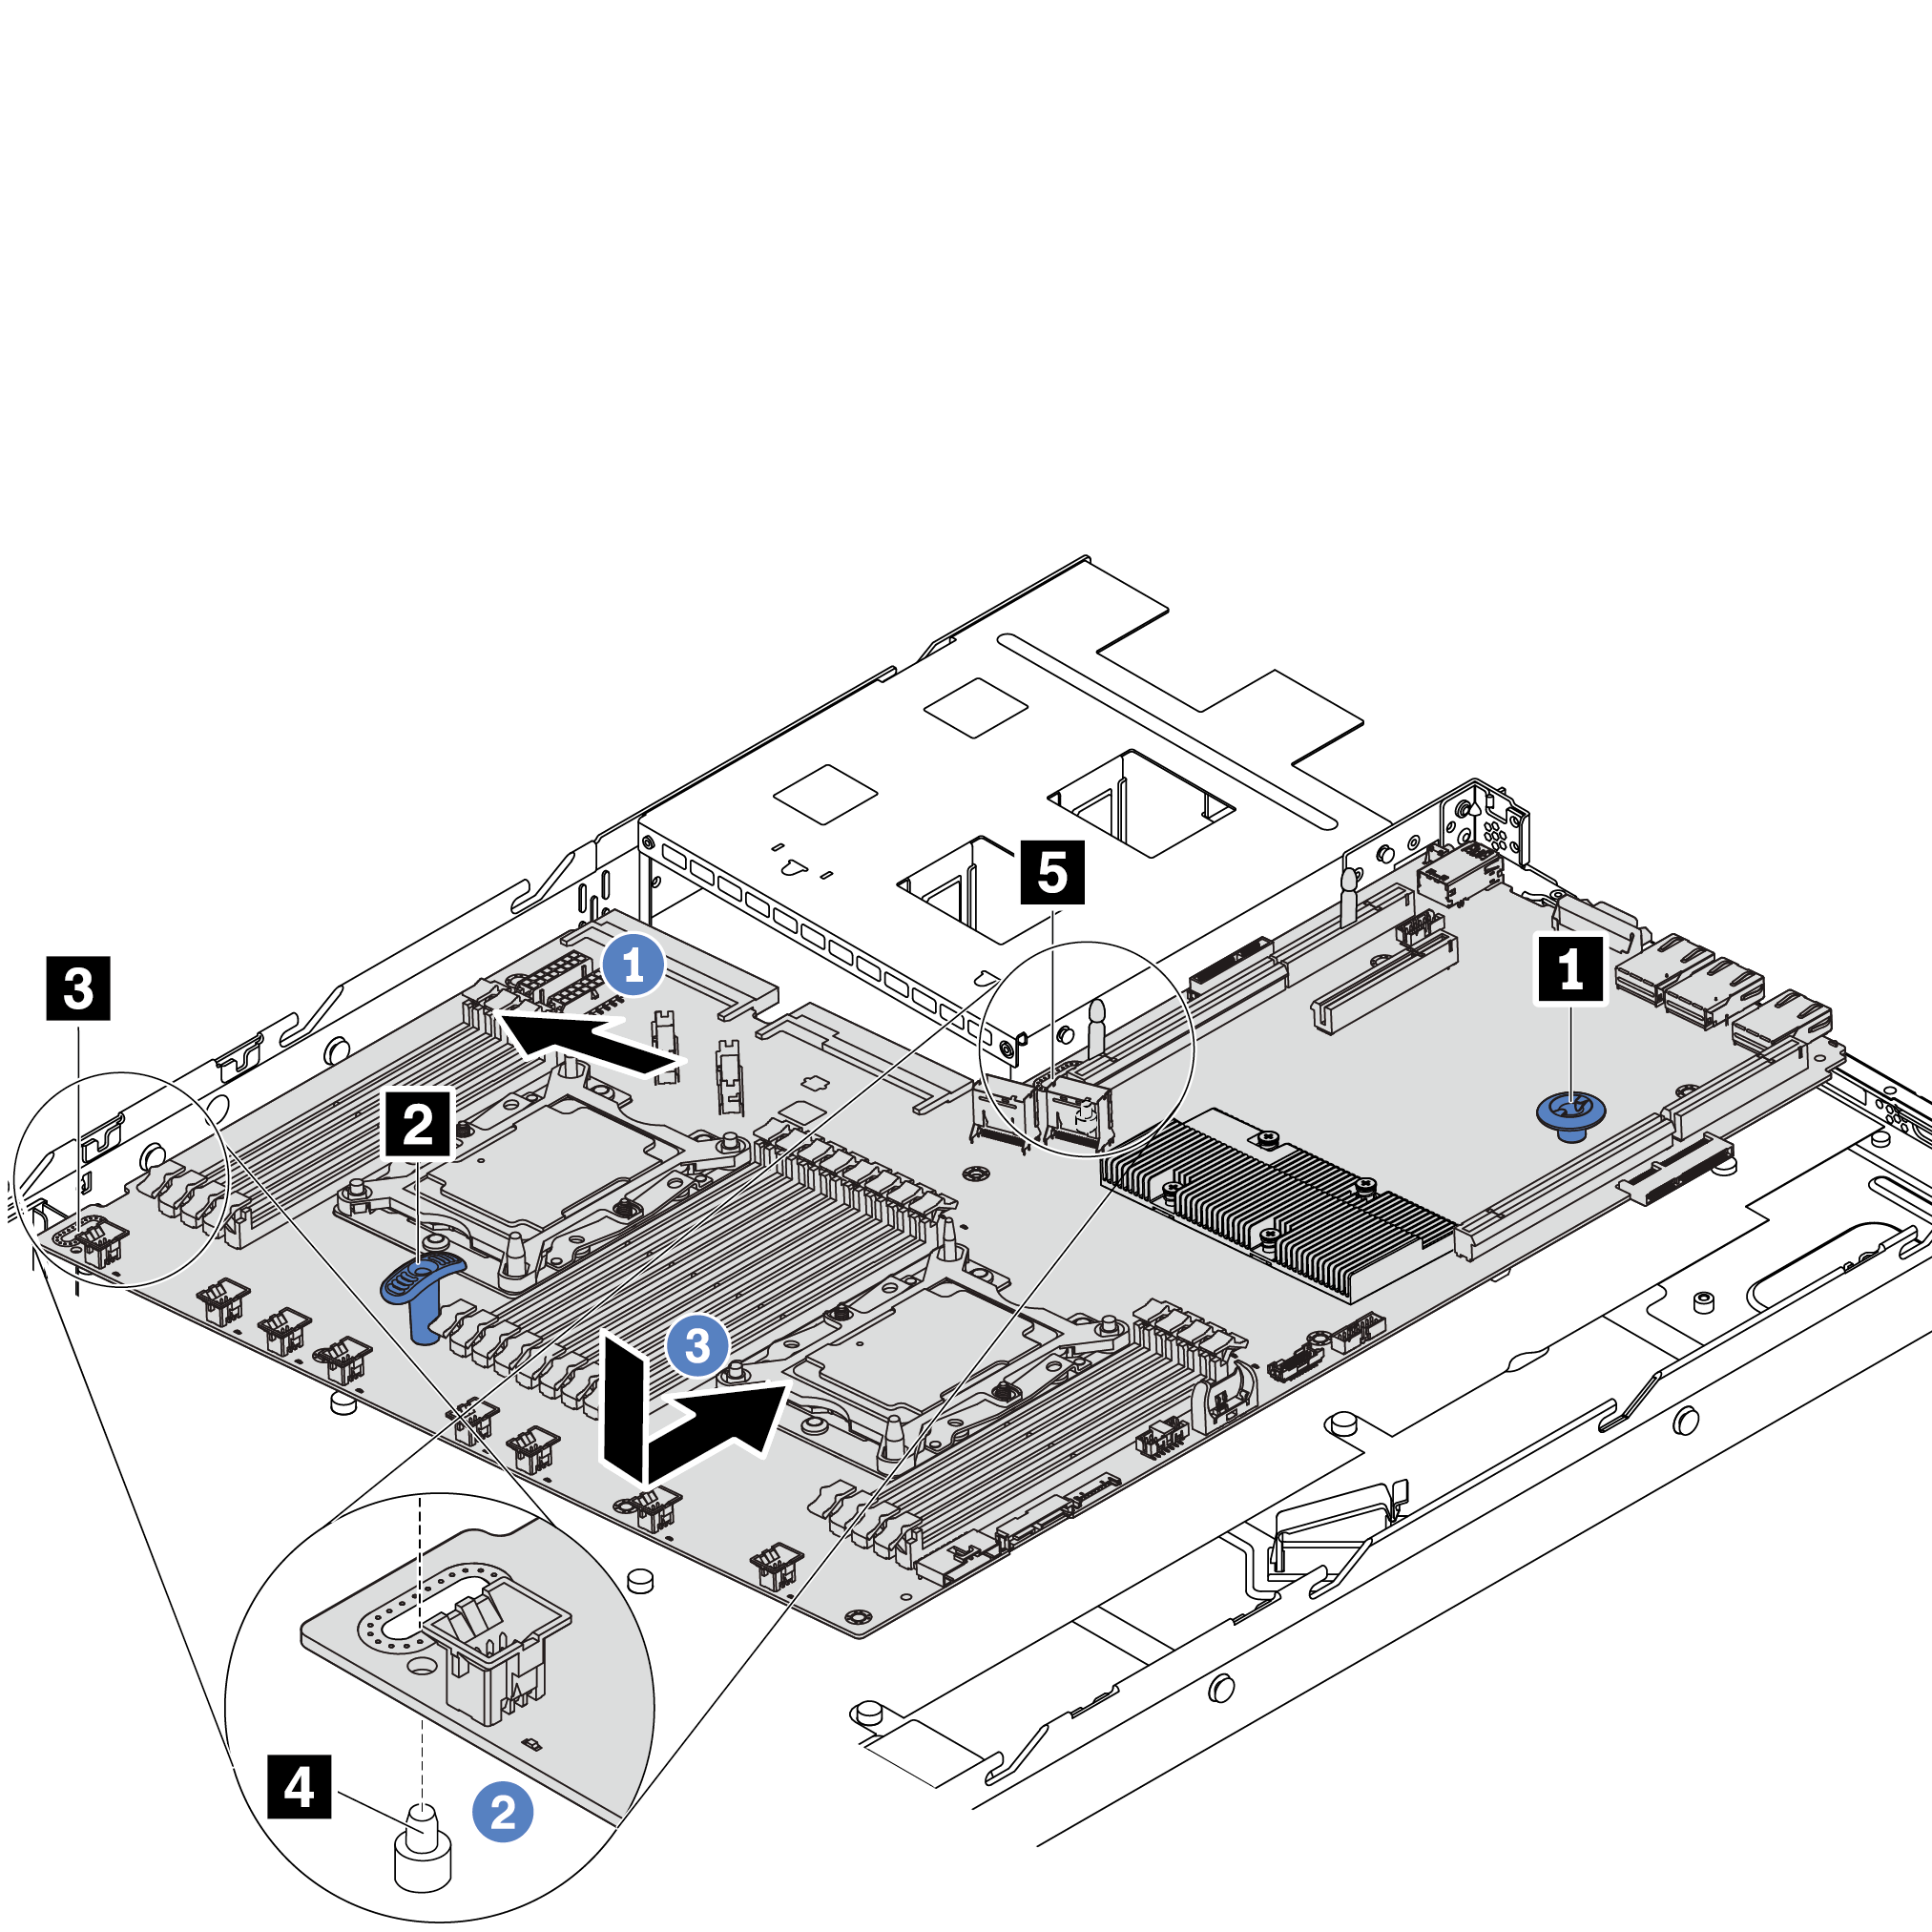
- Install the eight screws in the following sequence.Figure 3. System board screw installation sequence

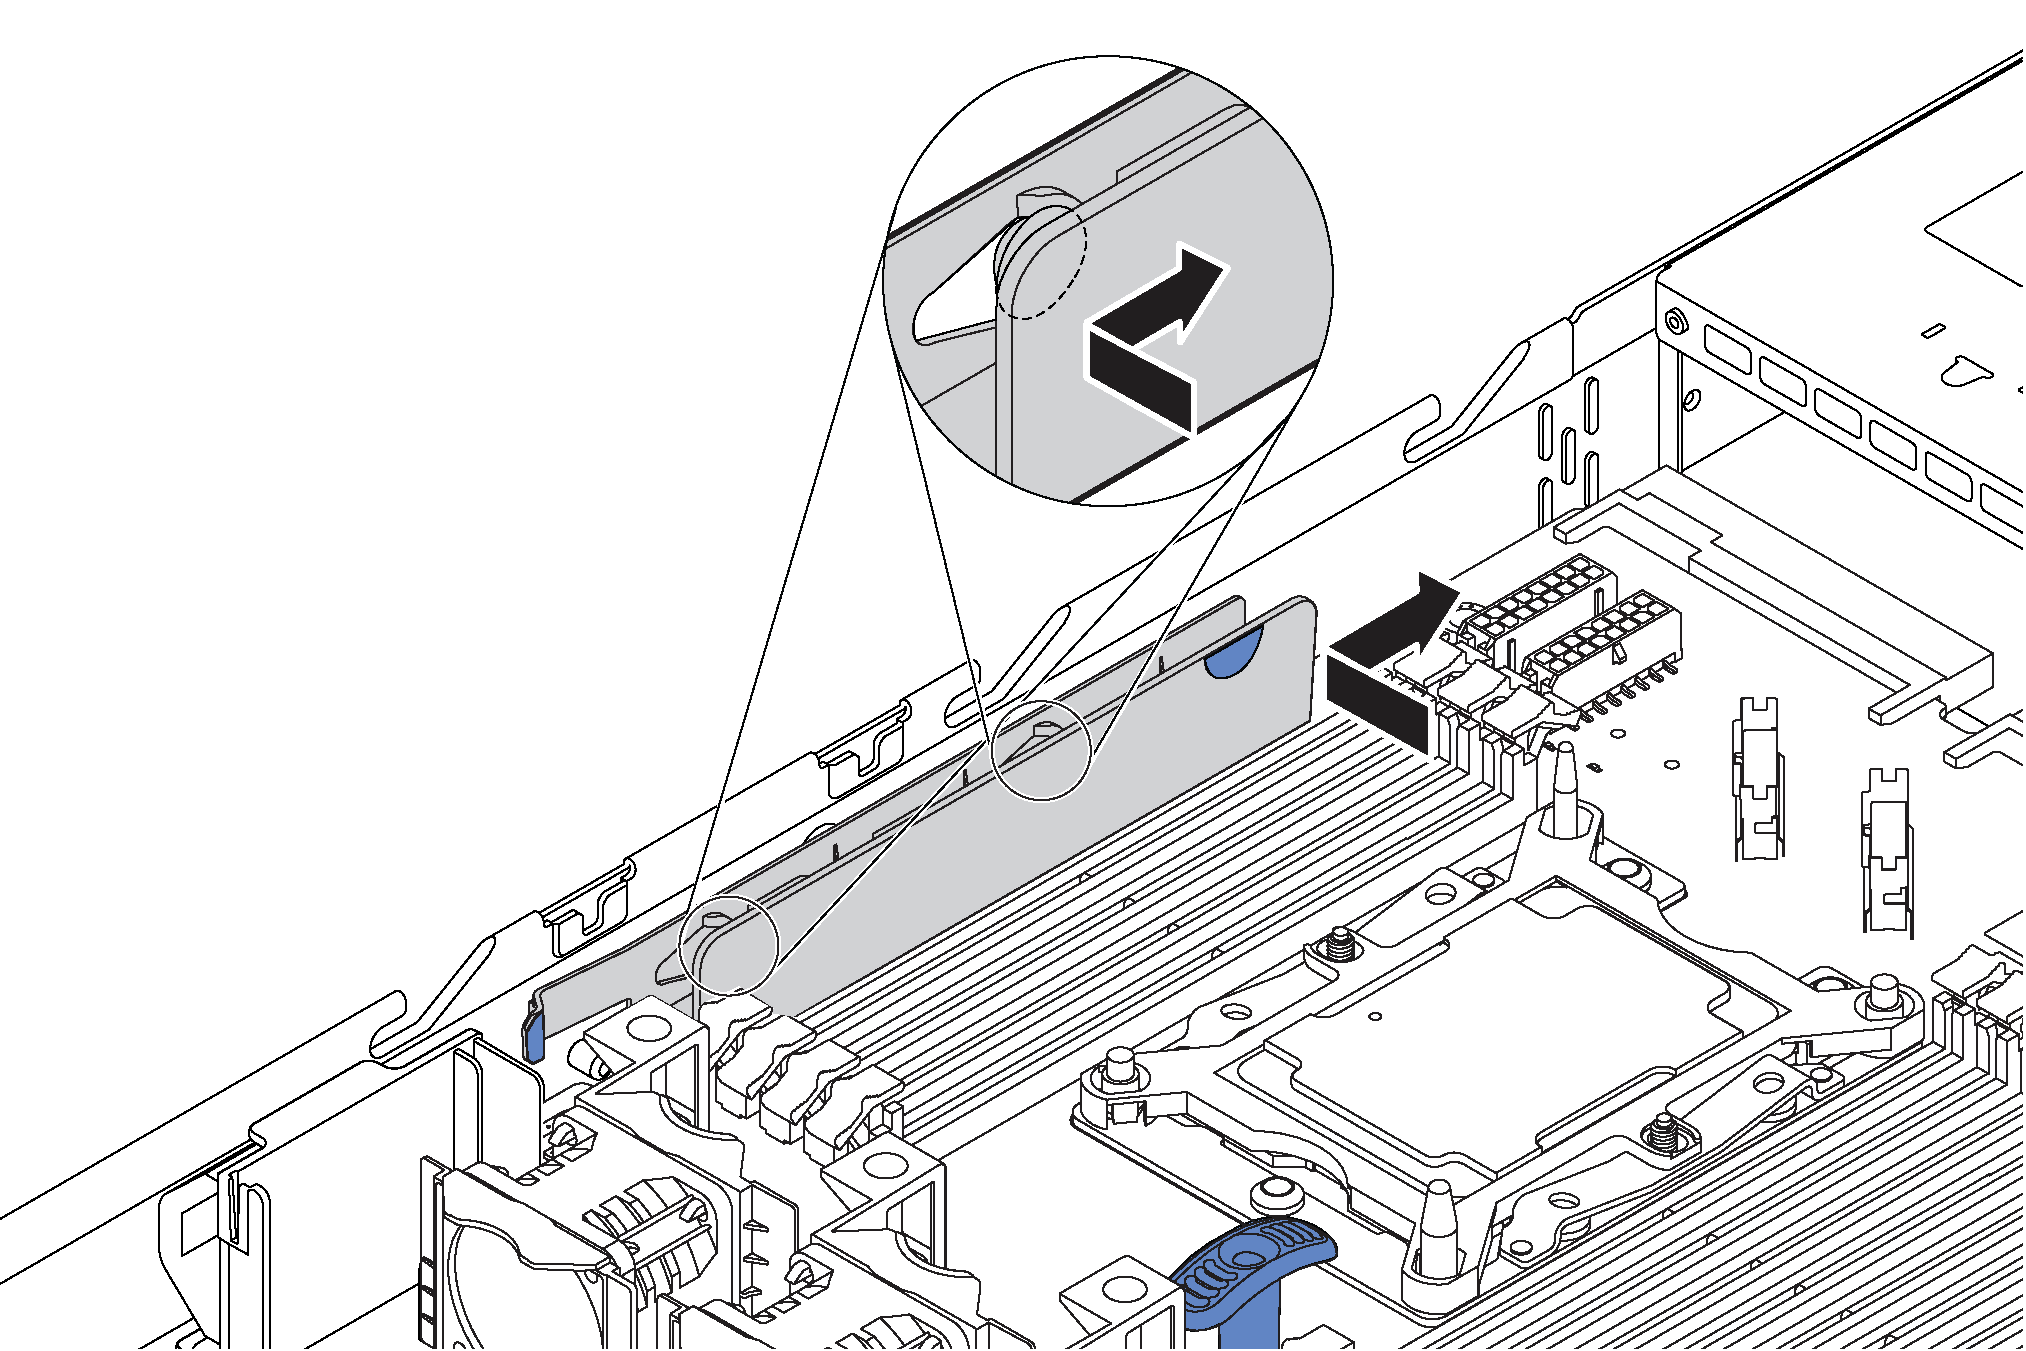
- Reinstall the cable holder as shown.Figure 4. Cable holder installation
Push the power supplies into the bays until they click into place.
Update the machine type and serial number with new vital product data (VPD). Use the Lenovo XClarity Provisioning Manager to update the machine type and serial number. See Update the machine type and serial number.
Enable TPM/TCM. See Enable TPM/TCM.
Optionally, enable Secure Boot. See Enable UEFI Secure Boot.