Remove the system board
Use this information to remove the system board.

Remove the top cover. See Remove the top cover.
Remove the air baffle. See Remove the air baffle.
- Record where the cables are connected to the system board; then, disconnect all the cables.AttentionTo avoid damaging the system board, make sure to follow the instructions in
Internal cable routing when disconnecting cables from the system board. - Remove any of the following components that are installed on the system board and put them in a safe, static-protective place. See the related topics in this chapter.
System fans
- Processor-heat-sink module (PHM)NoteDo not disassemble the PHM.
DIMMs
LOM adapter
M.2 backplane
Riser assemblies
CMOS battery
TCM/TPM (Only available in Chinese Mainland)
Pull out the power supplies slightly. Ensure that they are disconnected from the system board.
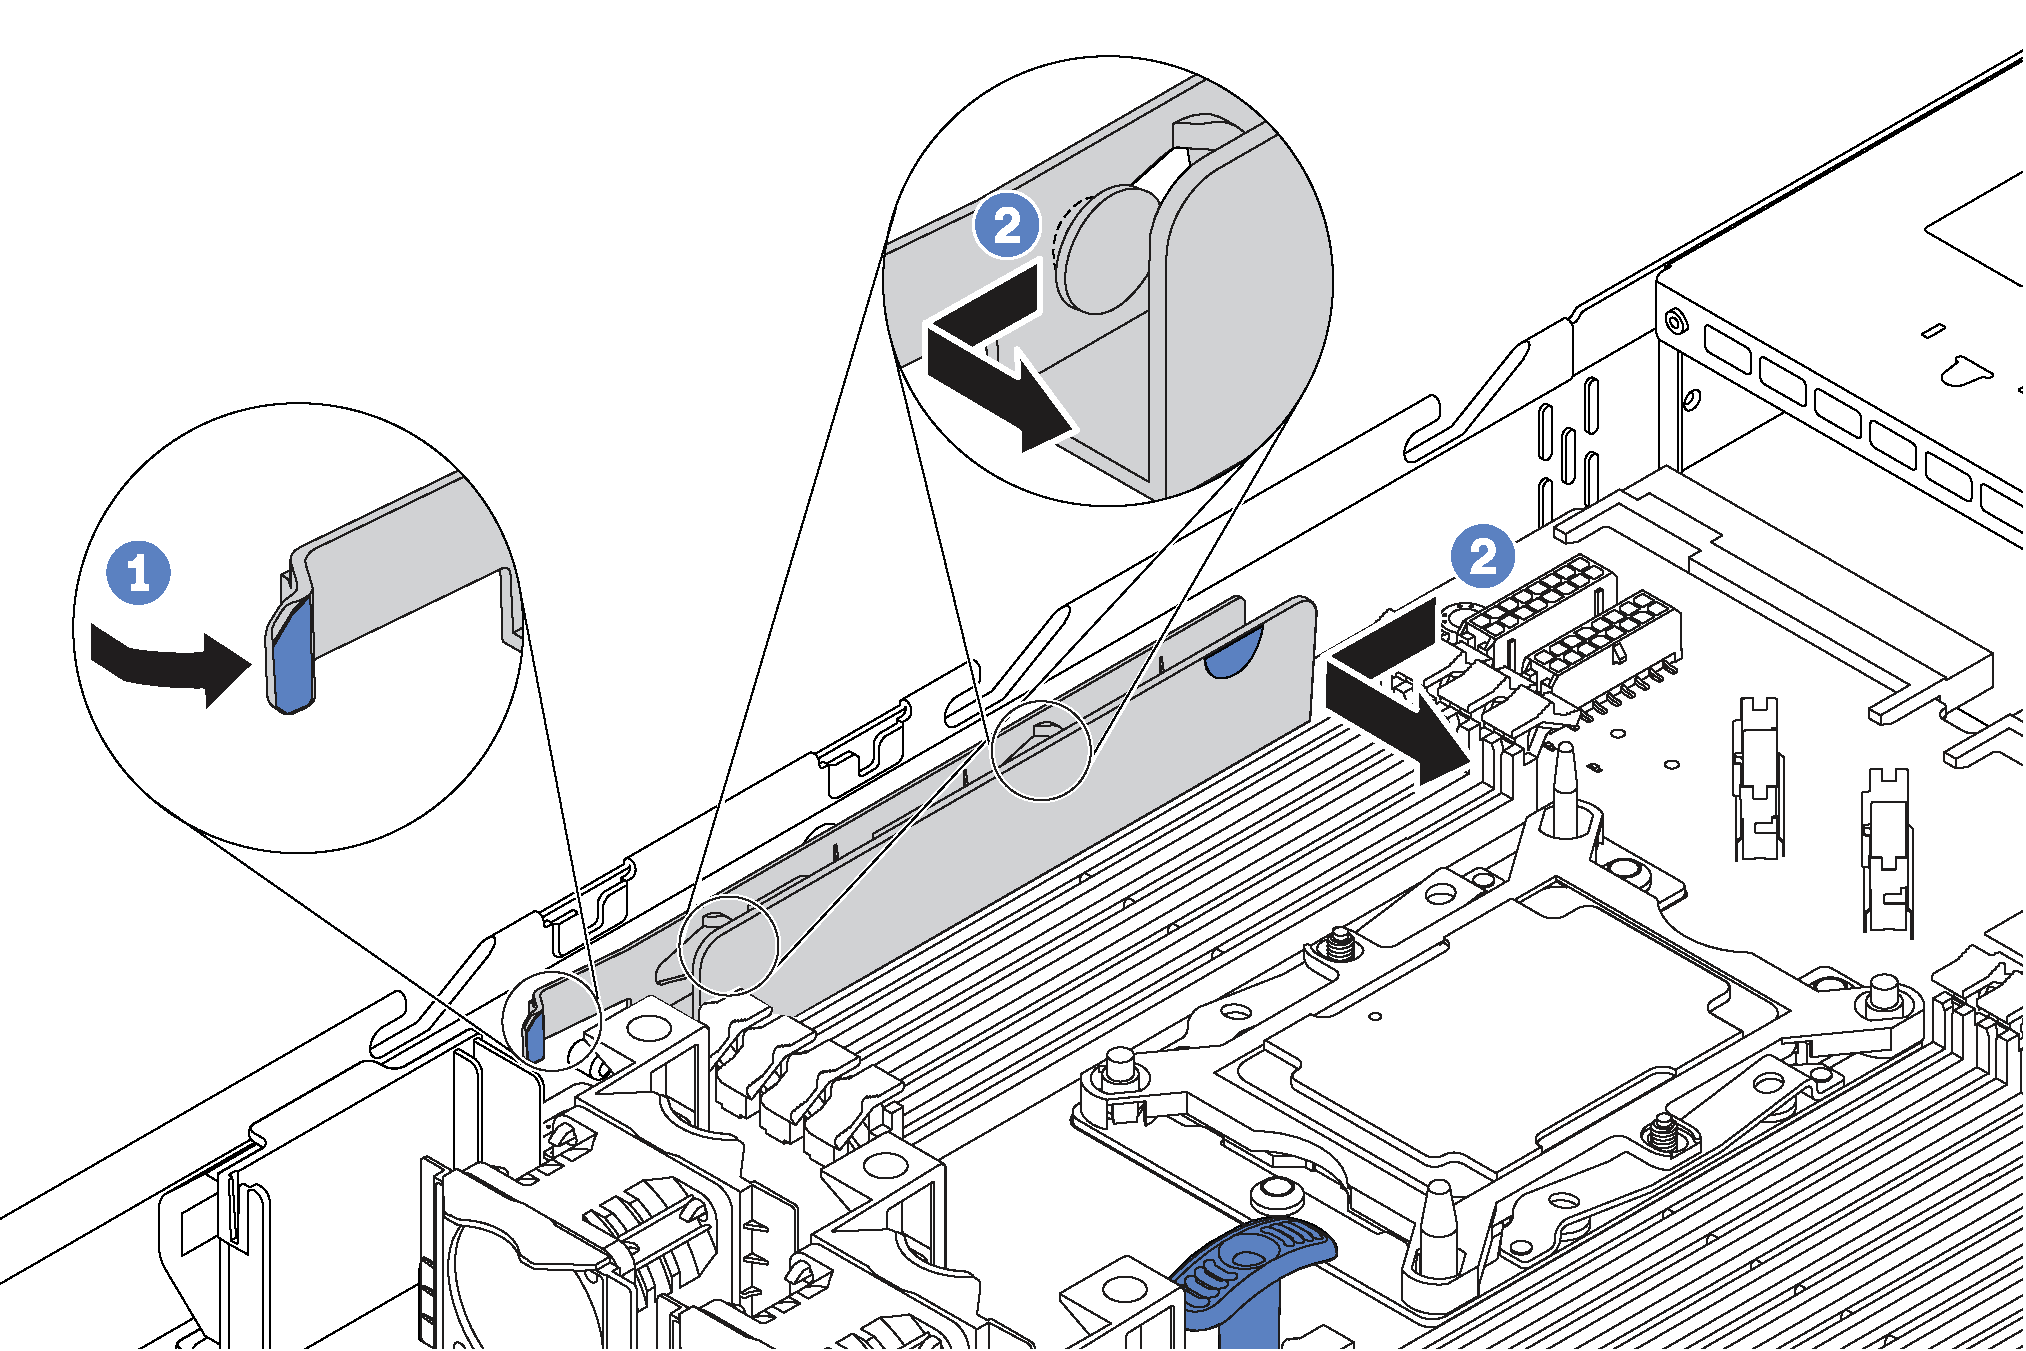
- Remove the cable holder as shown.Figure 1. Cable holder removal
To remove the system board, complete the following steps:
Watch the procedure
A video of this procedure is available at YouTube.
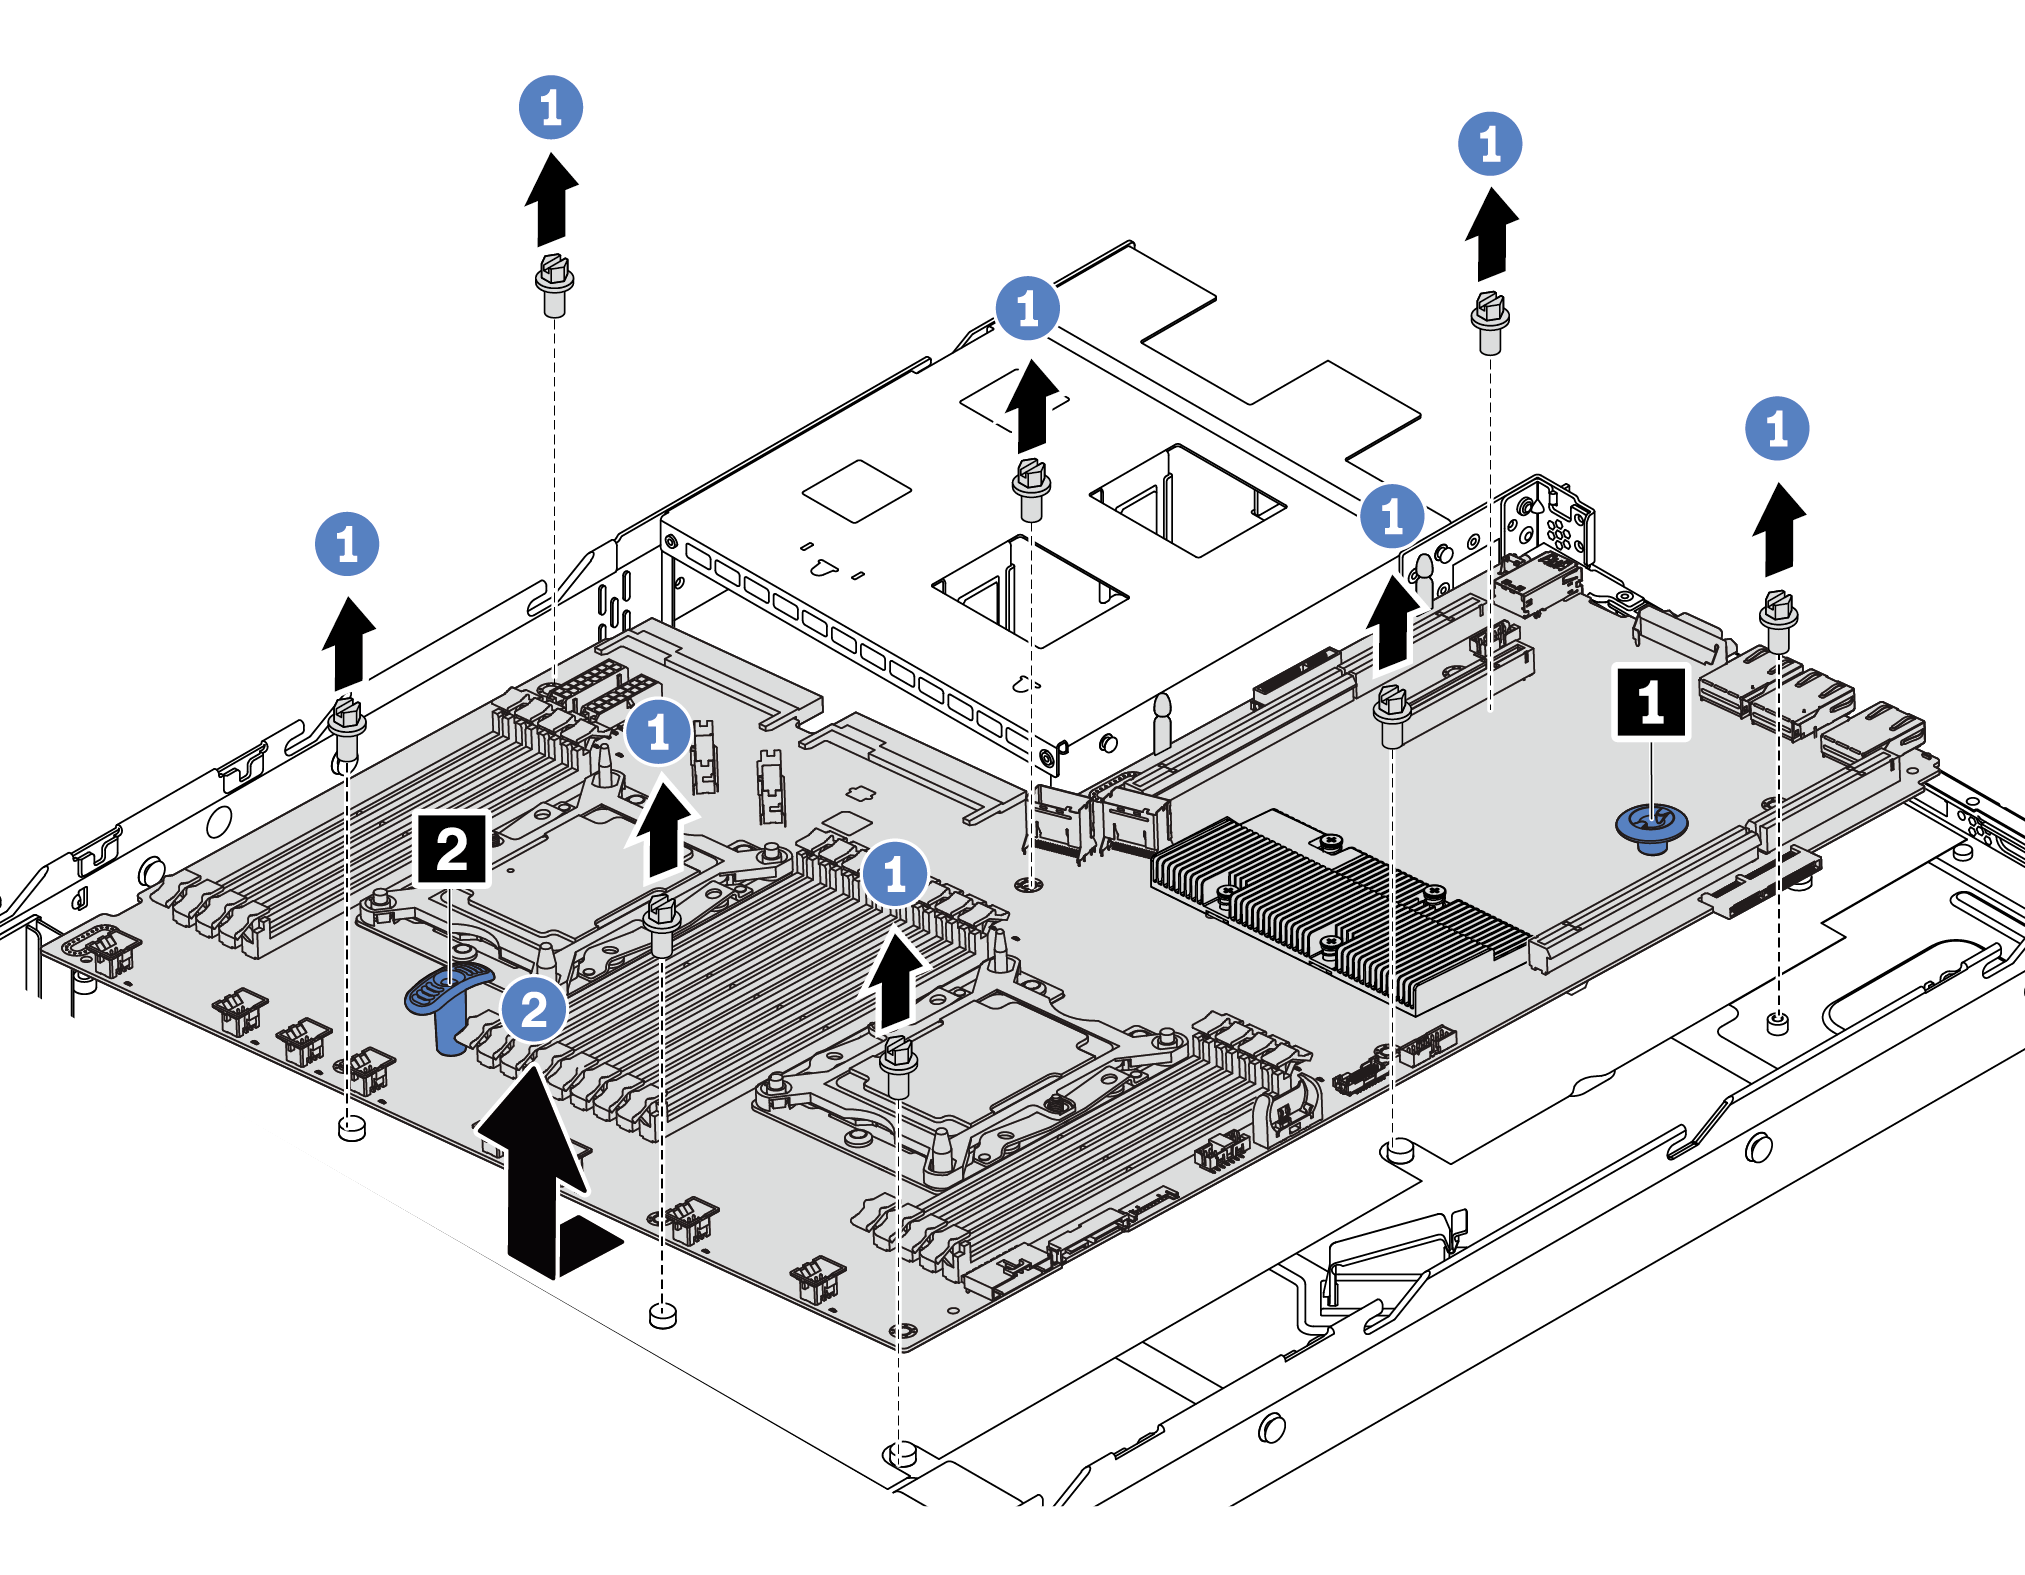
- Remove the eight screws that secure the system board, and put the screws in a safe place.
- Grasp the system board by the release pin 1 and the lift handle 2 at the same time and slide the system board toward the front of the server. Then lift and tilt the system board upwards to remove it out of the chassis.
Take a dust cover from the CPU socket assembly on the new system board and orient it correctly above the CPU socket assembly on the removed system board.
Gently press down the dust cover legs to the CPU socket assembly, pressing on the edges to avoid damage to the socket pins. You might hear a click on the dust cover is securely attached.
Make sure that the dust cover is securely attached to the CPU socket assembly.