Install a PCIe adapter on the riser assembly
Use the following information to install a PCIe adapter on the riser assembly.


Depending on the specific type, your PCIe adapter might look different from the illustration in this topic.
Use any documentation that comes with the PCIe adapter and follow those instructions in addition to the instructions in this topic.
Touch the static-protective package that contains the new PCIe adapter to any unpainted surface on the outside of the server. Then, take the new PCIe adapter out of the package and place it on a static-protective surface.
Locate an appropriate PCIe slot. See Rear view to identify the PCIe slots of your server.
To install a PCIe adapter on the riser assembly, complete the following steps:
Watch the procedure
A video of this procedure is available at YouTube.
- Align the PCIe adapter with the PCIe slot on the riser card. Then, carefully press the PCIe adapter straight into the slot until it is securely seated and its bracket also is secured.Figure 1. PCIe adapter installation
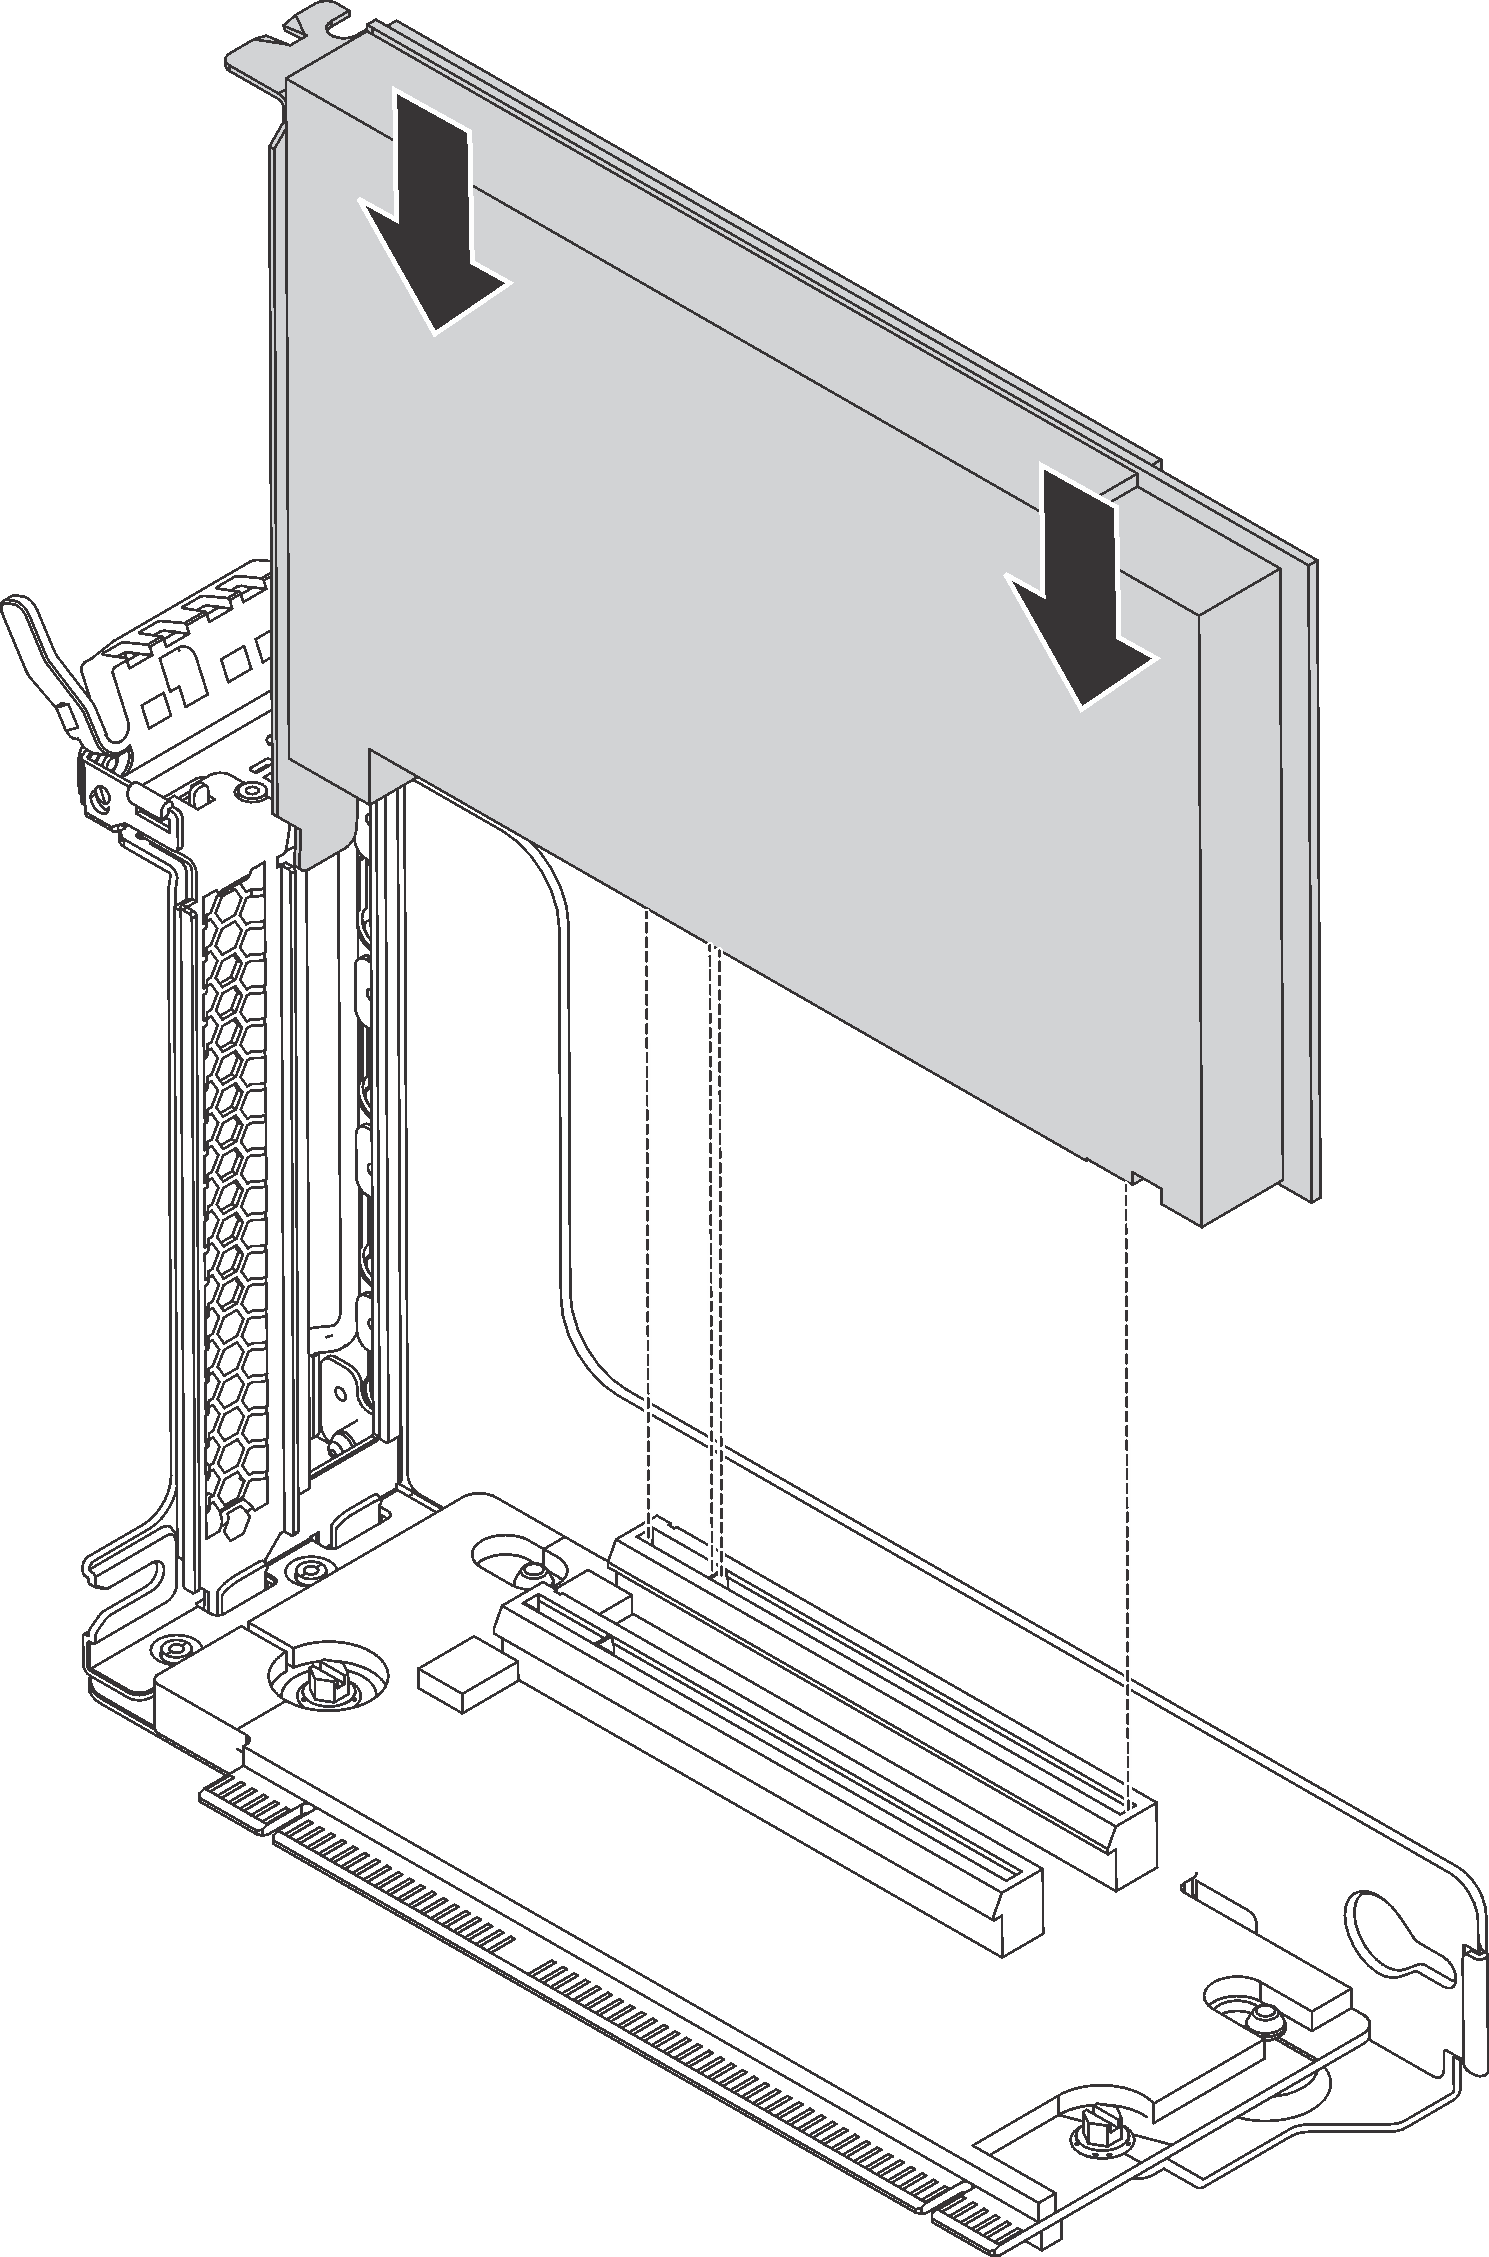 NoteCarefully handle the PCIe adapter by its edges.
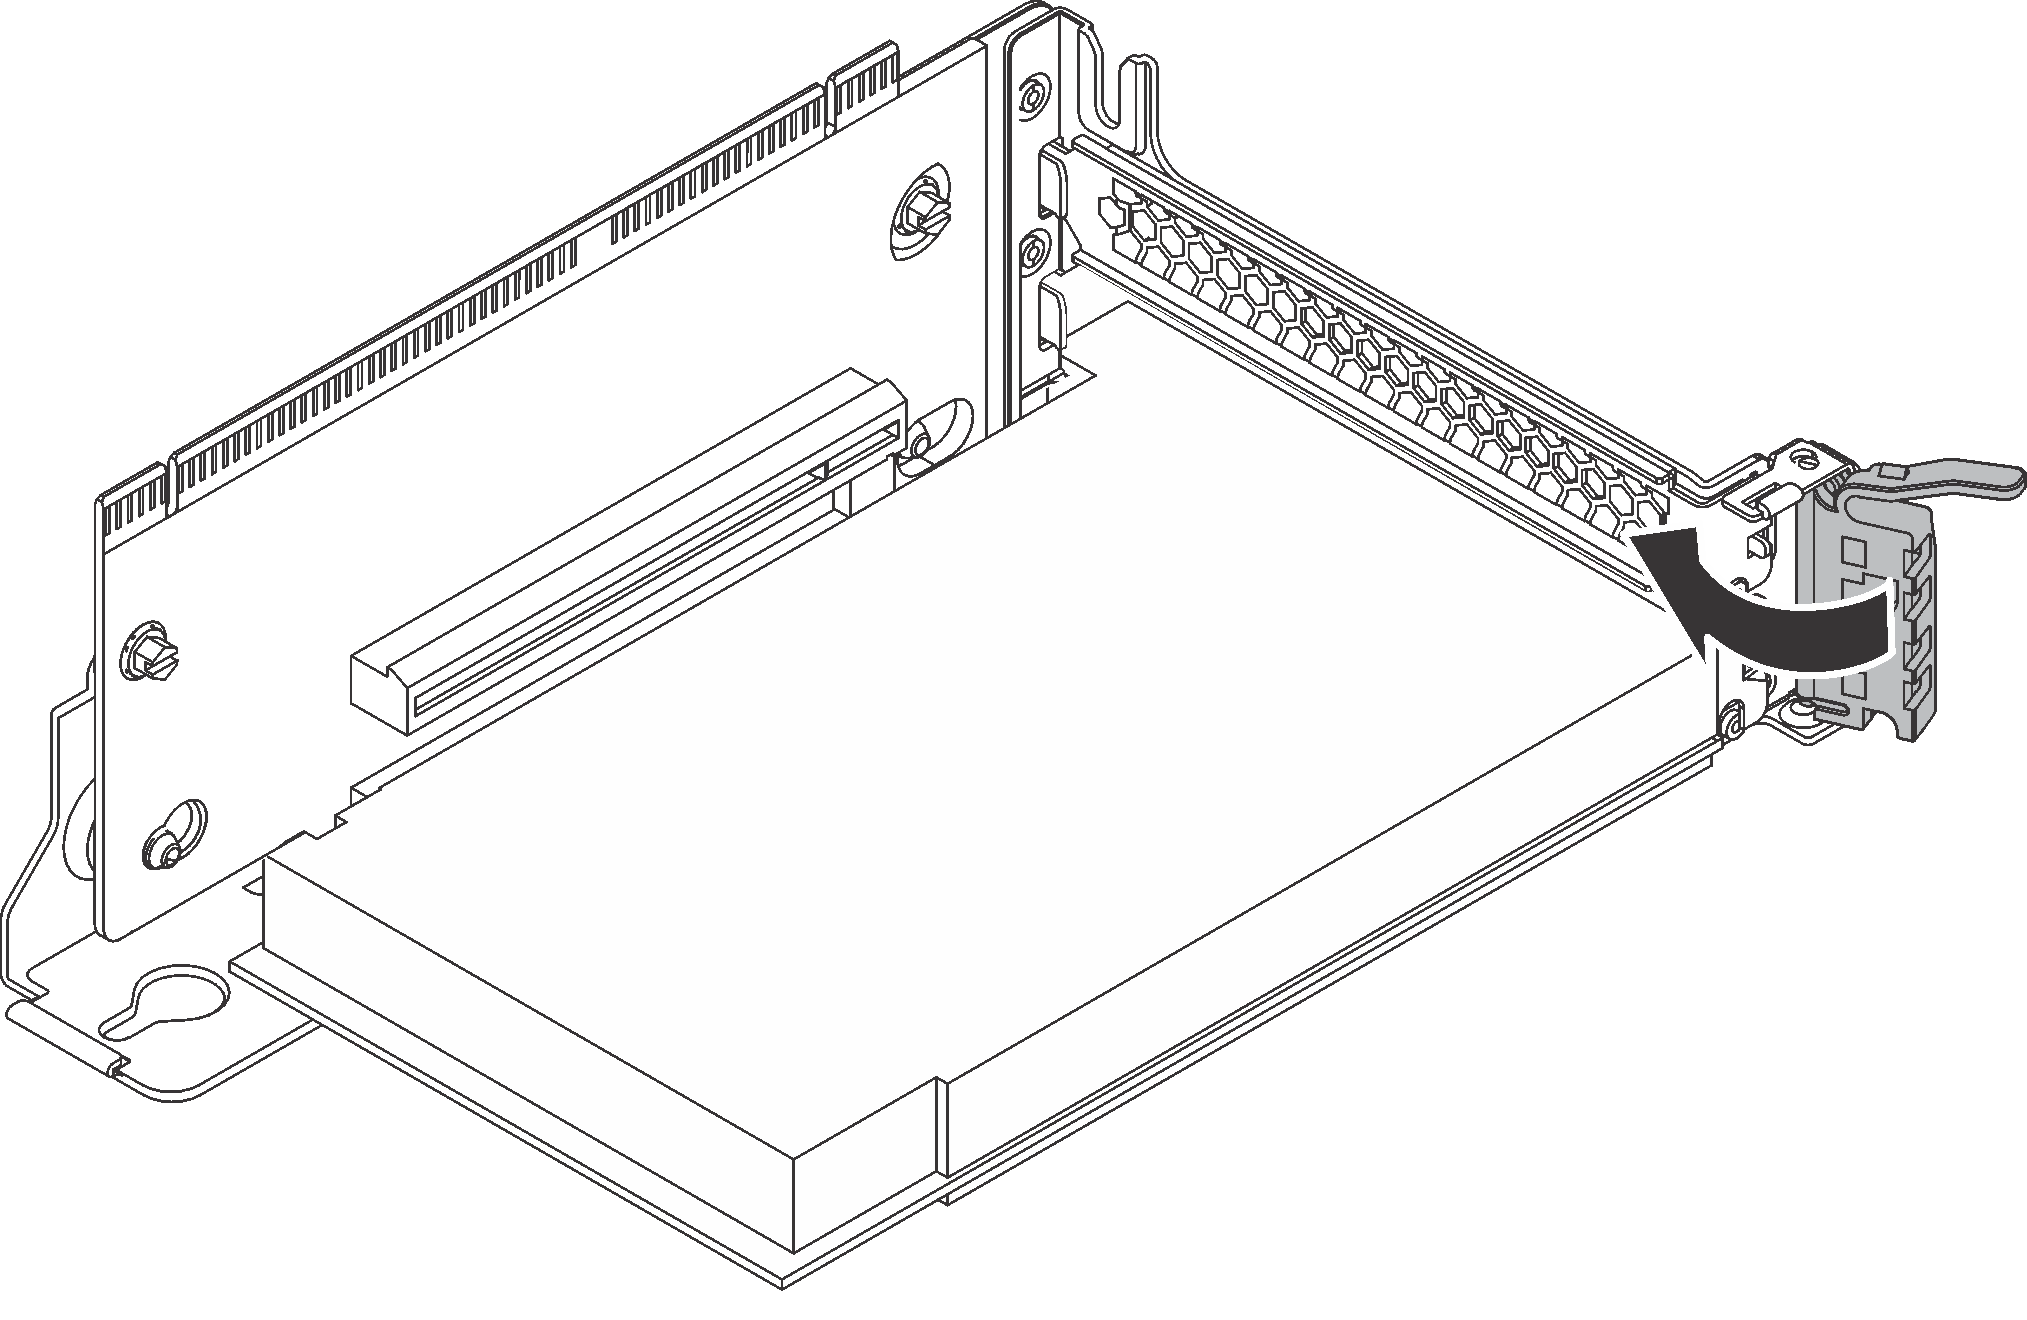
 - Pivot the PCIe adapter retention latch to the closed position.Figure 2. Closing the PCIe adapter retention latch
After installing the PCIe adapter on the riser assembly:
Refer to your record to reconnect the cables.
Reinstall the riser assembly. See Install a riser card.
Complete the parts replacement. See Completing the parts replacement.