Rimozione di un'unità hot-swap E3.S
Seguire le istruzioni riportate in questa sezione per rimuovere un'unità hot-swap E3.S.
Informazioni su questa attività
Leggere Linee guida per l'installazione ed Elenco di controllo per la sicurezza per accertarsi di operare in sicurezza.
Per garantire un adeguato raffreddamento del sistema, evitare di utilizzare il server per più di due minuti senza un'unità o un elemento di riempimento installato in ciascun vano.
Se è necessario rimuovere una o più unità EDSFF, è consigliabile disabilitarle preventivamente tramite il sistema operativo.
Prima di rimuovere o apportare modifiche alle unità, ai controller delle unità (compresi i controller integrati sulla scheda di sistema), ai backplane delle unità o ai cavi delle unità, effettuare un backup di tutti i dati importanti memorizzati sulle unità.
Prima di rimuovere un qualsiasi componente di un array RAID (ad esempio, unità, scheda RAID), effettuare un backup di tutte le informazioni sulla configurazione RAID.
Assicurarsi di disporre degli elementi di riempimento del vano dell'unità se alcuni vani delle unità saranno lasciati vuoti dopo la rimozione.
Procedura
- Rimuovere la mascherina E3.S.
 Premere il pulsante sulla mascherina E3.S per sganciare il coperchio.
 Rimuovere la mascherina E3.S del server.
Figura 1. Rimozione della mascherina E3.S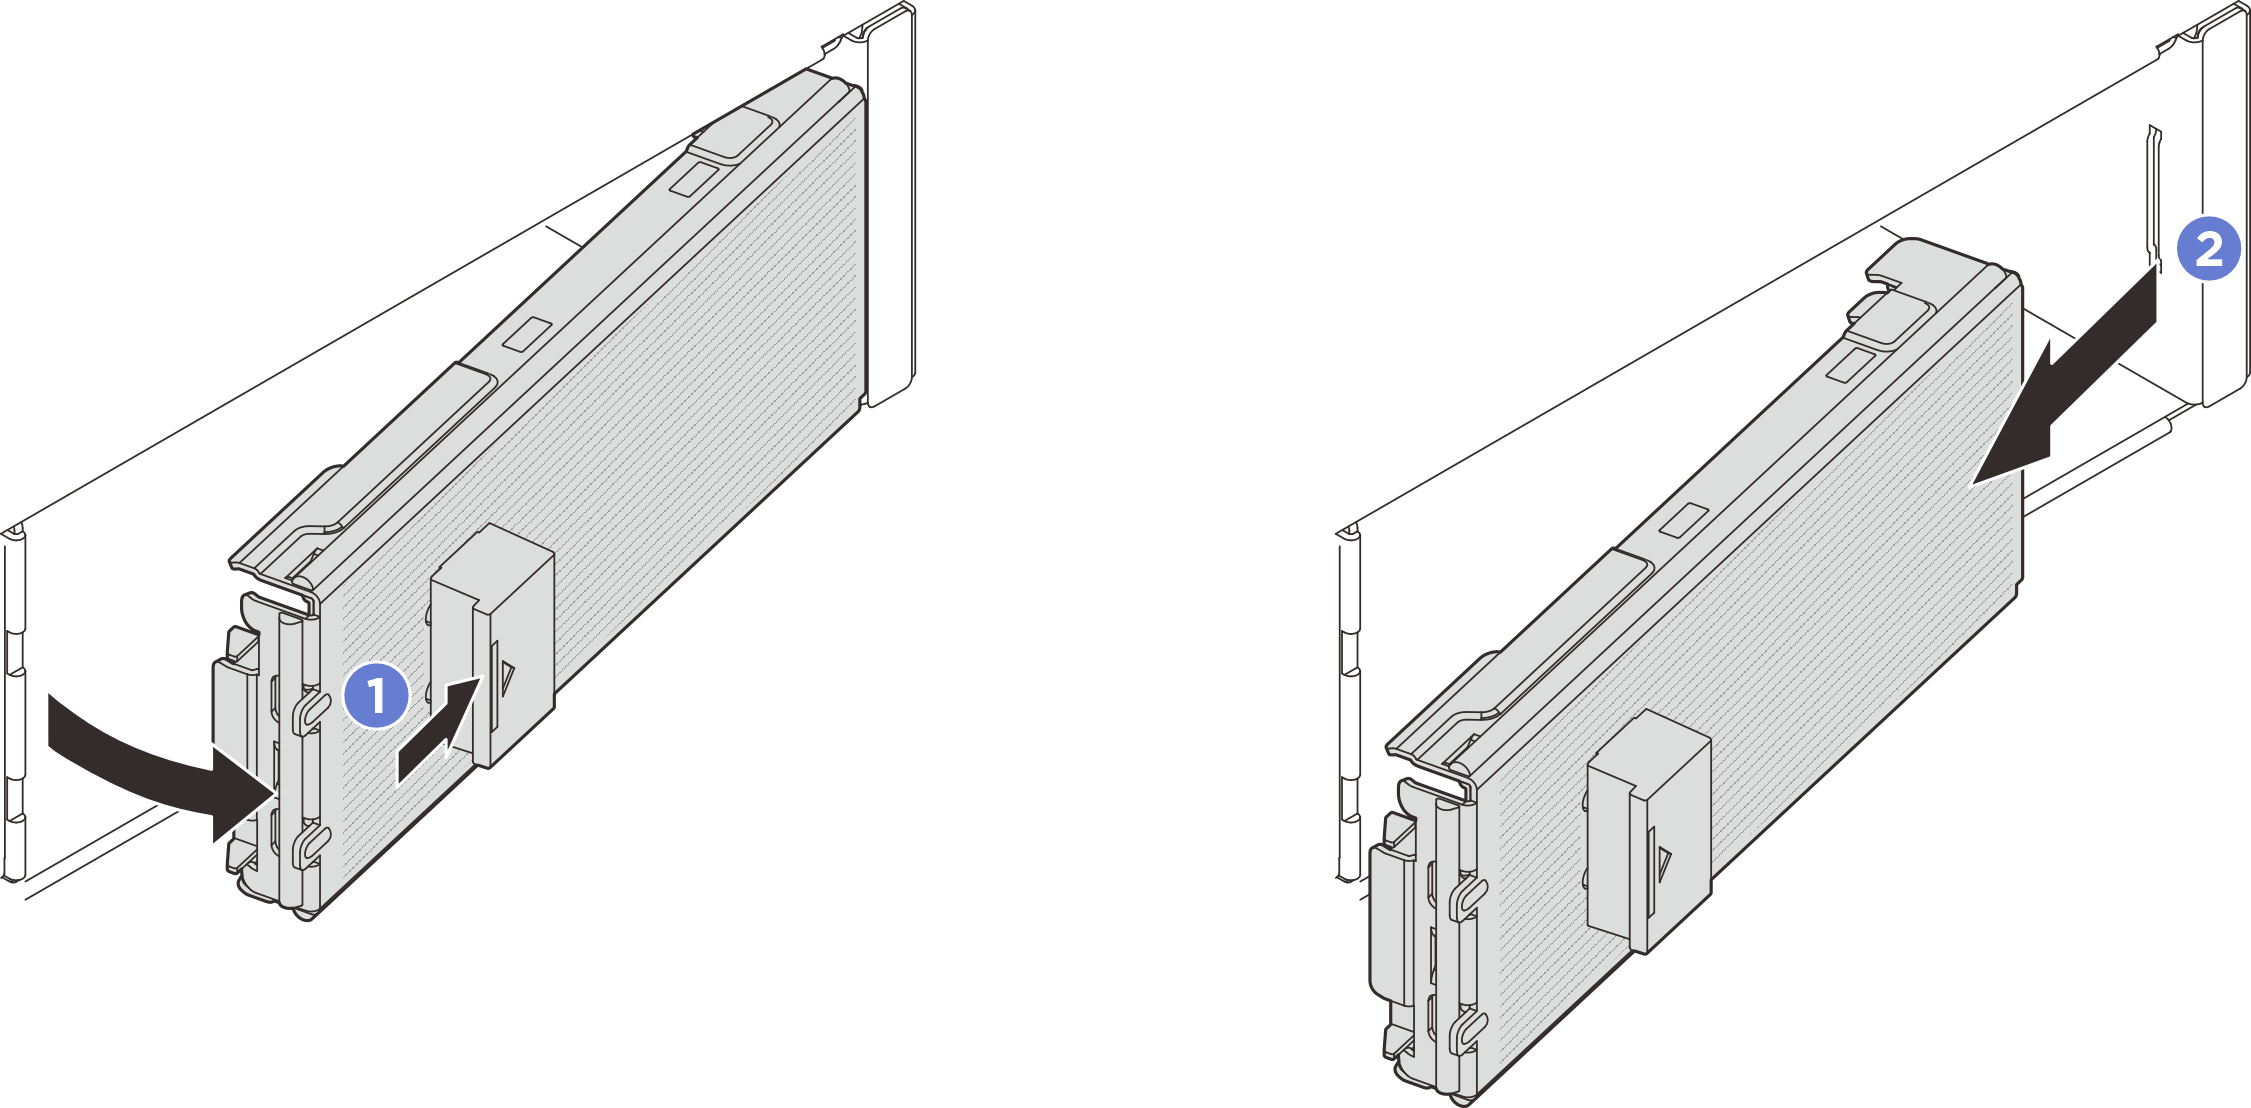
- Rimuovere un'unità hot-swap E3.S.
- Far scorrere il fermo di rilascio per sbloccare la maniglia dell'unità.
- Ruotare la maniglia dell'unità in posizione di apertura.
 Afferrare la maniglia ed estrarre l'unità dal vano dell'unità.
NotaInstallare un elemento di riempimento del vano o un'unità sostitutiva il prima possibile. VedereInstallazione di un'unità hot-swap E3.S. Figura 2. Rimozione di un'unità hot-swap E3.S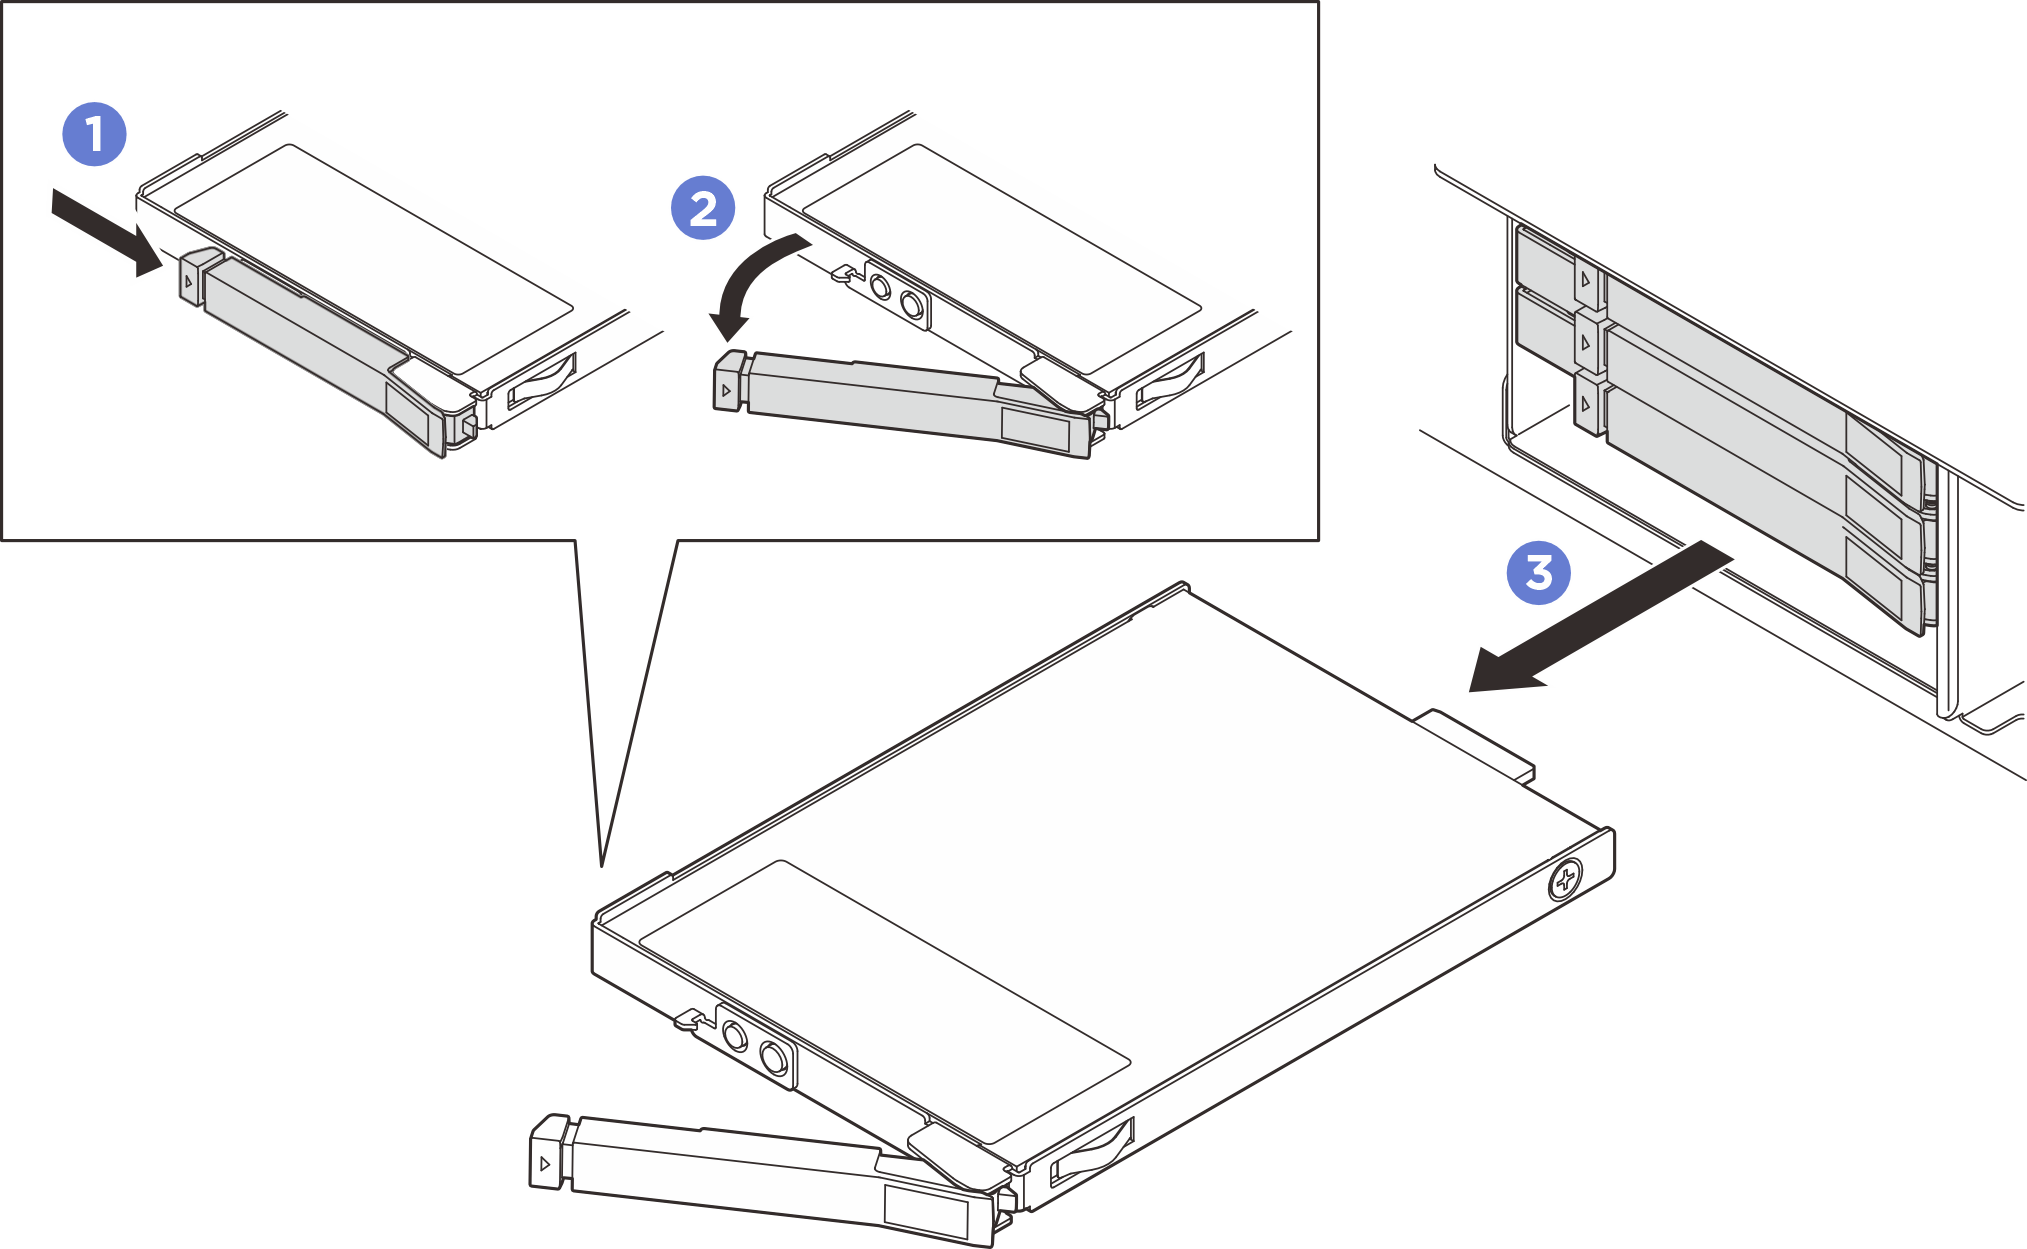
Dopo aver terminato
Se viene richiesto di restituire il componente o il dispositivo opzionale, seguire tutte le istruzioni di imballaggio e utilizzare i materiali di imballaggio per la spedizione forniti con il prodotto.
Video dimostrativo