Remove the serial port module
Use this information to remove the serial port module.
About this task
Attention
Read Installation guidelines to ensure that you work safely.
Prevent exposure to static electricity, which might lead to system halt and loss of data, by keeping static-sensitive components in their static-protective packages until installation, and handling these devices with an electrostatic-discharge wrist strap or other grounding system.
Procedure
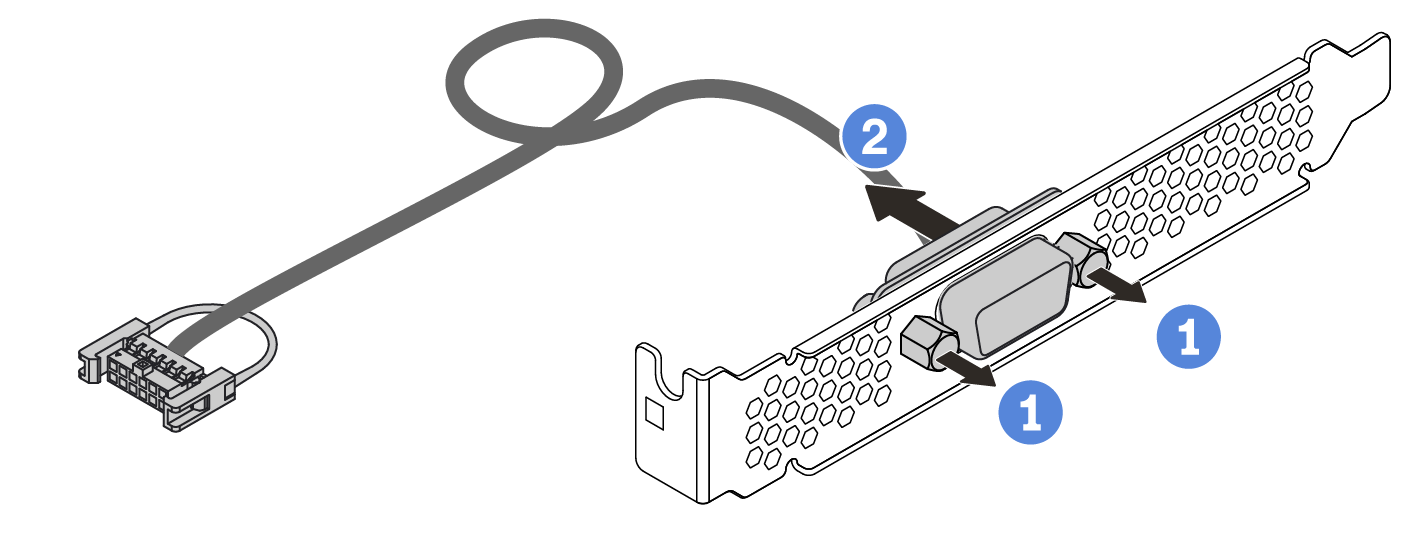
- (Optional) If you need to replace the serial port bracket, use a 5 mm wrench to disassemble the serial port cable from the bracket.Figure 1. Serial port module disassembling
After removing the serial port module:
Install a new serial port module, a PCIe adapter, or a PCIe slot bracket to cover the place. See Install the serial port module.
If you are instructed to return the old serial port module, follow all of the packaging instructions and use any packaging materials that are provided.
Give documentation feedback