Install a GPU
Use this information to install a GPU.
Depending on the specific type, your GPU might look different from the illustrations in this topic.
Use any documentation that comes with the GPU and follow those instructions in addition to the instructions in this topic.
Touch the static-protective package that contains the new GPU to any unpainted surface on the outside of the server. Then, take the new GPU out of the package and place it on a static-protective surface.
Ensure that your server has the appropriate air baffle installed. For more information, refer to Important information for the air baffle and GPU.
Depending on the GPU type, do one of the following:
For full-height full-length (FHFL) GPUs, if the GPU does not have a bracket installed on it, install the screws to secure the GPU bracket 1 to the GPU. Then, install the FHFL GPU holder 2 to the GPU.
Figure 1. GPU bracket and holder installation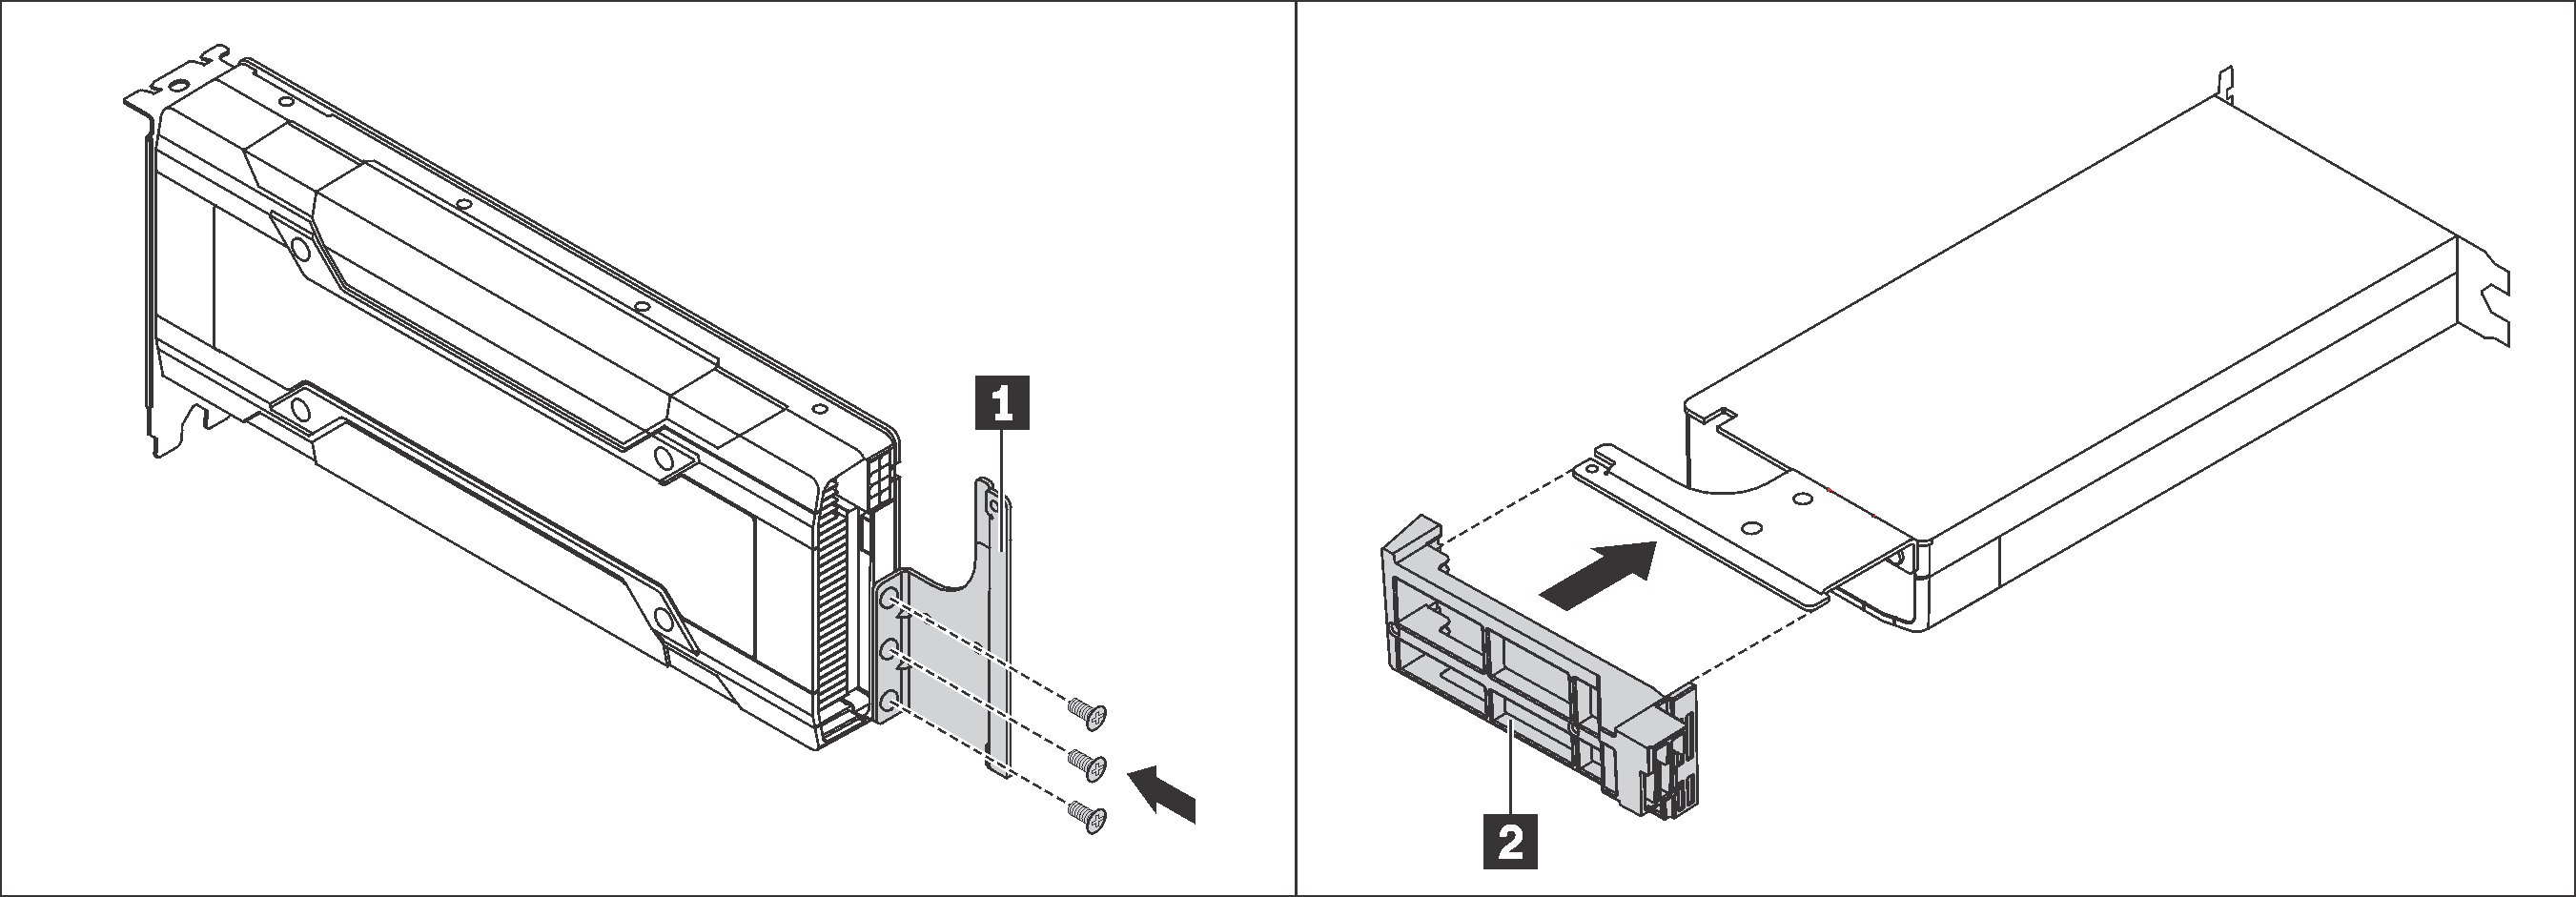
For NVIDIA P4 GPU, install the P4 GPU air baffle (also called the P4 GPU air duct).
Figure 2. P4 GPU air baffle installation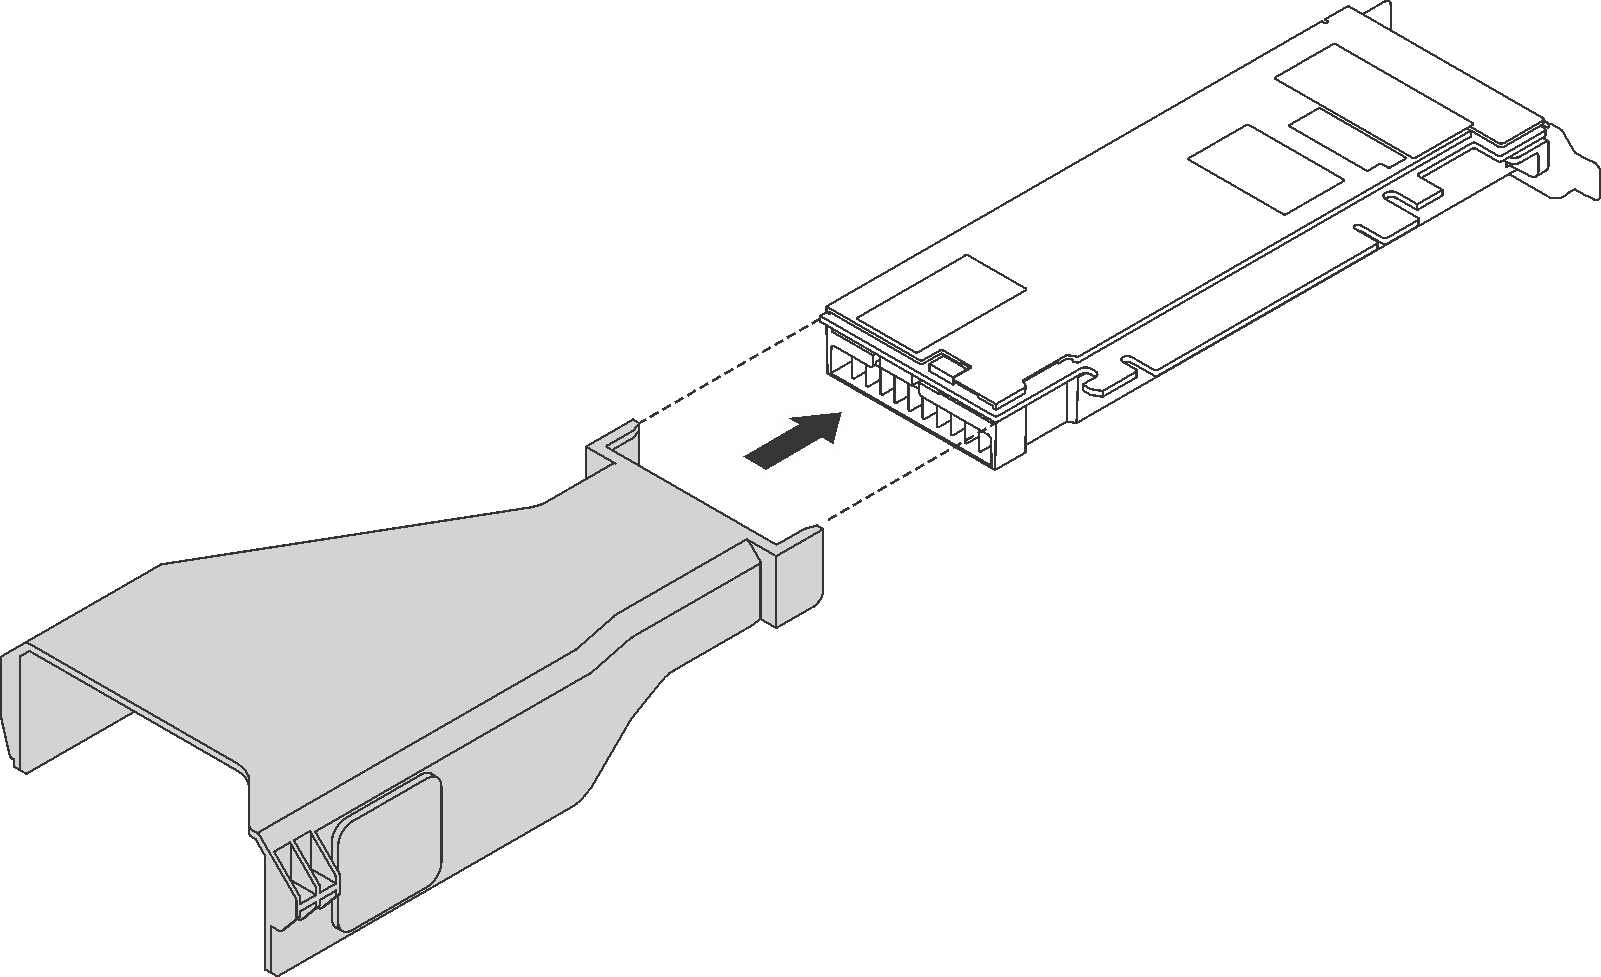
For NVIDIA A10 GPU, if you are installing one NVIDIA A10 on the one riser assembly, install a A10 GPU air baffle on the large-size air baffle first.
Figure 3. A10 GPU air baffle installation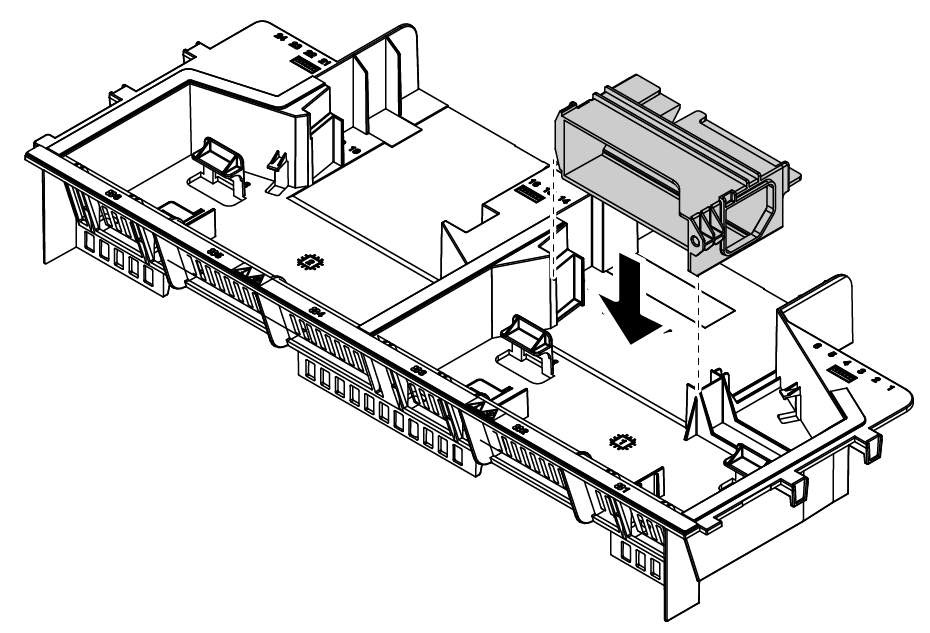 Figure 4. One A10 GPU installation
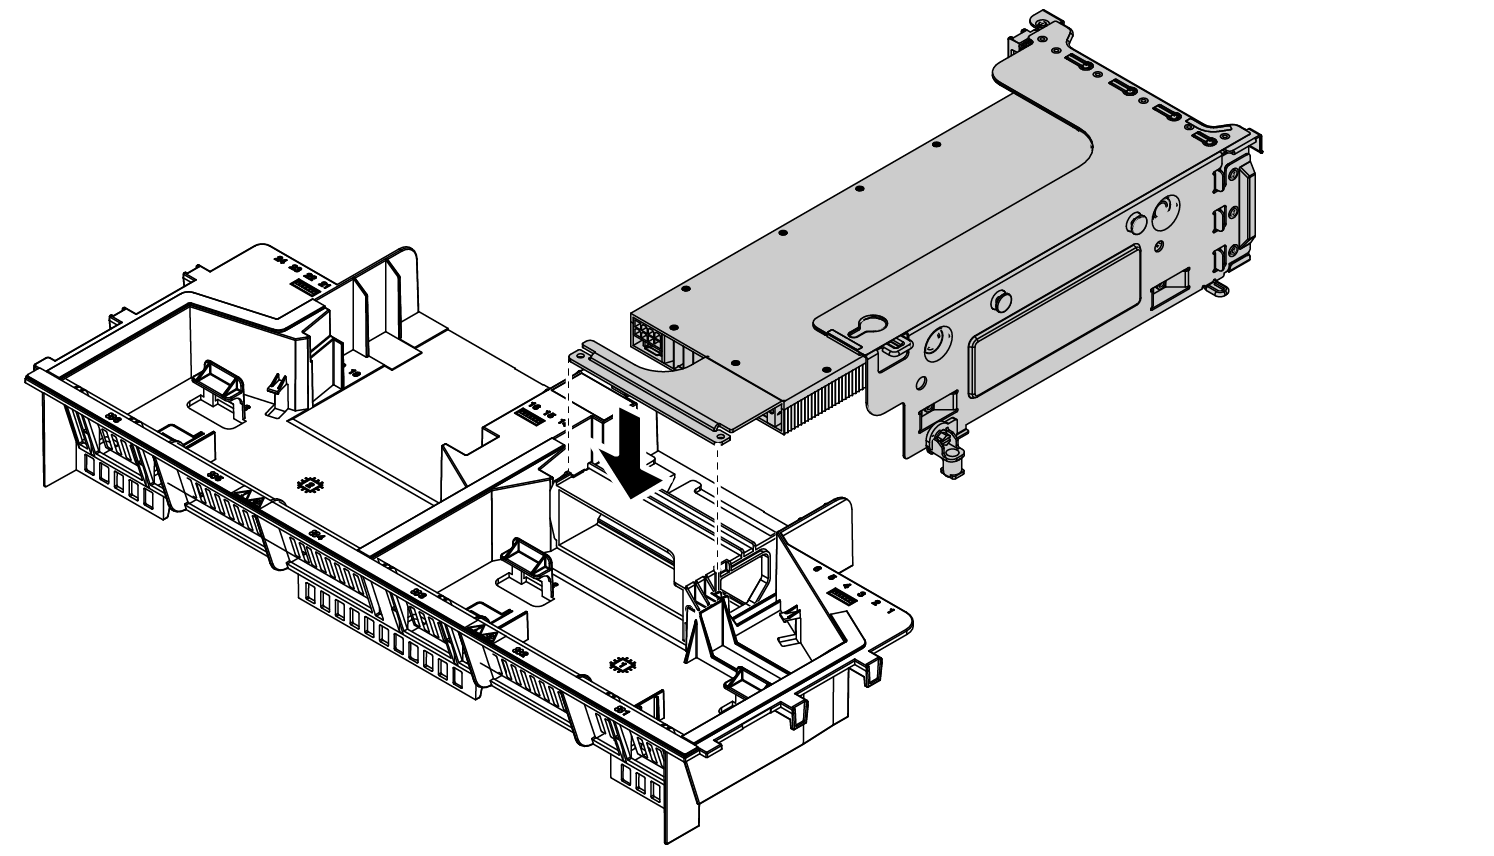
For NVIDIA A10 GPU, if you are installing two NVIDIA A10 GPUs on one riser assembly, install the FHFL GPU holder on the riser assembly first.
Figure 5. FHFL GPU holder installation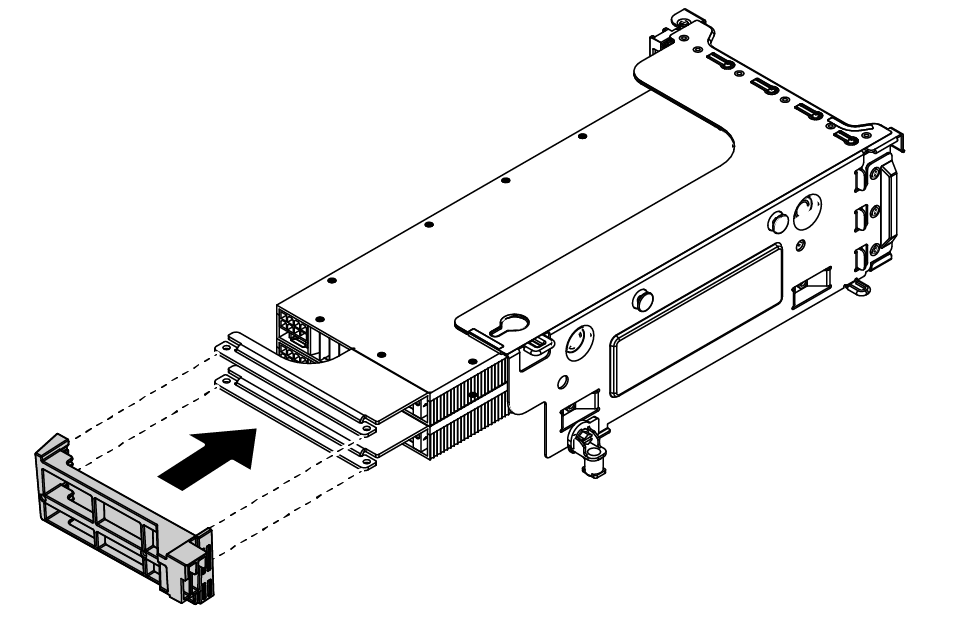 Figure 6. Two A10 GPUs installation on one riser assembly
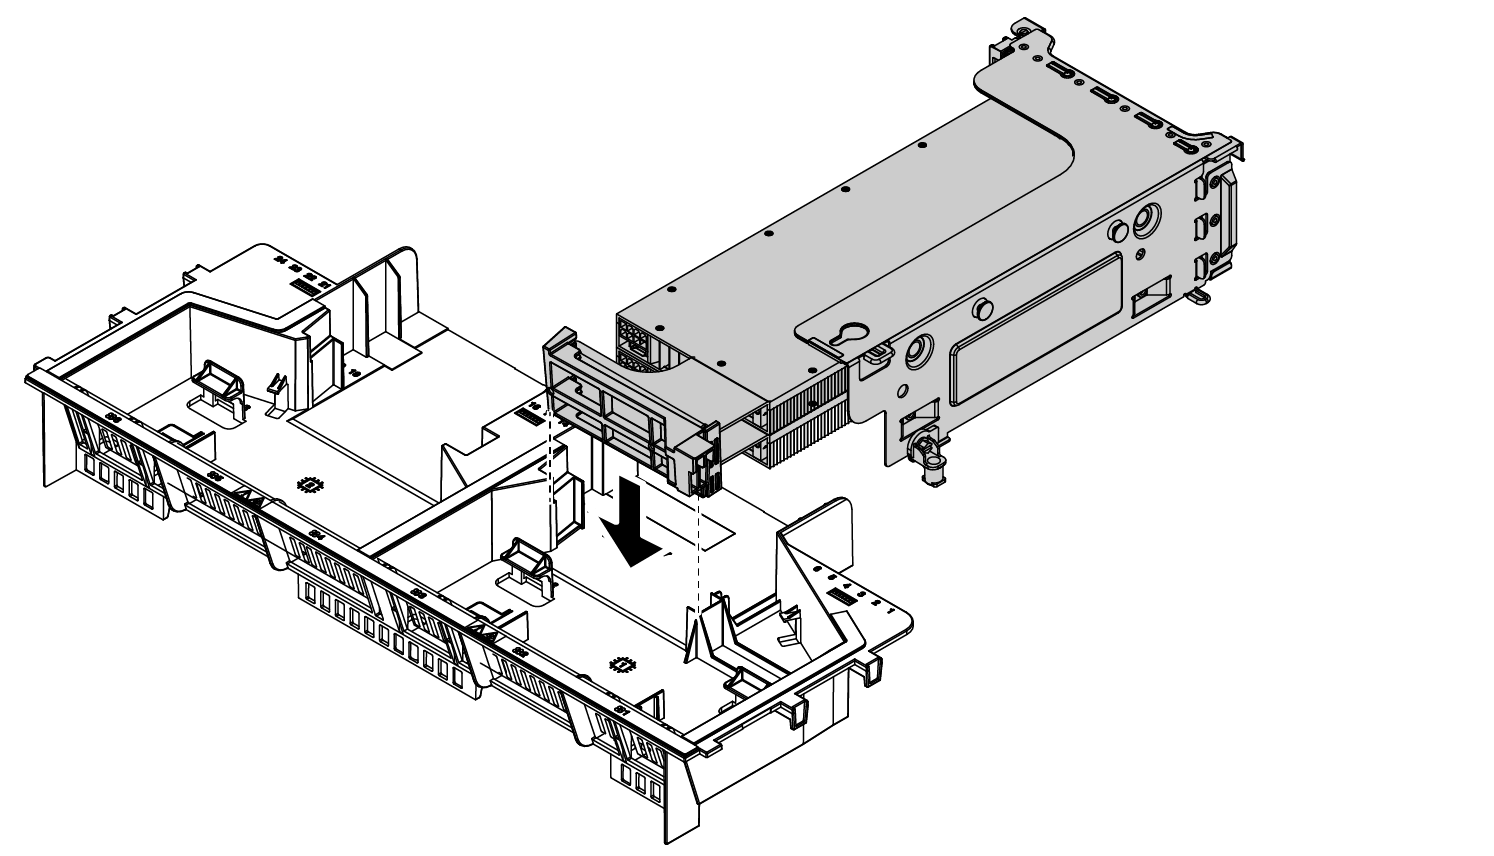
To install a GPU, complete the following steps:
- If you are installing a NVIDIA FHHL V100 GPU, do the following:
One V100 GPU air baffle supports up to two FHHL V100 GPUs installed. If you are installing two FHHL V100 GPUs, remove the middle plate from the V100 GPU air baffle. If you are installing one FHHL V100 GPU, go to the next step.
Figure 7. Middle plate removal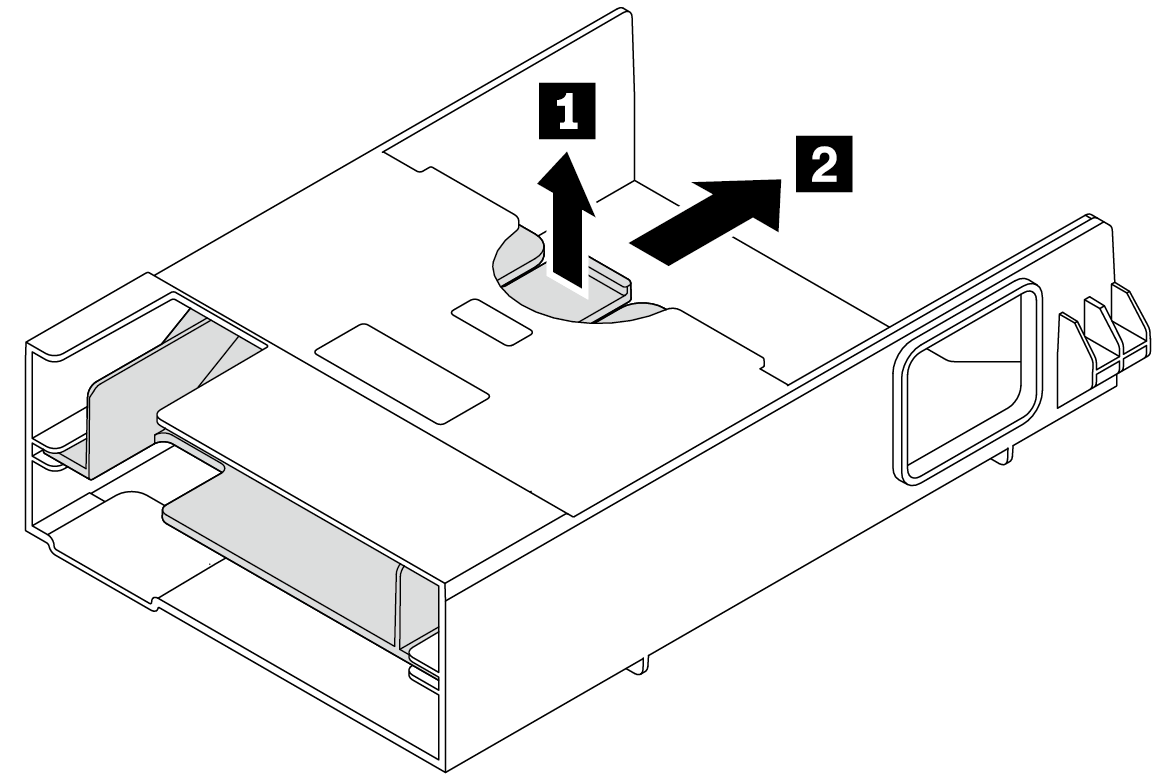
Install the V100 GPU air baffle.
Figure 8. V100 GPU air baffle installation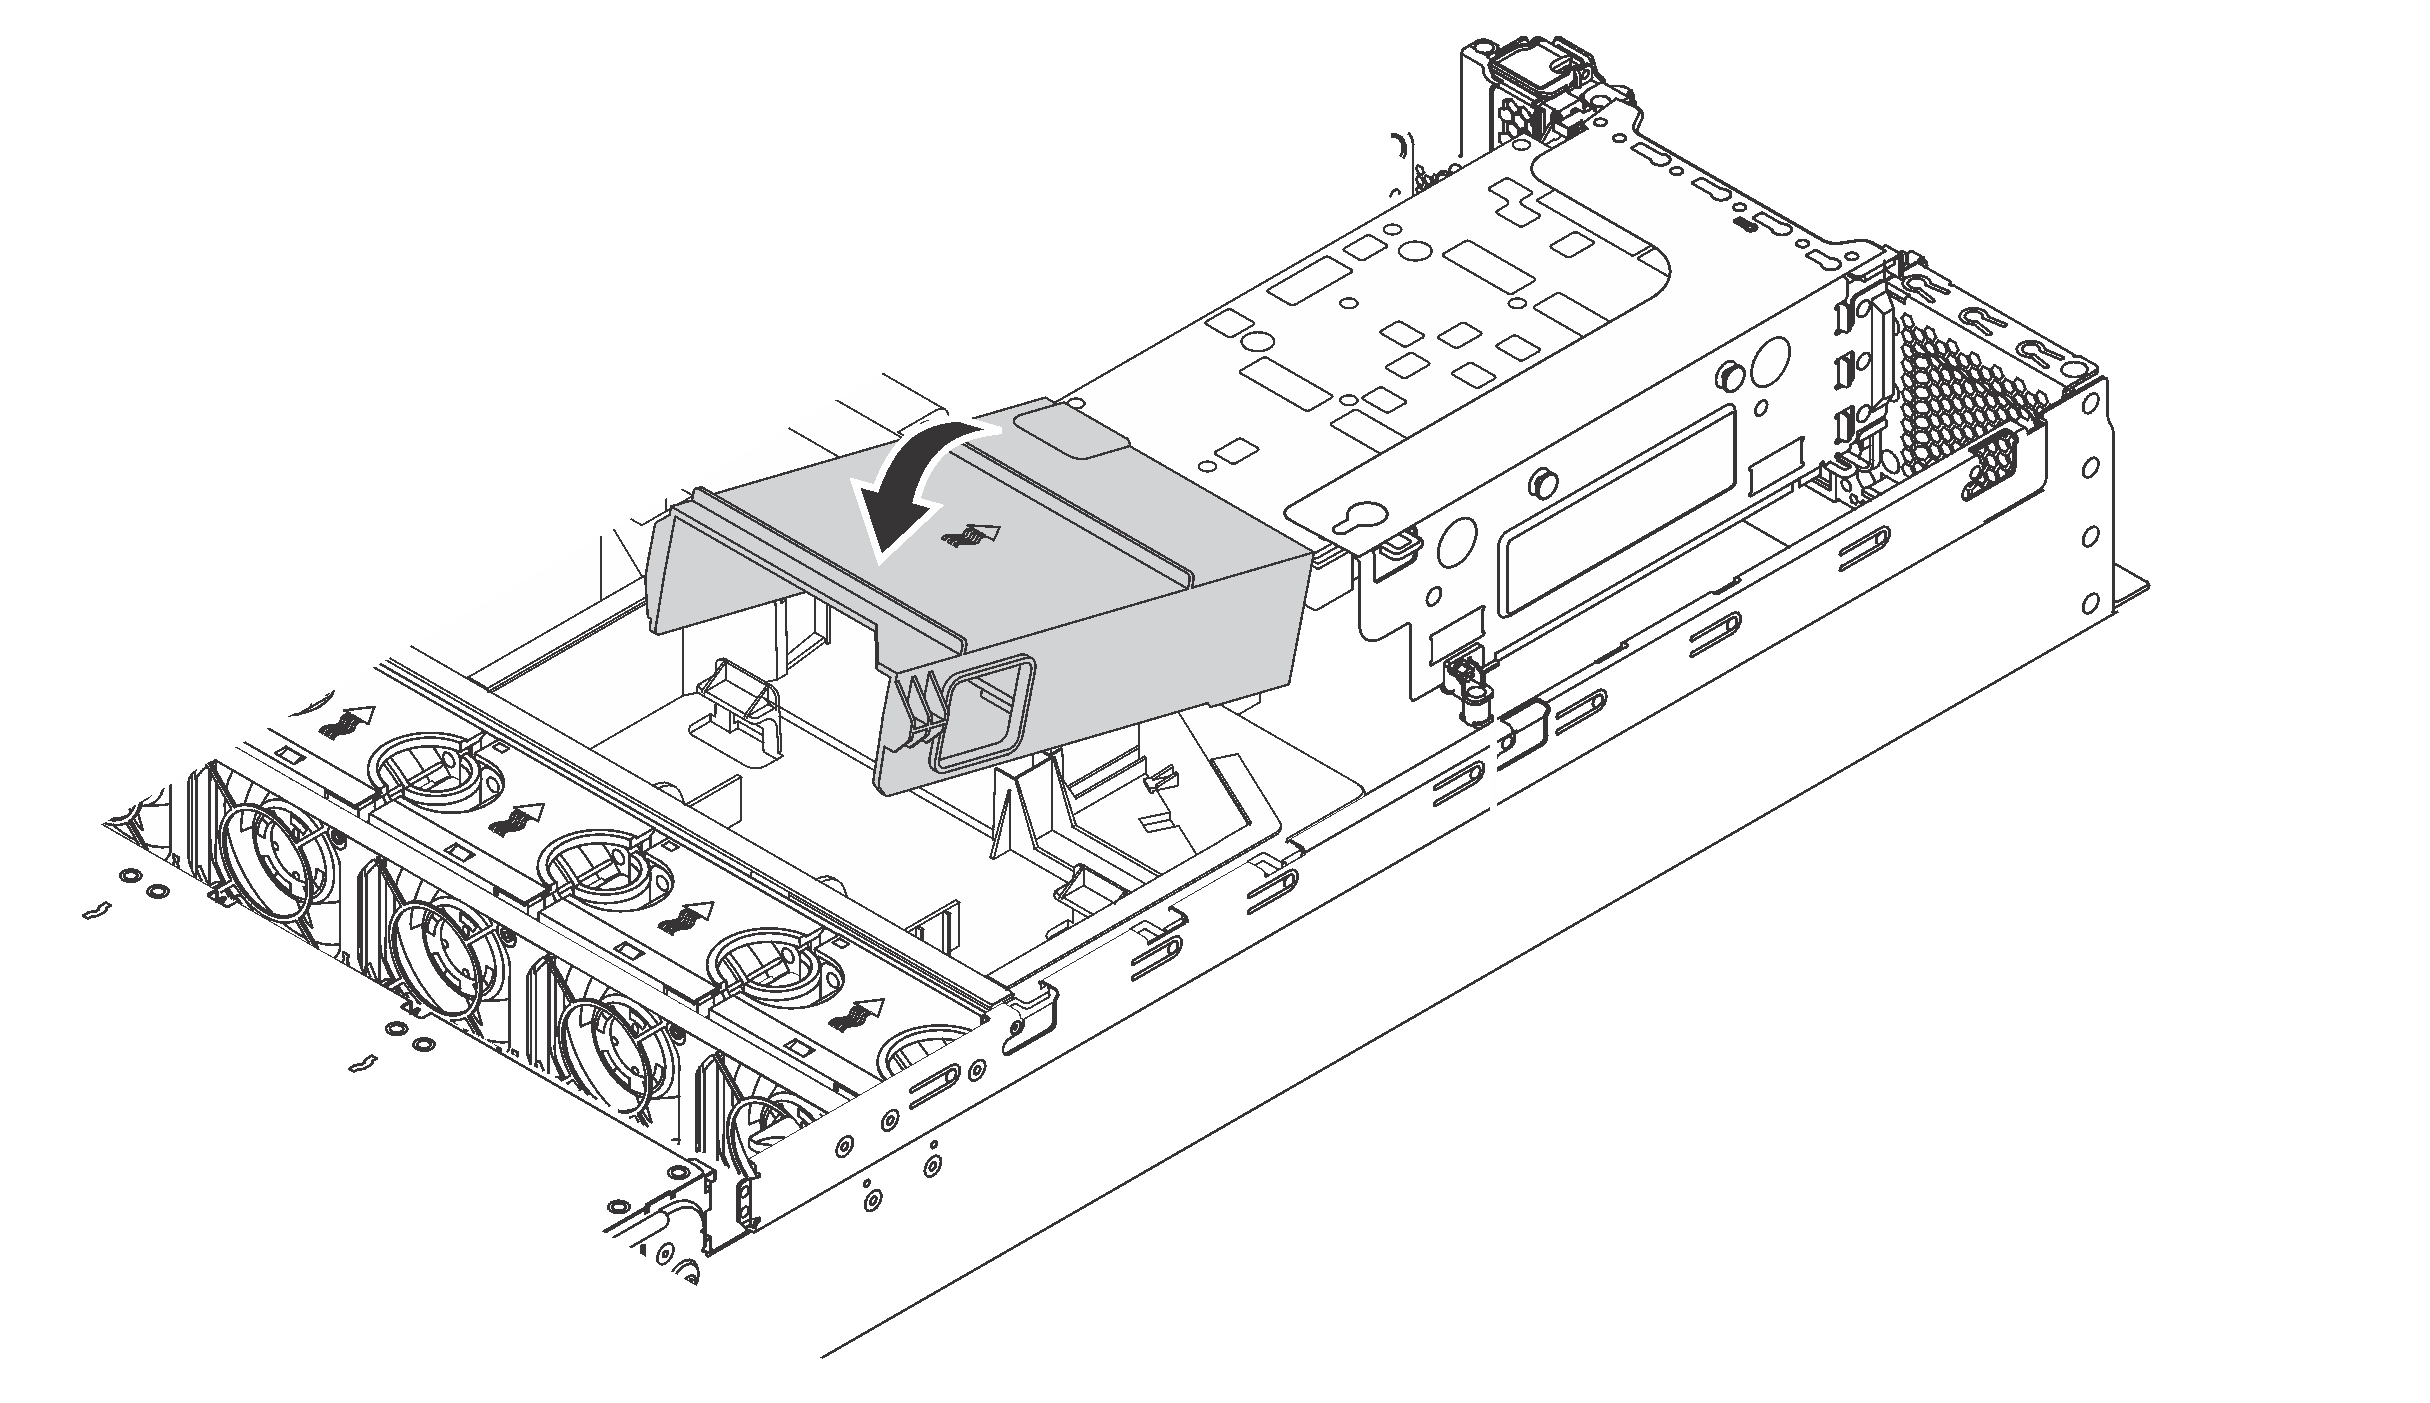
Complete the parts replacement. See Complete the parts replacement.


