Remove a 4U PCIe riser power cable assembly

Use this procedure to remove a 4U PCIe riser power cable assembly.

Before removing a 4U PCIe riser power cable assembly:

  1. Read the safety information and installation guidelines (see Safety and Installation Guidelines).

  2. Turn off the server and peripheral devices and disconnect the power cords and all external cables (see Power off the server).

  3. If the server is installed in a rack, remove the server from the rack.

  4. Remove the top cover (see Remove the top cover).

  5. Remove the PCIe expansion tray (see Remove the PCIe expansion tray).

To remove a 4U PCIe riser power cable assembly, complete the following steps:

Note
When remove both 4U PCIe riser power cable assemblies, always remove the 4U PCIe riser 3 power cable assembly first.
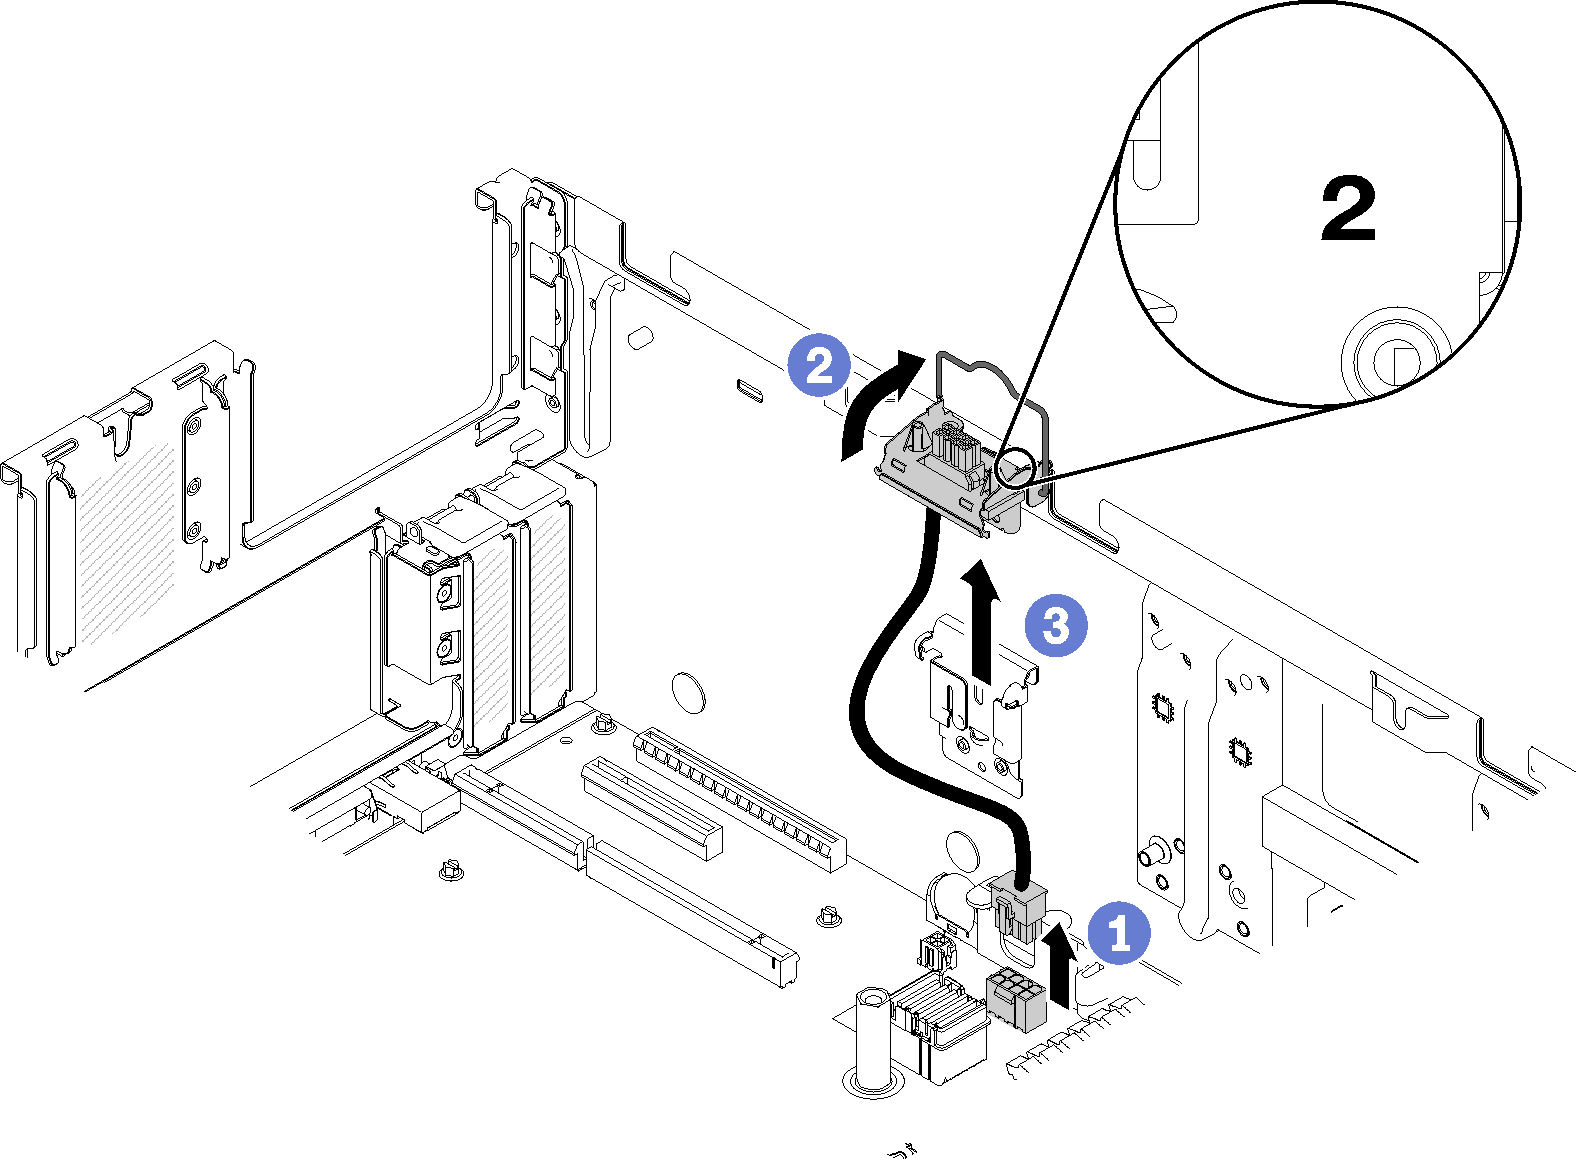
  1. Rotate the handle on the processor and memory expansion tray upward to provide enough space for cable removal; then, disconnect the cable from the power connector on the tray.
  2. Rotate the latch upward.
  3. Lift the 4U PCIe riser power cable assembly out of the server.
    Figure 1. 4U PCIe riser 3 power cable assembly removal


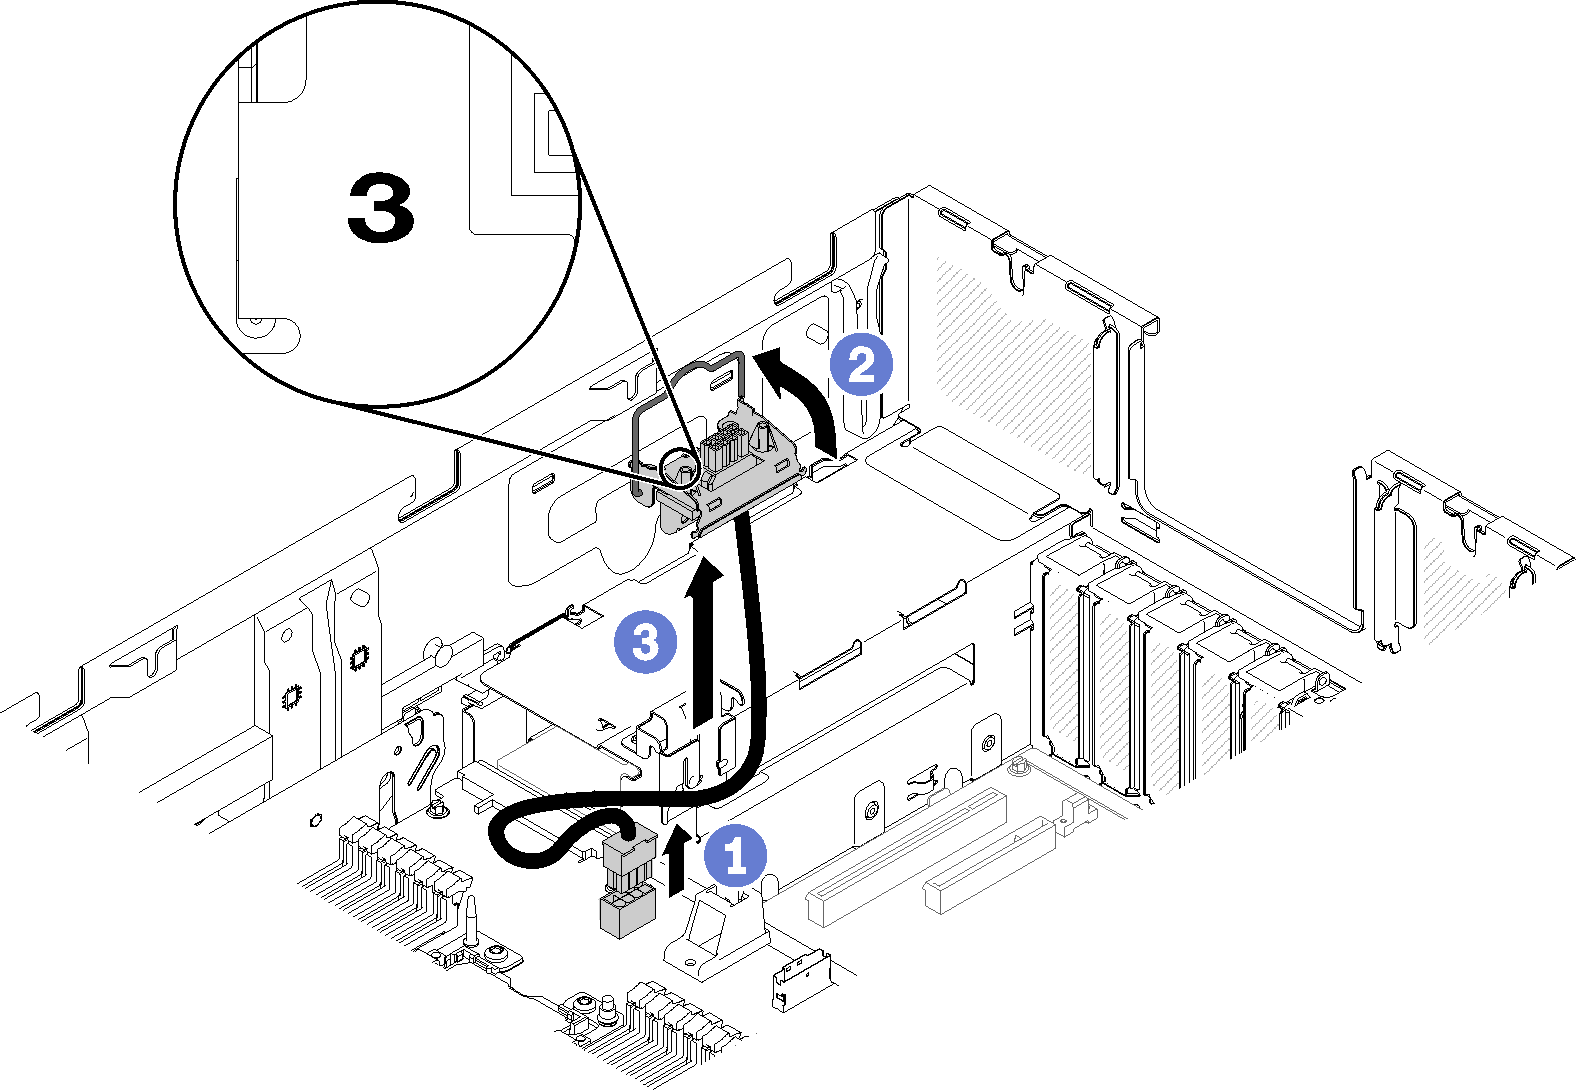
  4. To remove the 4U PCIe riser 2 power cable assembly :
    1. Remove the processor and memory expansion tray (see Remove the processor and memory expansion tray).
    2. Repeat previous steps 2 and 3 to remove the 4U PCIe riser 2 power cable assembly .
      Figure 2. 4U PCIe riser 2 power cable assembly removal


If you are instructed to return the component or optional device, follow all packaging instructions, and use any packaging materials for shipping that are supplied to you.

Demo video
Watch the procedure on YouTube