Install a DIMM
Use this information to install a DIMM.


Disconnect all power cords for this task.
DIMMs are sensitive to static discharge and require special handling. In addition to the standard guidelines for Handling static-sensitive devices:
Always wear an electrostatic-discharge strap when removing or installing DIMMs. Electrostatic-discharge gloves can also be used.
Never hold two or more DIMMs together so that they touch. Do not stack DIMMs directly on top of each other during storage.
Never touch the gold DIMM connector contacts or allow these contacts to touch the outside of the DIMM connector housing.
Handle DIMMs with care: never bend, twist, or drop a DIMM.
Touch the static-protective package that contains the new DIMM to any unpainted surface on the outside of the server. Then, take the new DIMM out of the package and place it on a static-protective surface.
Ensure that you consider and follow the DIMM installation rules when performing the operation. See DIMM installation rules.
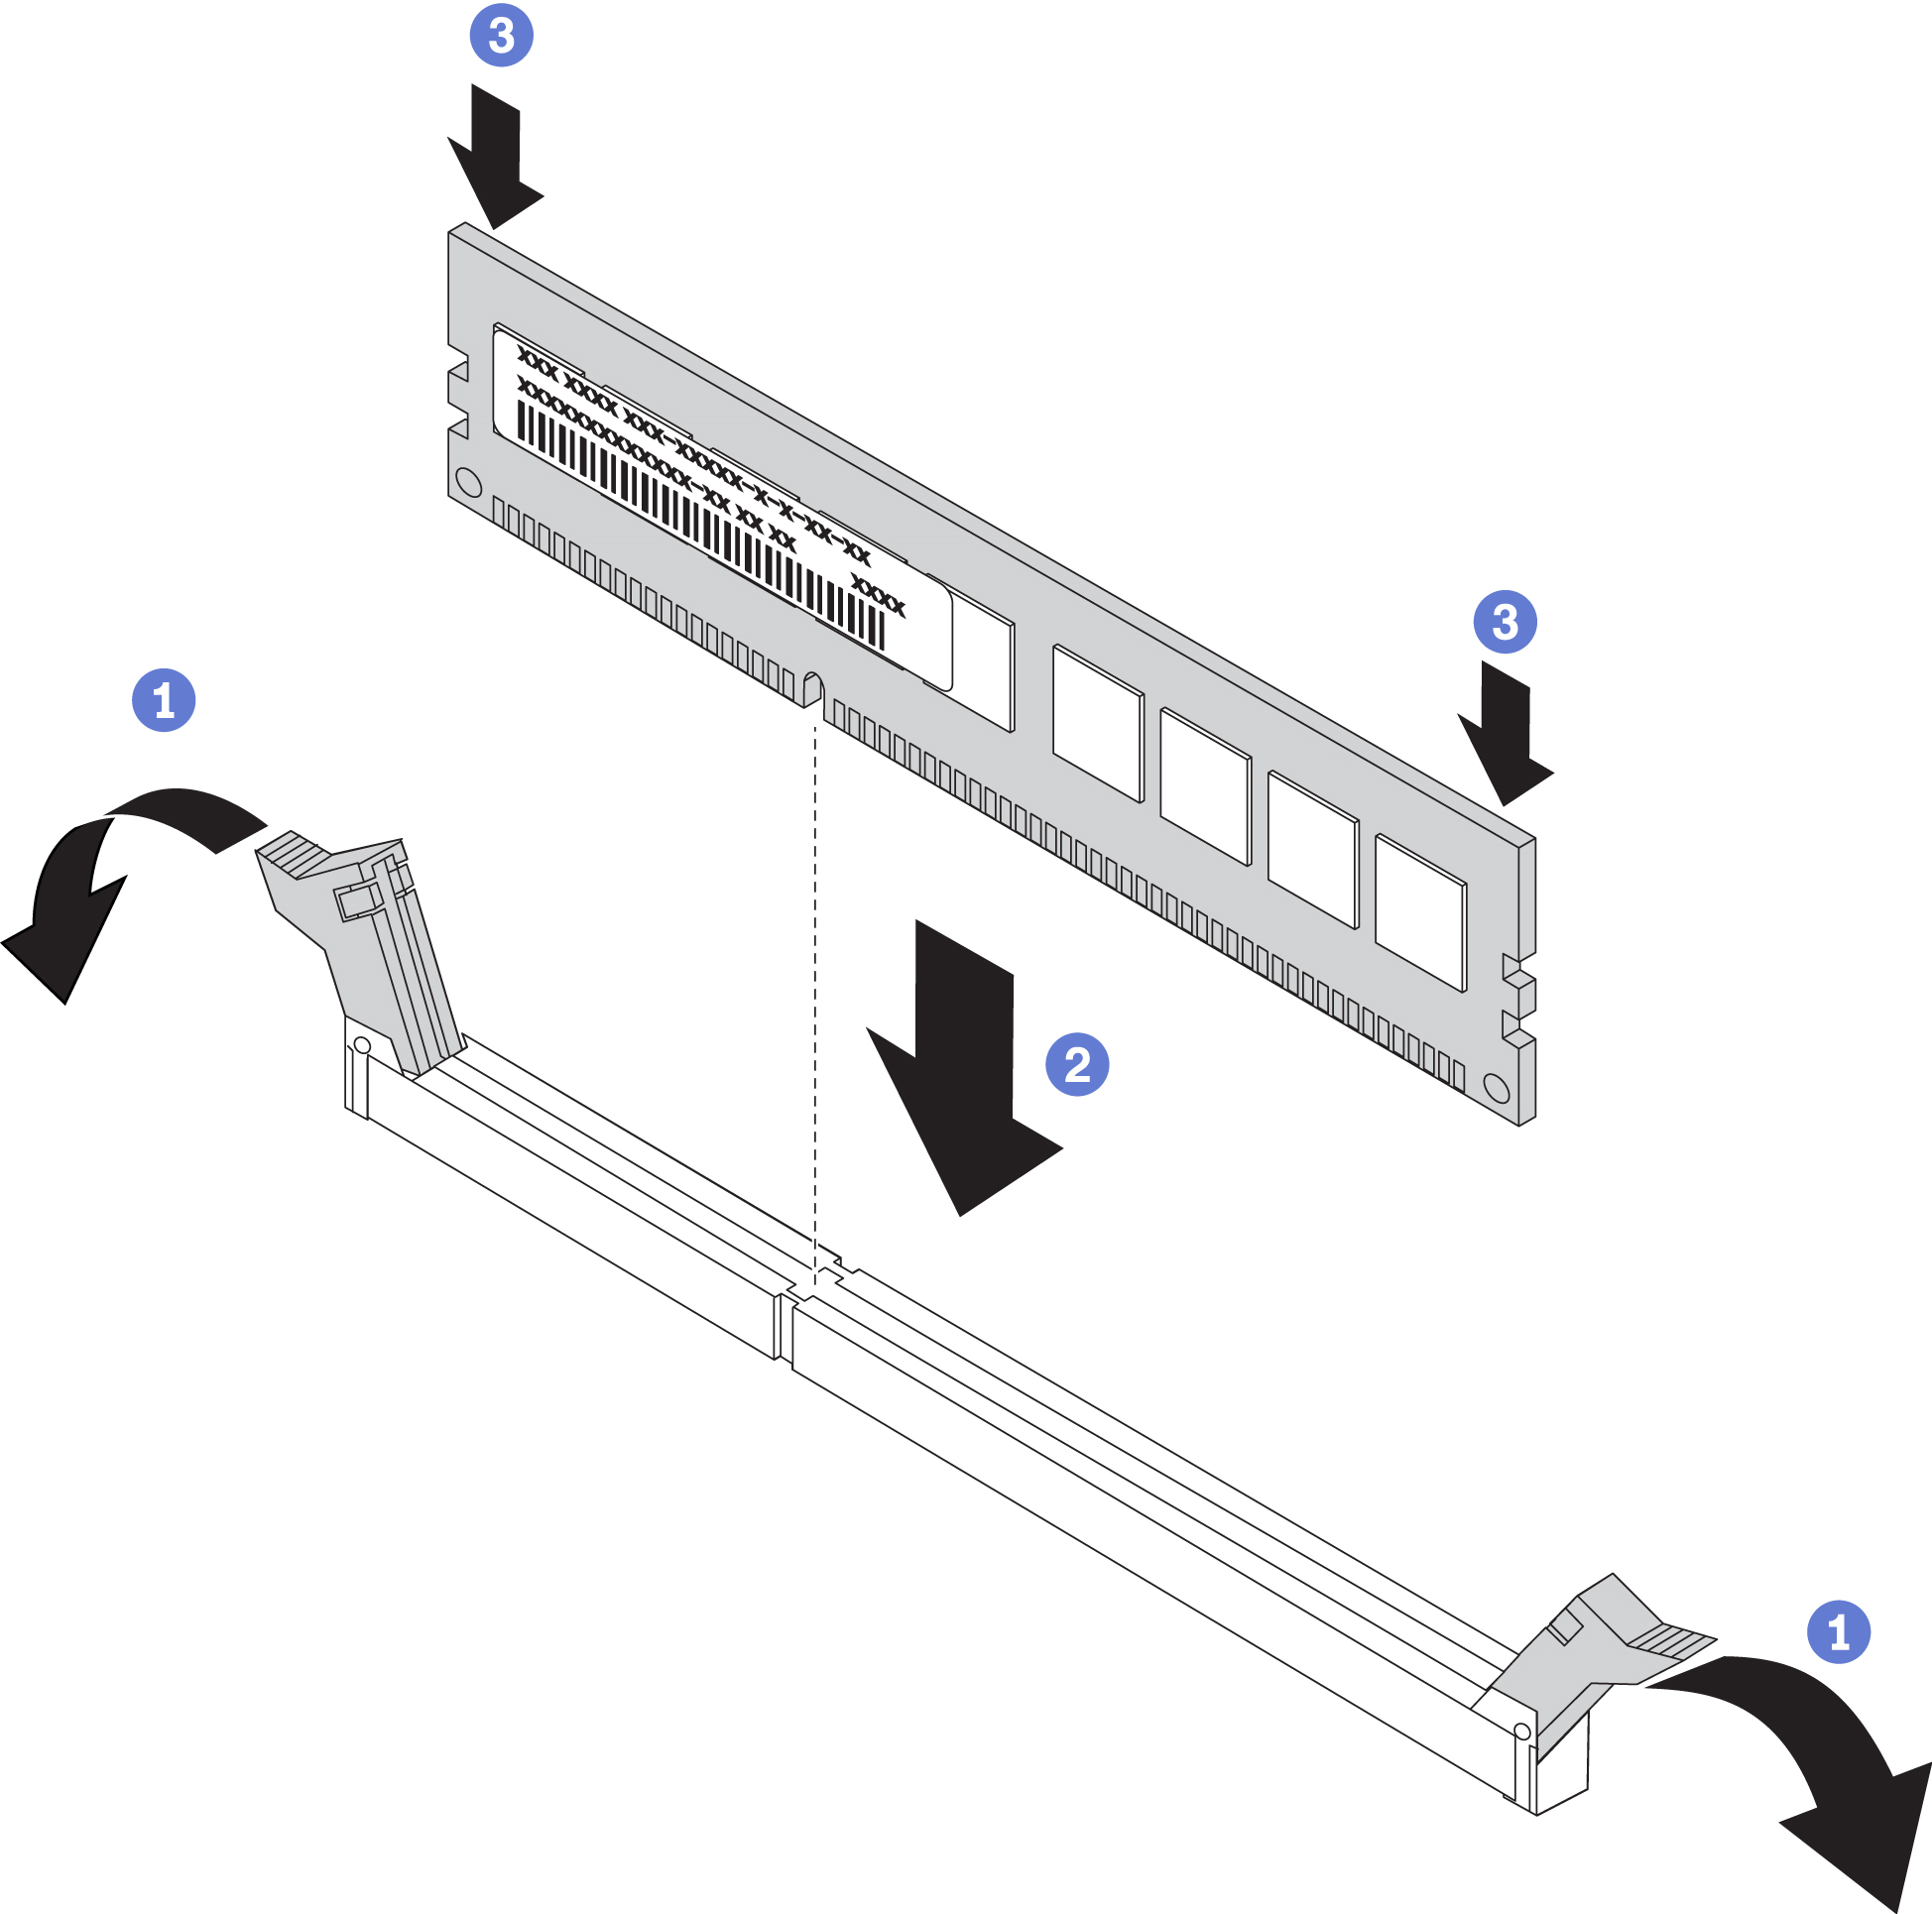
To install a DIMM, complete the following steps:
- A video of this procedure is available at YouTube