
Install the front panel

Use this information to install the front panel.

To install the front panel, complete the following steps:

Watch the procedure
  • A video of this procedure is available at YouTube

  1. Touch the static-protective package that contains the new front panel to any unpainted metal surface on the server. Then, take the new front panel from the package and place it on a static-protective surface.
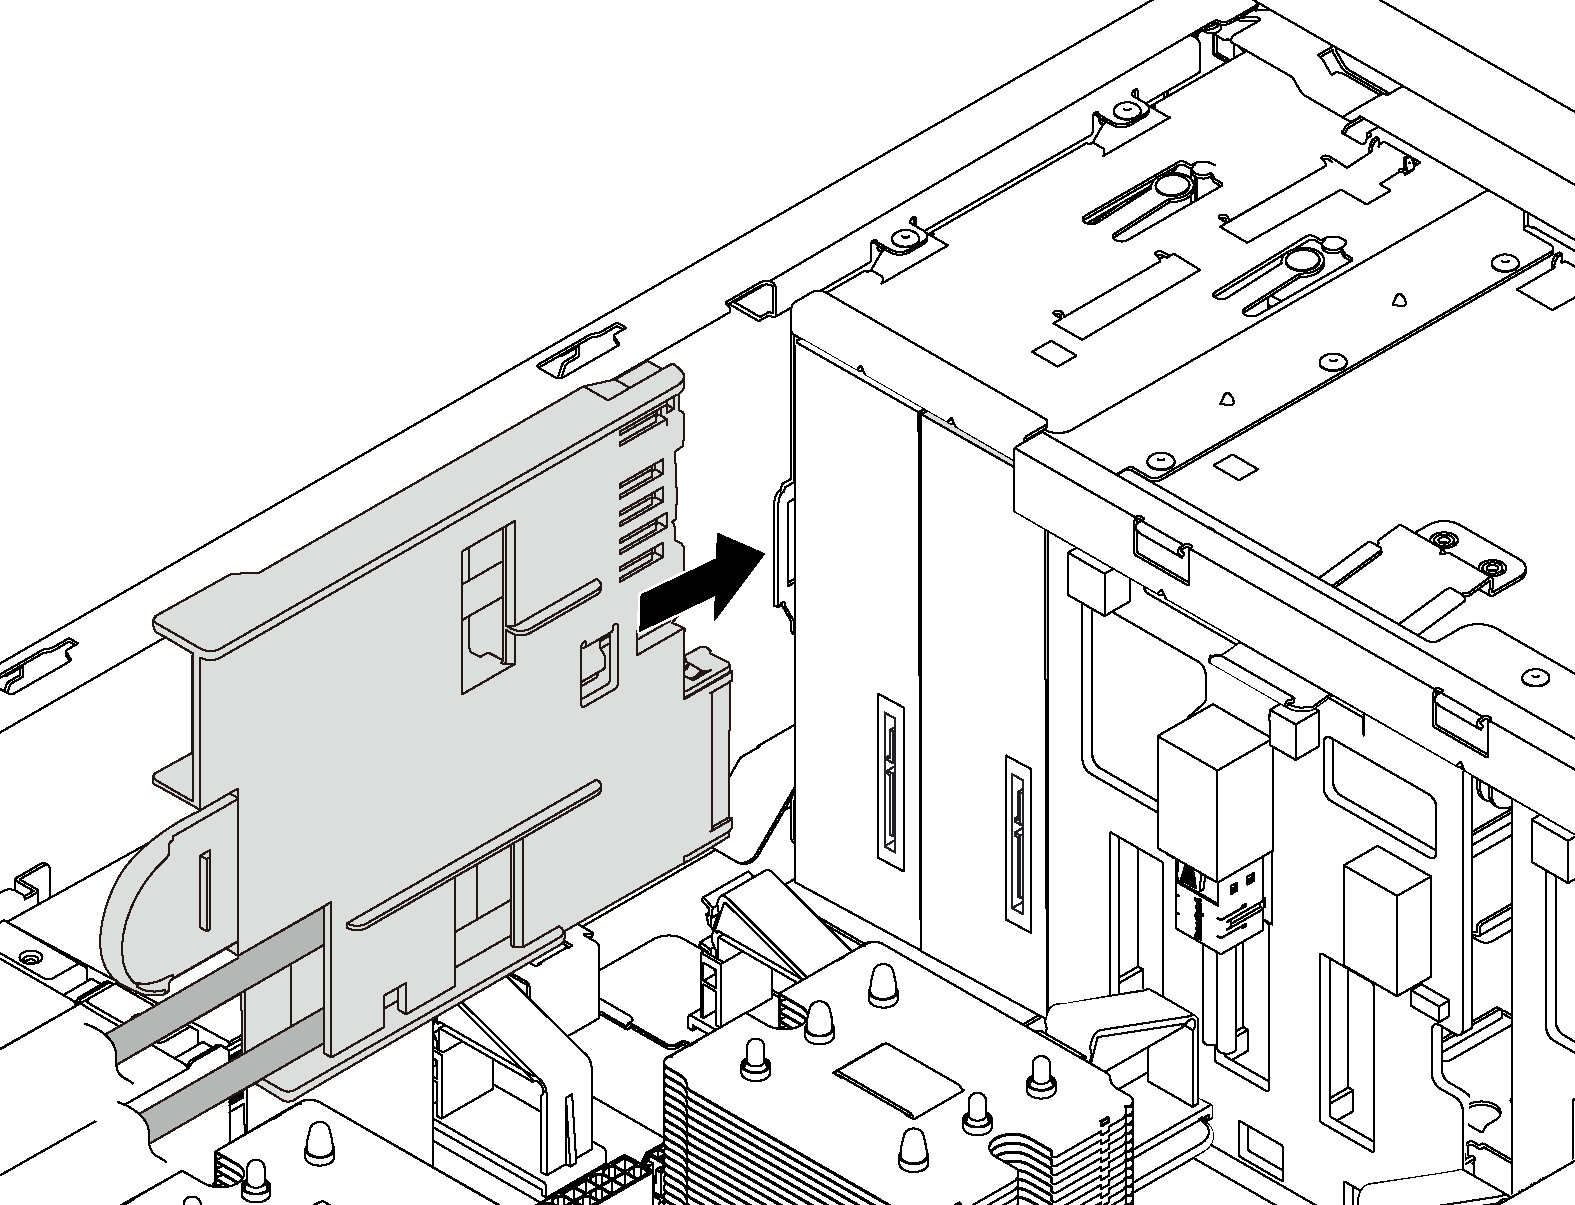
  2. Insert the front panel into the dedicated bay as shown. Then, carefully slide the front panel into the bay until it snaps into place.
    Figure 1. Front panel installation
    Install the front panel.

  3. Carefully route the two front panel cables from the secured front panel along the back side of the storage drive bays. Manage the cables so that they are secured by the clips under the front fans or fan fillers.
    Important
    The front panel cables and all other cables in this space must be secured by the clips so that it is possible to install the fans or fan fillers over the cables.
  4. Connect the front panel cables to the corresponding connectors on the system board. For more information, see Front panel.

After installing the front panel, complete the parts replacement. See Complete the parts replacement.