Install the EIA brackets
See this section to learn how to install the EIA brackets.
Procedure
- If foot stands are installed on your tower server, lay the server on its side and remove them first.
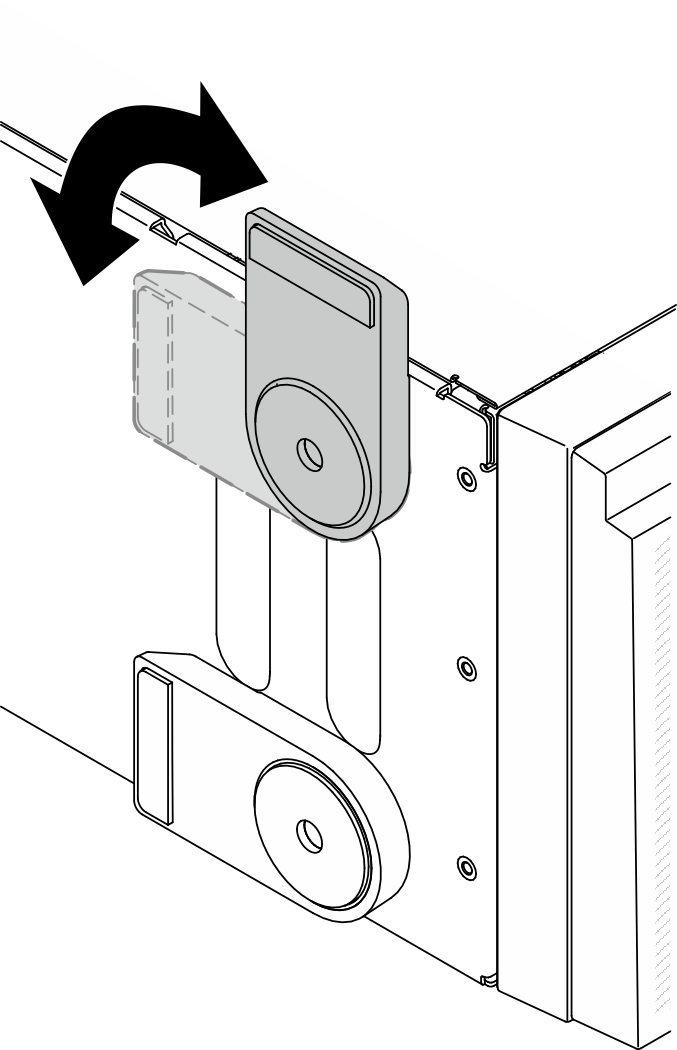
- For each foot stand, rotate the foot stand inwards.Figure 1. Adjusting foot stand
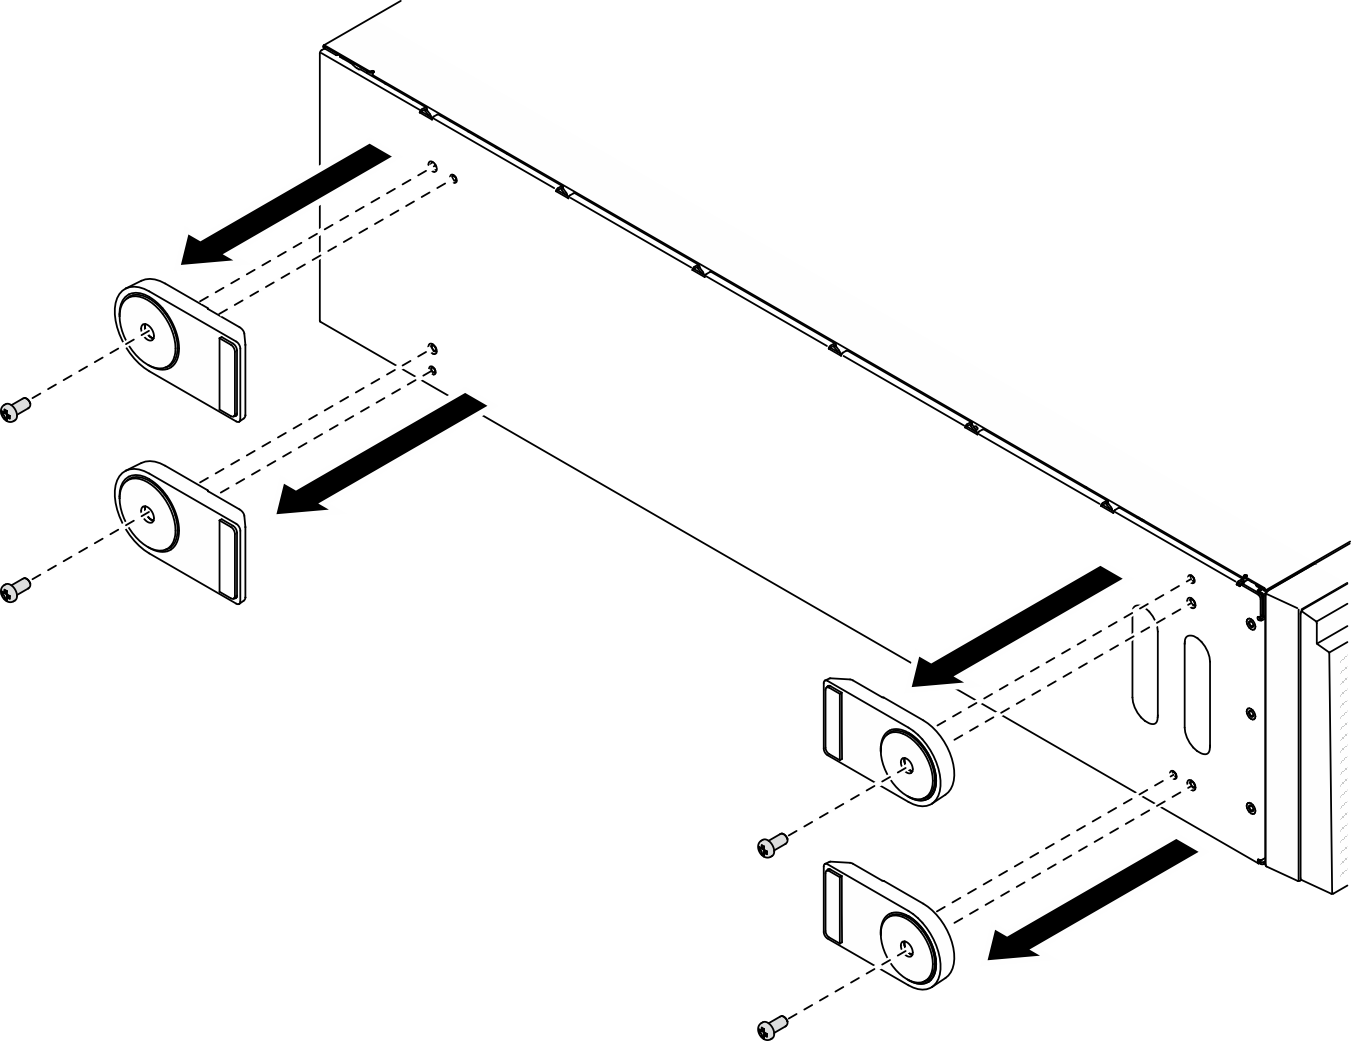
- For each foot stand, use a screwdriver to remove the screw that secures the foot stand; then, remove the foot stand from the chassis.Figure 2. Removing foot stand
- For each foot stand, rotate the foot stand inwards.
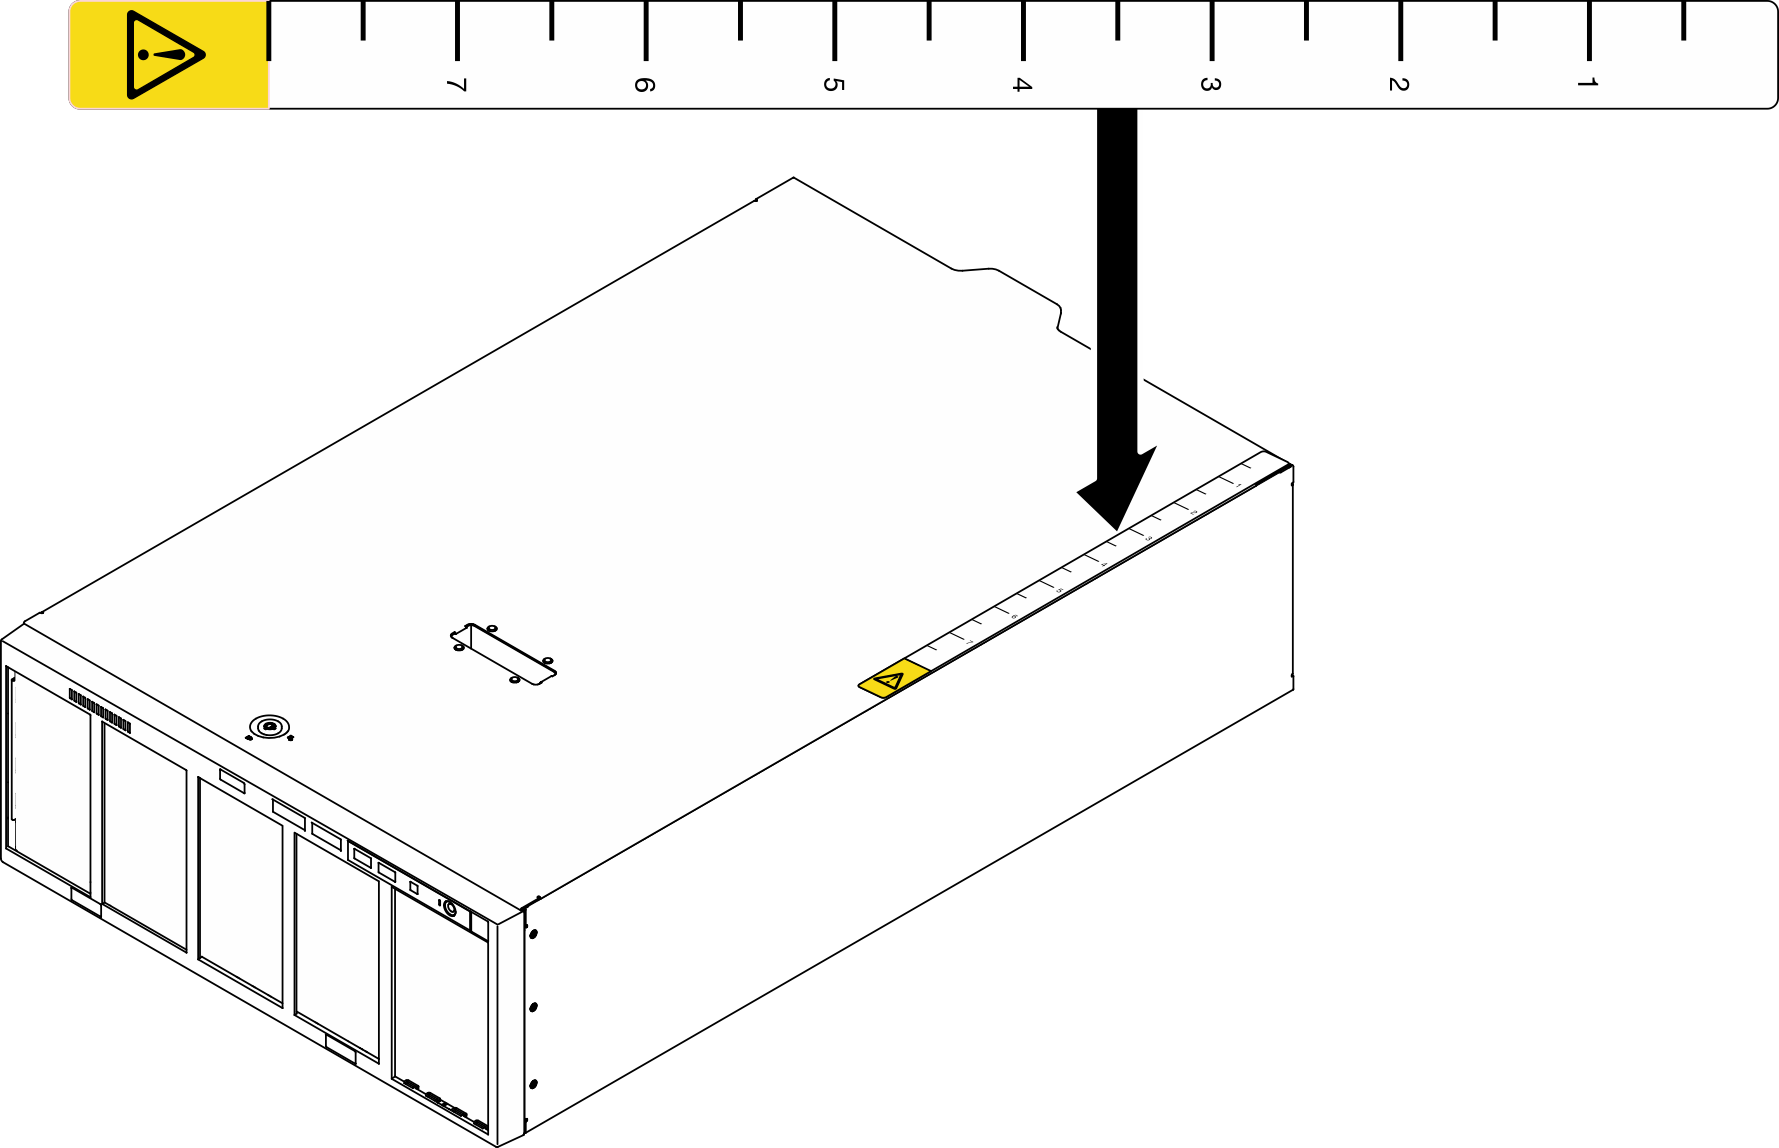
- Lay the server on its side; peel away the plastic and apply ruler label to rear corner of side cover as shown.Figure 3. Applying ruler label
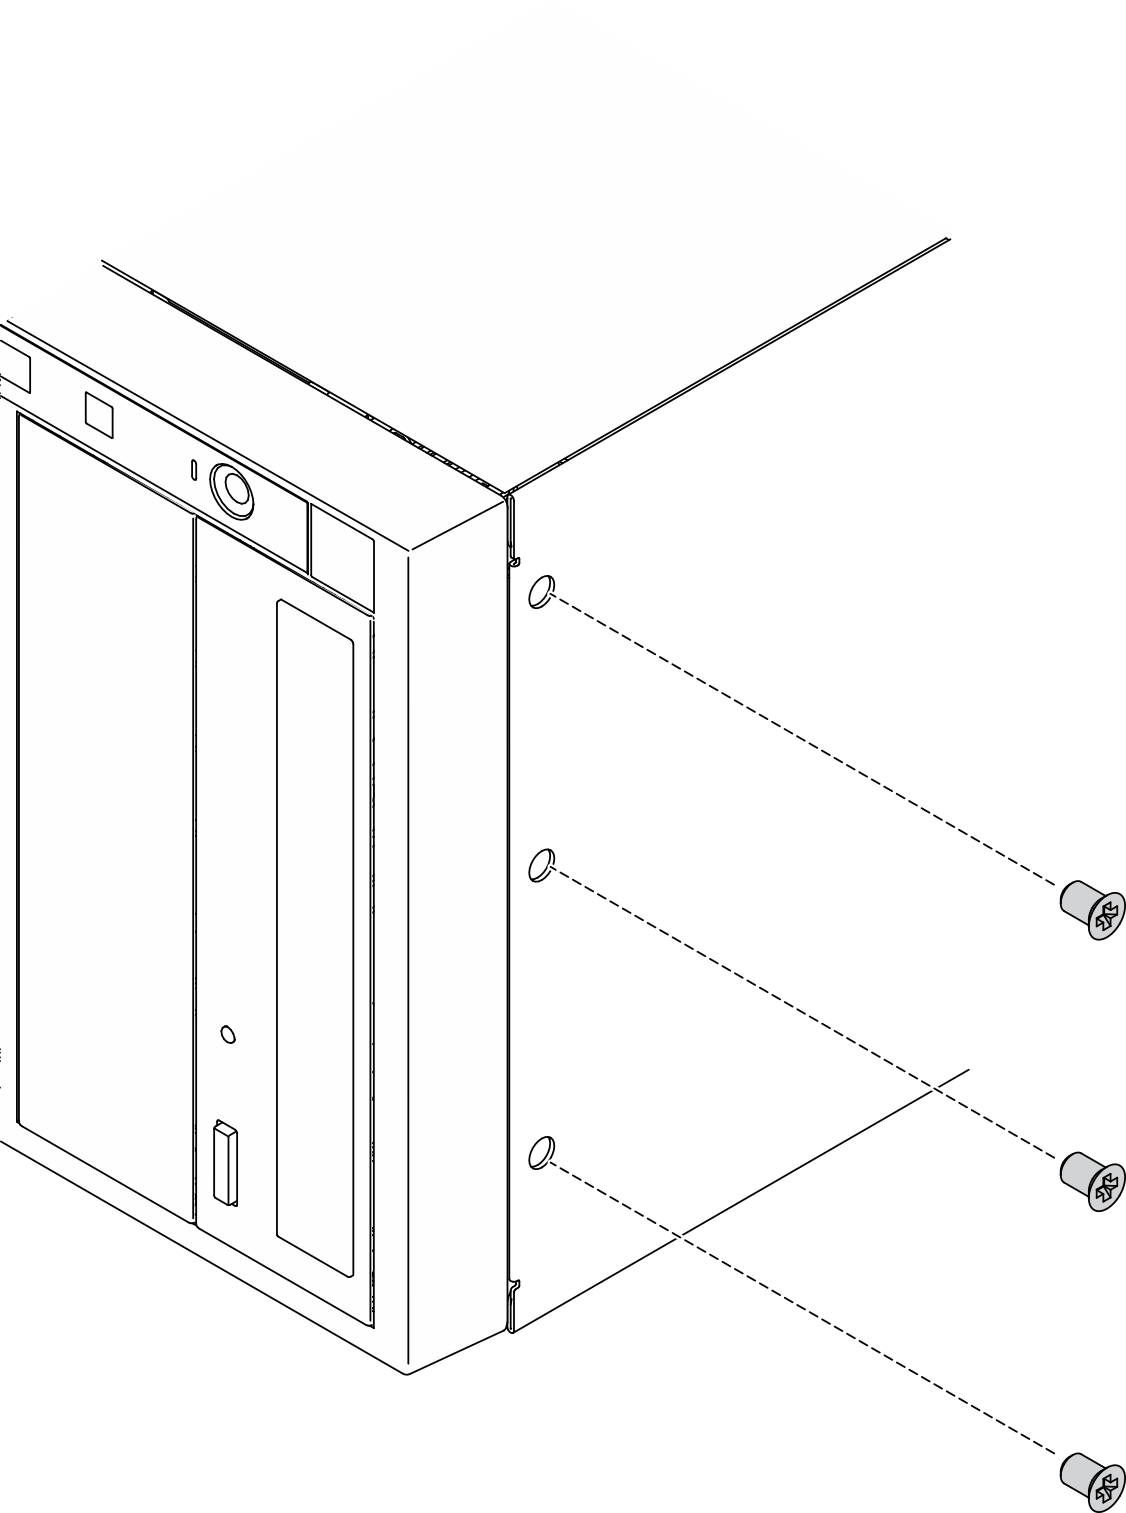
- Use a screwdriver to remove the three screws on the top of the chassis.Figure 4. Removing screws on top of chassis
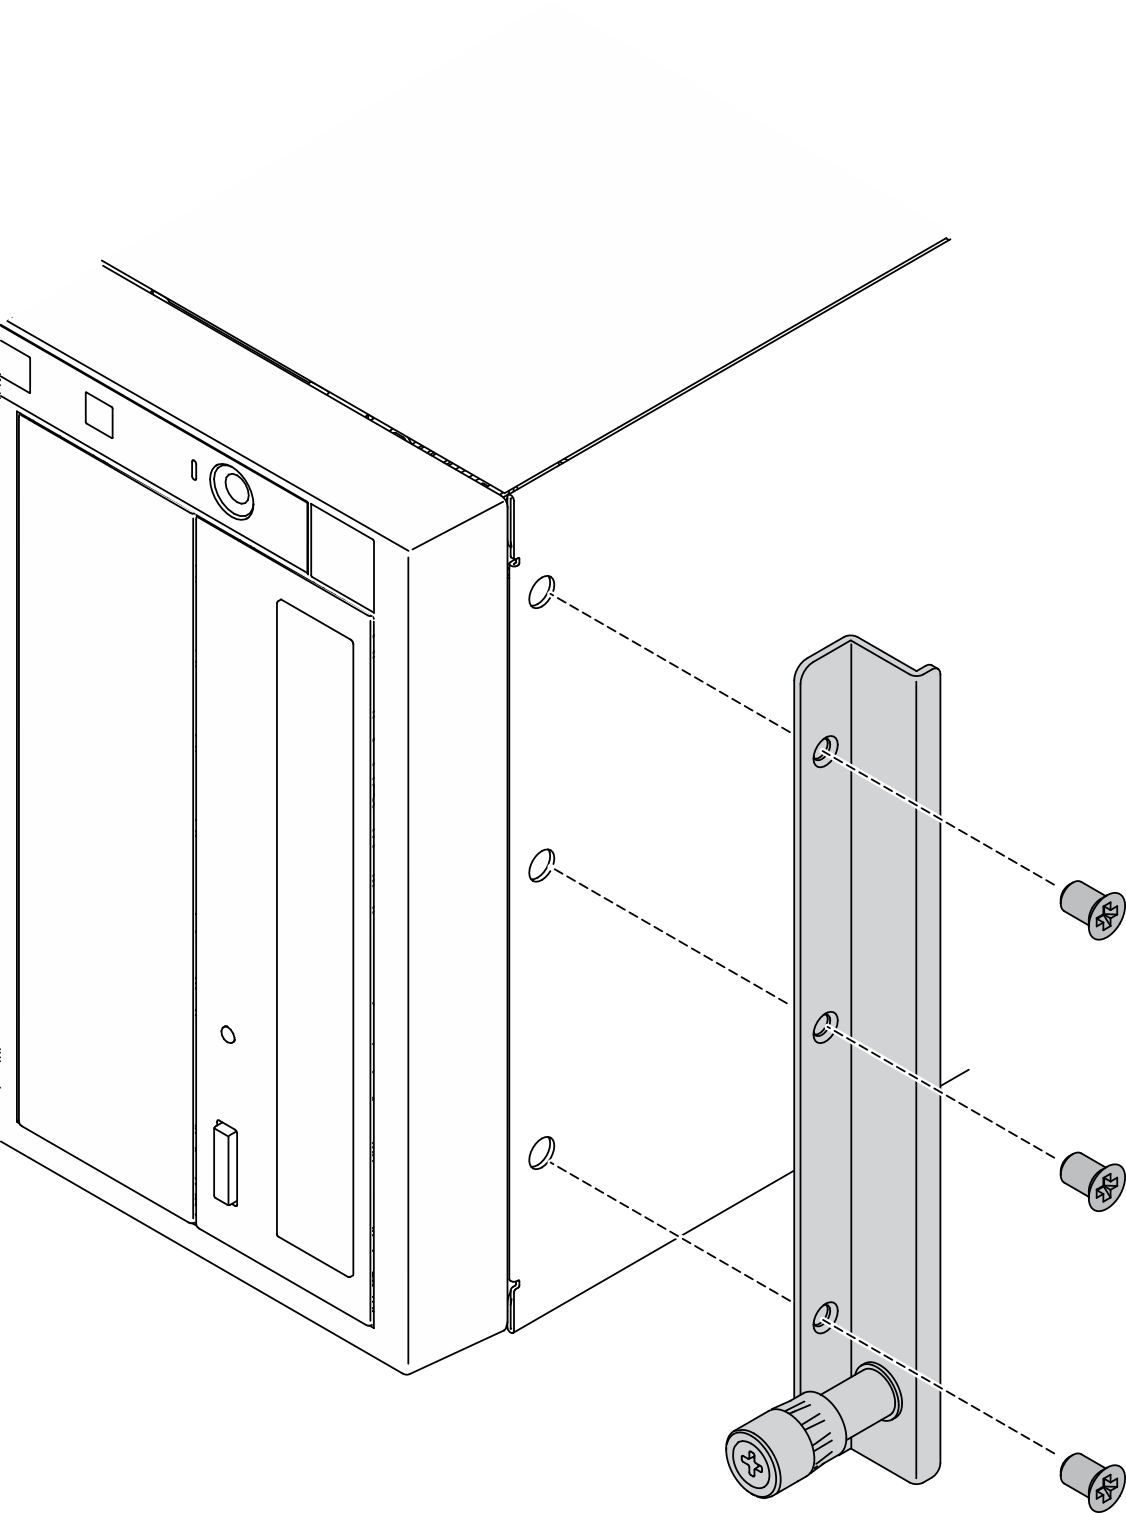
- Align the holes in the right EIA bracket with the corresponding holes on the top of the chassis; then, use a screwdriver to reinstall the three screws that you removed to secure the right EIA bracket.Figure 5. Installing right EIA bracket
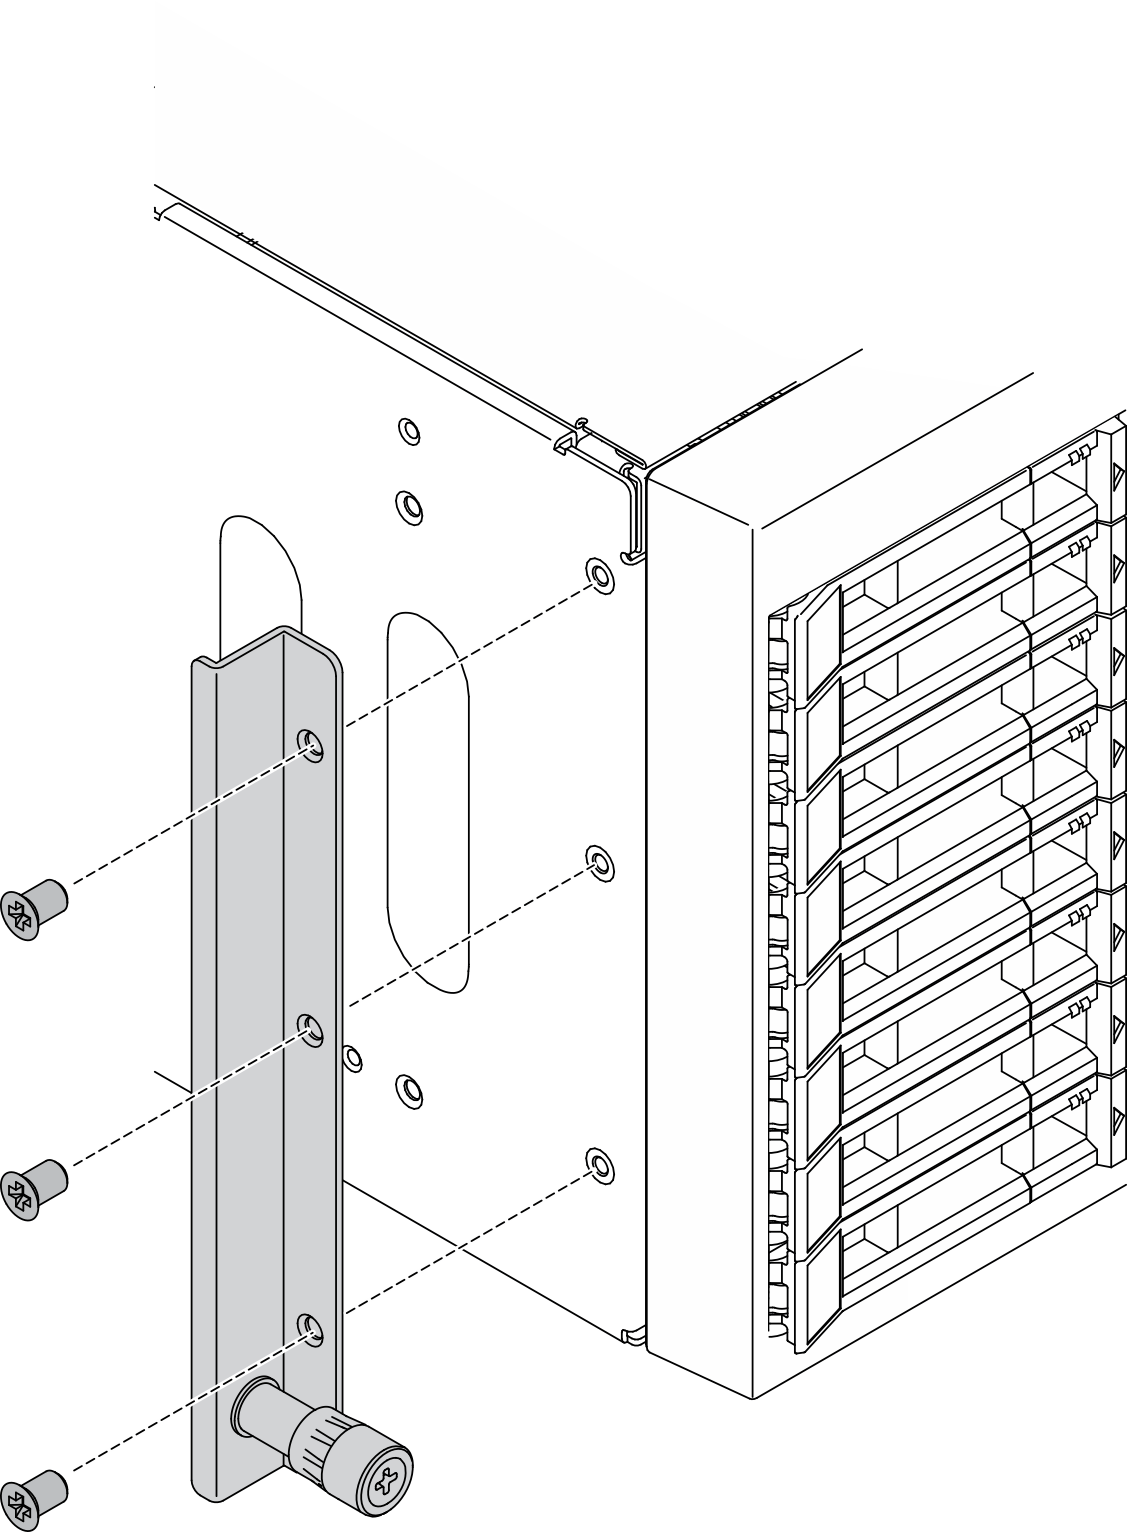
- Align the holes in the left EIA bracket with the corresponding holes on the bottom of the chassis; then, use a screwdriver to install the three screws to secure the left EIA bracket.Figure 6. Installing left EIA bracket
Demo video
Give documentation feedback