Remove the riser assembly from the node
Follow instructions in this section to remove the riser assembly from the node.
About this task
Read Installation Guidelines and Safety inspection checklist to ensure that you work safely.
Power off the server and peripheral devices and disconnect the power cords and all external cables. See Power off the server.
If the node is installed in an enclosure or mounted, remove the node from the enclosure or mount. See Configuration guide.
Procedure
- Disengage the riser assembly from the node.
 Loosen the two thumbscrews in the front of the riser assembly.
 Loosen the three screws on both sides of the node.
 Loosen the three captive screws on the top of the riser assembly.
Figure 1. Disengaging the riser assembly
- Lift the riser assembly from the node.Figure 2. Lifting the riser assembly
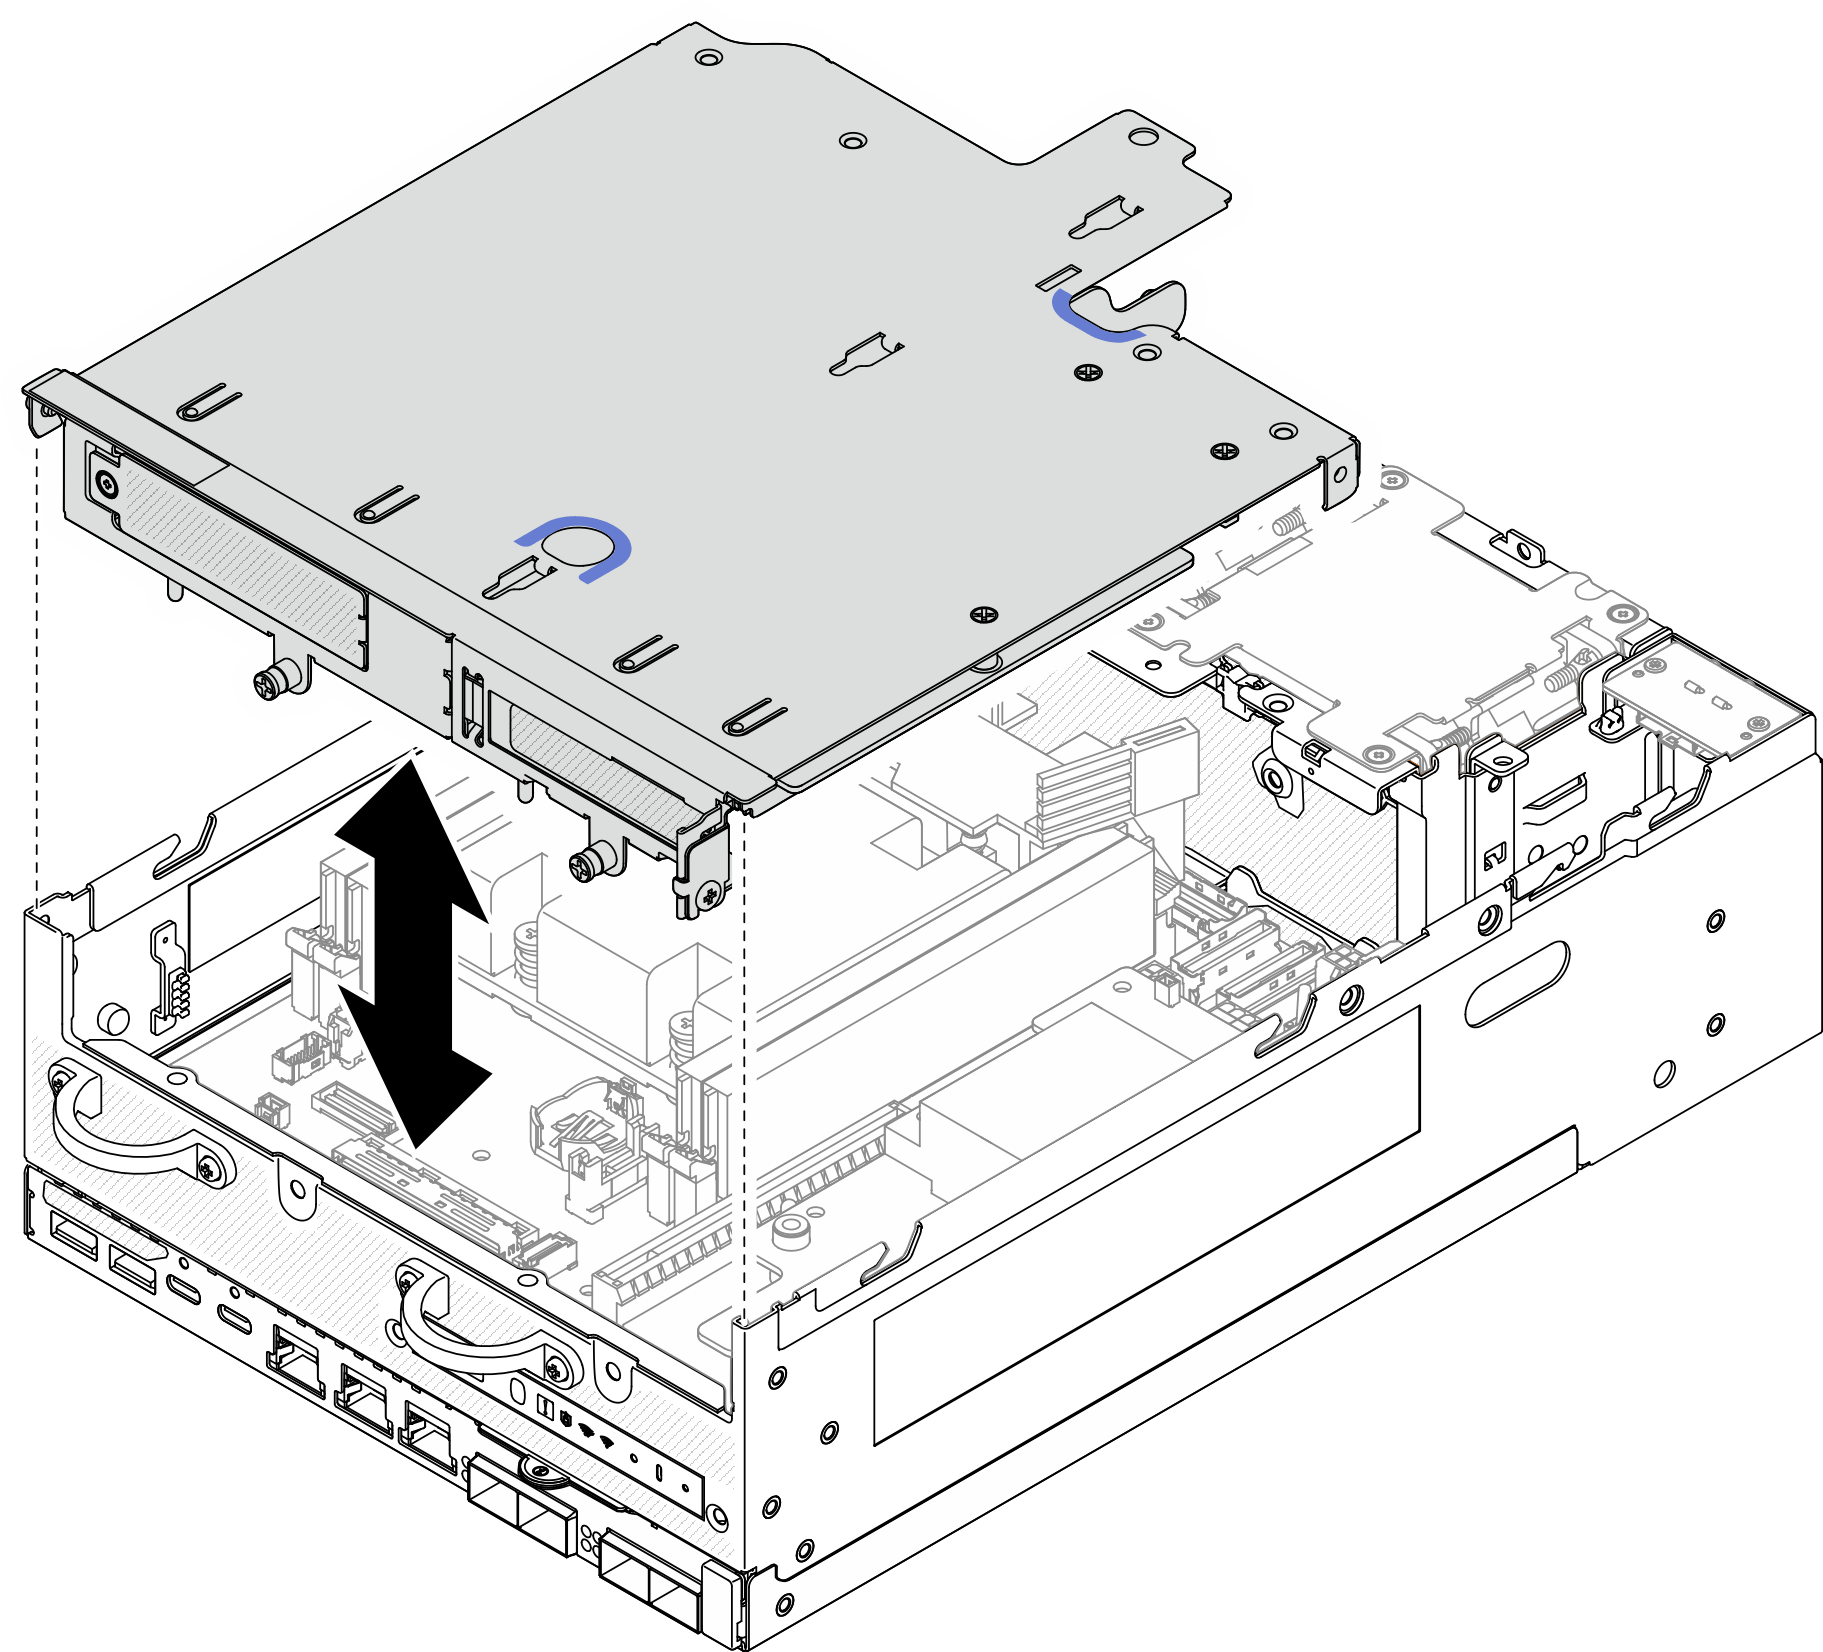 NoteIf necessary, after lifting the riser assembly, place the assembly on the top of the fan modules for easier operation.
After this task is completed
To remove the components of the riser assembly, proceed to the section corresponding to the component to be removed:
To reinstall the riser assembly to the node, see Install the riser assembly to the node.
If you are instructed to return the component or optional device, follow all packaging instructions, and use any packaging materials for shipping that are supplied to you.
Demo Video