Install components to the right wing of riser assembly
Follow instructions in this section to install components to the right wing of riser assembly.
About this task
Read Installation Guidelines and Safety inspection checklist to ensure that you work safely.
Power off the server and peripheral devices and disconnect the power cords and all external cables. See Power off the server.
Touch the static-protective package that contains the component to any unpainted metal surface on the server; then, remove it from the package and place it on a static-protective surface.
Install the M.2 assembly
- Install an M.2 drive to the M.2 adapter.
- Locate the slot to install the M.2 drive.
Top side of M.2 adapter 
1 Slot 9 / M.2 Bay 8 2 Slot 7 / M.2 Bay 6 Bottom side of M.2 adapter 
1 Slot 10 / M.2 Bay 9 2 Slot 8 / M.2 Bay 7  Hold the M.2 drive at an angle, and insert the drive into the M.2 slot.
 Lower the rear side of the M.2 drive down to the M.2 adapter.
 Secure the M.2 drive with one screw.
Figure 1. Installing an M.2 drive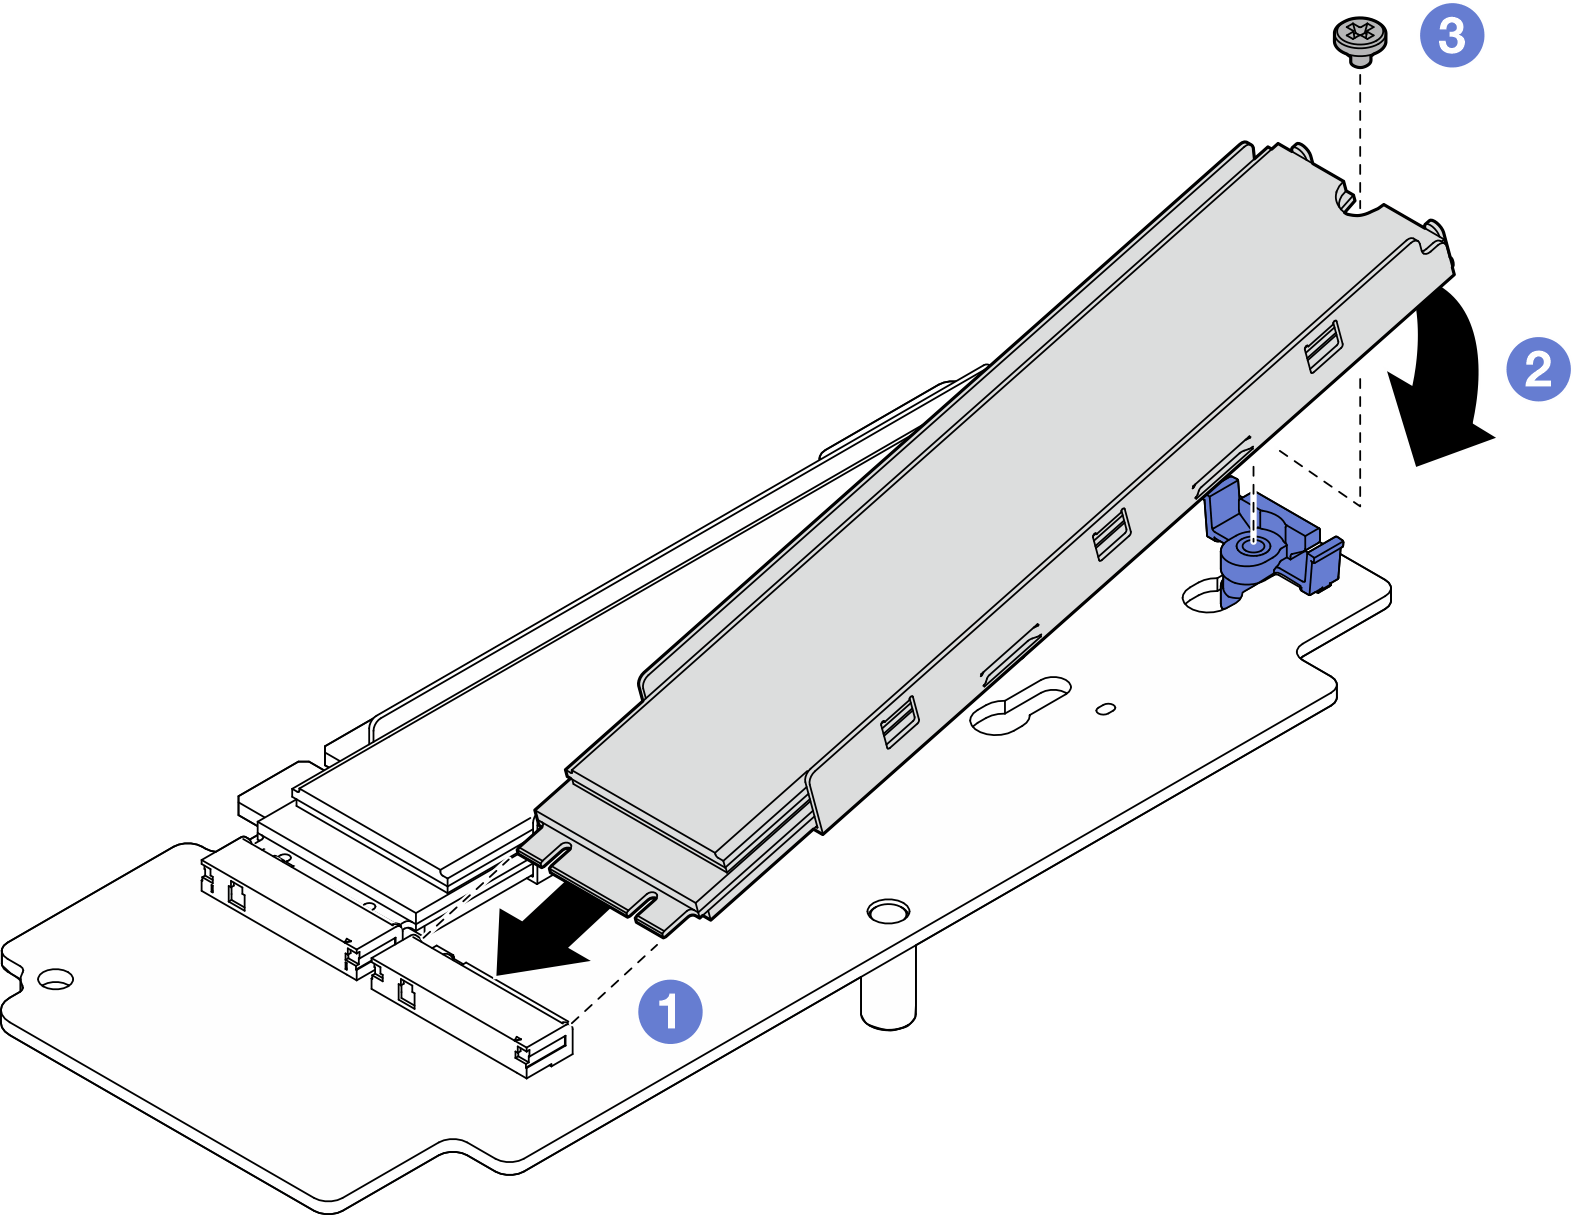 Note
NoteIf necessary, repeat this procedure to other M.2 drives to be installed.
- Locate the slot to install the M.2 drive.
- Install the M.2 riser card to the riser cage.
- Align the riser card with the guide pins on the riser cage; then, insert and slide the riser card downward until the guide pins are seated in the small opening of the keyholes.
- Secure the riser card with two screws.
Figure 2. Installing the riser card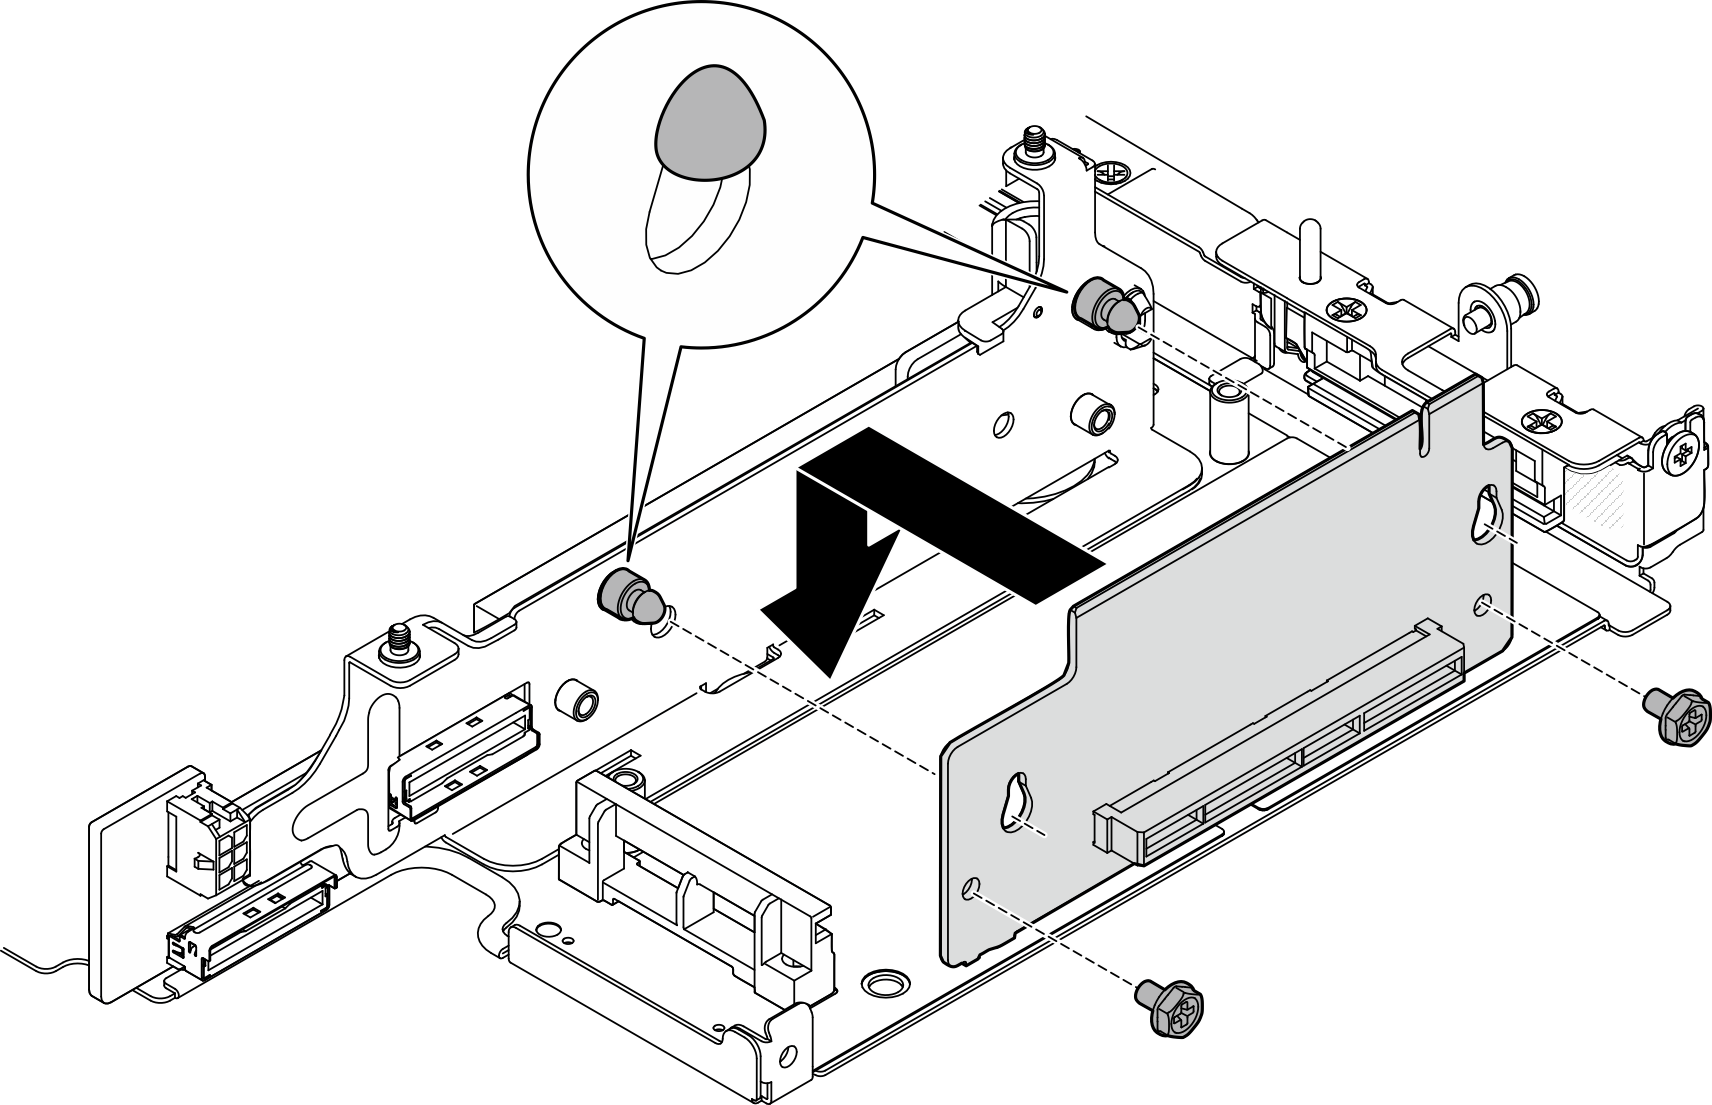
- Install the M.2 adapter to the riser cage.
- Align the M.2 adapter with the slot; then, slide the adapter into the slot until it is firmly seated.
- Tighten two screws to the top side of the M.2 adapter.
- Tighten one screw to the bottom side of the M.2 adapter.
Figure 3. Installing the M.2 adapter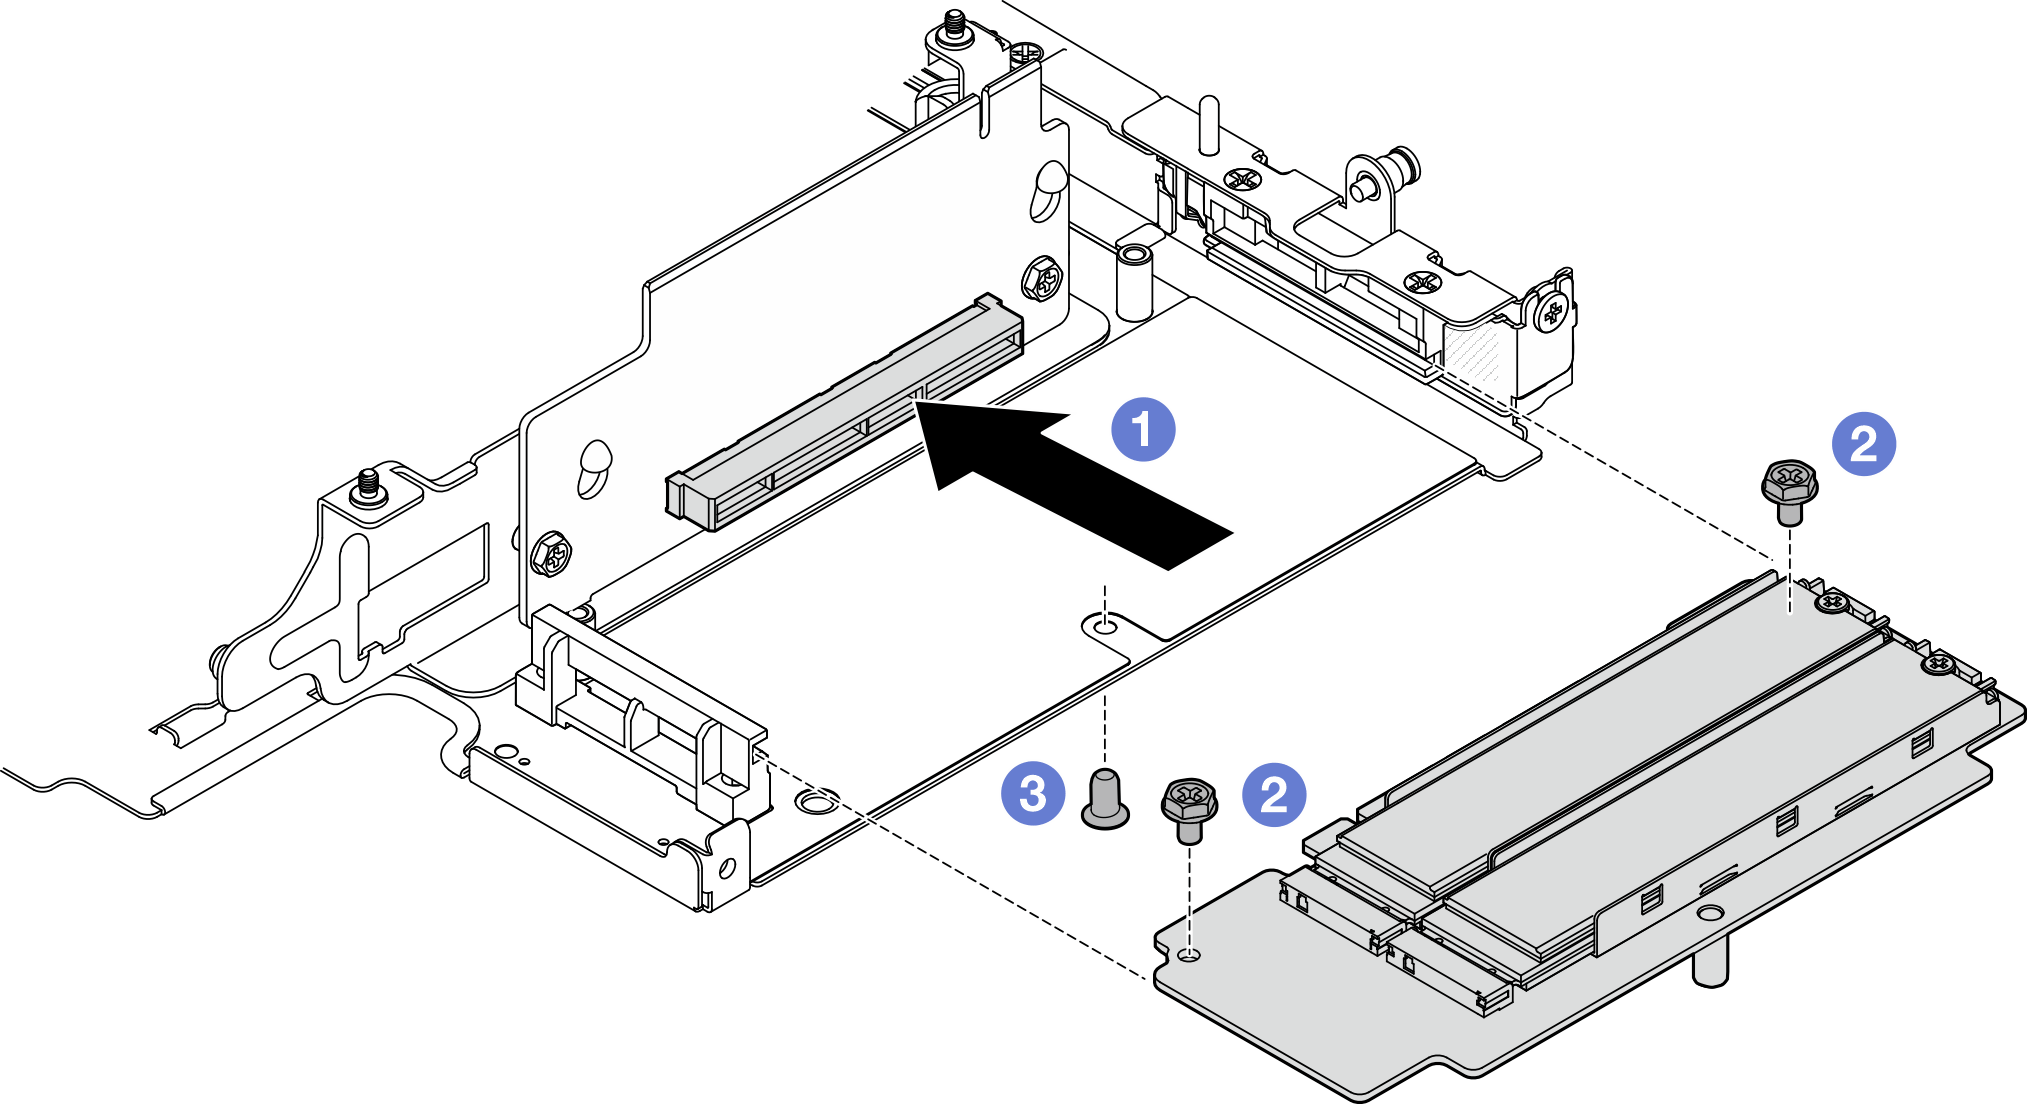
After this task is completed
Reinstall the riser assembly to the node. See Install the riser assembly to the node.
If you are instructed to return the component or optional device, follow all packaging instructions, and use any packaging materials for shipping that are supplied to you.
Demo Video
Install the PCIe assembly
- Install the PCIe riser card to the riser cage.
- Align the riser card with the guide pins on the riser cage; then, insert and slide the riser card downward until the guide pins are seated in the small opening of the keyholes.
- Secure the riser card with two screws.
Figure 4. Installing the riser card
- Install the PCIe adapter to the riser cage.
- (Optional) If a PCIe filler is installed in the slot, loosen the screw that secures the filler; then, remove the filler. Save the filler for future use.
- Align the PCIe adapter with the slot; then, carefully slide the adapter into the slot until it is firmly seated.
- Secure the PCIe adapter with one screw.
Figure 5. Installing the PCIe adapter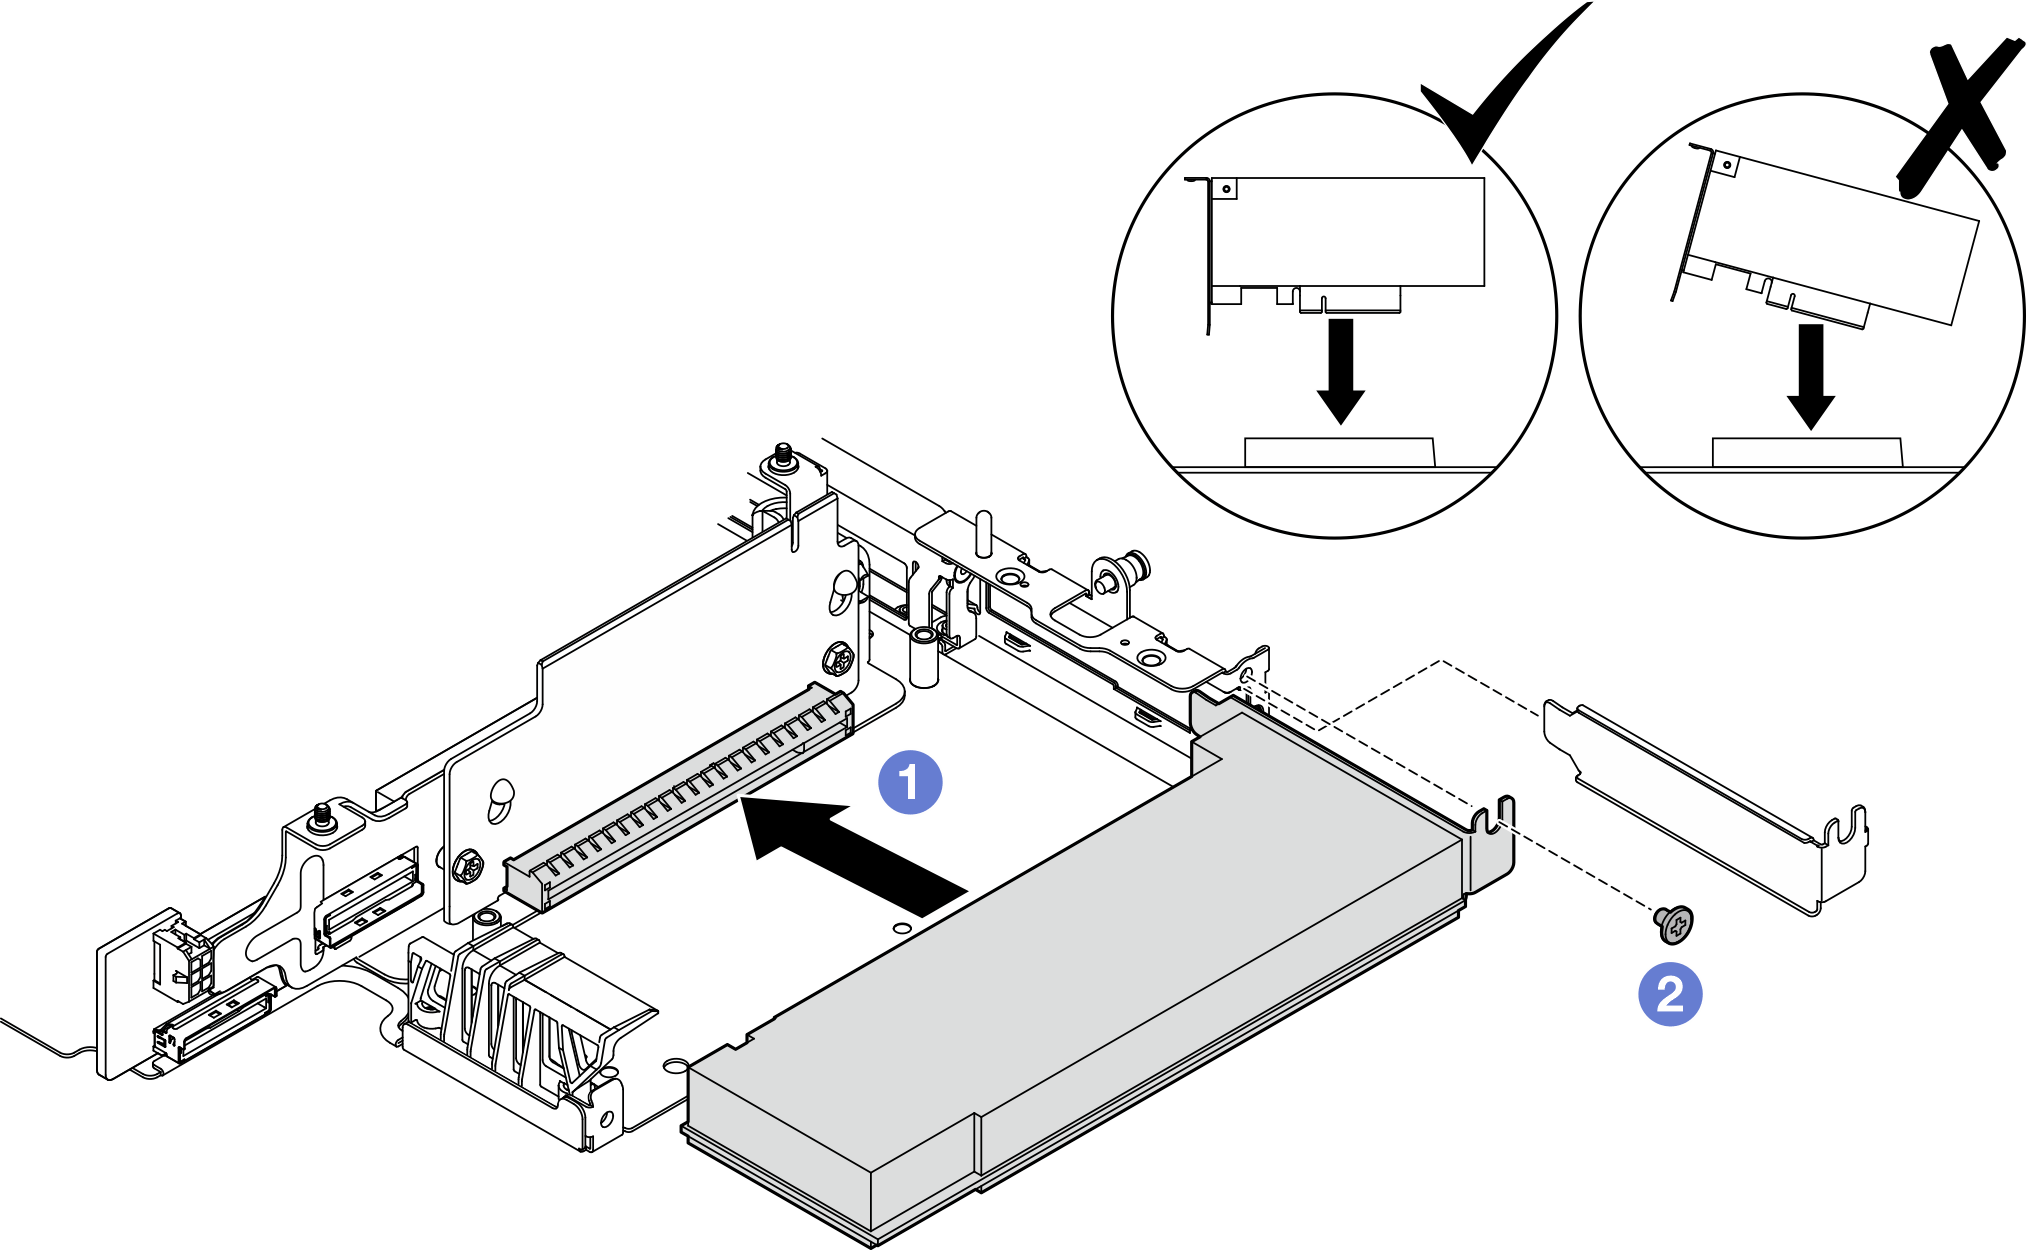
After this task is completed
Reinstall the riser assembly to the node. See Install the riser assembly to the node.
If you are instructed to return the component or optional device, follow all packaging instructions, and use any packaging materials for shipping that are supplied to you.
Demo Video