Installing a microprocessor and heat sink
Use this information to install a microprocessor and heat sink in the blade server.
The following notes describe the type of microprocessor that the server supports and other information that you must consider when you install a microprocessor:
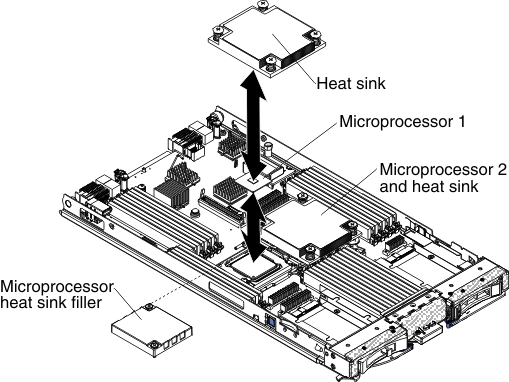
- Each microprocessor socket must always contain either a socket cover and heat-sink filler or a microprocessor and heat sink. If the blade server has only one microprocessor, it must be installed in microprocessor socket 1.
- If you are installing a second microprocessor, make sure that the microprocessors are identical.
- Before you install a new microprocessor, download and install the most current level of UEFI code (see Updating firmware and device drivers).
- When you install a second microprocessor, you might have to install additional memory, or redistribute memory across the DIMM connectors (see Installing a memory module).
- The microprocessor installation tool might become worn after several uses. Make sure that the tool can hold the microprocessor securely if you are reusing an existing microprocessor installation tool. Do not return the tool with other parts that you are returning.
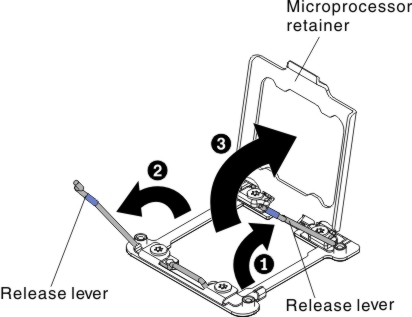
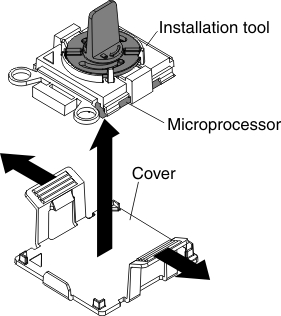
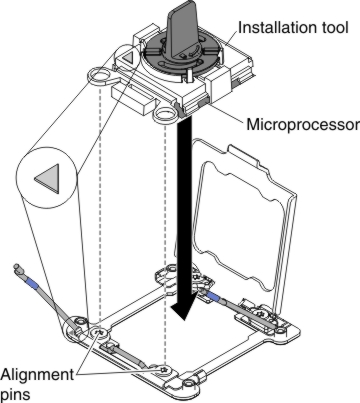
The following illustration shows how to install a microprocessor and heat sink in the blade server.
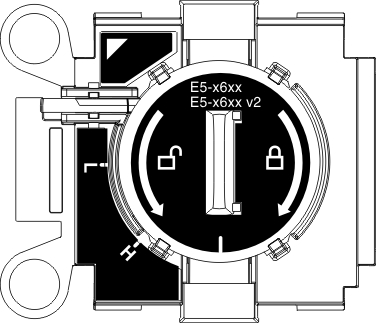
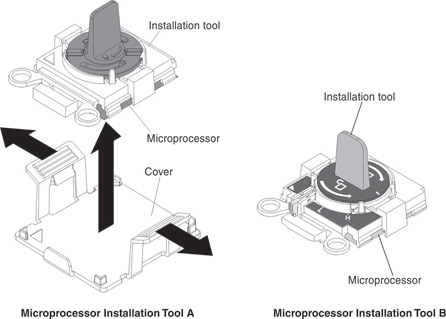
There are two types of microprocessor installation tools. The tools are similar in function and design, however Tool A has one setting for installing one size of microprocessor, and supports the following families of microprocessors: E5-26xx, E5-46xx. Installation Tool B has two settings for installing two different sizes of microprocessors. The settings that are marked on Tool B are "L" for smaller low core microprocessors, and "H" for larger high core microprocessors. Installation Tool B supports the following families of microprocessors: E5-26xx, E5-46xx, E5-26xx v2, E5-46xx v2.
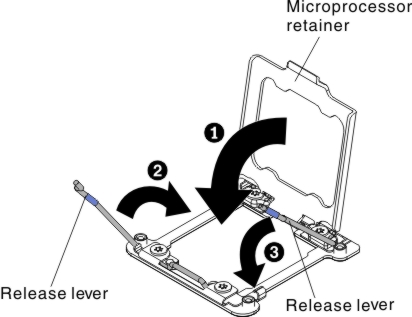
- Do not use any tools or sharp objects to lift the release levers on the microprocessor socket. Doing so might result in permanent damage to the system board.
- Do not touch the contacts in the microprocessor socket. Touching these contacts might result in permanent damage to the system board.
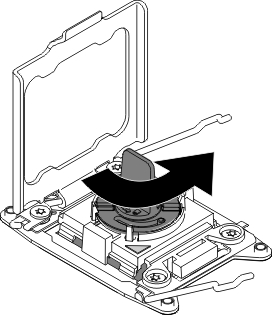
To install a microprocessor and heat sink, complete the following steps:
