Removing the bezel assembly
Use this information to remove the bezel assembly from the blade server.
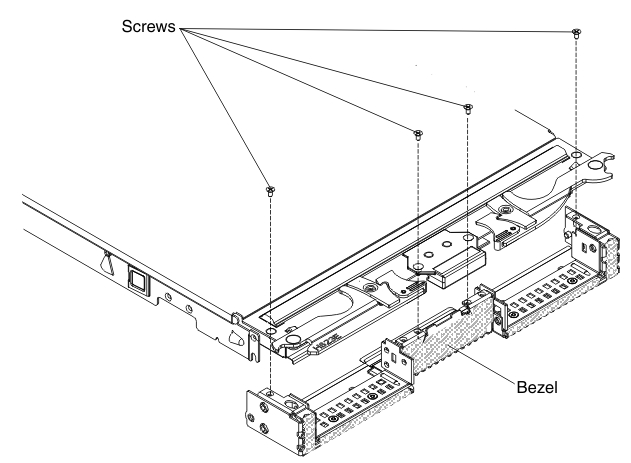
The following illustration shows how to remove a bezel assembly from a blade server.
Note
The illustrations in this document might differ slightly from your hardware.
To remove the bezel assembly, complete the following steps.
- Before you begin, read Safety and Installation guidelines.
- If the blade server is installed in a BladeCenter unit, remove it (see Removing the blade server from the BladeCenter unit for instructions).
- Carefully lay the blade server on a flat, static-protective surface, with the cover side down.
- Open the blade server cover (see Removing the blade server cover for instructions).
- If an optional expansion unit is installed, remove it (see Removing an optional expansion unit).
- If a hot-swap storage drive or a storage drive filler is installed, remove it (see Removing a hot-swap storage drive).
- If an optional expansion unit is installed, remove it (see Removing an optional expansion unit).
- Locate the four screws that secure the bezel assembly to the blade server base assembly.
- Use a screwdriver to remove the four screws that secure the bezel assembly to the blade server base assembly. Save the screws in a safe place. It is recommended to use the same screws when installing the bezel assembly.
- While holding the bezel assembly and the blade server, rotate the blade server so that the cover side is up.
- Lift the bezel assembly away from the blade server.
- If you are instructed to return the bezel assembly, follow all packaging instructions, and use any packaging materials for shipping that are supplied to you.
Give documentation feedback