
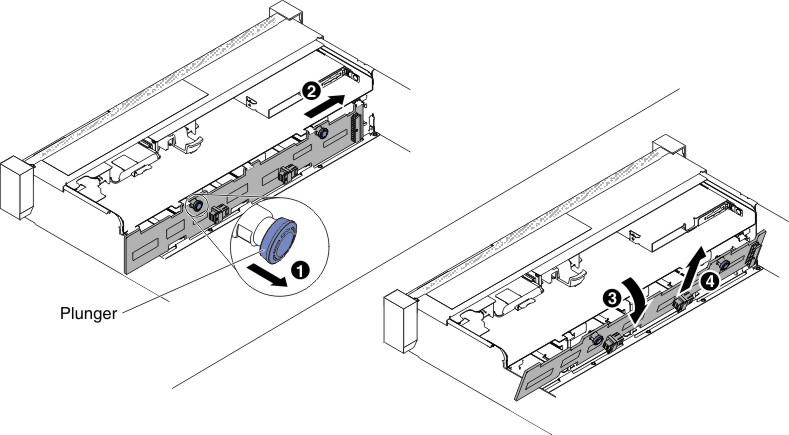
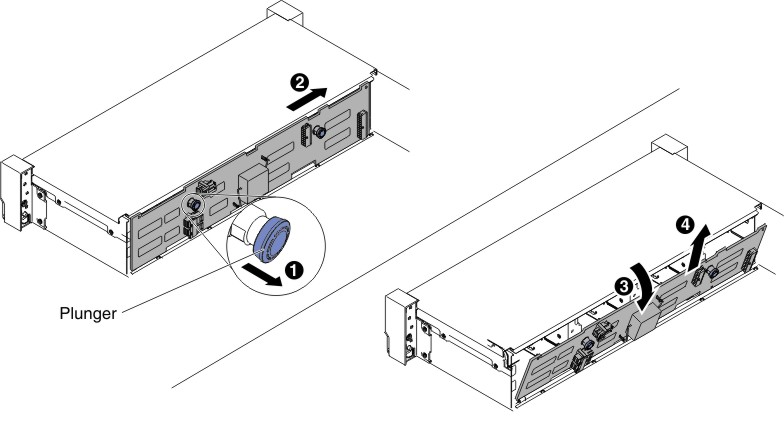
Removing the 3.5-inch hot-swap hard disk drive backplane

Use this information to remove the 3.5-inch hot-swap hard disk drive backplane.

To remove the 3.5-inch hot-swap hard disk drive backplane, complete the following steps:

  1. Read the safety information that begins on Safety and Removing and replacing guidelines.
  2. Turn off the server and peripheral devices and disconnect all power cords.
  3. Remove the top cover (see Removing the top cover).
  4. Pull the hard disk drives or fillers out of the server slightly to disengage them from the backplane. See Removing a hot-swap hard disk drive.
  5. To obtain more working room, remove the fan cage assembly (see Removing the fan cage assembly).
  6. Disconnect the SAS signal and power/configuration cables from the system board.
    Note
    Disengage all latches, release tabs or locks on cable connectors when you disconnect all cables from the system board. Failing to release them before removing the cables will damage the cable sockets on the system board. The cable sockets on the system board are fragile. Any damage to the cable sockets may require replacing the system board.
  7. Pull the two plungers while you push the backplane to the left to disengage the backplane.
    • For eight 3.5-inch hot-swap hard disk drive backplane
      Figure 1. 3.5-inch hot-swap hard disk drive backplane removal
      3.5-inch hot-swap hard disk drive backplane removal
    • For twelve 3.5-inch hot-swap hard disk drive backplane
      Figure 2. 3.5-inch hot-swap hard disk drive backplane removal
      3.5-inch hot-swap hard disk drive backplane removal
  8. Rotate the backplane toward the rear of the server and lift the backplane up to remove it from the server.
  9. If you are instructed to return the backplane, follow all packaging instructions, and use any packaging materials for shipping that are supplied to you.