Controller-to-stack connection rules
You can correctly cable the SAS connections from each controller to each stack in an HA pair configuration by understanding that SAS disk shelves use software-based disk ownership, how controller ports A/C and B/D are connected to stacks, how controller ports A/C and B/D are organized into port pairs, and how DM3000x, DM5000x, or DM7000x ports 0b and 0a are connected to stacks.
SAS disk shelf software-based disk ownership rule
SAS disk shelves use software-based disk ownership (not hardware-based disk ownership). This means that disk drive ownership is stored on the disk drive rather than it being determined by the topology of the storage system's physical connections (as it is for hardware-based disk ownership). Specifically, disk drive ownership is assigned by ONTAP (automatically or by CLI commands), not by how you cable the controller-to-stack connections.
SAS disk shelves should never be cabled using the hardware-based disk ownership scheme.
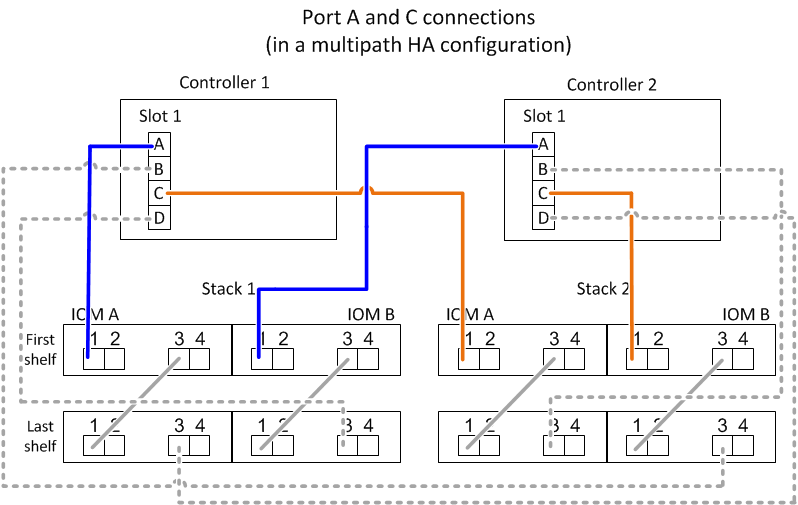
Controller A and C port connection rules (for non DM3000x, DM5000x, or DM7000x configurations)
- A and C ports are always the primary paths to a stack.
- A and C ports always connect to the logical first disk shelf in a stack.
- A and C ports always connect to disk shelf IOM ports 1 and 2.
IOM port 2 is only used for quad-path HA and quad-path configurations.
- Controller 1 A and C ports always connect to IOM A (domain A).
- Controller 2 A and C ports always connect to IOM B (domain B).
Controller B and D port connection rules (for non DM3000x, DM5000x, or DM7000x configurations)
- B and D ports are always the secondary paths to a stack.
- B and D ports always connect to the logical last disk shelf in a stack.
- B and D ports always connect to disk shelf IOM ports 3 and 4.
IOM port 4 is only used for quad-path HA and quad-path configurations.
- Controller 1 B and D ports always connect to IOM B (domain B).
- Controller 2 B and D ports always connect to IOM A (domain A).
- B and D ports are connected to the stacks by offsetting the order of the PCI slots by one so that the first port on the first slot is cabled last.
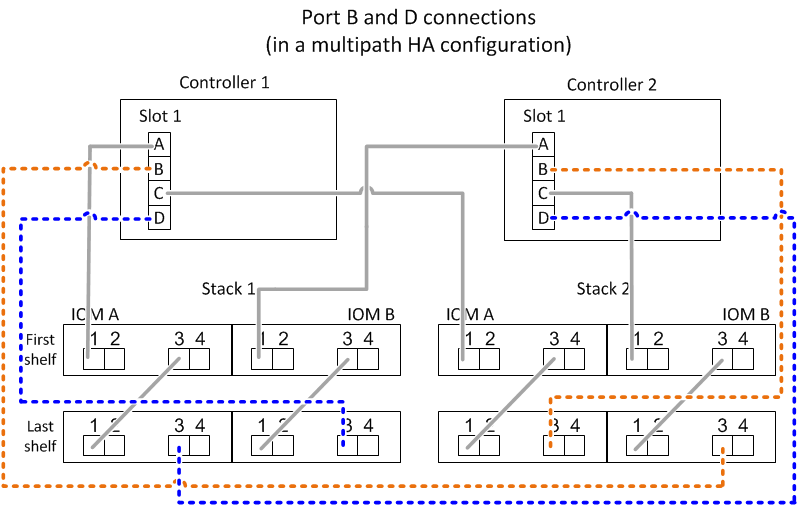
Port pair connection rules (for non DM3000x, DM5000x, or DM7000x configurations)
Controller SAS ports A, B, C, and D are organized into port pairs using a method that leverages all of the SAS ports for system resiliency and consistency when cabling controller-to-stack connections in HA pair configurations.
- Port pairs consist of a controller A or C SAS port and a controller B or D SAS port.
A and C SAS ports connect to the logical first shelf in a stack. B and D SAS ports connect to the logical last shelf in a stack.
- Port pairs use all SAS ports on each controller in your system.
You increase system resiliency by incorporating all SAS ports (on an HBA in a physical PCI slot [slot 1-N] and on board the controller [slot 0]) into port pairs. Do not exclude any SAS ports.
- Port pairs are identified and organized as follows:
List A ports and then C ports in sequence of slots (0,1, 2, 3, and so on).
For example: 1a, 2a, 3a, 1c, 2c, 3c
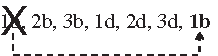
List B ports and then D ports in sequence of slots (0,1, 2, 3, and so on).
For example: 1b, 2b, 3b, 1d, 2d, 3d
Rewrite the D and B port list so that the first port in the list is moved to the end of the list.
For example:
Offsetting the order of the slots by one balances port pairs across multiple slots (physical PCI slots and on board slots) when more than one slot of SAS ports is available; therefore, preventing a stack from being cabled to a single SAS HBA.
Pair the A and C ports (listed in step 1) to the D and B ports (listed in step 2) in the order that they are listed.
For example: 1a/2b, 2a/3b, 3a/1d,1c/2d, 2c/3d, 3c/1b.
NoteFor anHA pair, the list of port pairs you identify for the first controller is also applicable to the second controller.
- When cabling your system, you can use port pairs in the order in which you identified them or you can skip port pairs:
- Use port pairs in the order in which you identified (listed) them when all port pairs are needed to cable the stacks in your system.
For example, if you identified six port pairs for your system and you have six stacks to cable as multipath, you cable the port pairs in the order in which you listed them:
1a/2b, 2a/3b, 3a/1d,1c/2d, 2c/3d, 3c/1b
- Skip port pairs (use every other port pair) when not all port pairs are needed to cable the stacks in your system.
For example, if you identified six port pairs for your system and you have three stacks to cable as multipath, you cable every other port pair in your list:
 NoteWhen you have more port pairs than you need to cable the stacks in your system, the best practice is to skip port pairs to optimize the SAS ports on your system. By optimizing SAS ports, you optimize your system's performance.
- Use port pairs in the order in which you identified (listed) them when all port pairs are needed to cable the stacks in your system.
Controller-to-stack cabling worksheets are convenient tools for identifying and organizing port pairs so that you can cable the controller-to-stack connections for your HA pair configuration.
Controller-to-stack cabling worksheet template for multipathed connectivity
Controller-to-stack cabling worksheet template for quad-pathed connectivity
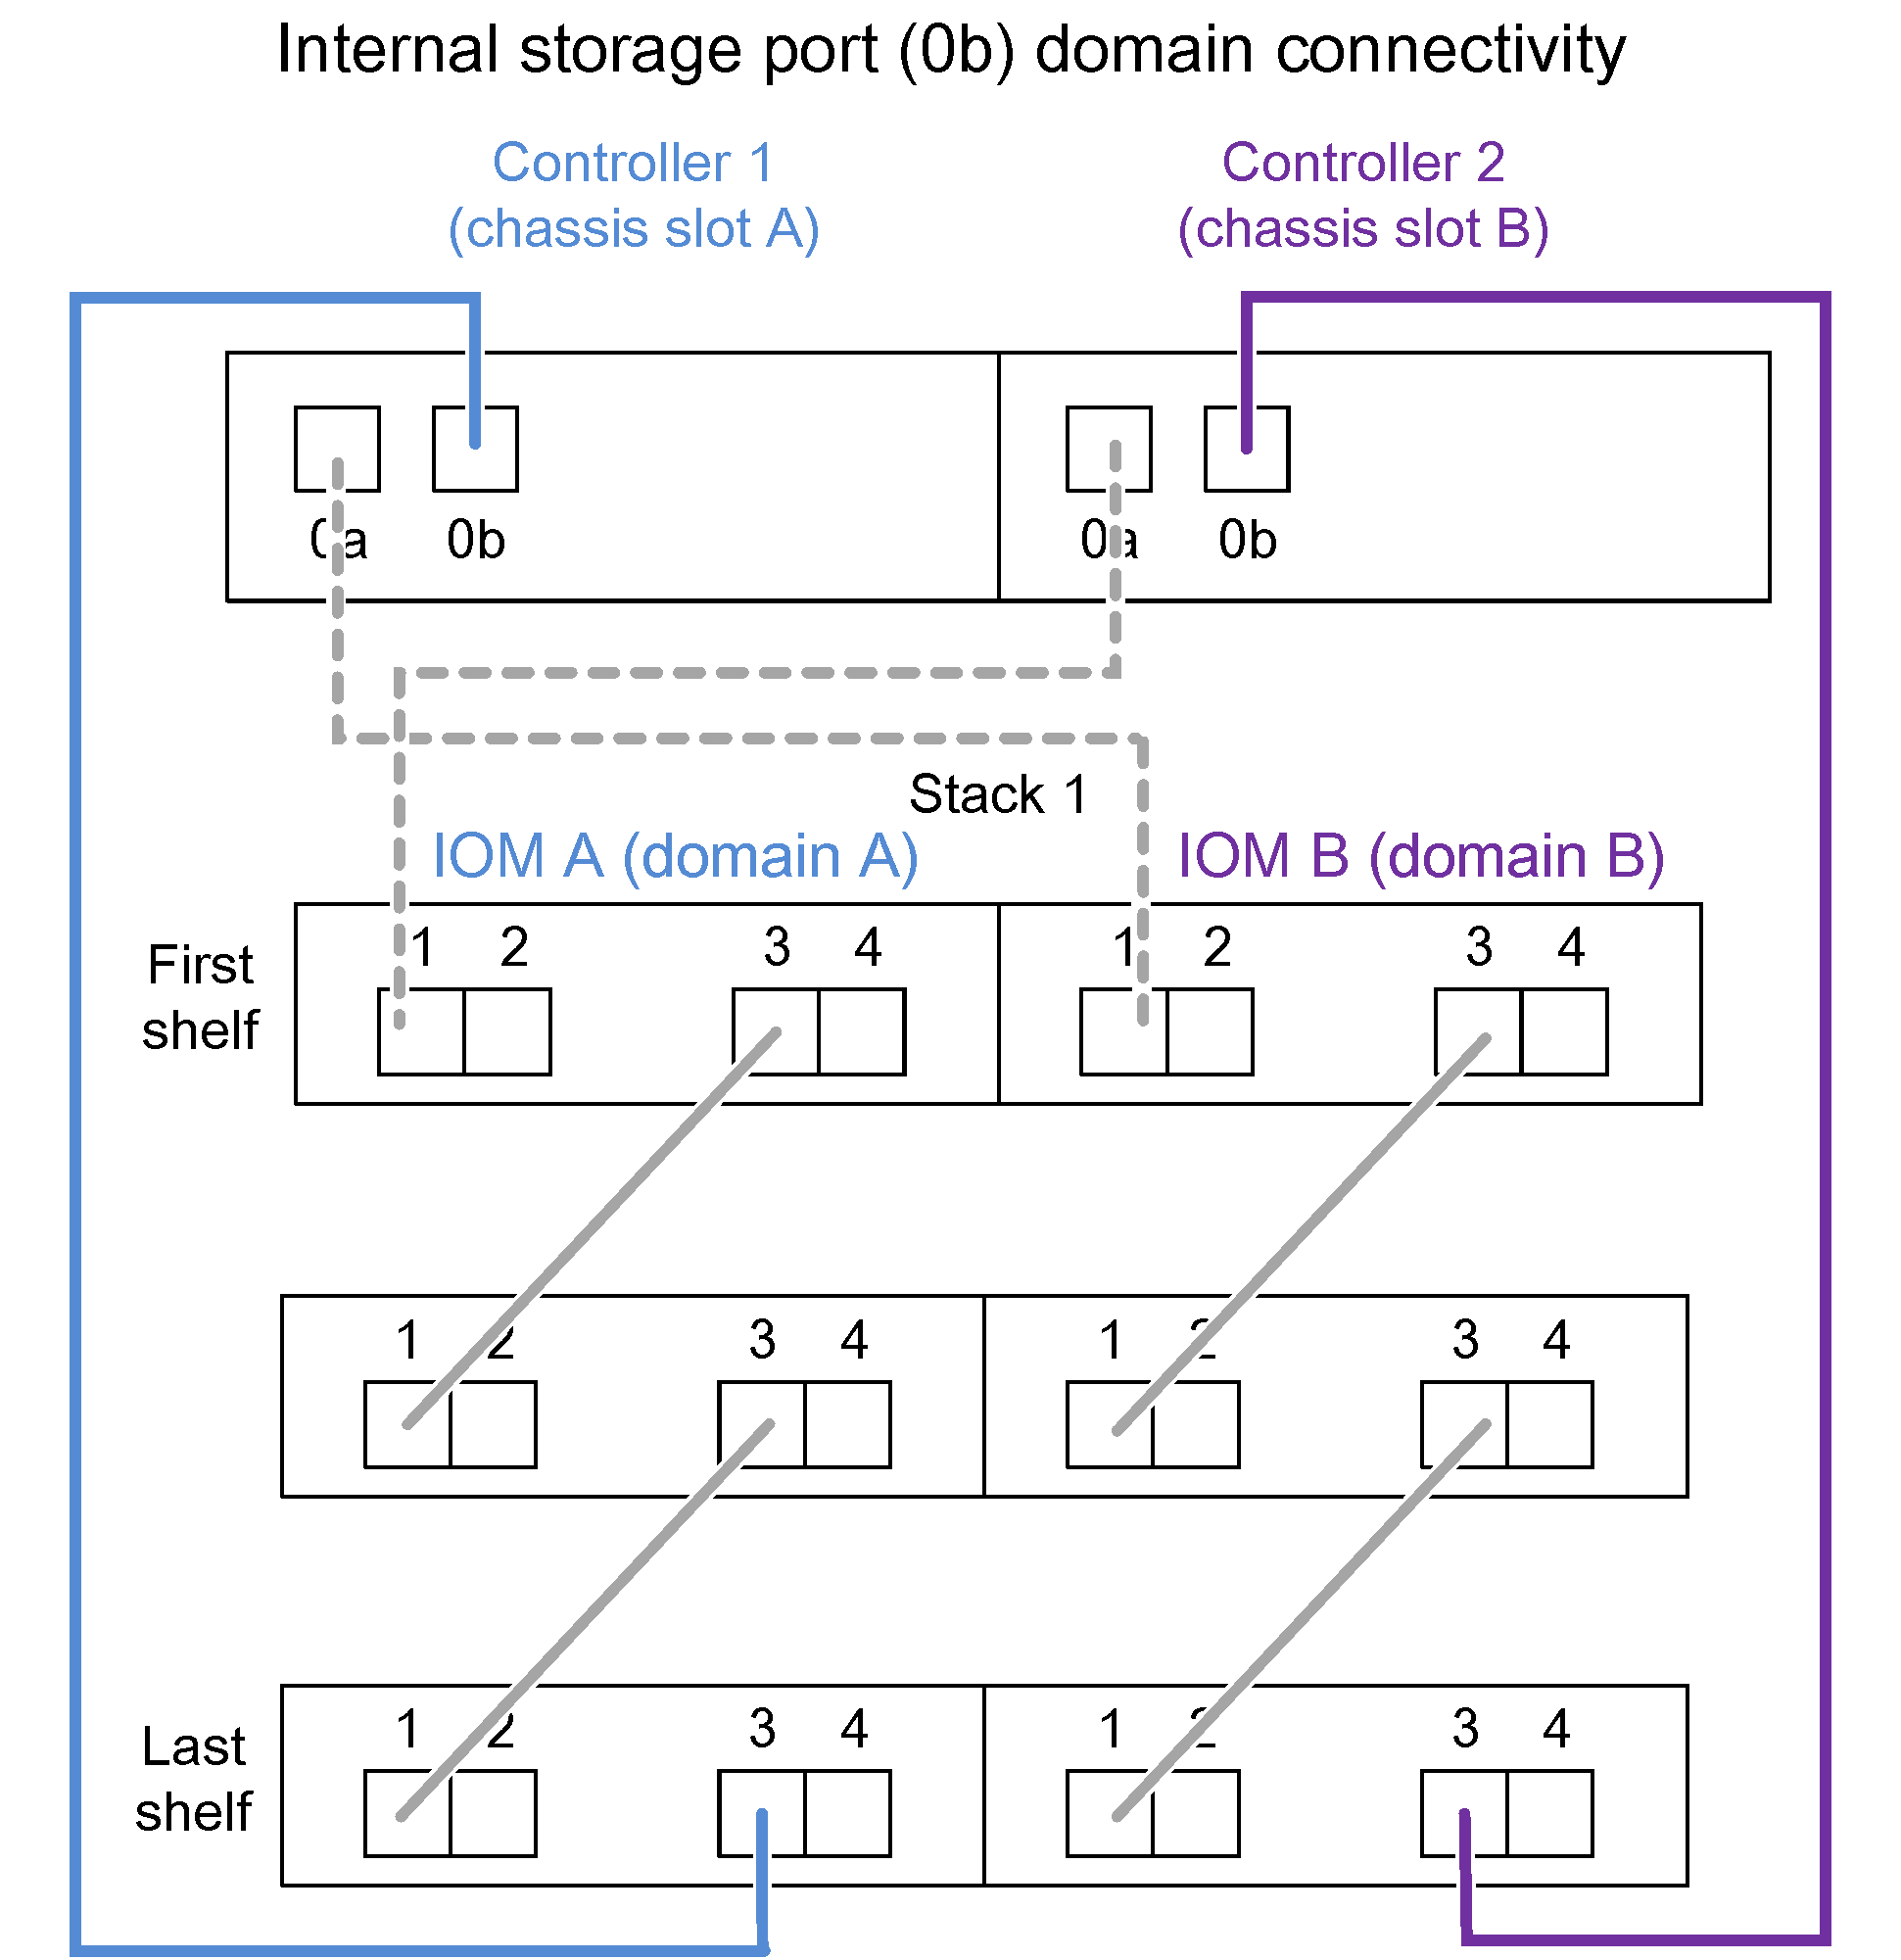
DM3000x, DM5000x, or DM7000x controller 0b and 0a port connection rules to external disk shelves
- Controller 0b port (internal storage port):
- Controller 1 0b port always connects to IOM A (domain A).
- Controller 2 0b port always connects to IOM B (domain B).
- Port 0b is always the primary path.
- Port 0b always connects to the logical last disk shelf in a stack.
- Port 0b always connect to disk shelf IOM port 3.
- Controller 0a port (internal HBA port):
- Controller 1 0a port always connects to IOM B (domain B).
- Controller 2 0a port always connects to IOM A (domain A).
- Port 0a is always the secondary path.
- Port 0a always connects to the logical first disk shelf in a stack.
- Port 0a always connect to disk shelf IOM port 1.
The following illustration highlights internal storage port (0b) domain connectivity for a DM3000x, DM5000x, or DM7000x multipath HA configuration: