Drain the heat exchanger of water

See this topic to learn how to drain the heat exchanger of water.

About this task

S038
Use eye protection
CAUTION
Eye protection should be worn for this procedure.
Attention
Wear safety goggles or other eye protection whenever you fill, drain, or purge air or nitrogen from the heat exchanger.

Procedure

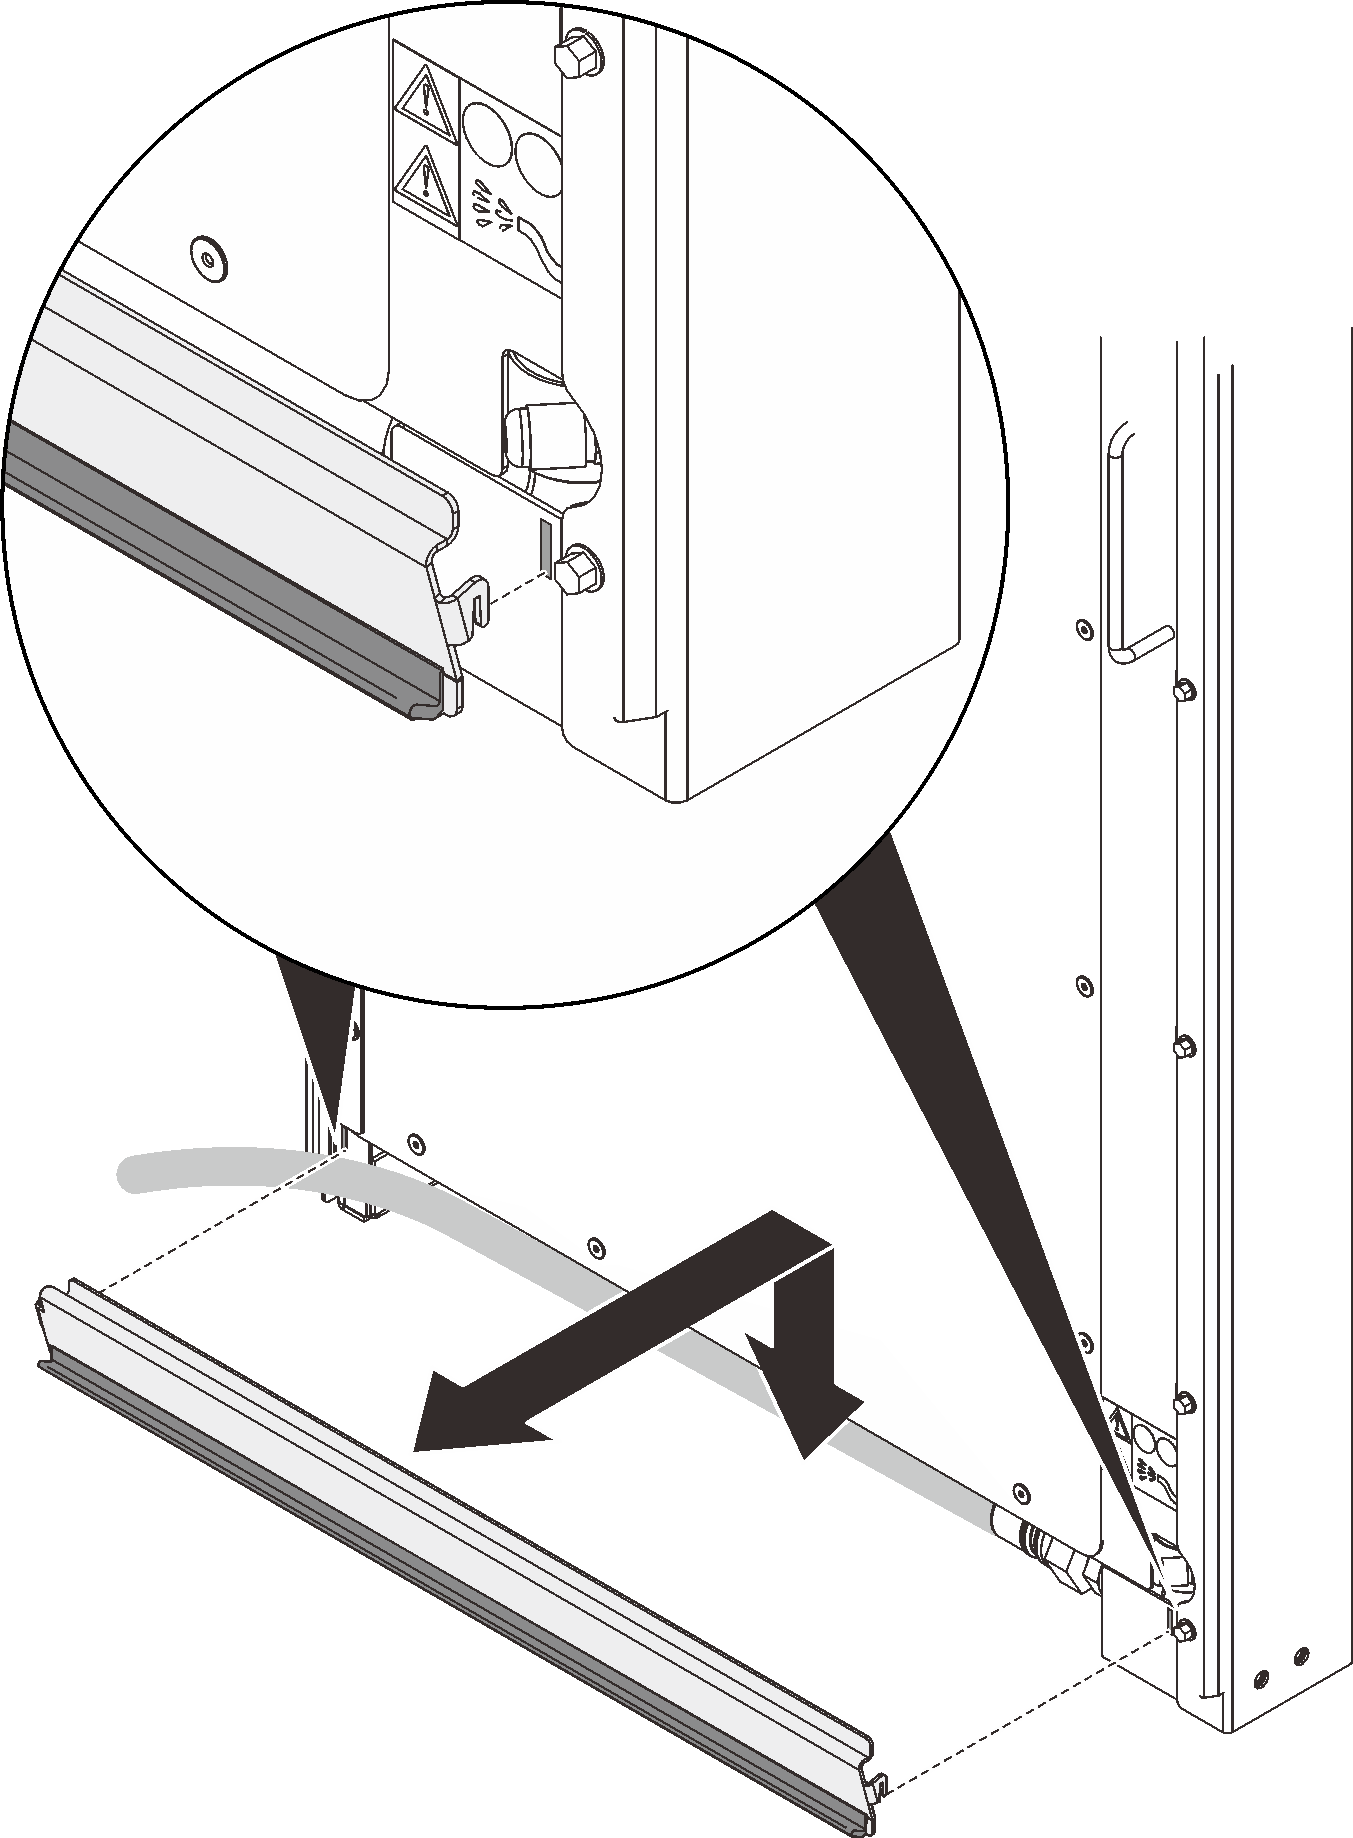
  1. Lift and remove the inner hose access panel from the heat exchanger.
    Figure 1. Removing the inner hose access pane

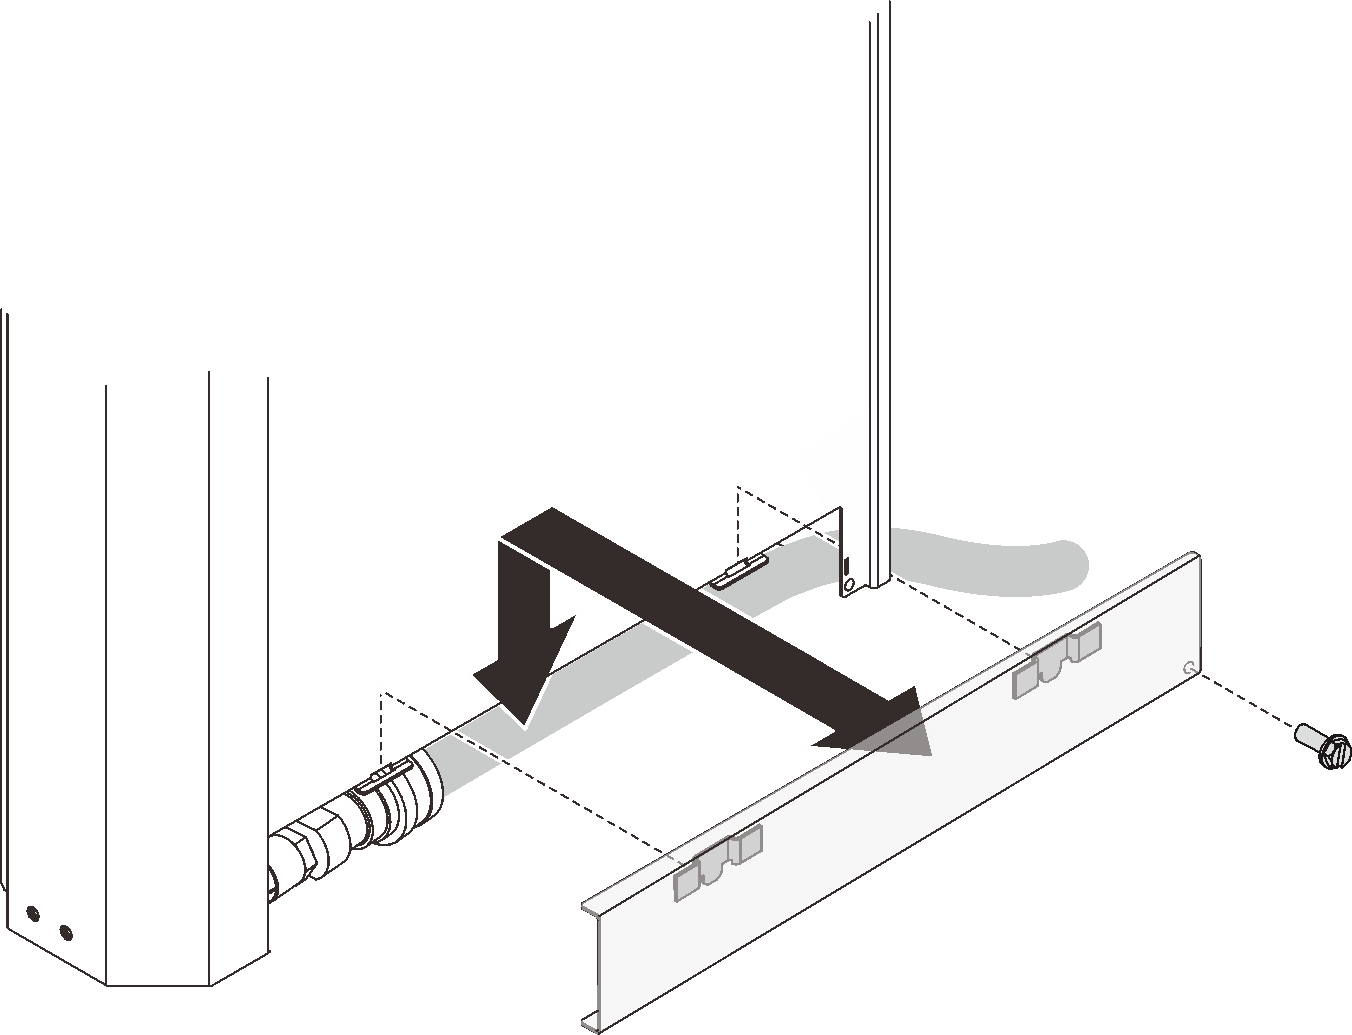
  2. Remove the screw that secures the panel if applicable, then lift and remove the panel from the heat exchanger.
    Figure 2. Removing the outer hose access pane

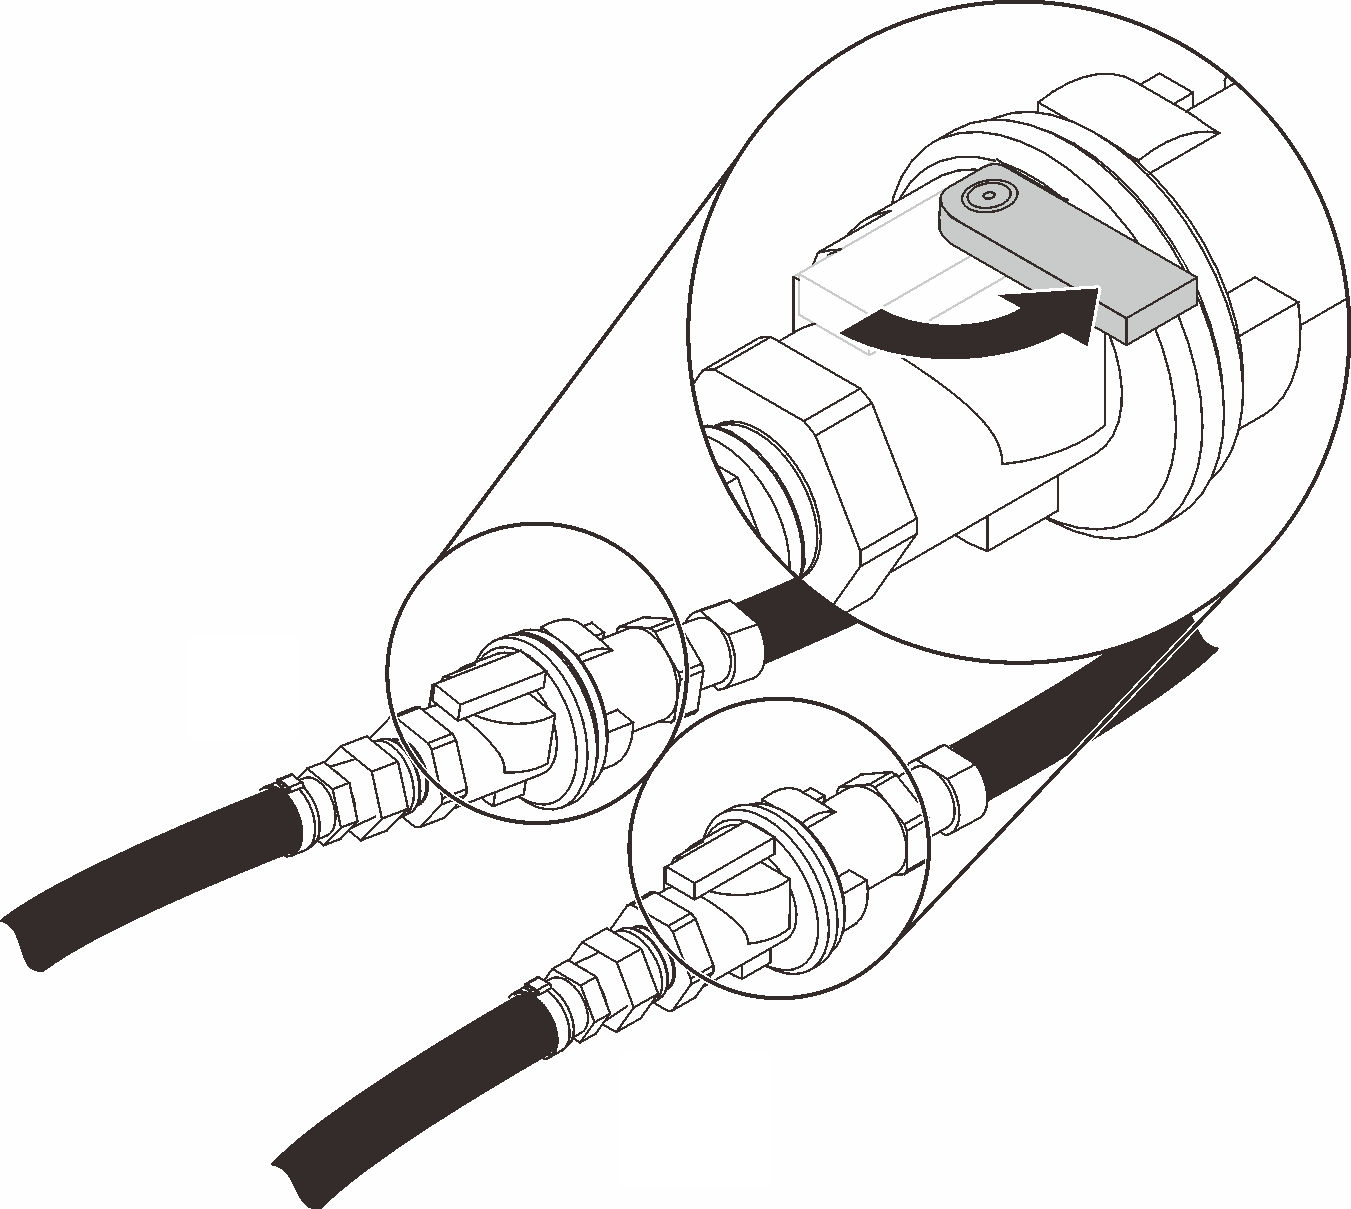
  3. Open the four Eaton ball valves, and disconnect the supply and return couplings from the manifolds.
    Figure 3. Opening Eaton ball valves

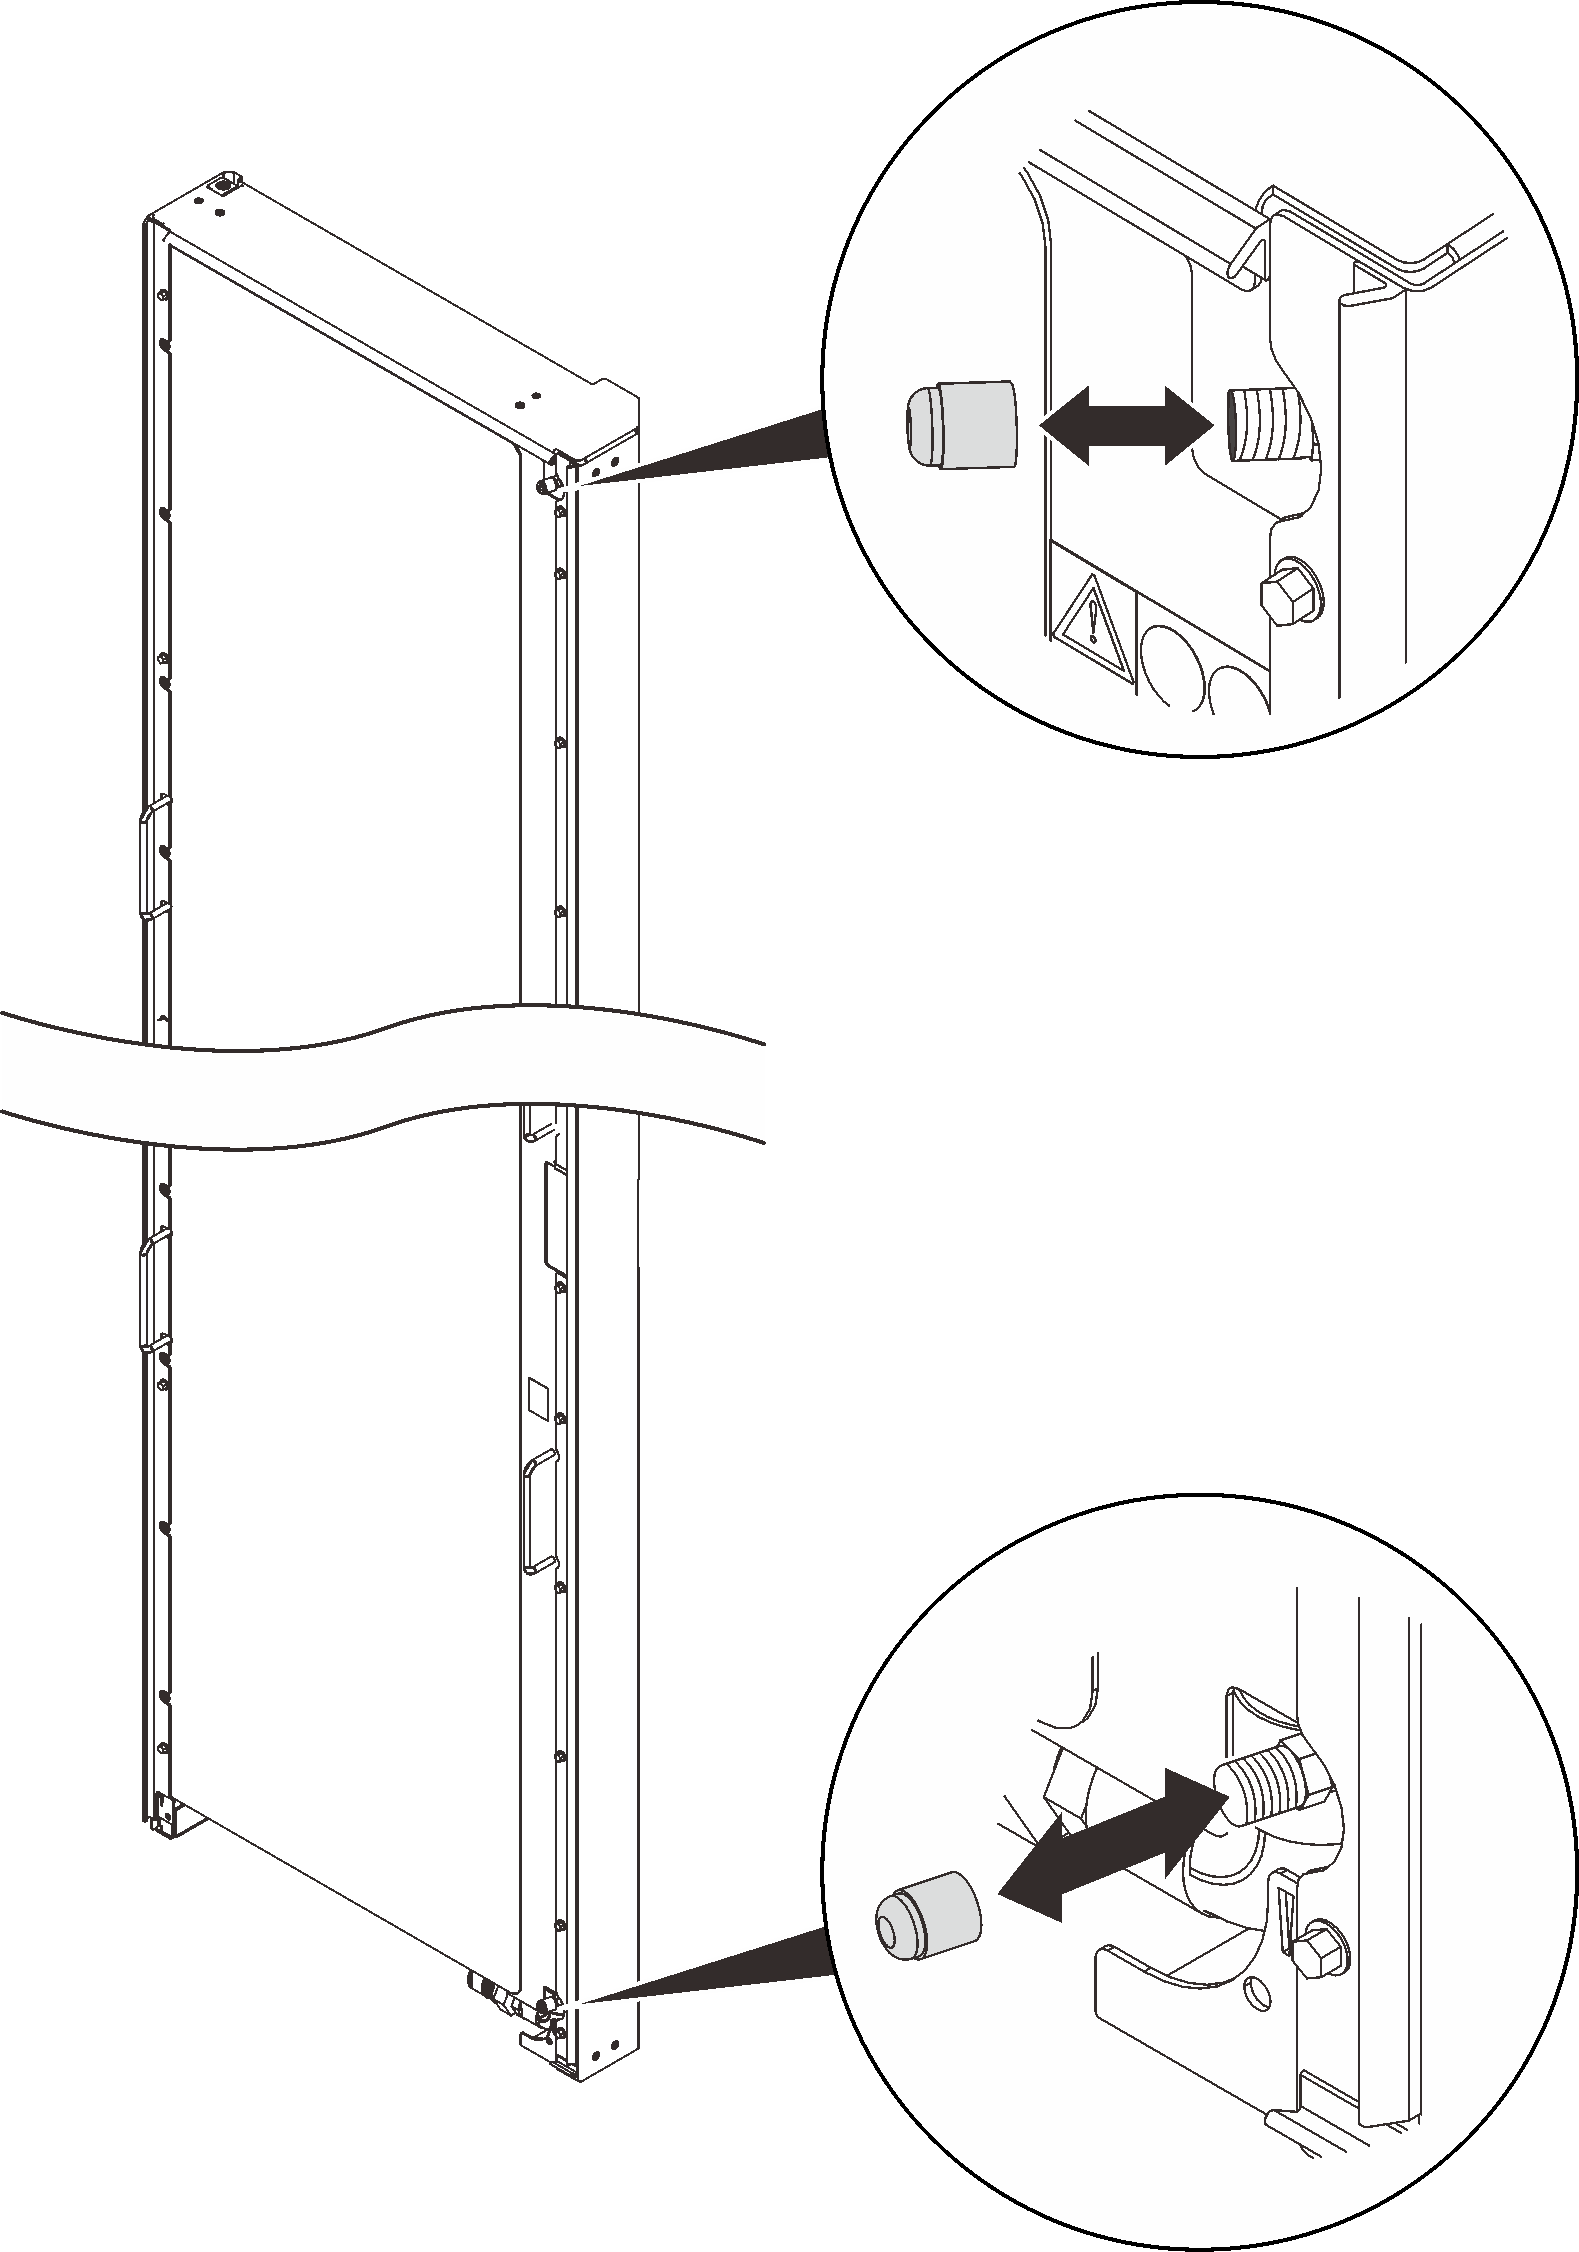
  4. Remove the caps from the air-purging and drain valve.
    Figure 4. Removing valve caps

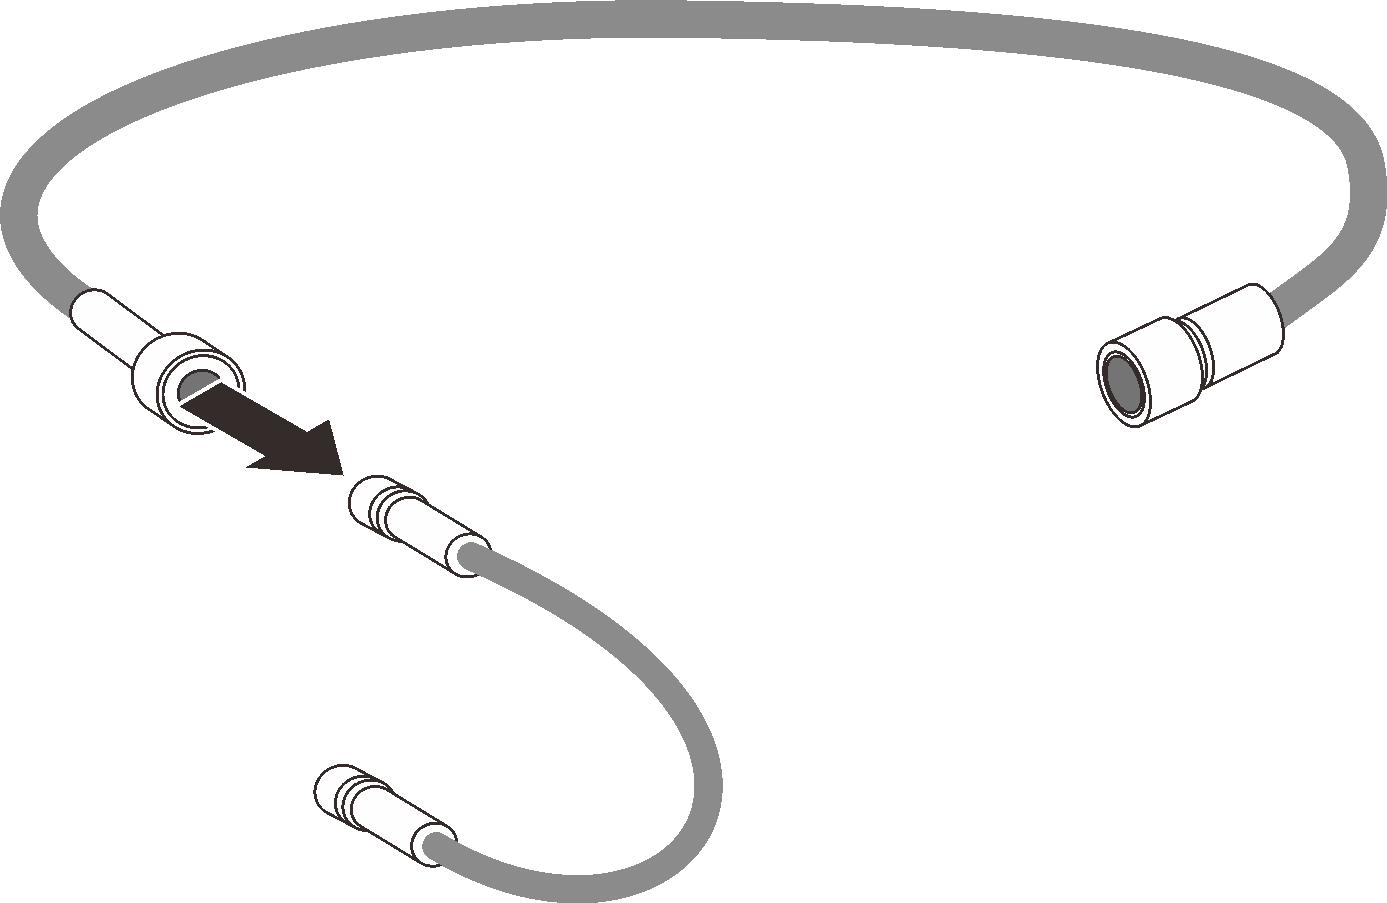
  5. Remove the extension hose from the air-purging tool.
    Figure 5. Removing the extension hose

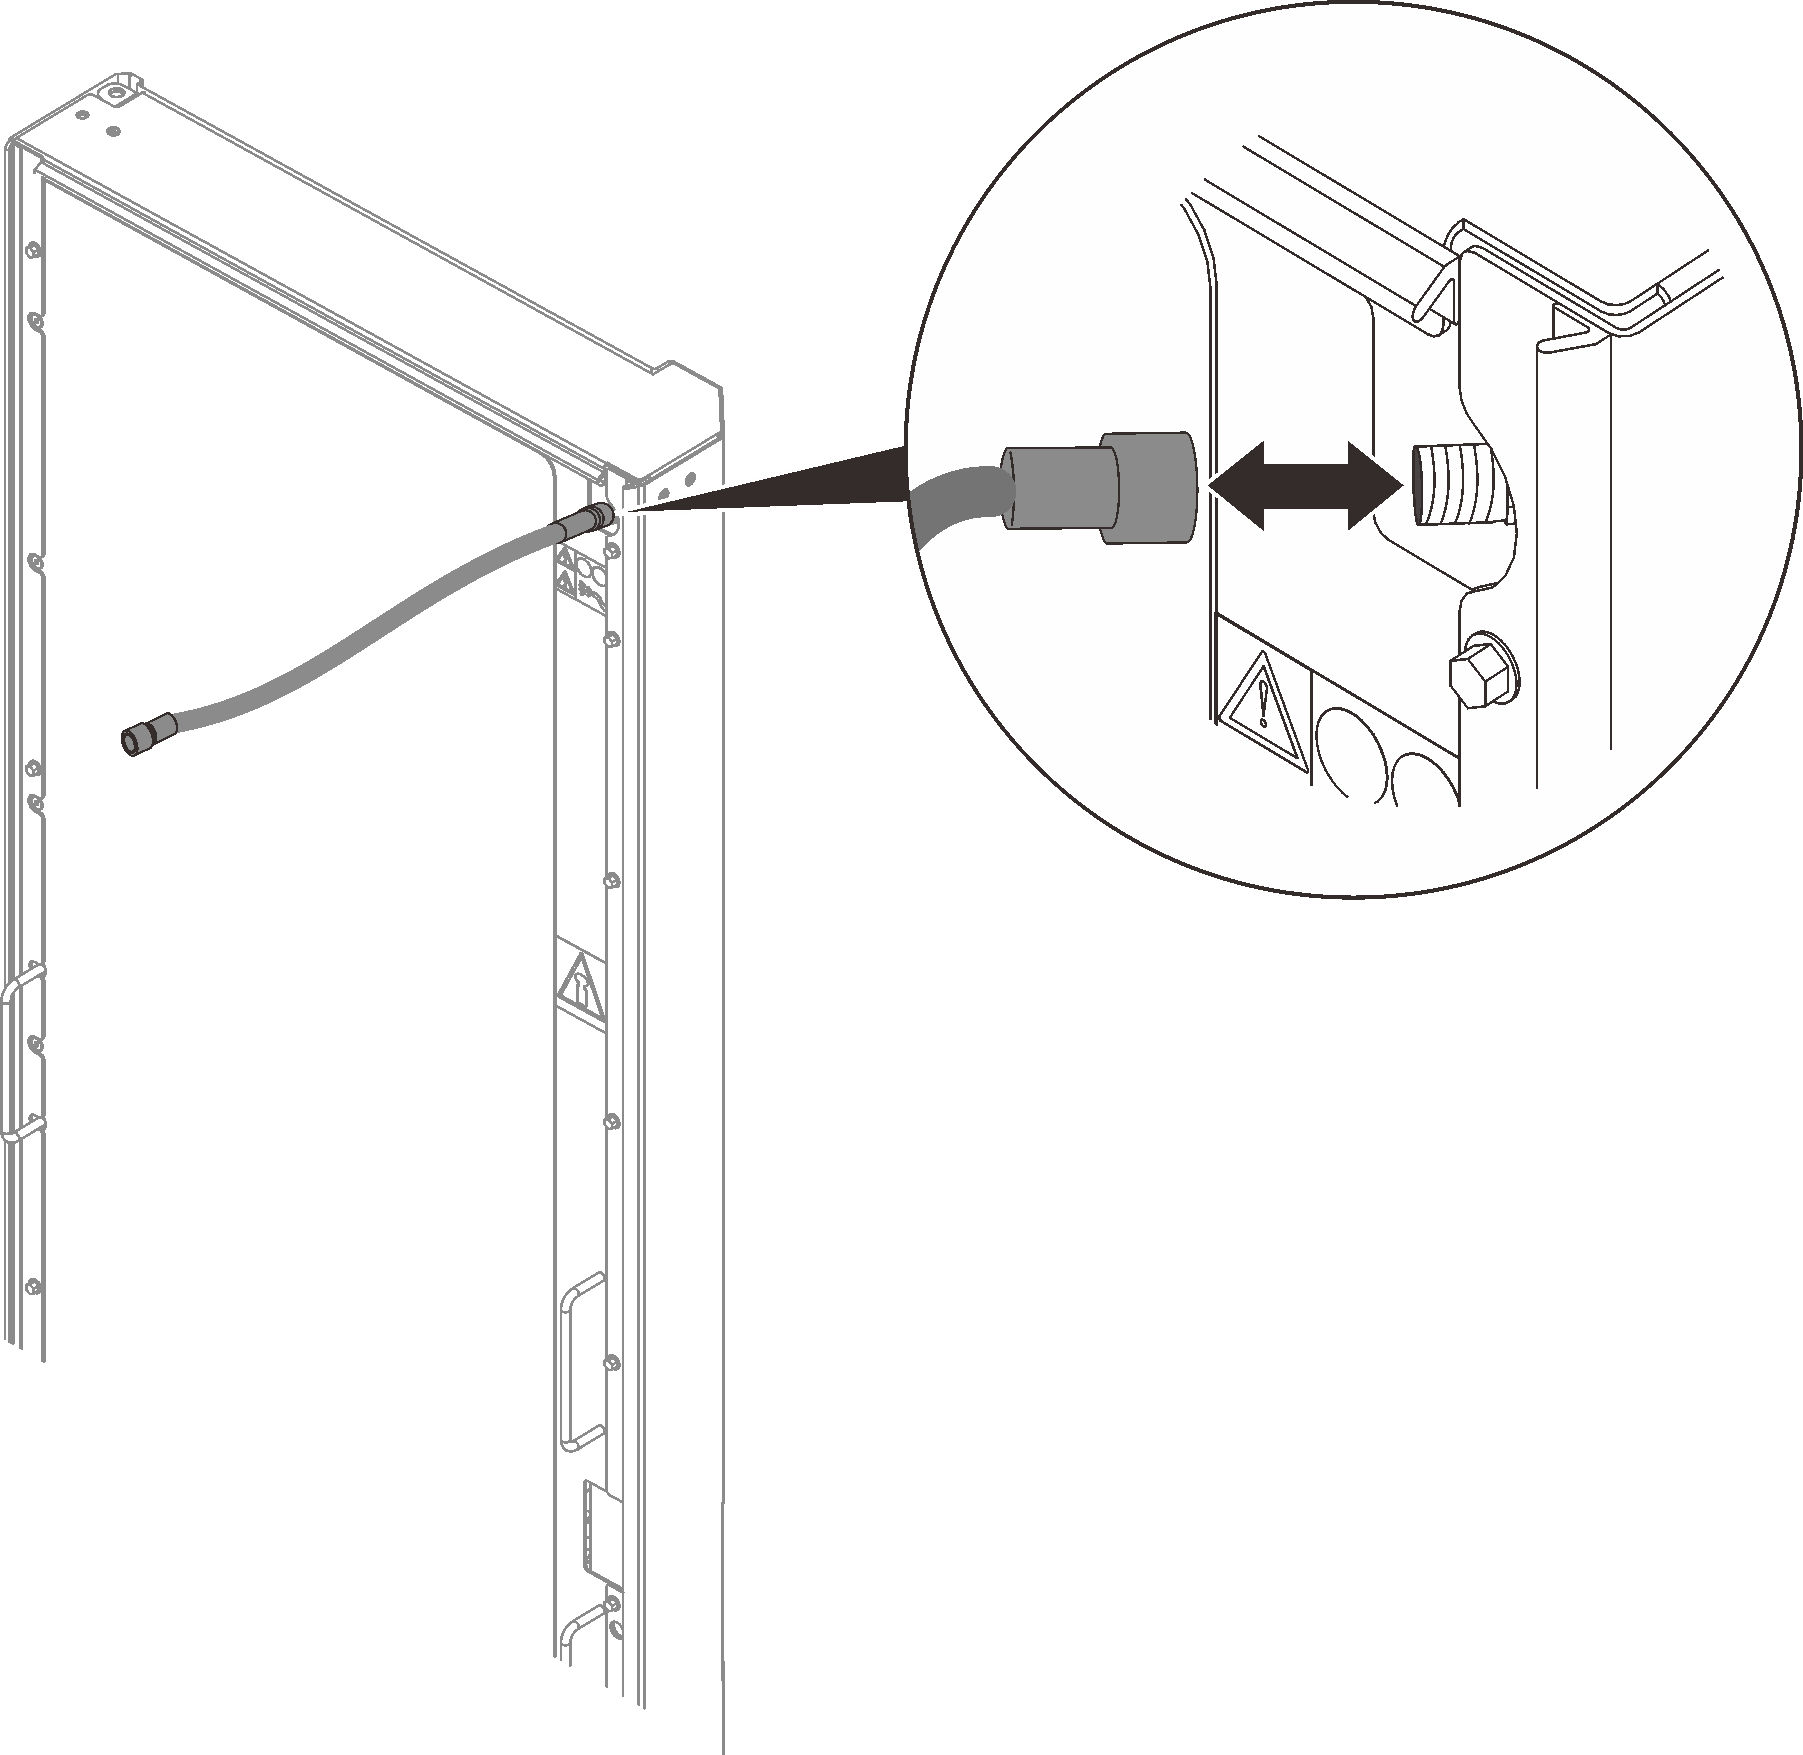
  6. Insert one end of the air-purging tool extension hose into the center of air-purging valve stem at the top of the heat exchanger to allow air to enter the manifolds.
    Figure 6. Inserting the air-purging tool extension hose

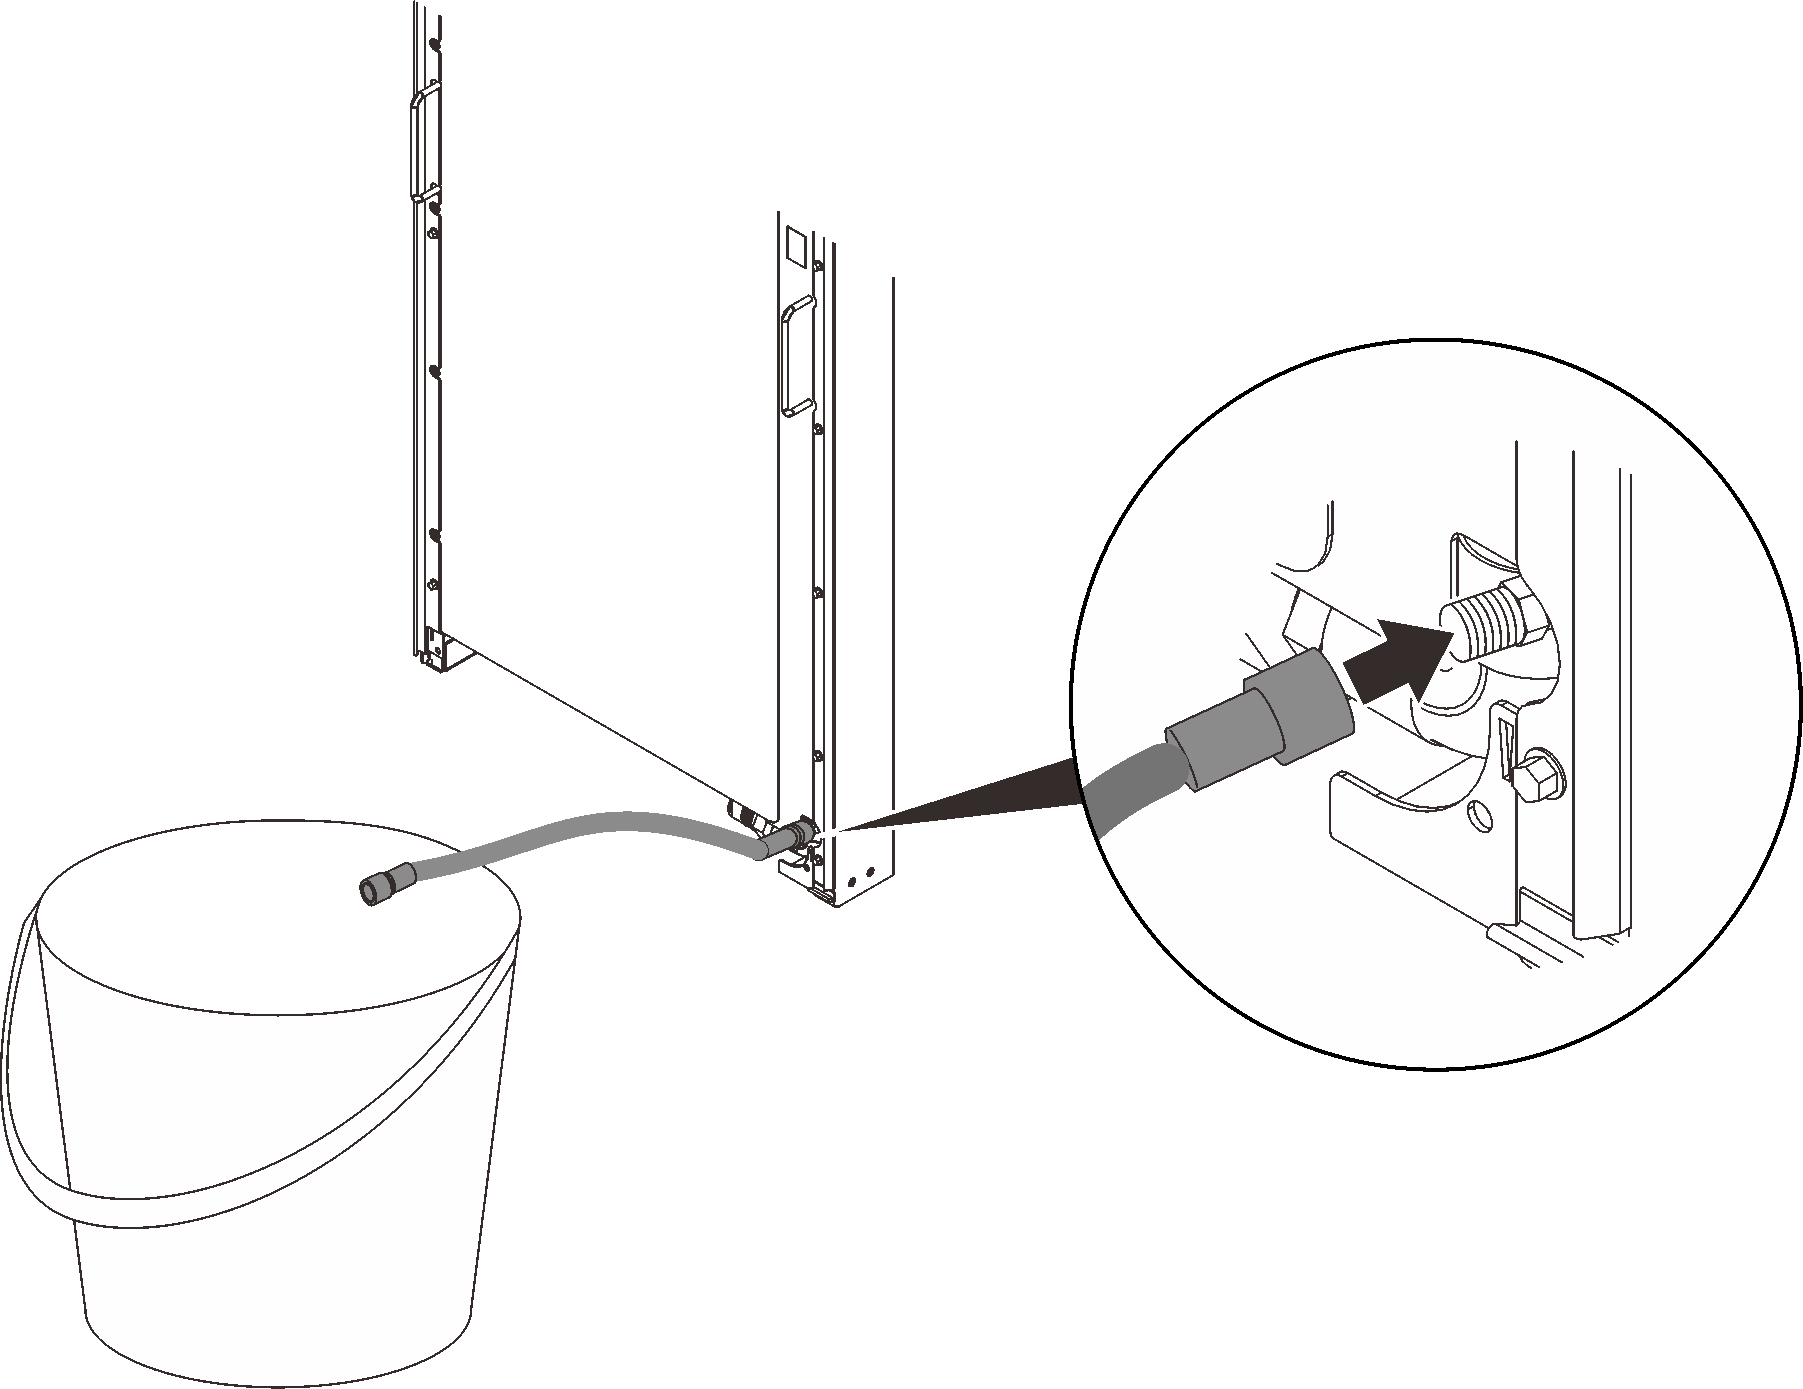
  7. Attach the air-purging tool to the drain valve at the bottom of the heat exchanger, and place the drain end into a 2-liter (or larger) container to catch the water.
    Figure 7. Draining water

  8. When the water is drained completely, Remove the air-purging-tool extension hose from the valve.
    Figure 8. Removing the air-purging tool extension hose

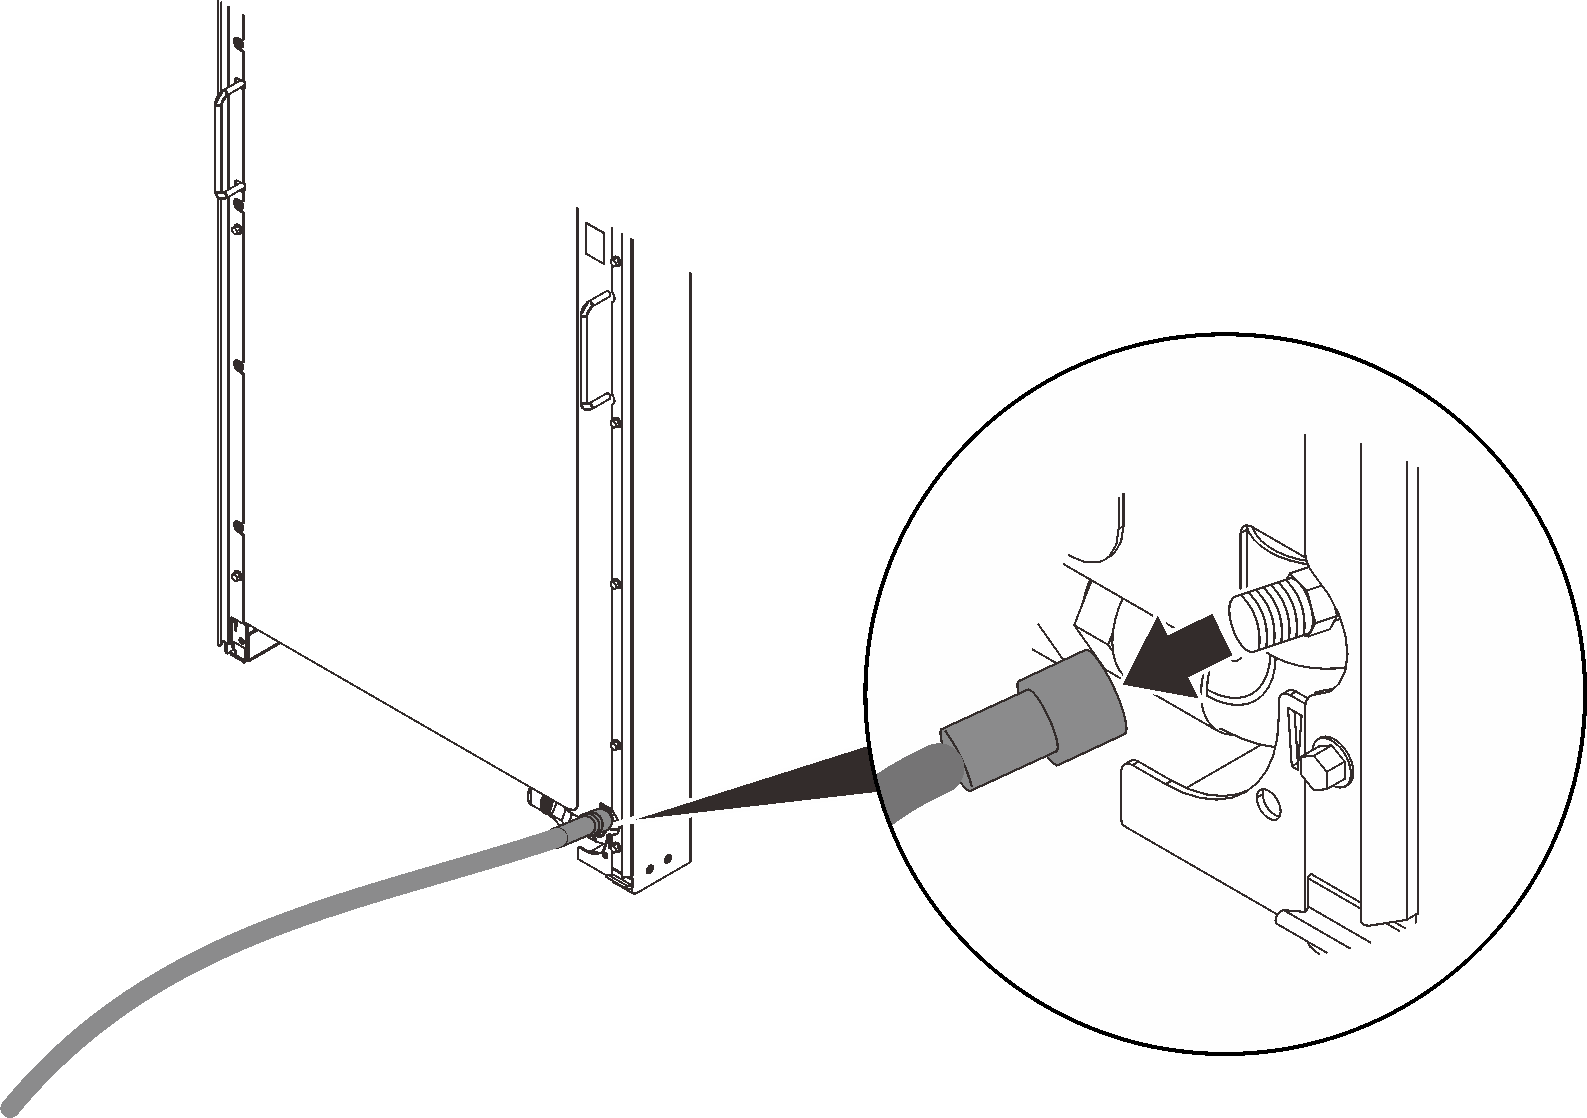
  9. Remove the air-purging tool from the drain valve.
    Figure 9. Removing the air-purging tool

  10. Install the two caps back to the air-purging and drain valve.
    Figure 10. Installing the valve caps