Fill the heat exchanger with water
See this topic to learn how to fill ThinkSystem Rear Door Heat eXchanger V2 with water.
About this task
S038

CAUTION
Eye protection should be worn for this procedure.
Attention
Wear safety goggles or other eye protection whenever you fill, drain, or purge air or nitrogen from the heat exchanger.
Procedure
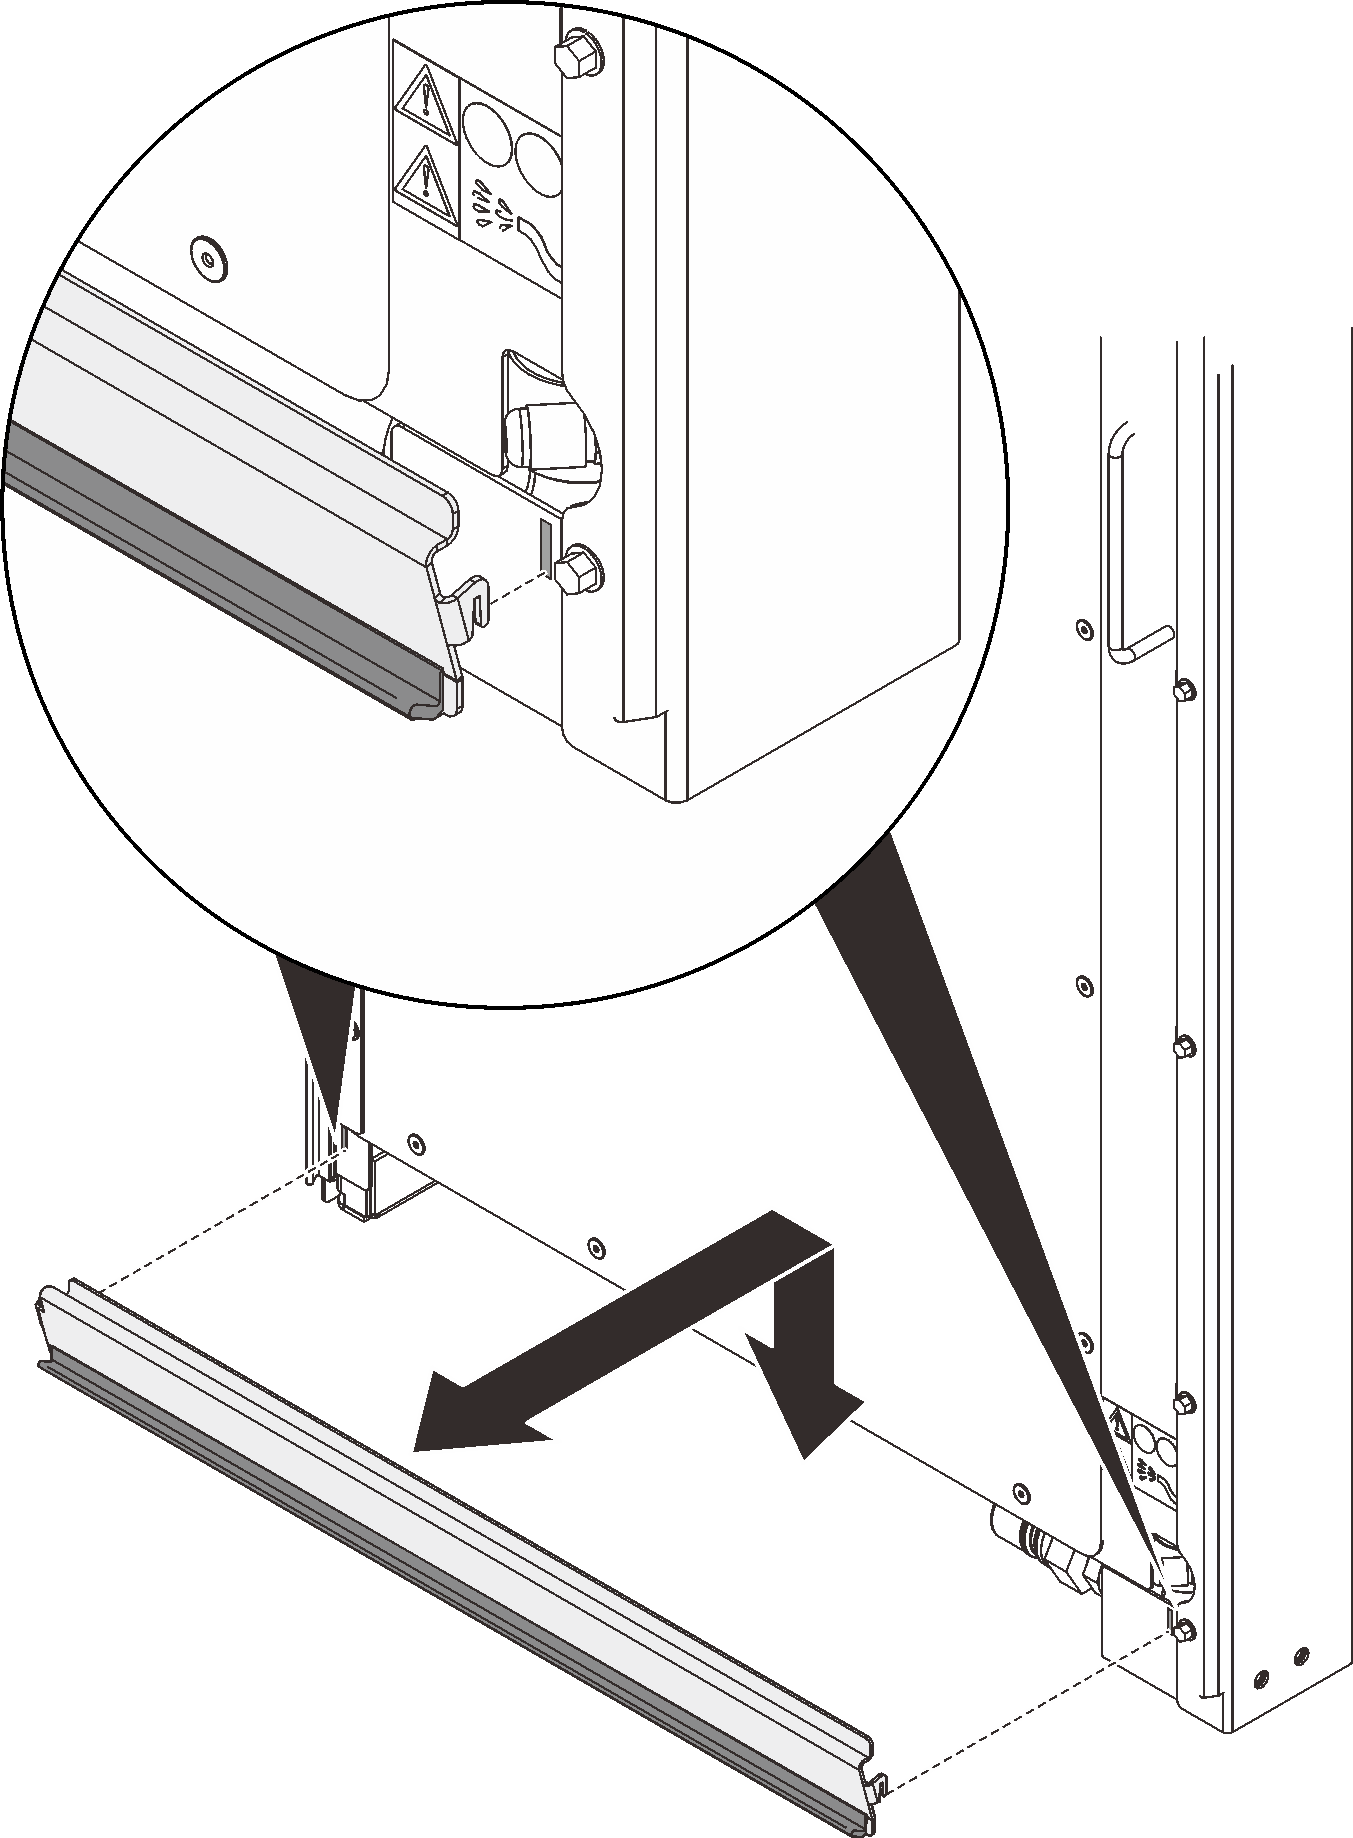
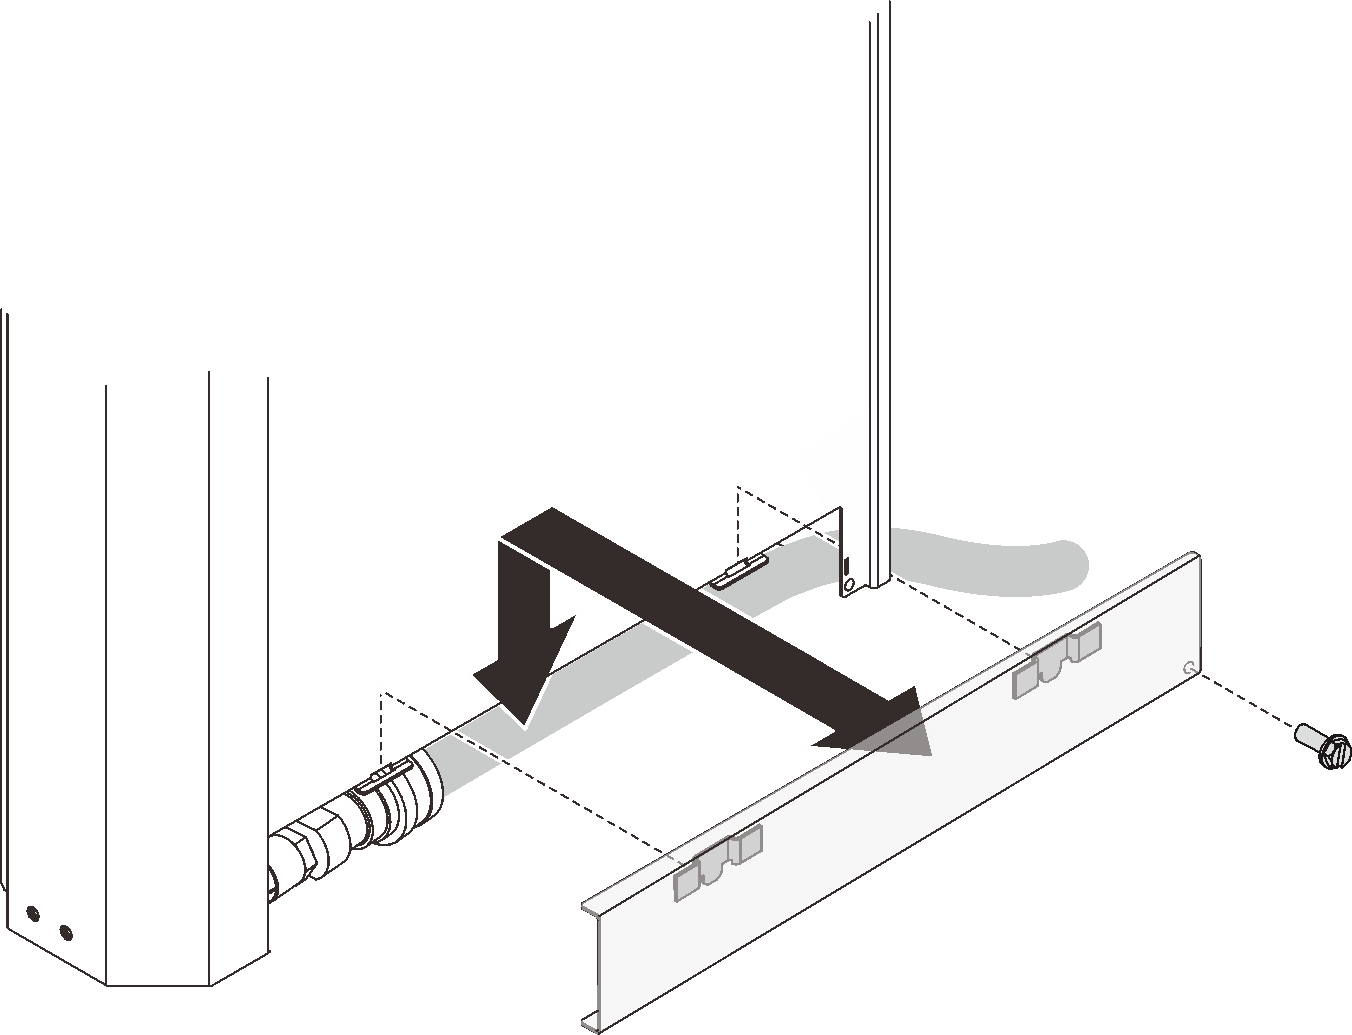
- If the inner hose access panel is installed, lift and remove it from the heat exchanger.Figure 1. Removing the inner hose access panel
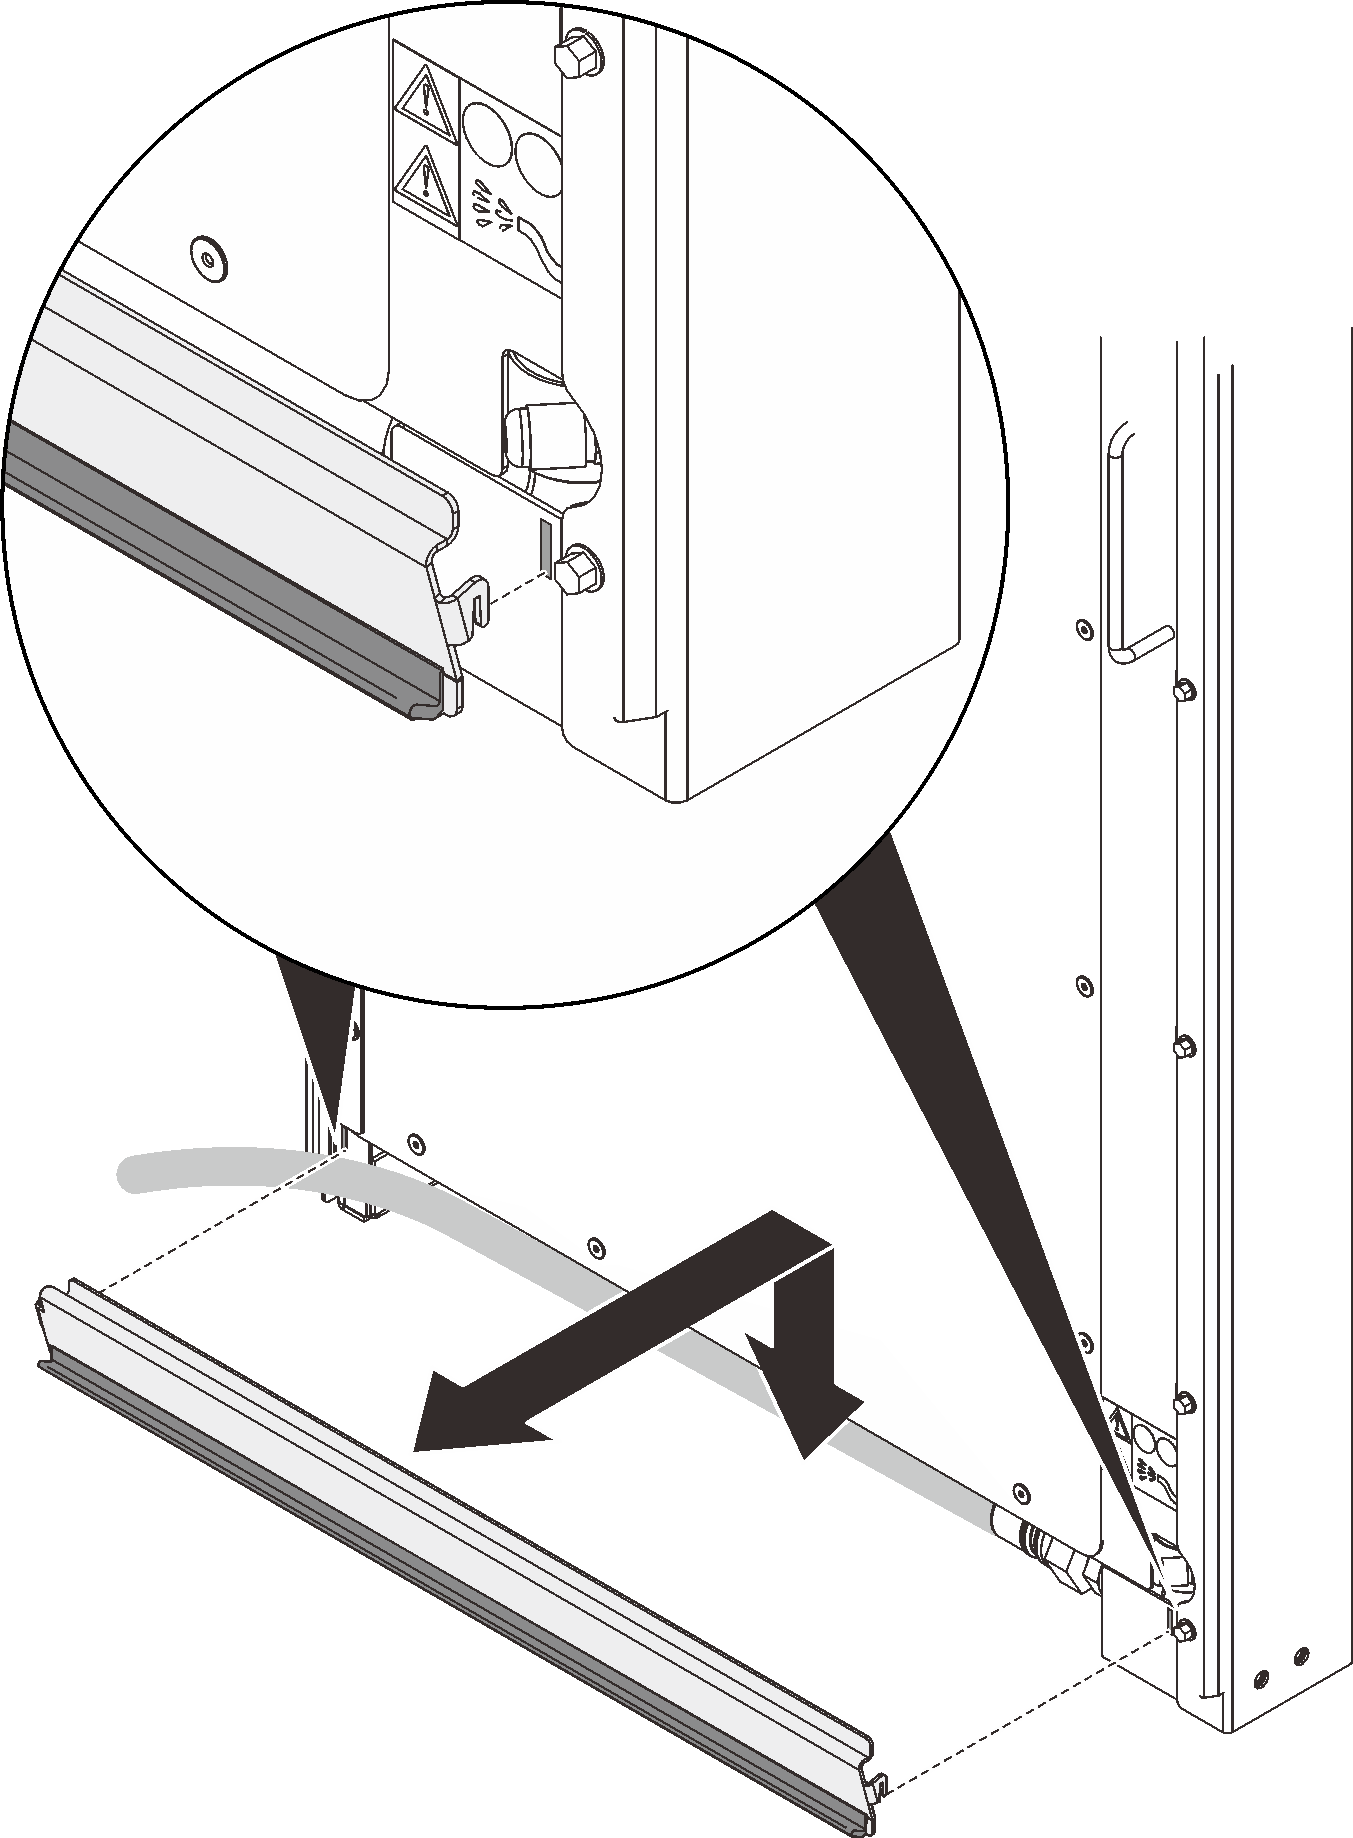
- If the outer hose access panel is installed, remove the screw that secures the panel (if applicable), then lift and remove the panel from the heat exchanger.Figure 2. Removing the outer hose access panel

- Purge the nitrogen that has been filled in the hose from the hose.Figure 3. Purging nitrogen
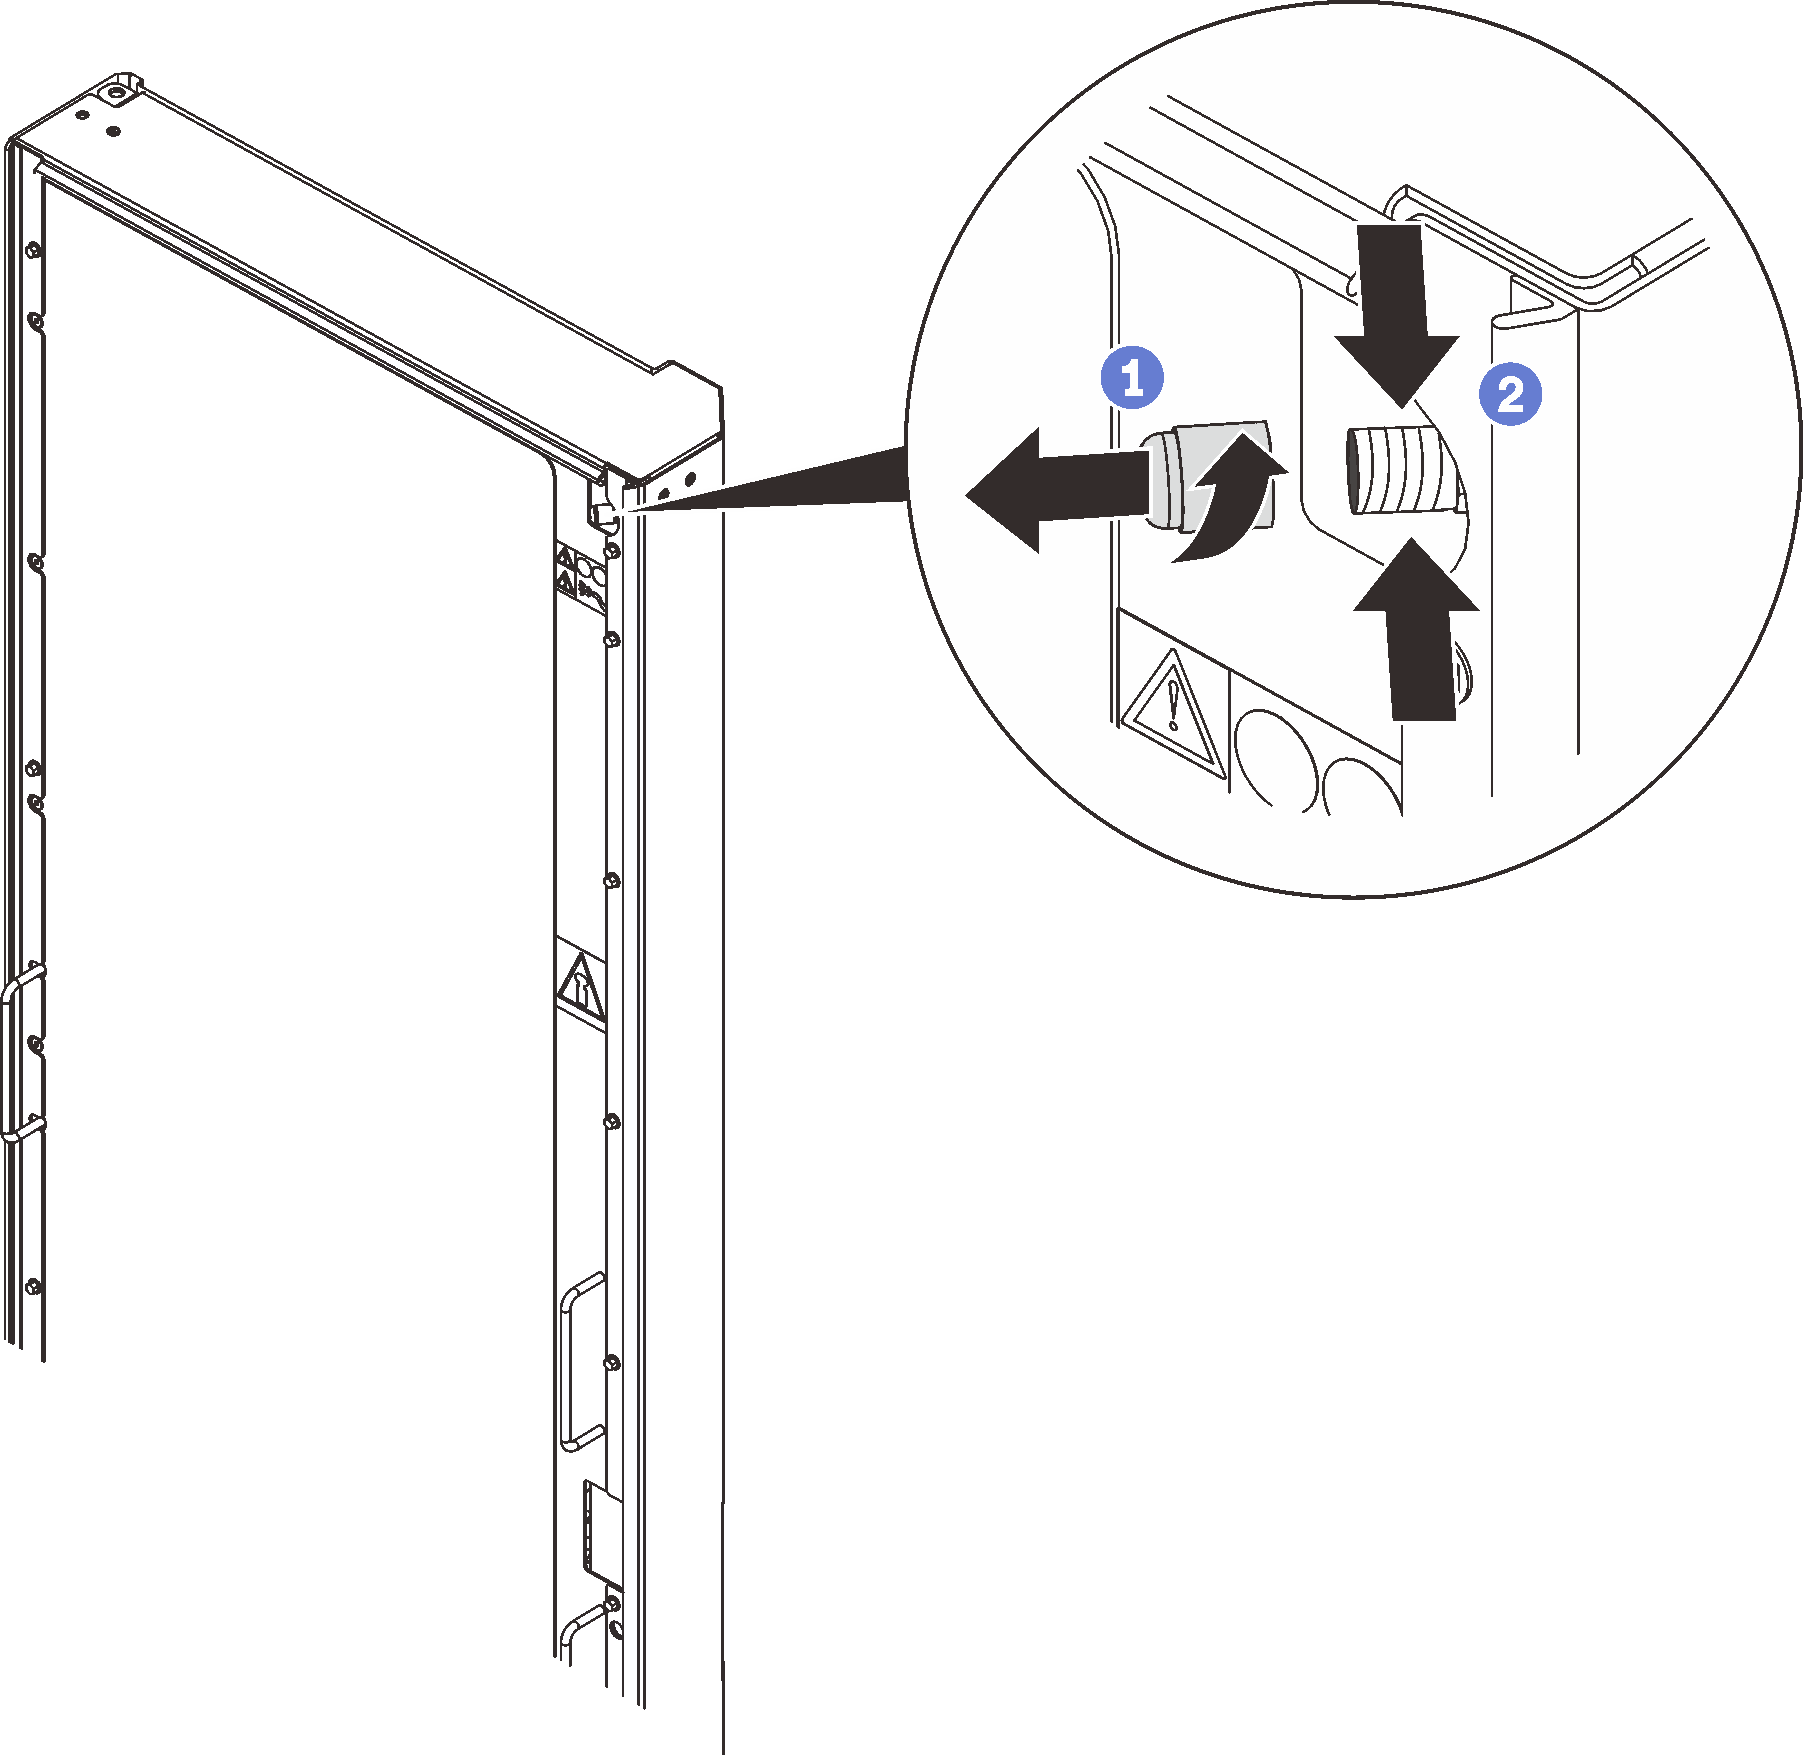
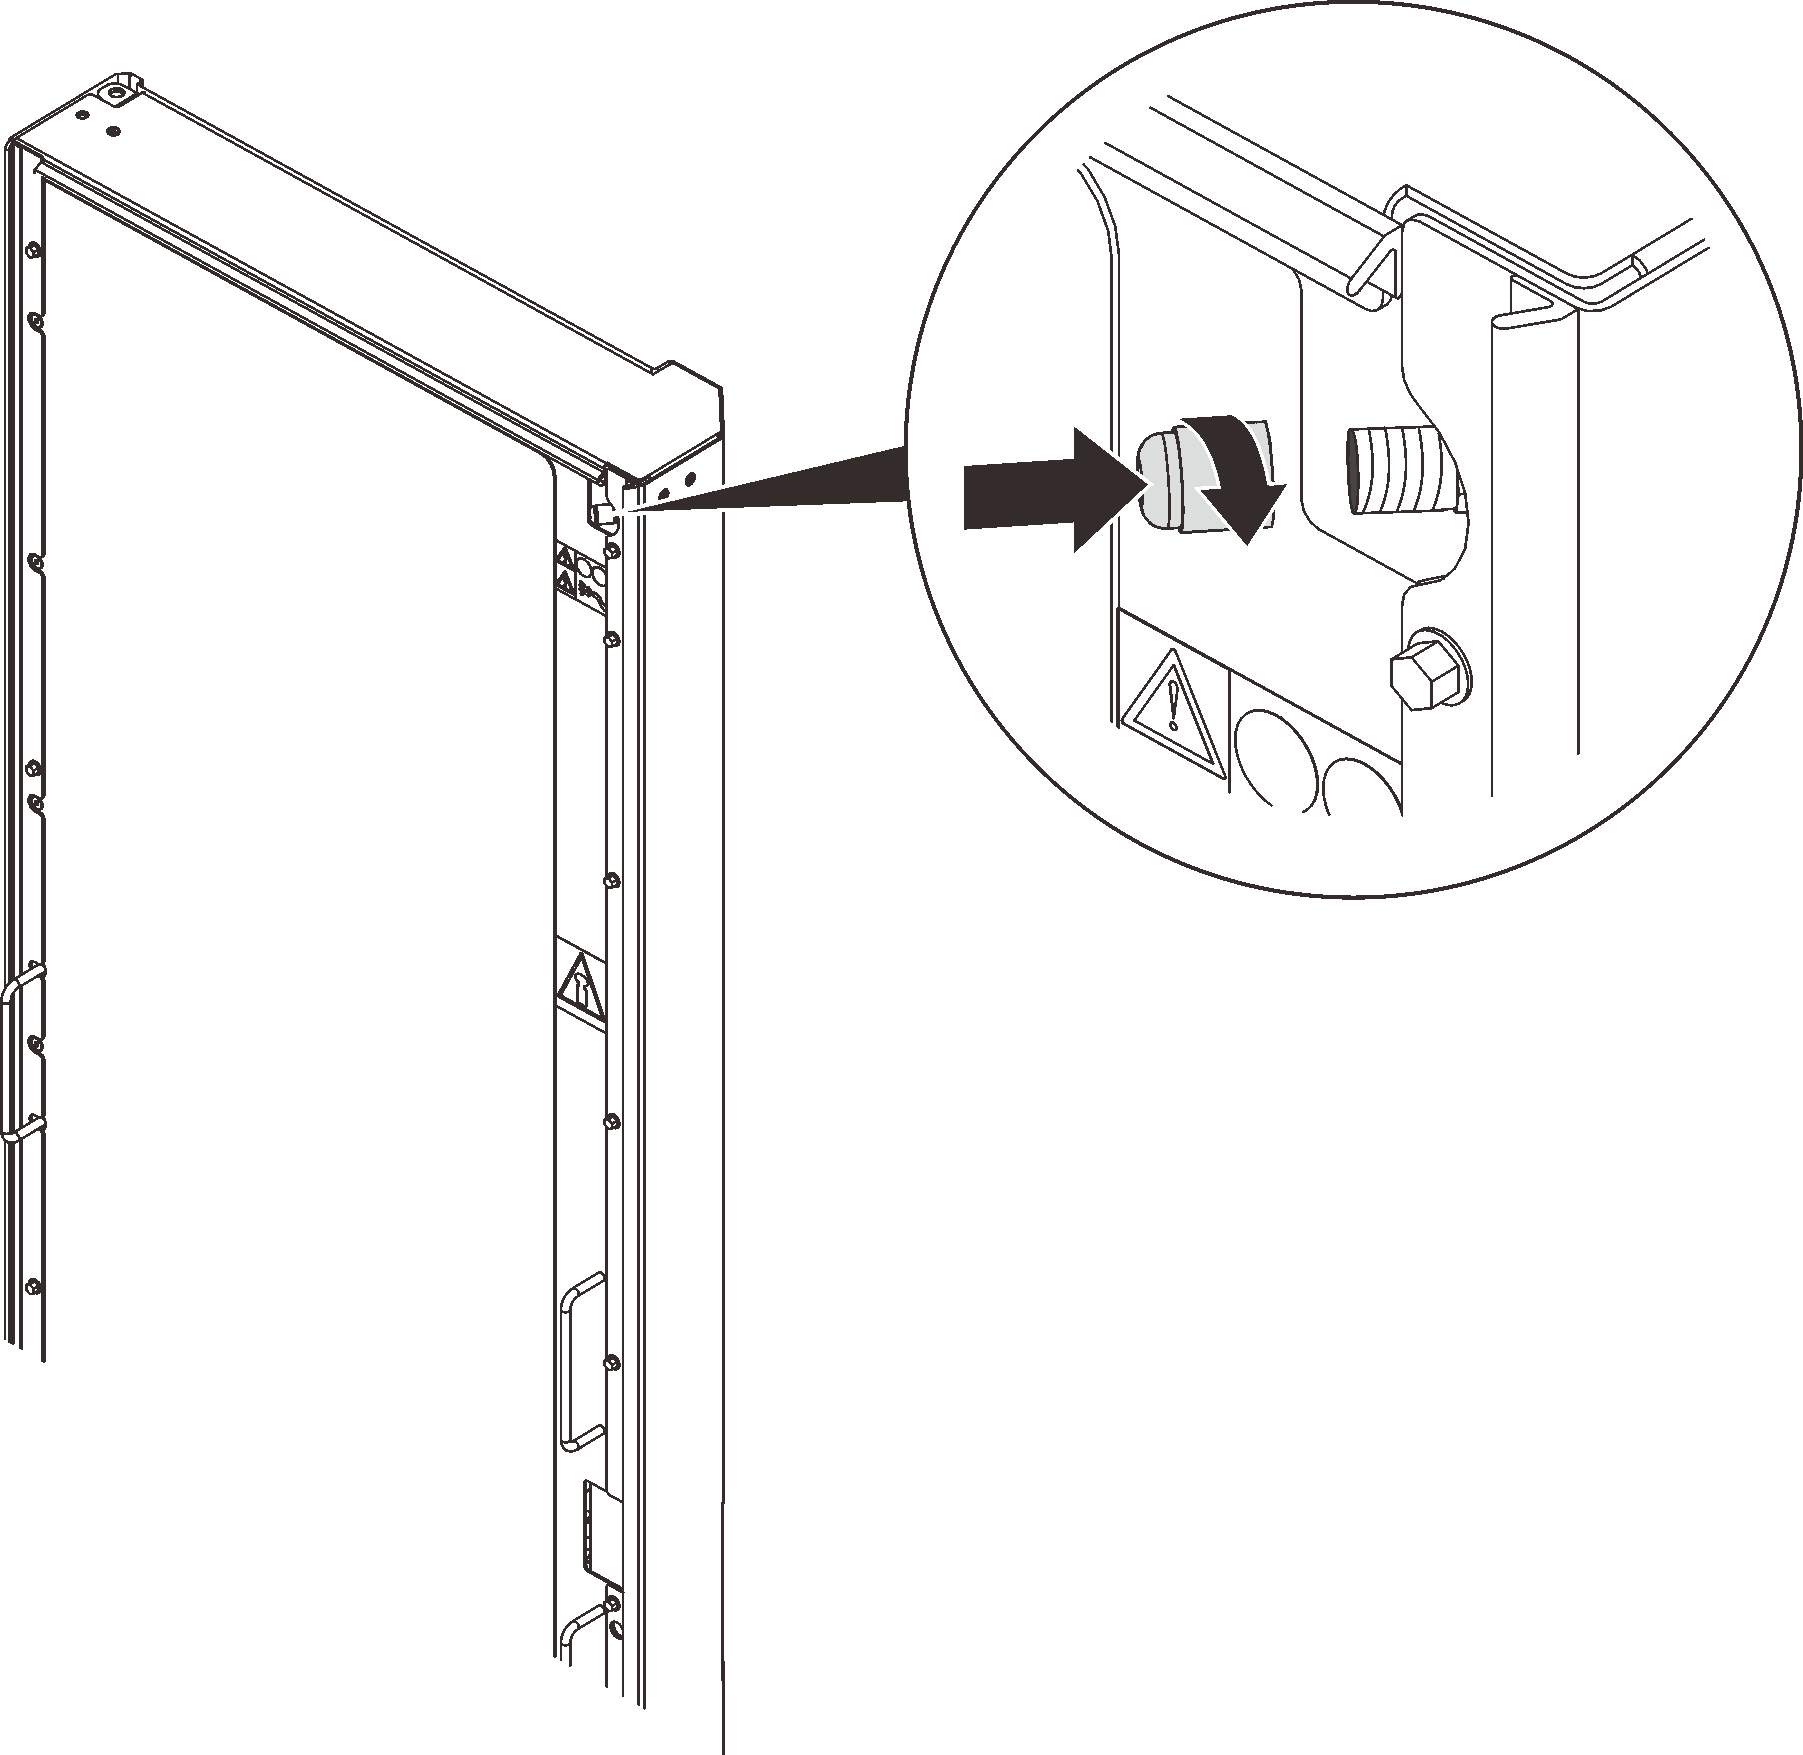
 Loosen and remove the cap from the air-purging valve.
 Press in on the valve stem of the air-purging valve to purge the nitrogen from the heat exchanger. Continue holding in the valve stem until the pressure is released.
- Align the supply hose coupling with the supply manifold, push it in and pull the collar backward until it locks in place with an audible click. Then, repeat the same procedure on the return hose and manifold.Figure 4. Supply and return hoses and manifold couplings
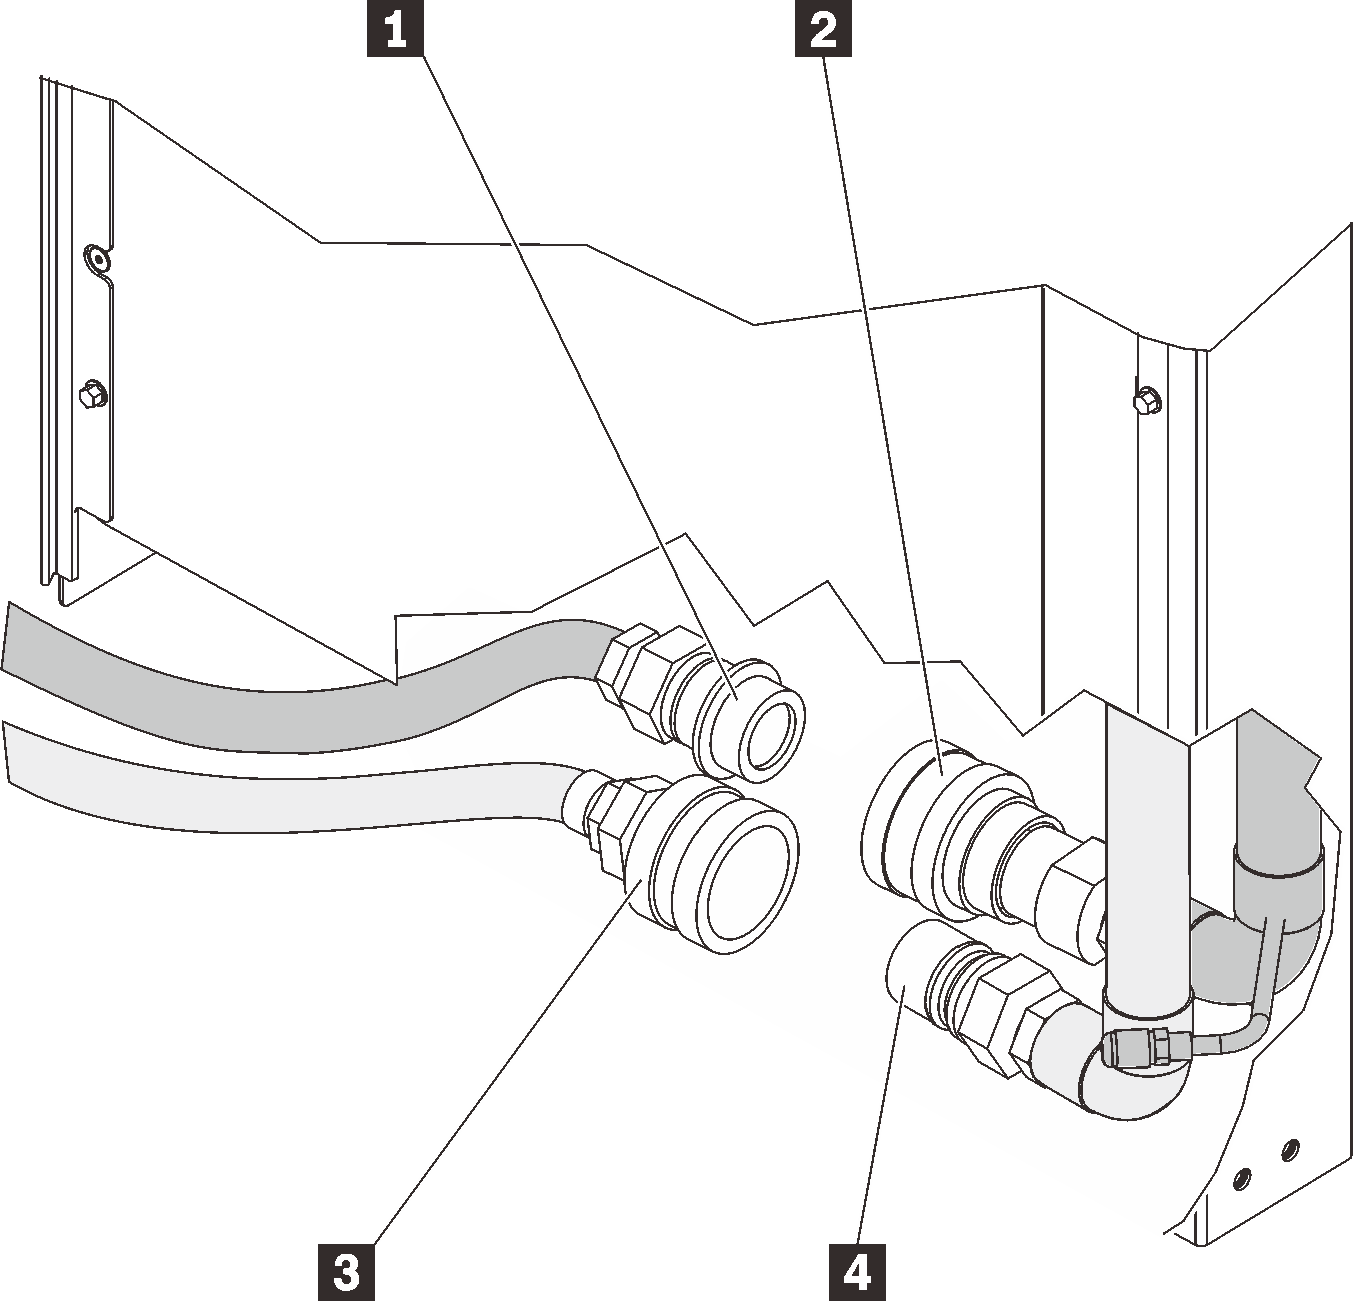
- Connect the supply hose assembly (1) to the supply manifold-coupling (2).
- Connect the return hose assembly (3) to the return manifold-coupling (4).
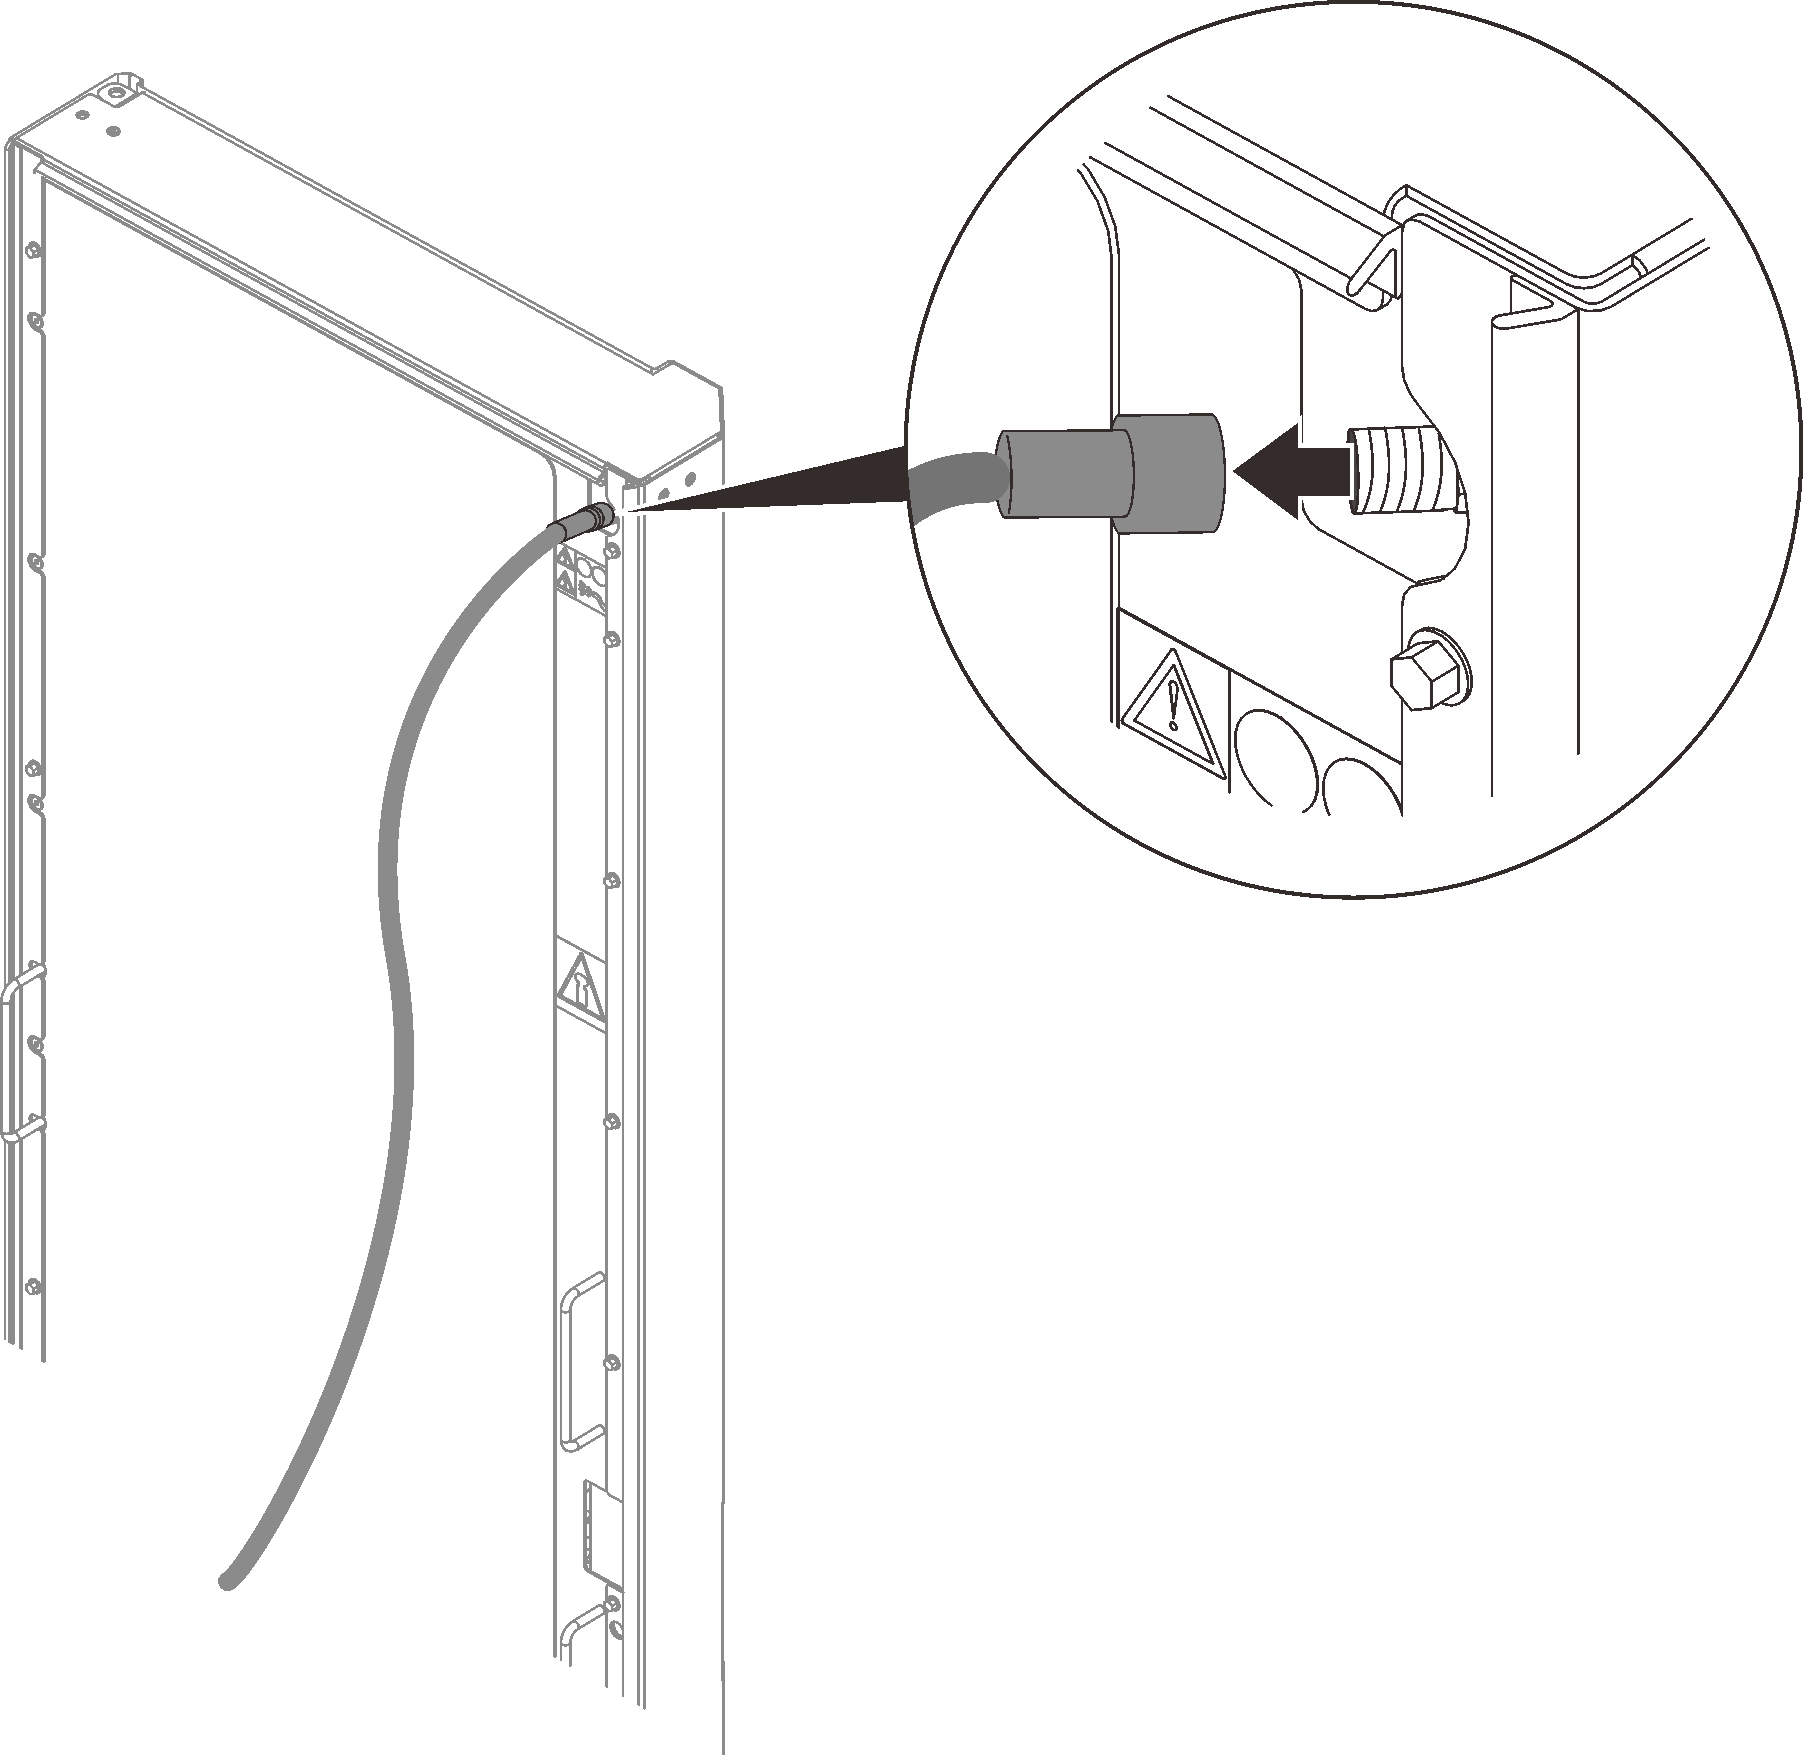
- Attach the air-purging tool to the air-purging valve at the top of the heat exchanger, and place the drain end into a 2-liter (or larger) container to catch the water and air bubbles that escape during the filling procedure.Figure 5. Installing the air-purging tool

- When there is a steady stream of liquid into the container from the air-purging tool, disconnect the tool from the heat exchanger.AttentionIf water drips from the air-purging valve after you remove the air-purging tool, reattach the tool and disconnect it again to seal the valve.Figure 6. Removing the air-purging tool
- Install the valve cap back to the air-purging valve.Figure 7. Installing the valve cap
- Align the hooks on the inner hose access panel with the slots on the inner side of the heat exchanger, and lower the panel to secure it.Figure 8. Installing the inner hose access panel
- Align the slots on the outer hose access panel with the hooks on the outer side of the heat exchanger, and lower the panel to attach it to the heat exchanger. Optionally, secure the panel with a M4 screw.Figure 9. Installing the outer hose access panel
Give documentation feedback