Install 48U Standard Rack Extension Kit
See this topic to learn how to install 48U Standard Rack Extension Kit.
Each unit of rack extension kit comes with additional capacity of one unit 0U PDU to each side of the rack.
Each rack cabinet supports up to two units of rack extension kit (one to the front and one to the rear side). However, if the rear side has been installed with the Rear Door Heat Exchanger, the rack extension kit cannot be installed.
If there is a plan to install baying kit while only one of the adjacent cabinets will be installed with extension, make sure to install the baying kit first (see Install the baying kit). Then, as preparation for this procedure, remove the two screws from the upper and lower part of the cabinet that will be installed with the extension kit, and jump to 4.
Figure 1. Removing screws to prepare for extension installation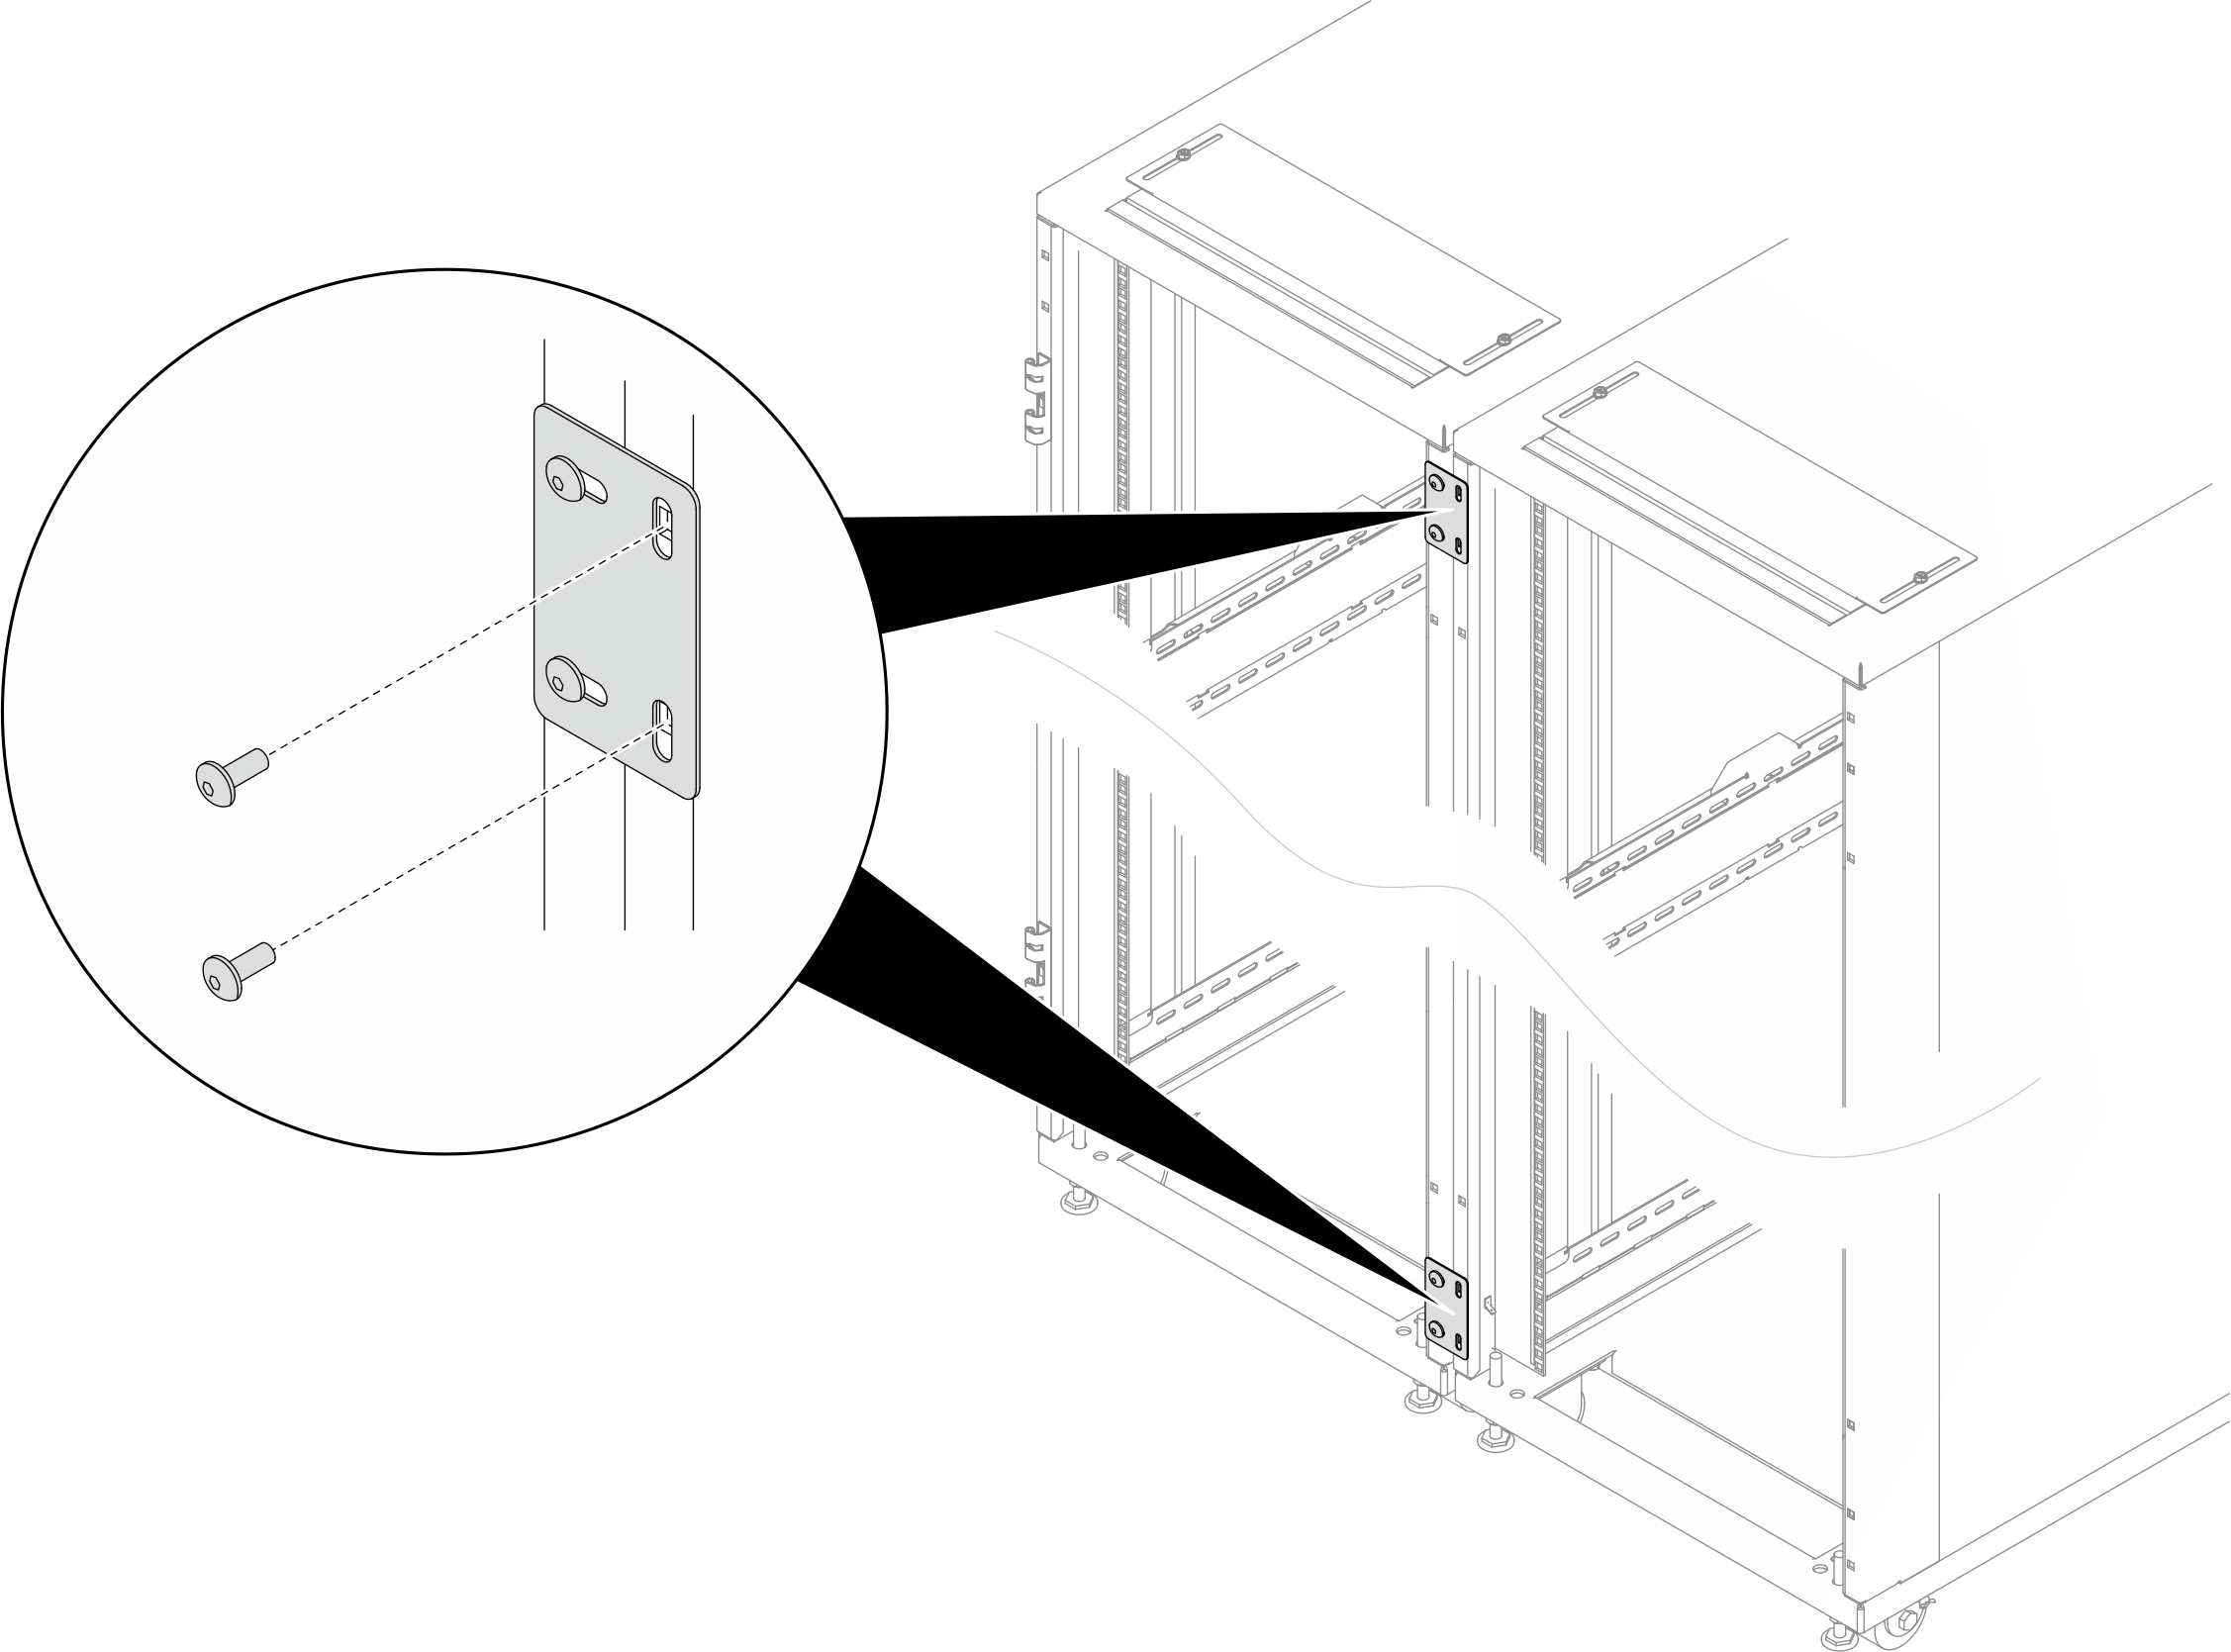
Procedure
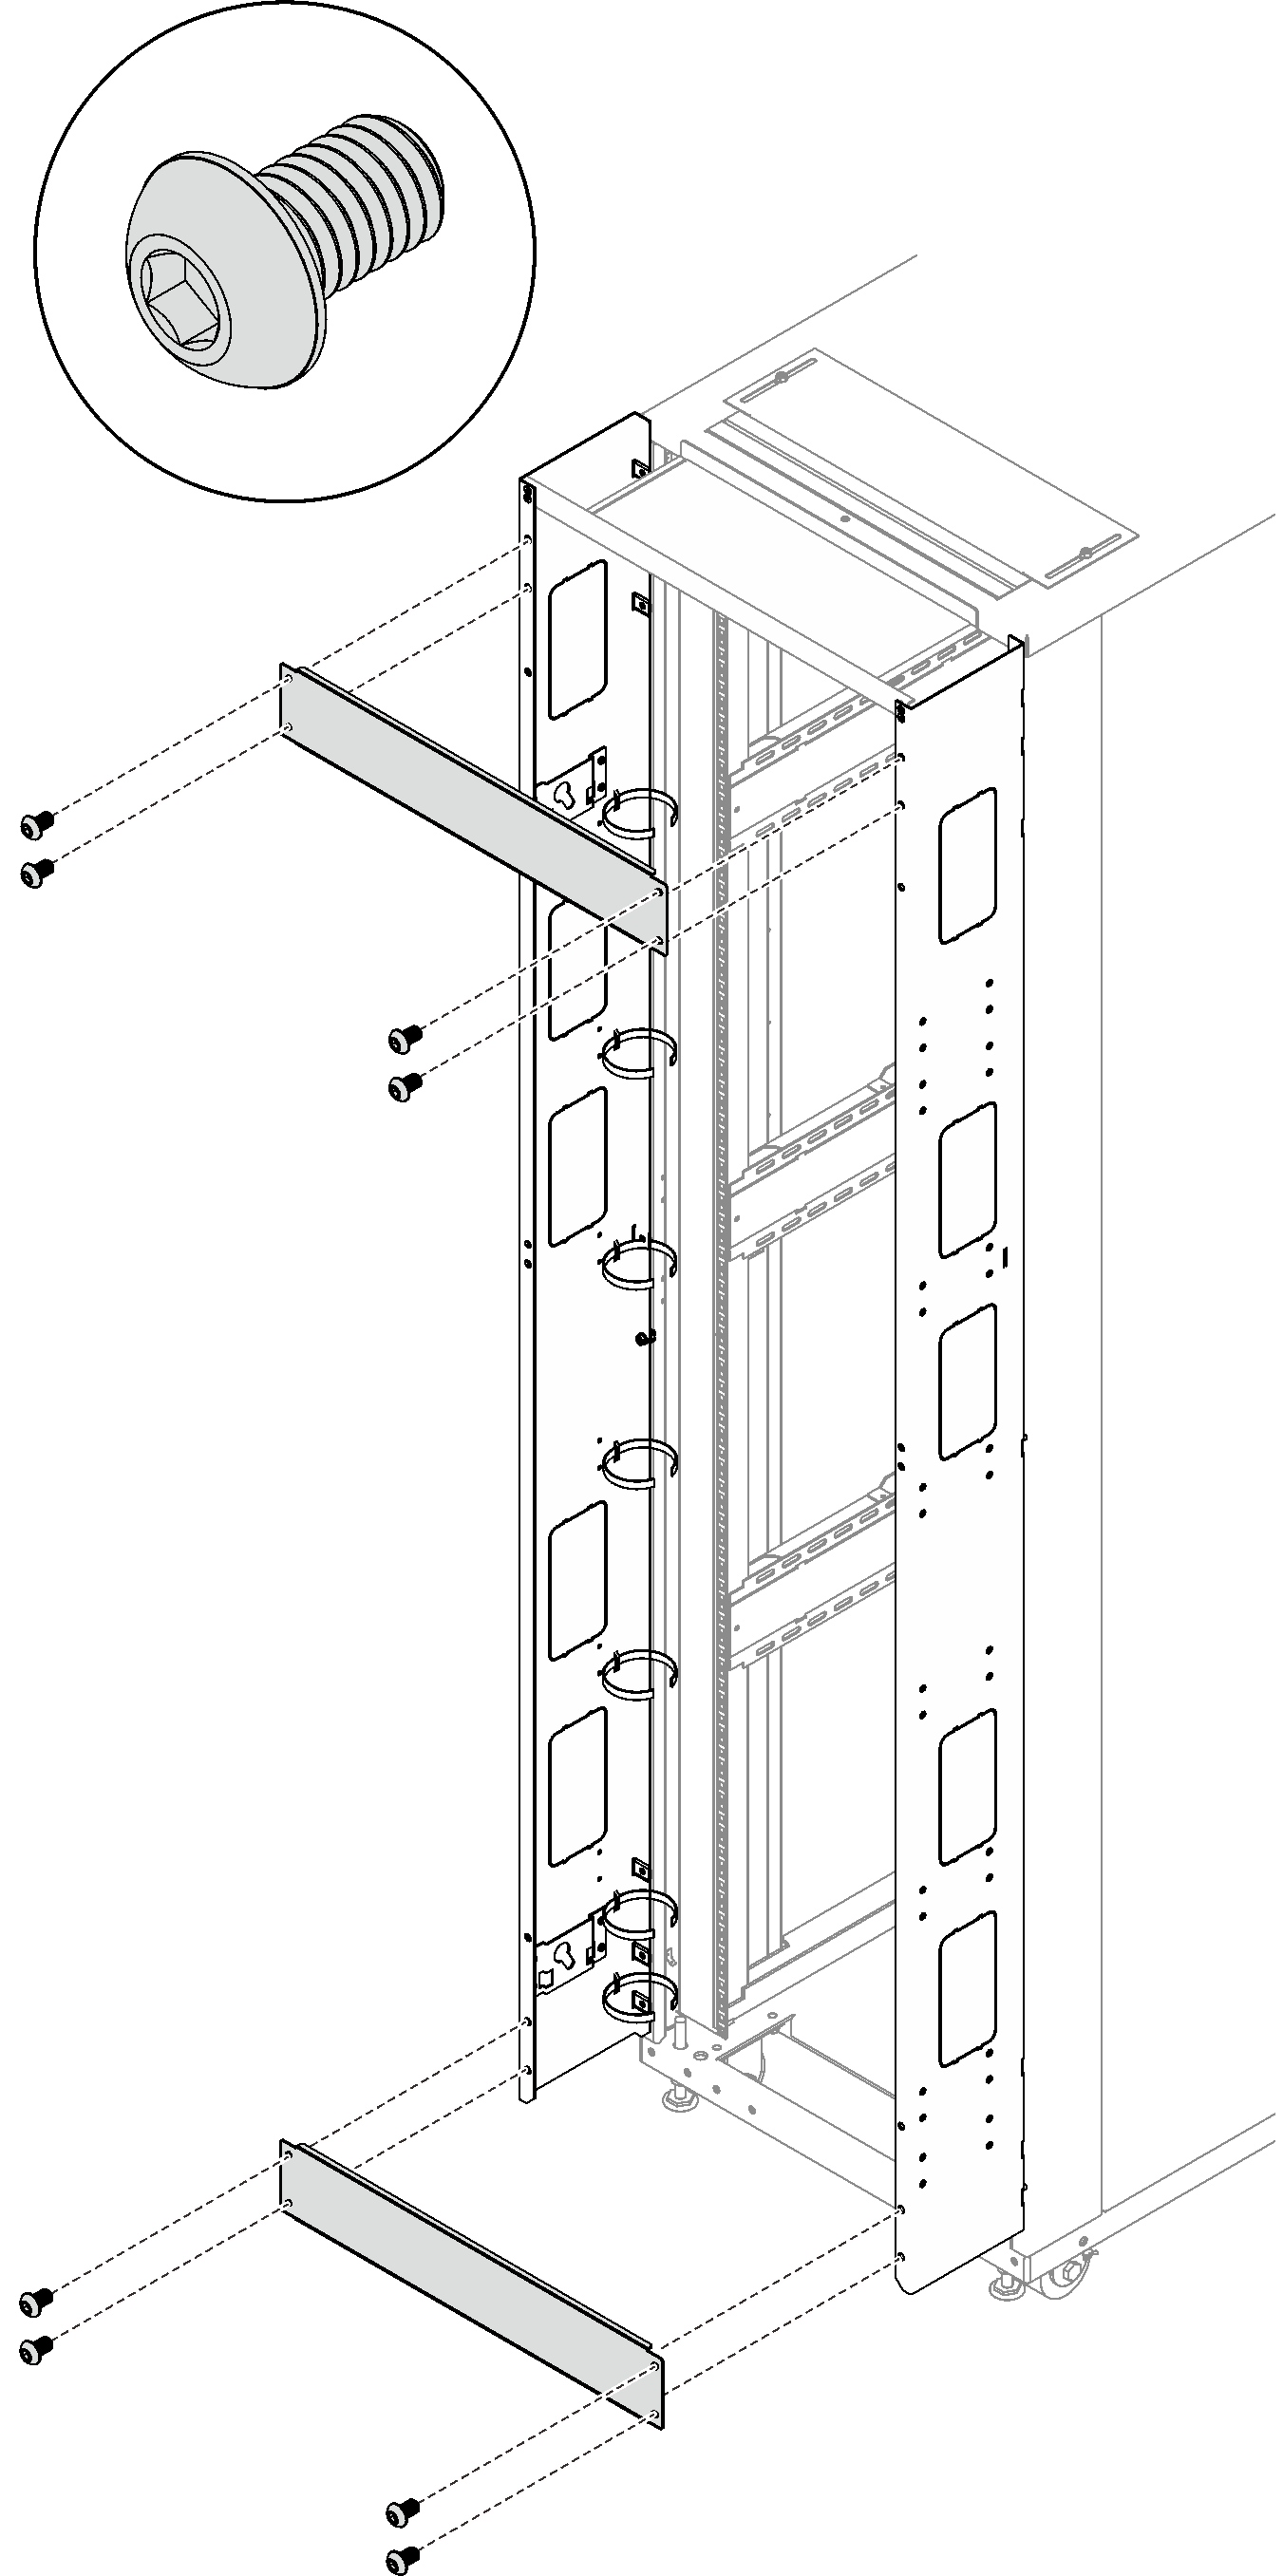
- Secure an extension panel to the side of the rack with seven screws, and repeat the step on the other extension panel.Figure 2. Installing an extension panel
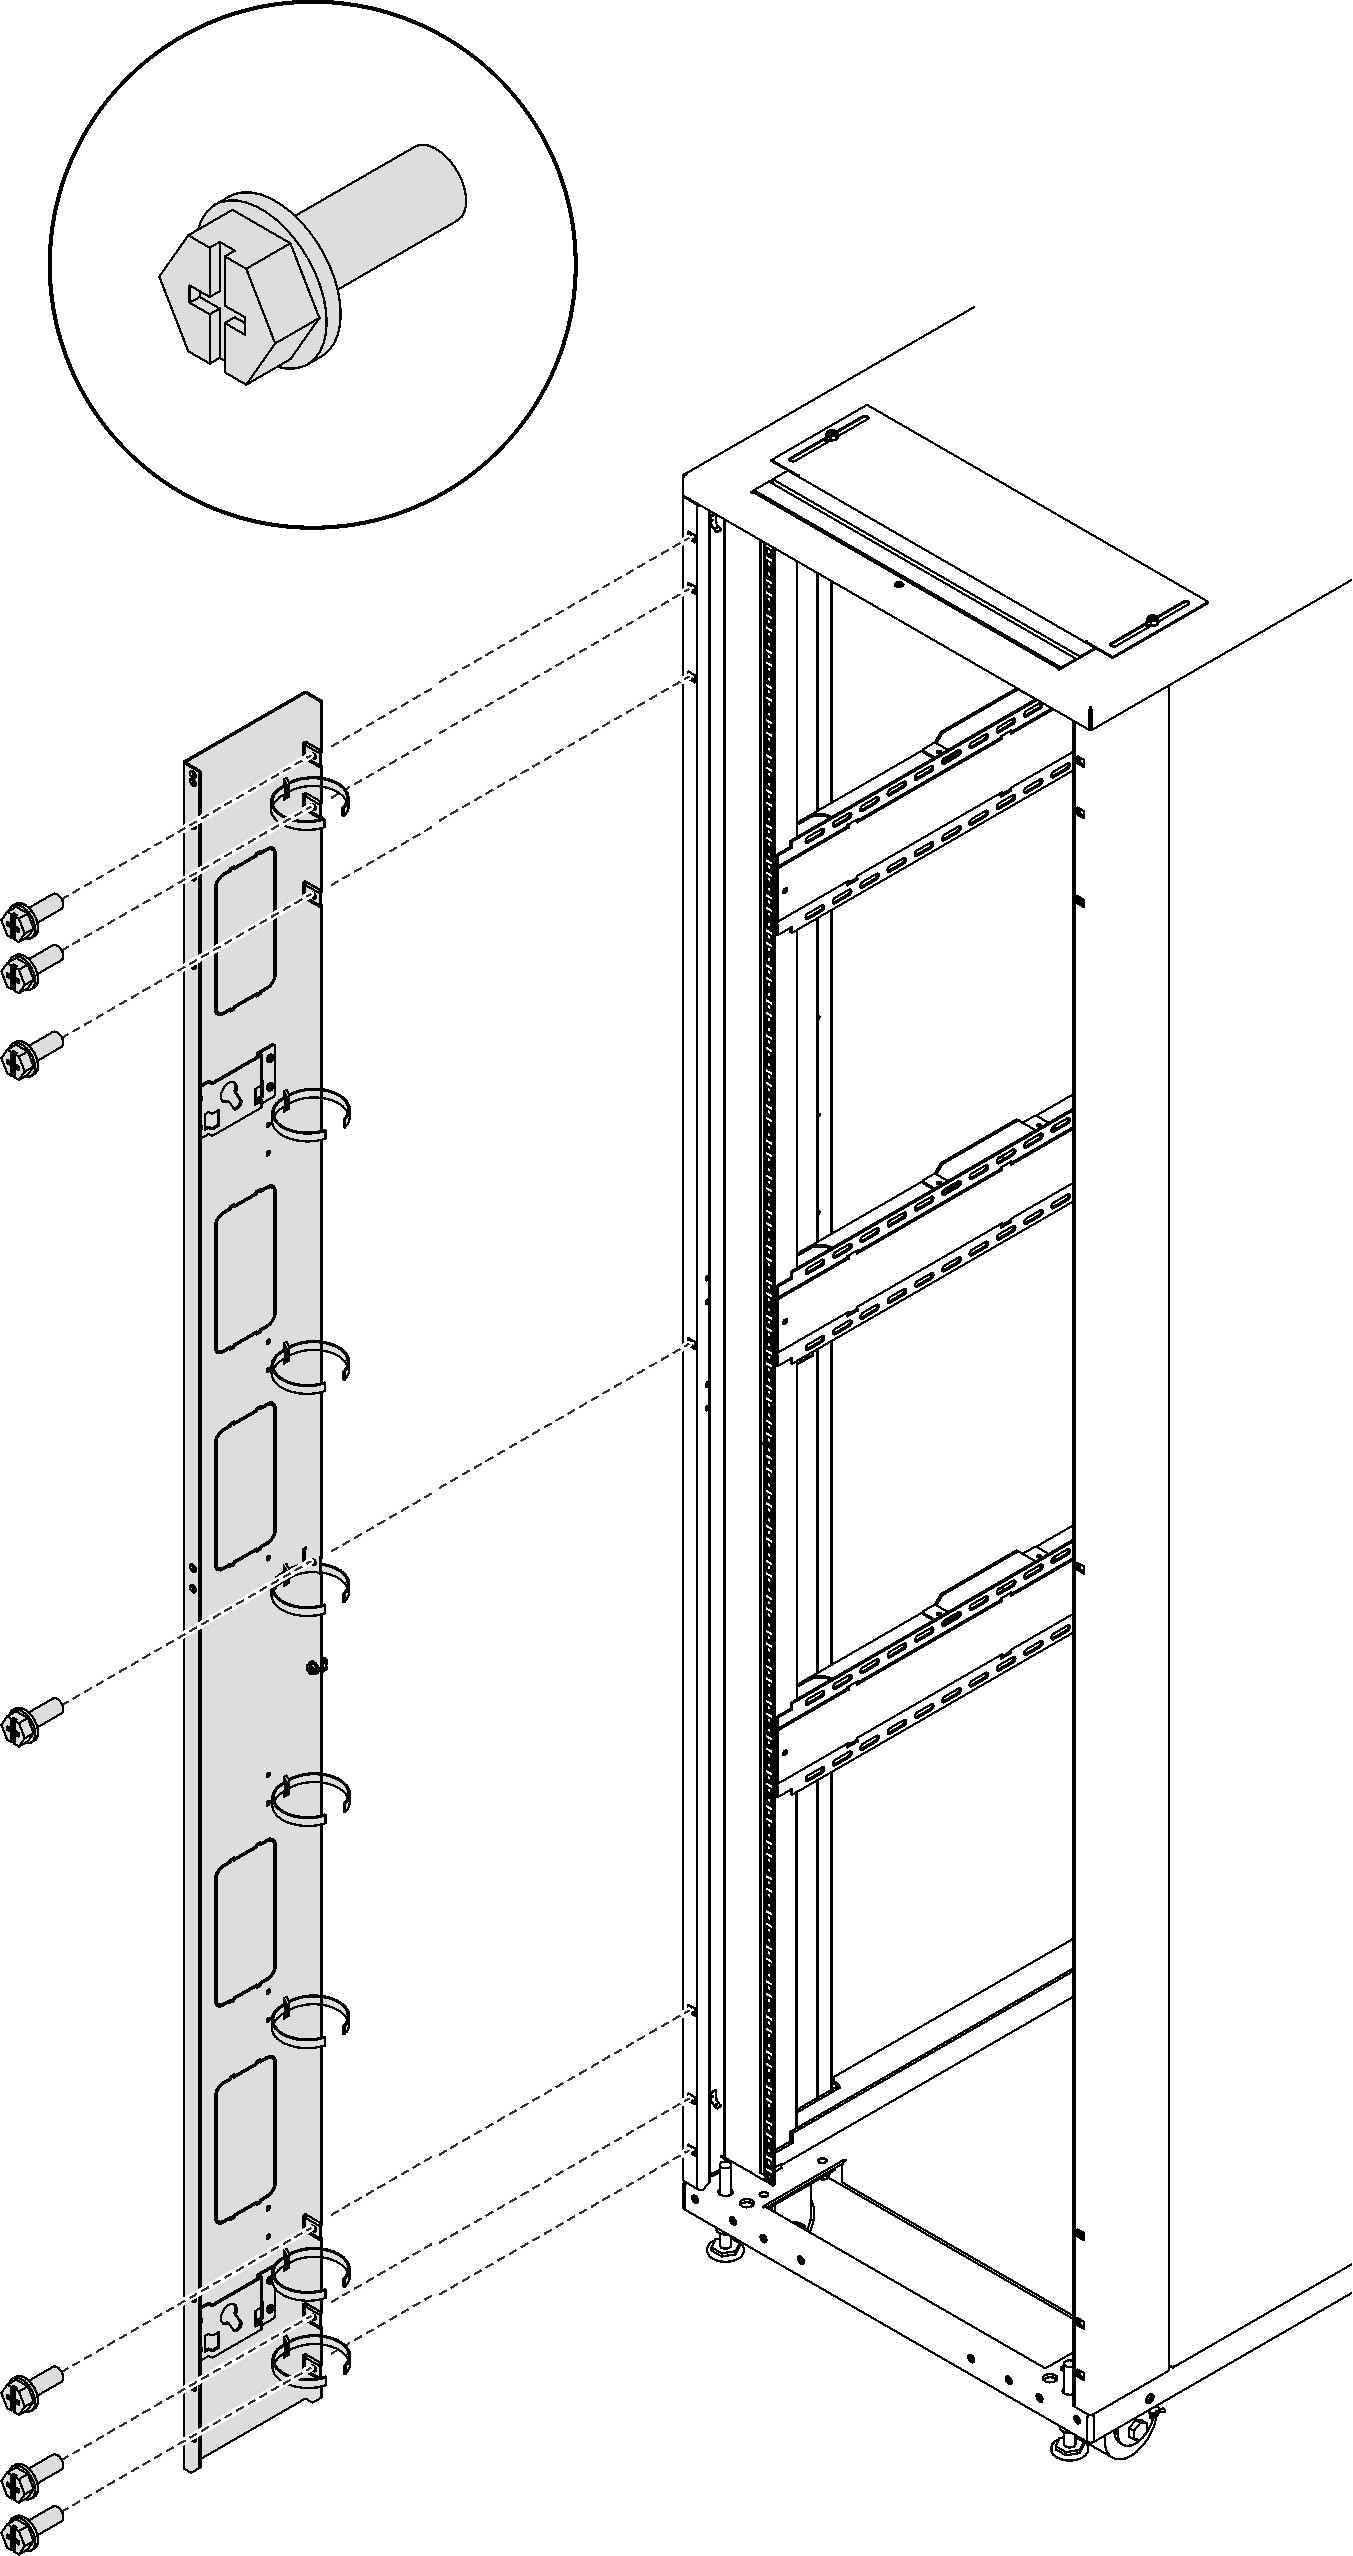 Figure 3. Installing an extension panel (with baying kit)
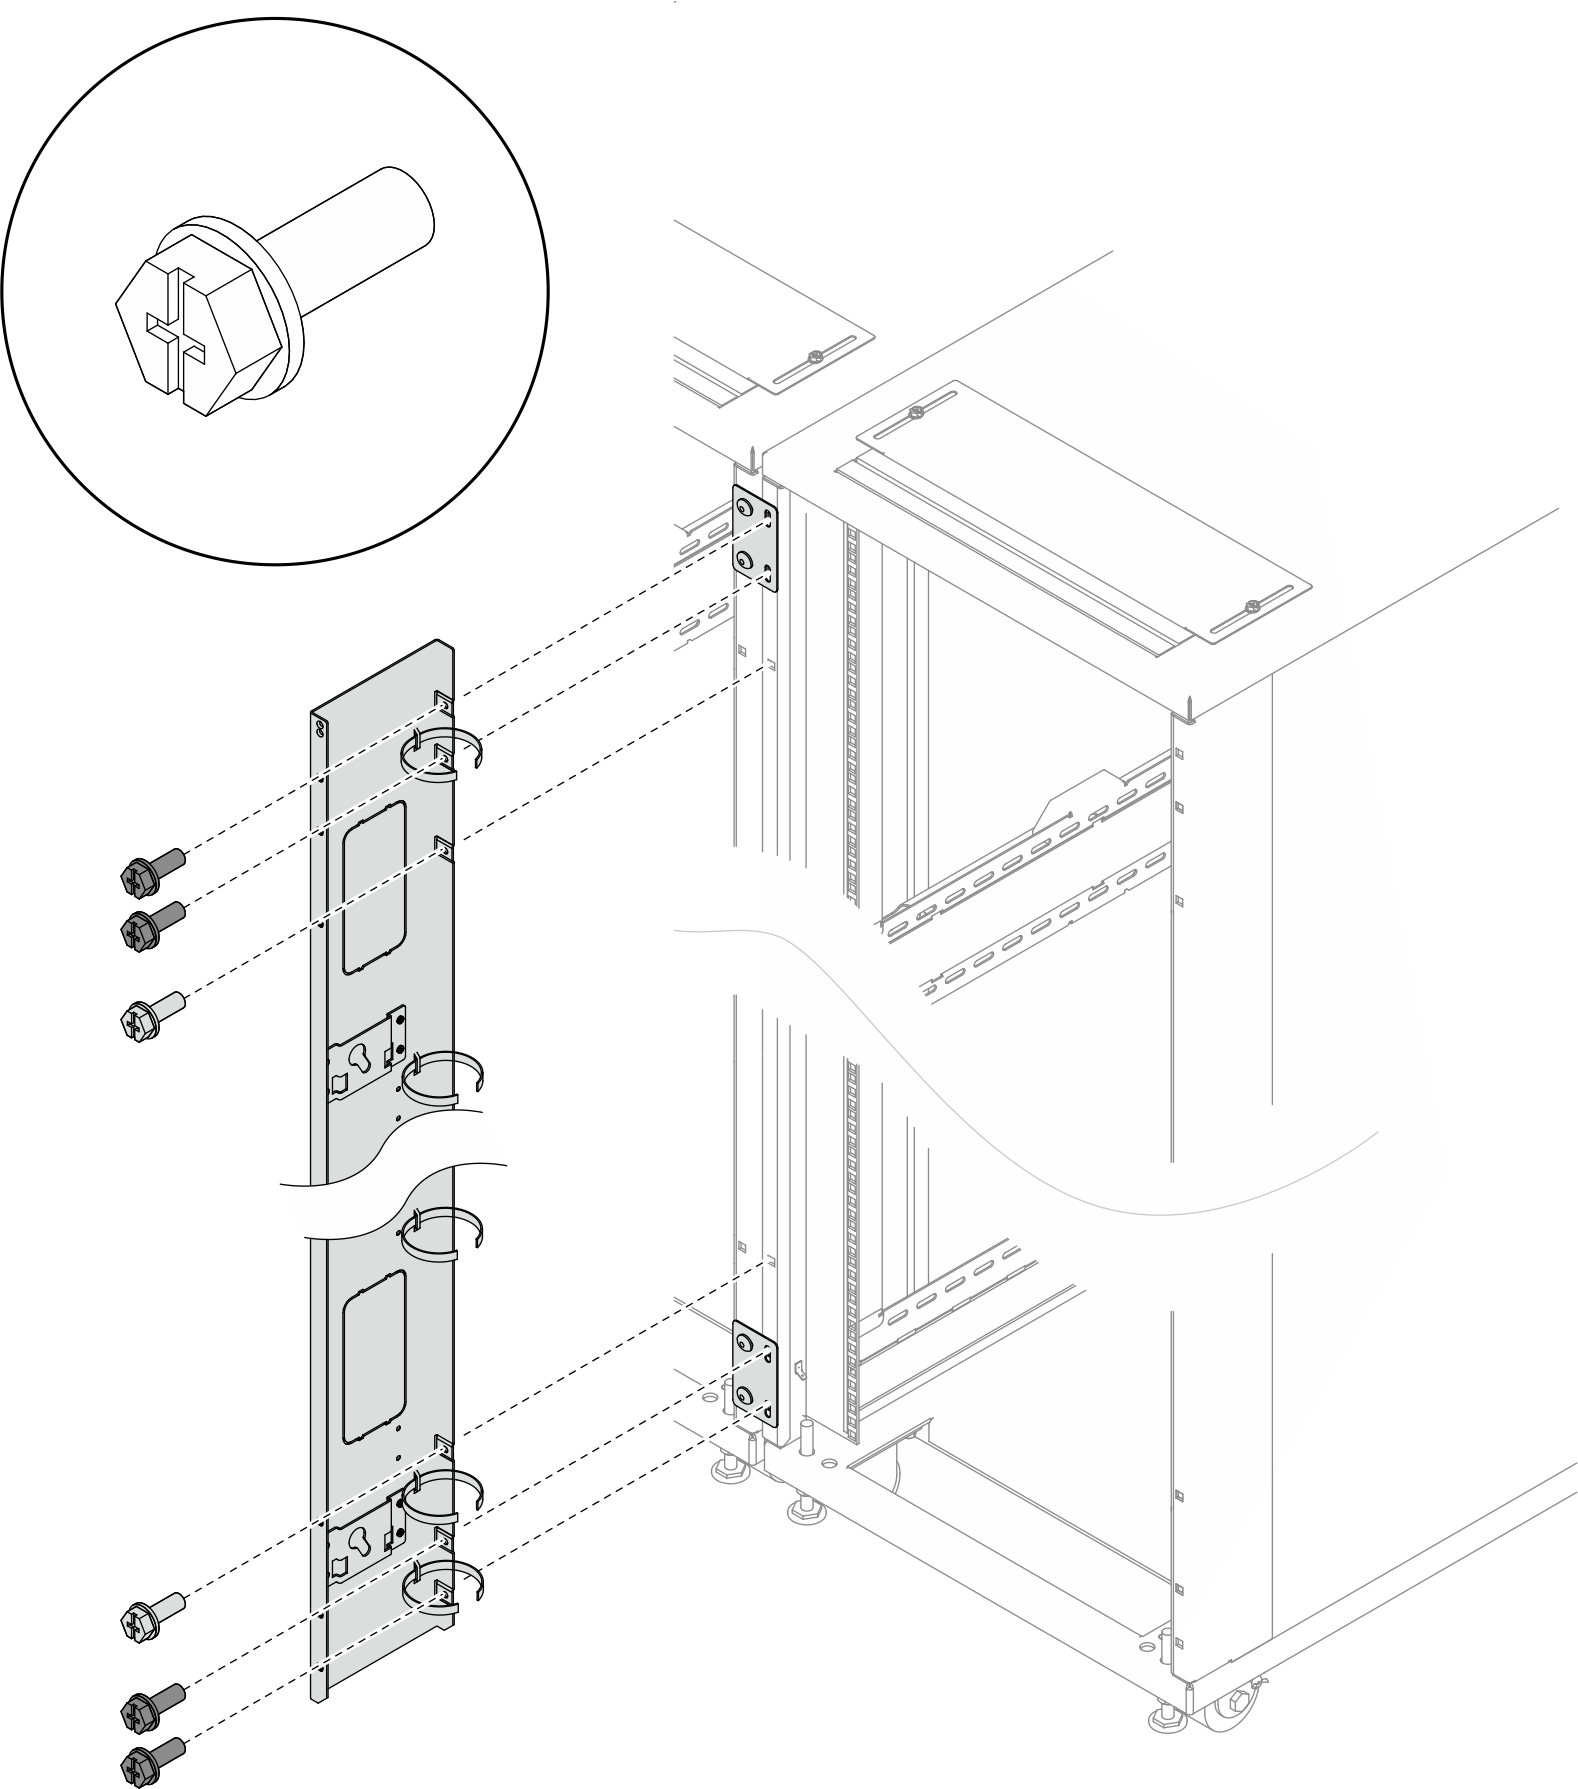
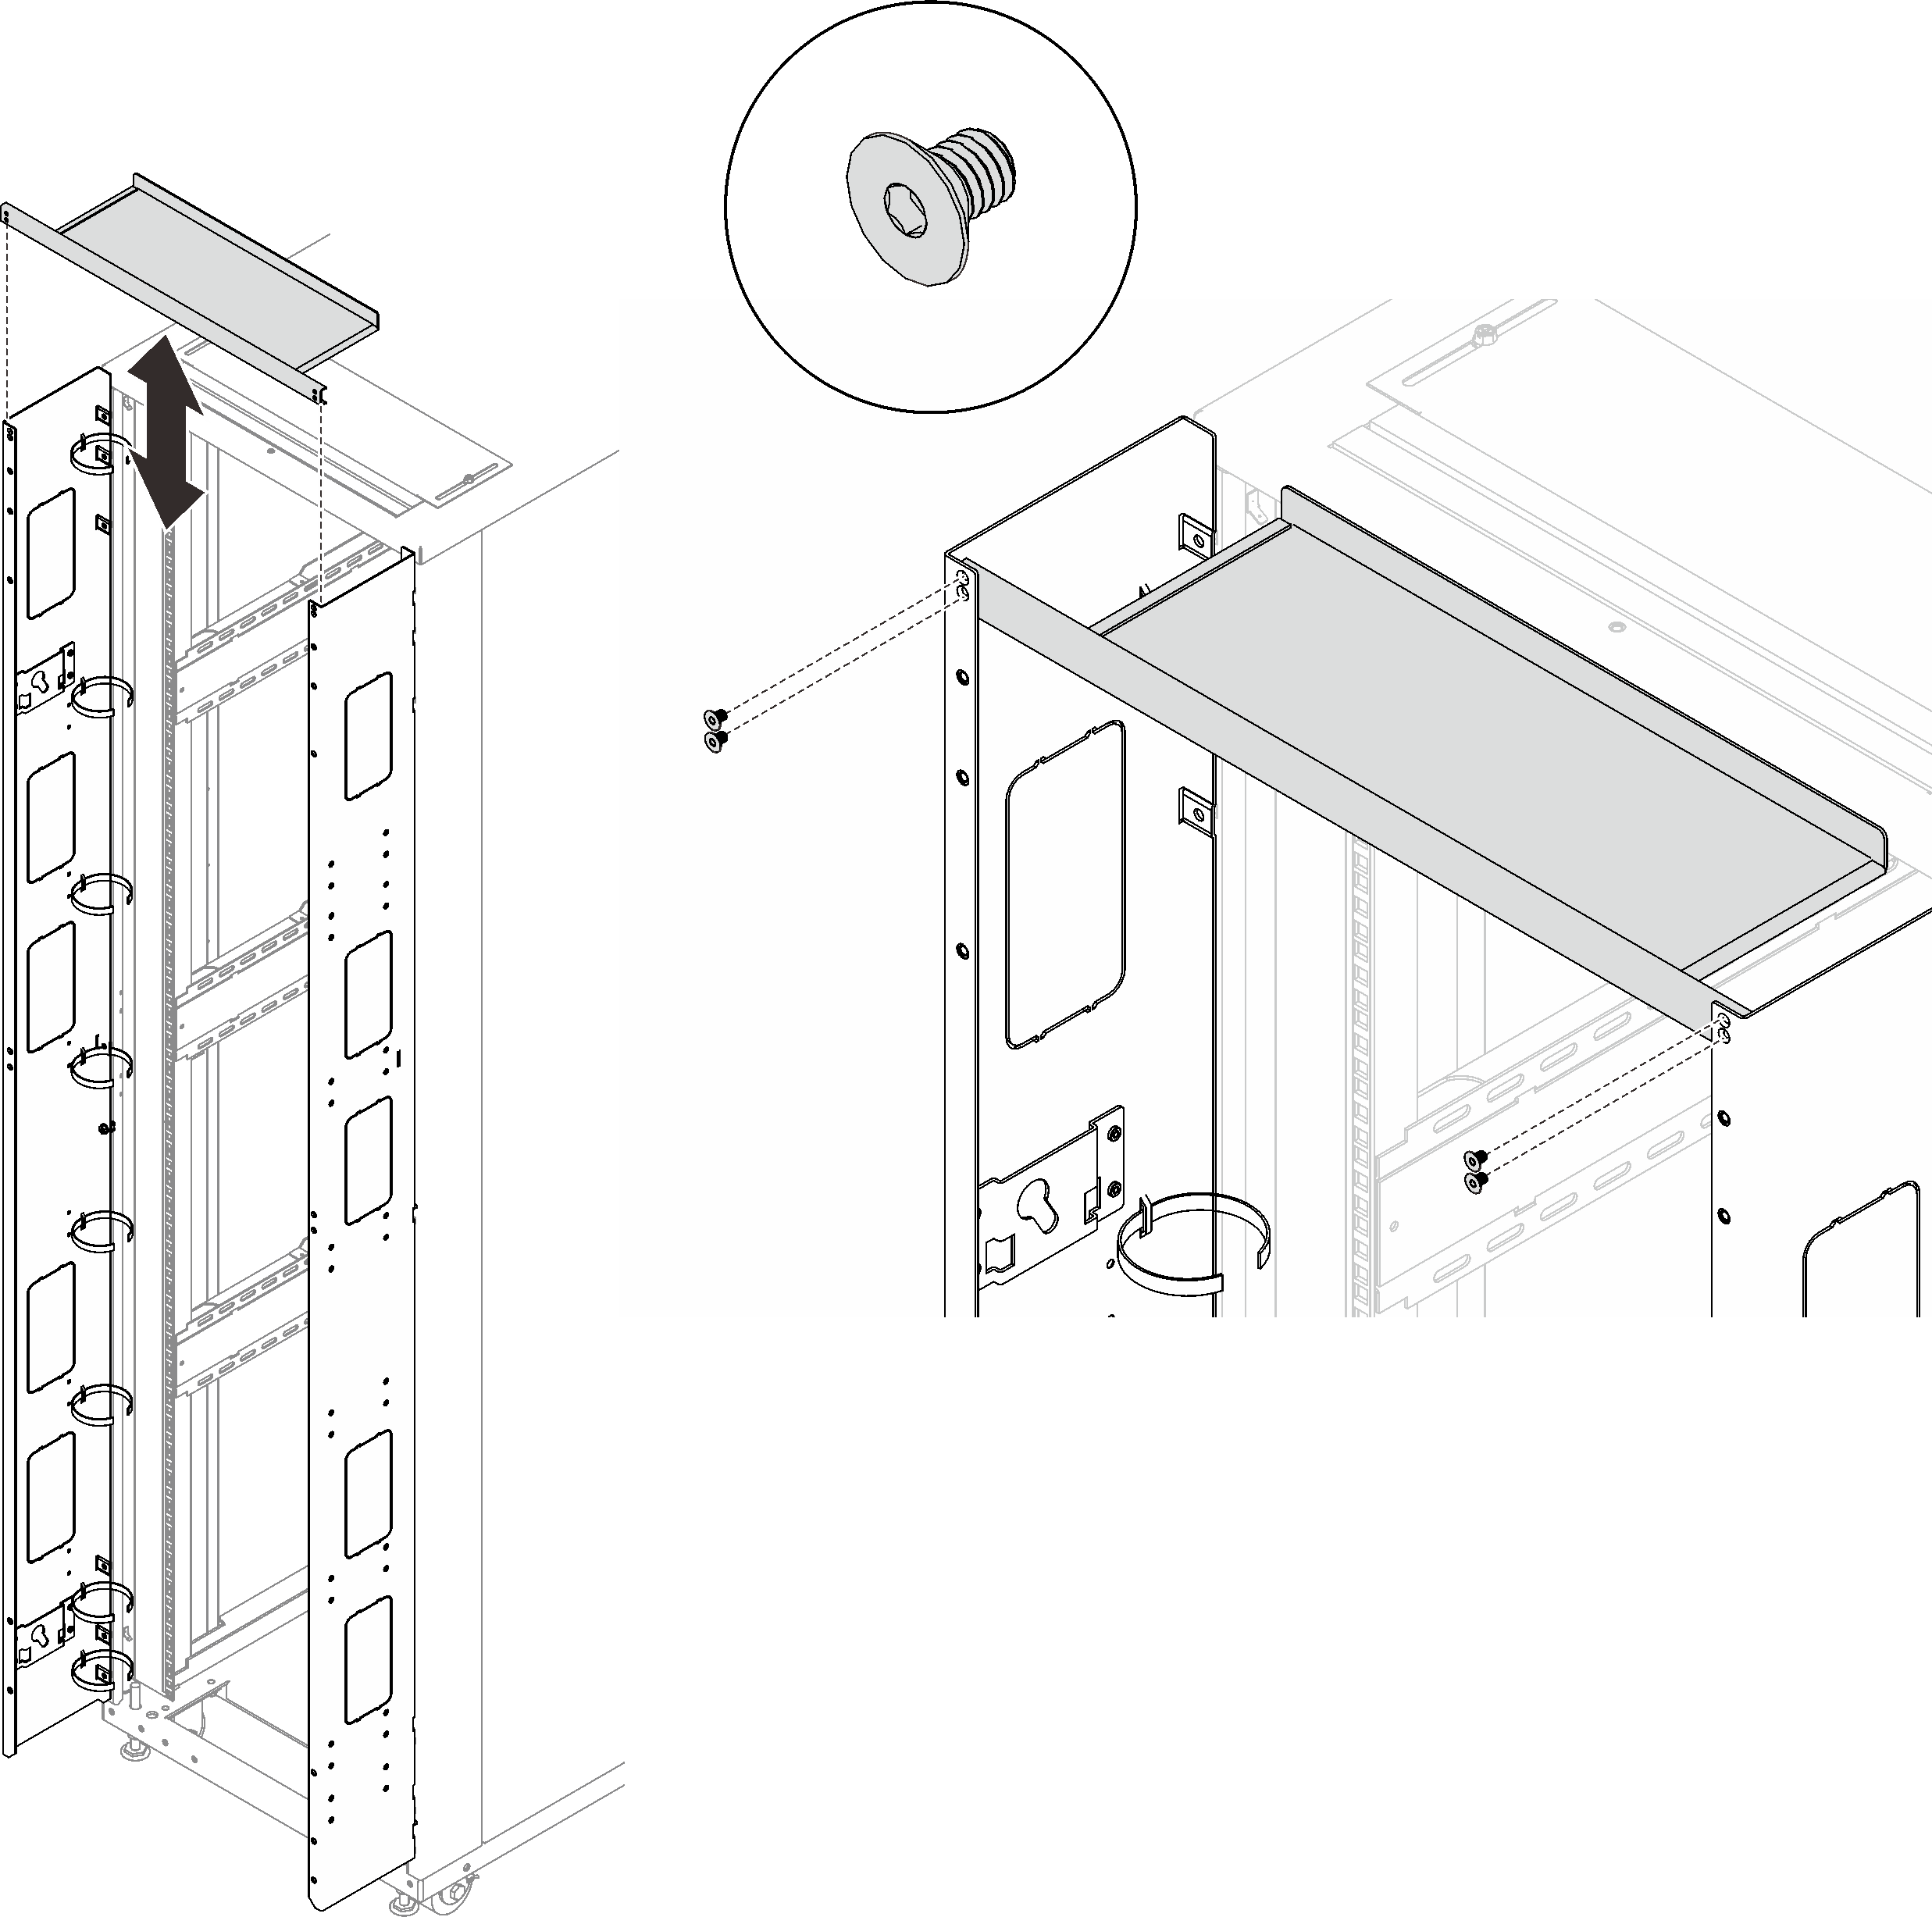
- Align the extension top cover with the screw holes on the front of the rack, and secure each side with two screws.NoteIt is advised not to fully tighten the screws in this step.Figure 4. Installing the extension top cover
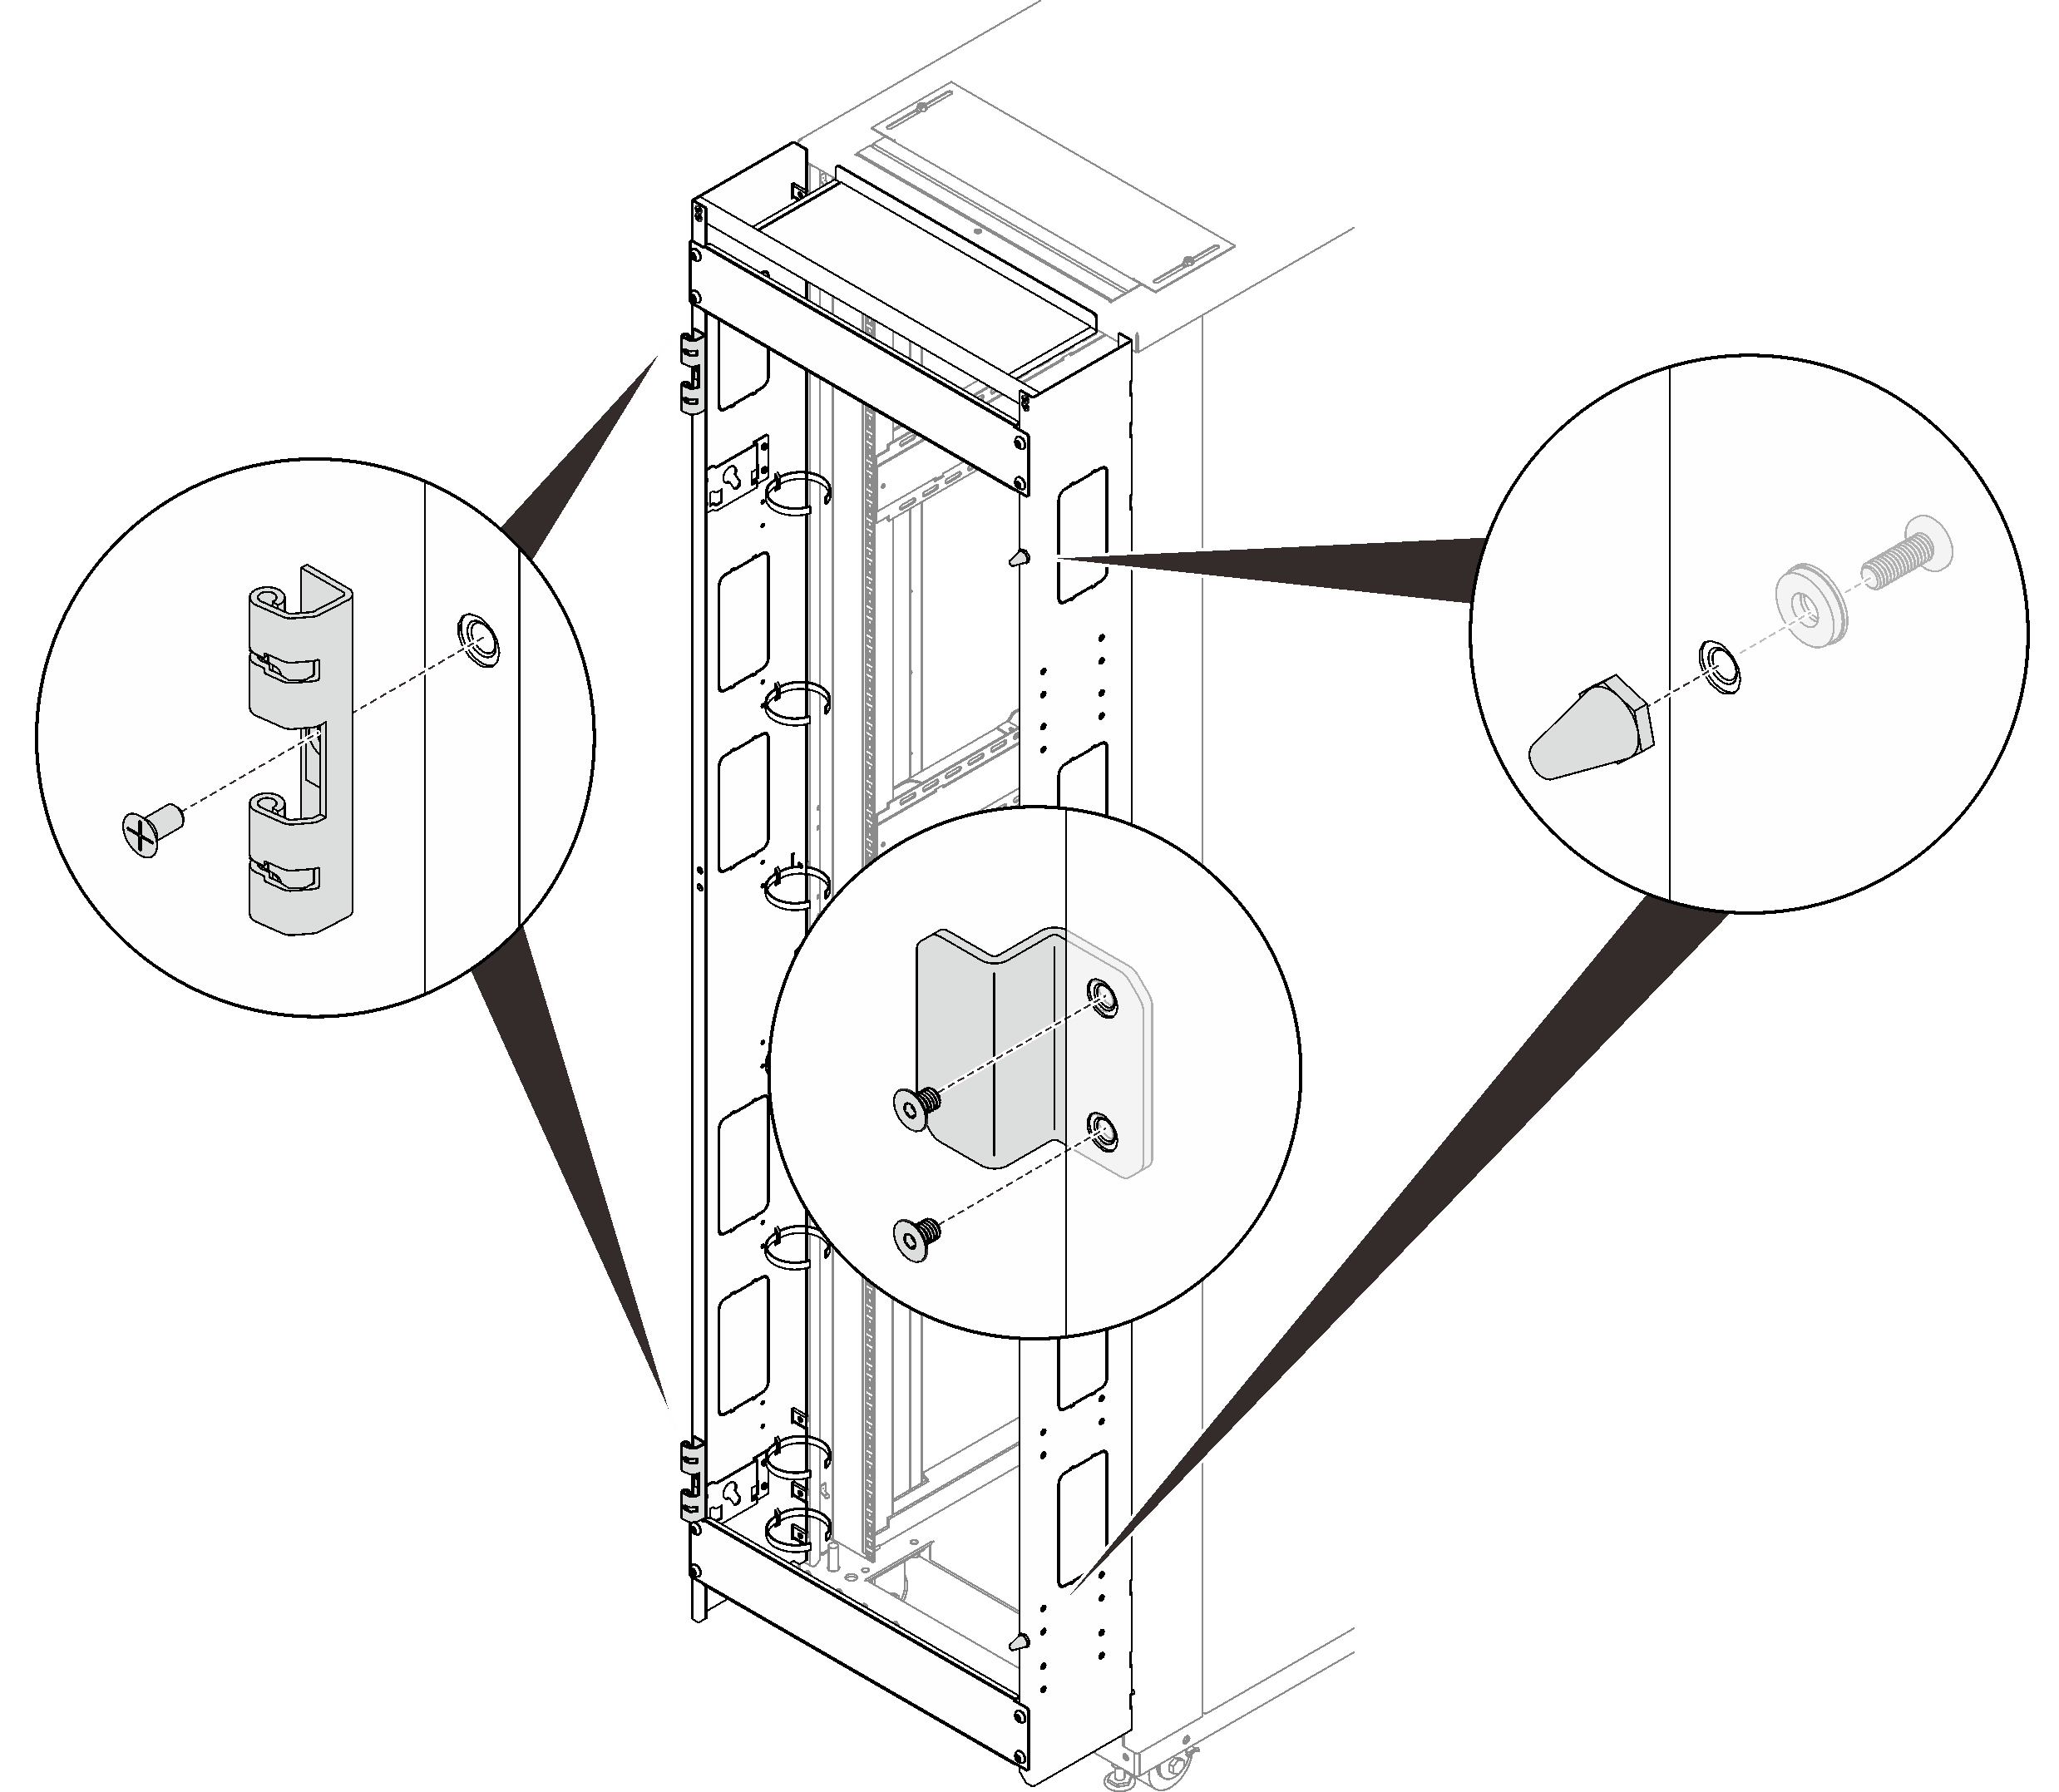
- Secure each of the two support brackets to the extension panels with four screws. If the extension panel screws have not been fully tightened, tighten them now.Figure 5. Installing the support brackets
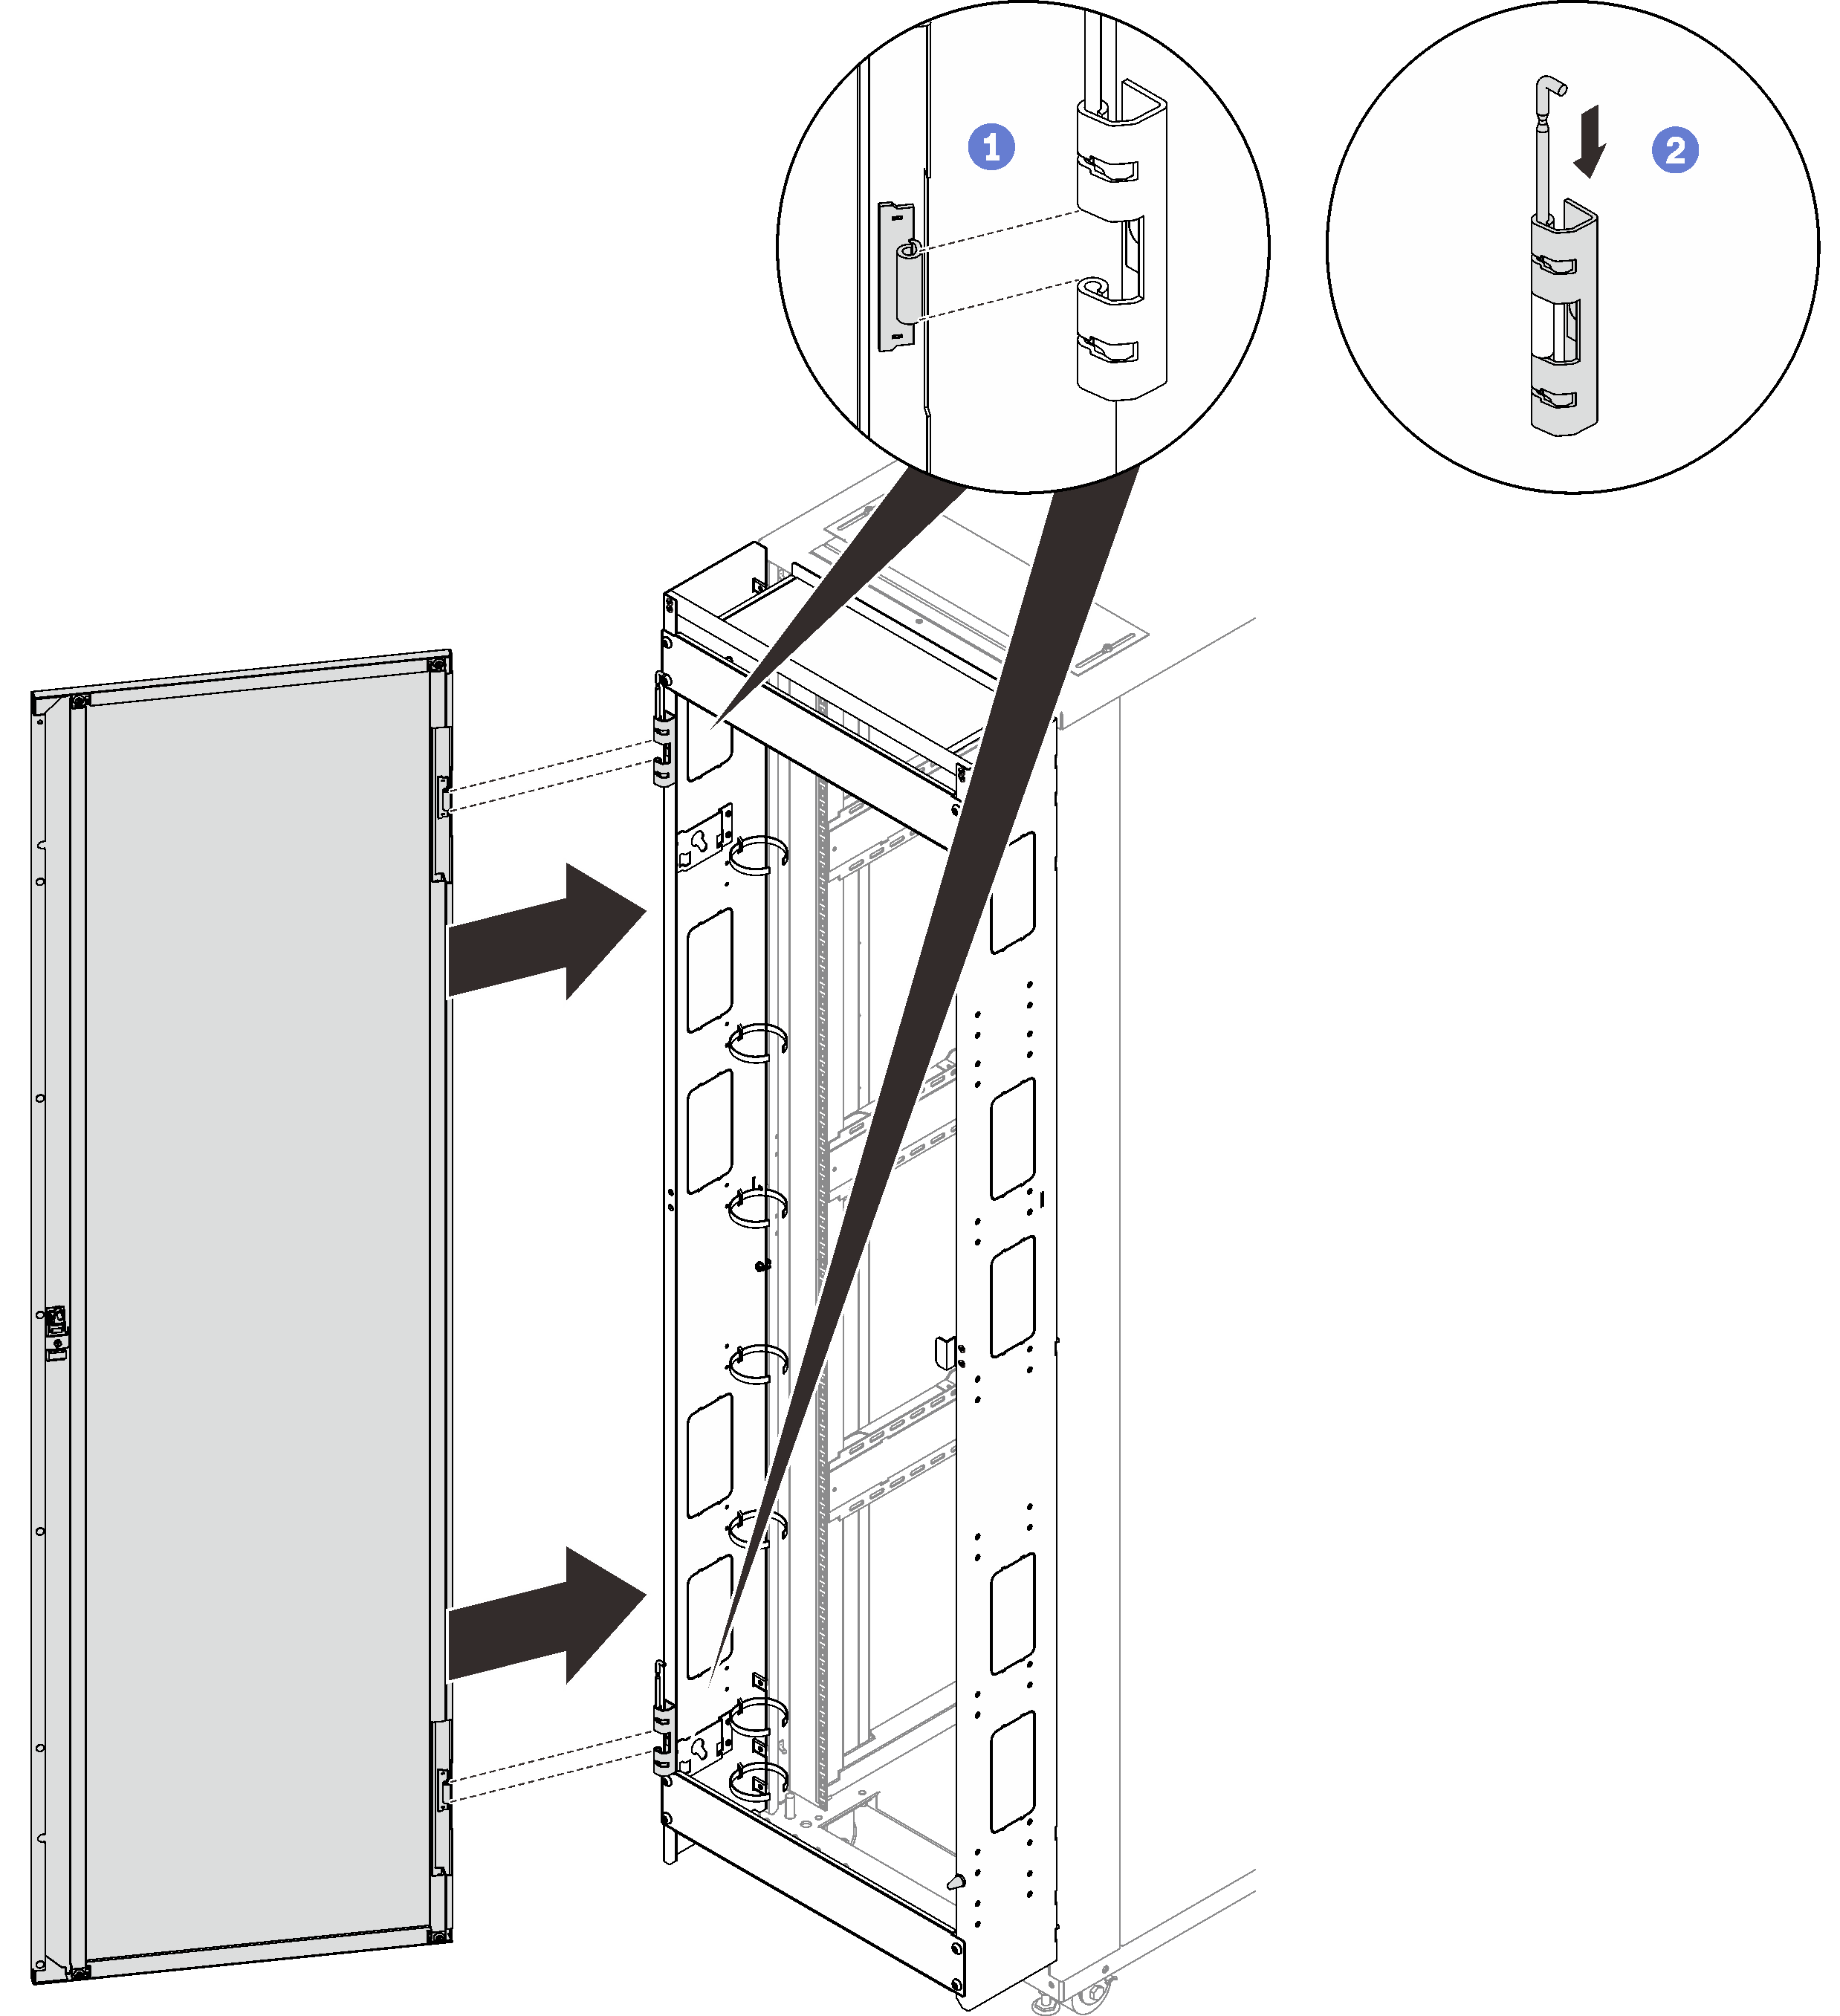
- Install the two hinges, two doorstops, and the door latch to the rack.Figure 6. Install the hinges, doorstops, the door latch
- Install the door back to the rack.Figure 7. Installing the door
 Align the door with the hinges, and hold the door in place.
 Push the hinge pins down to the closed position so that the door is secured.