Remove 48U Standard Rack Extension Kit
See this topic to learn how to remove 48U Standard Rack Extension Kit.
Procedure
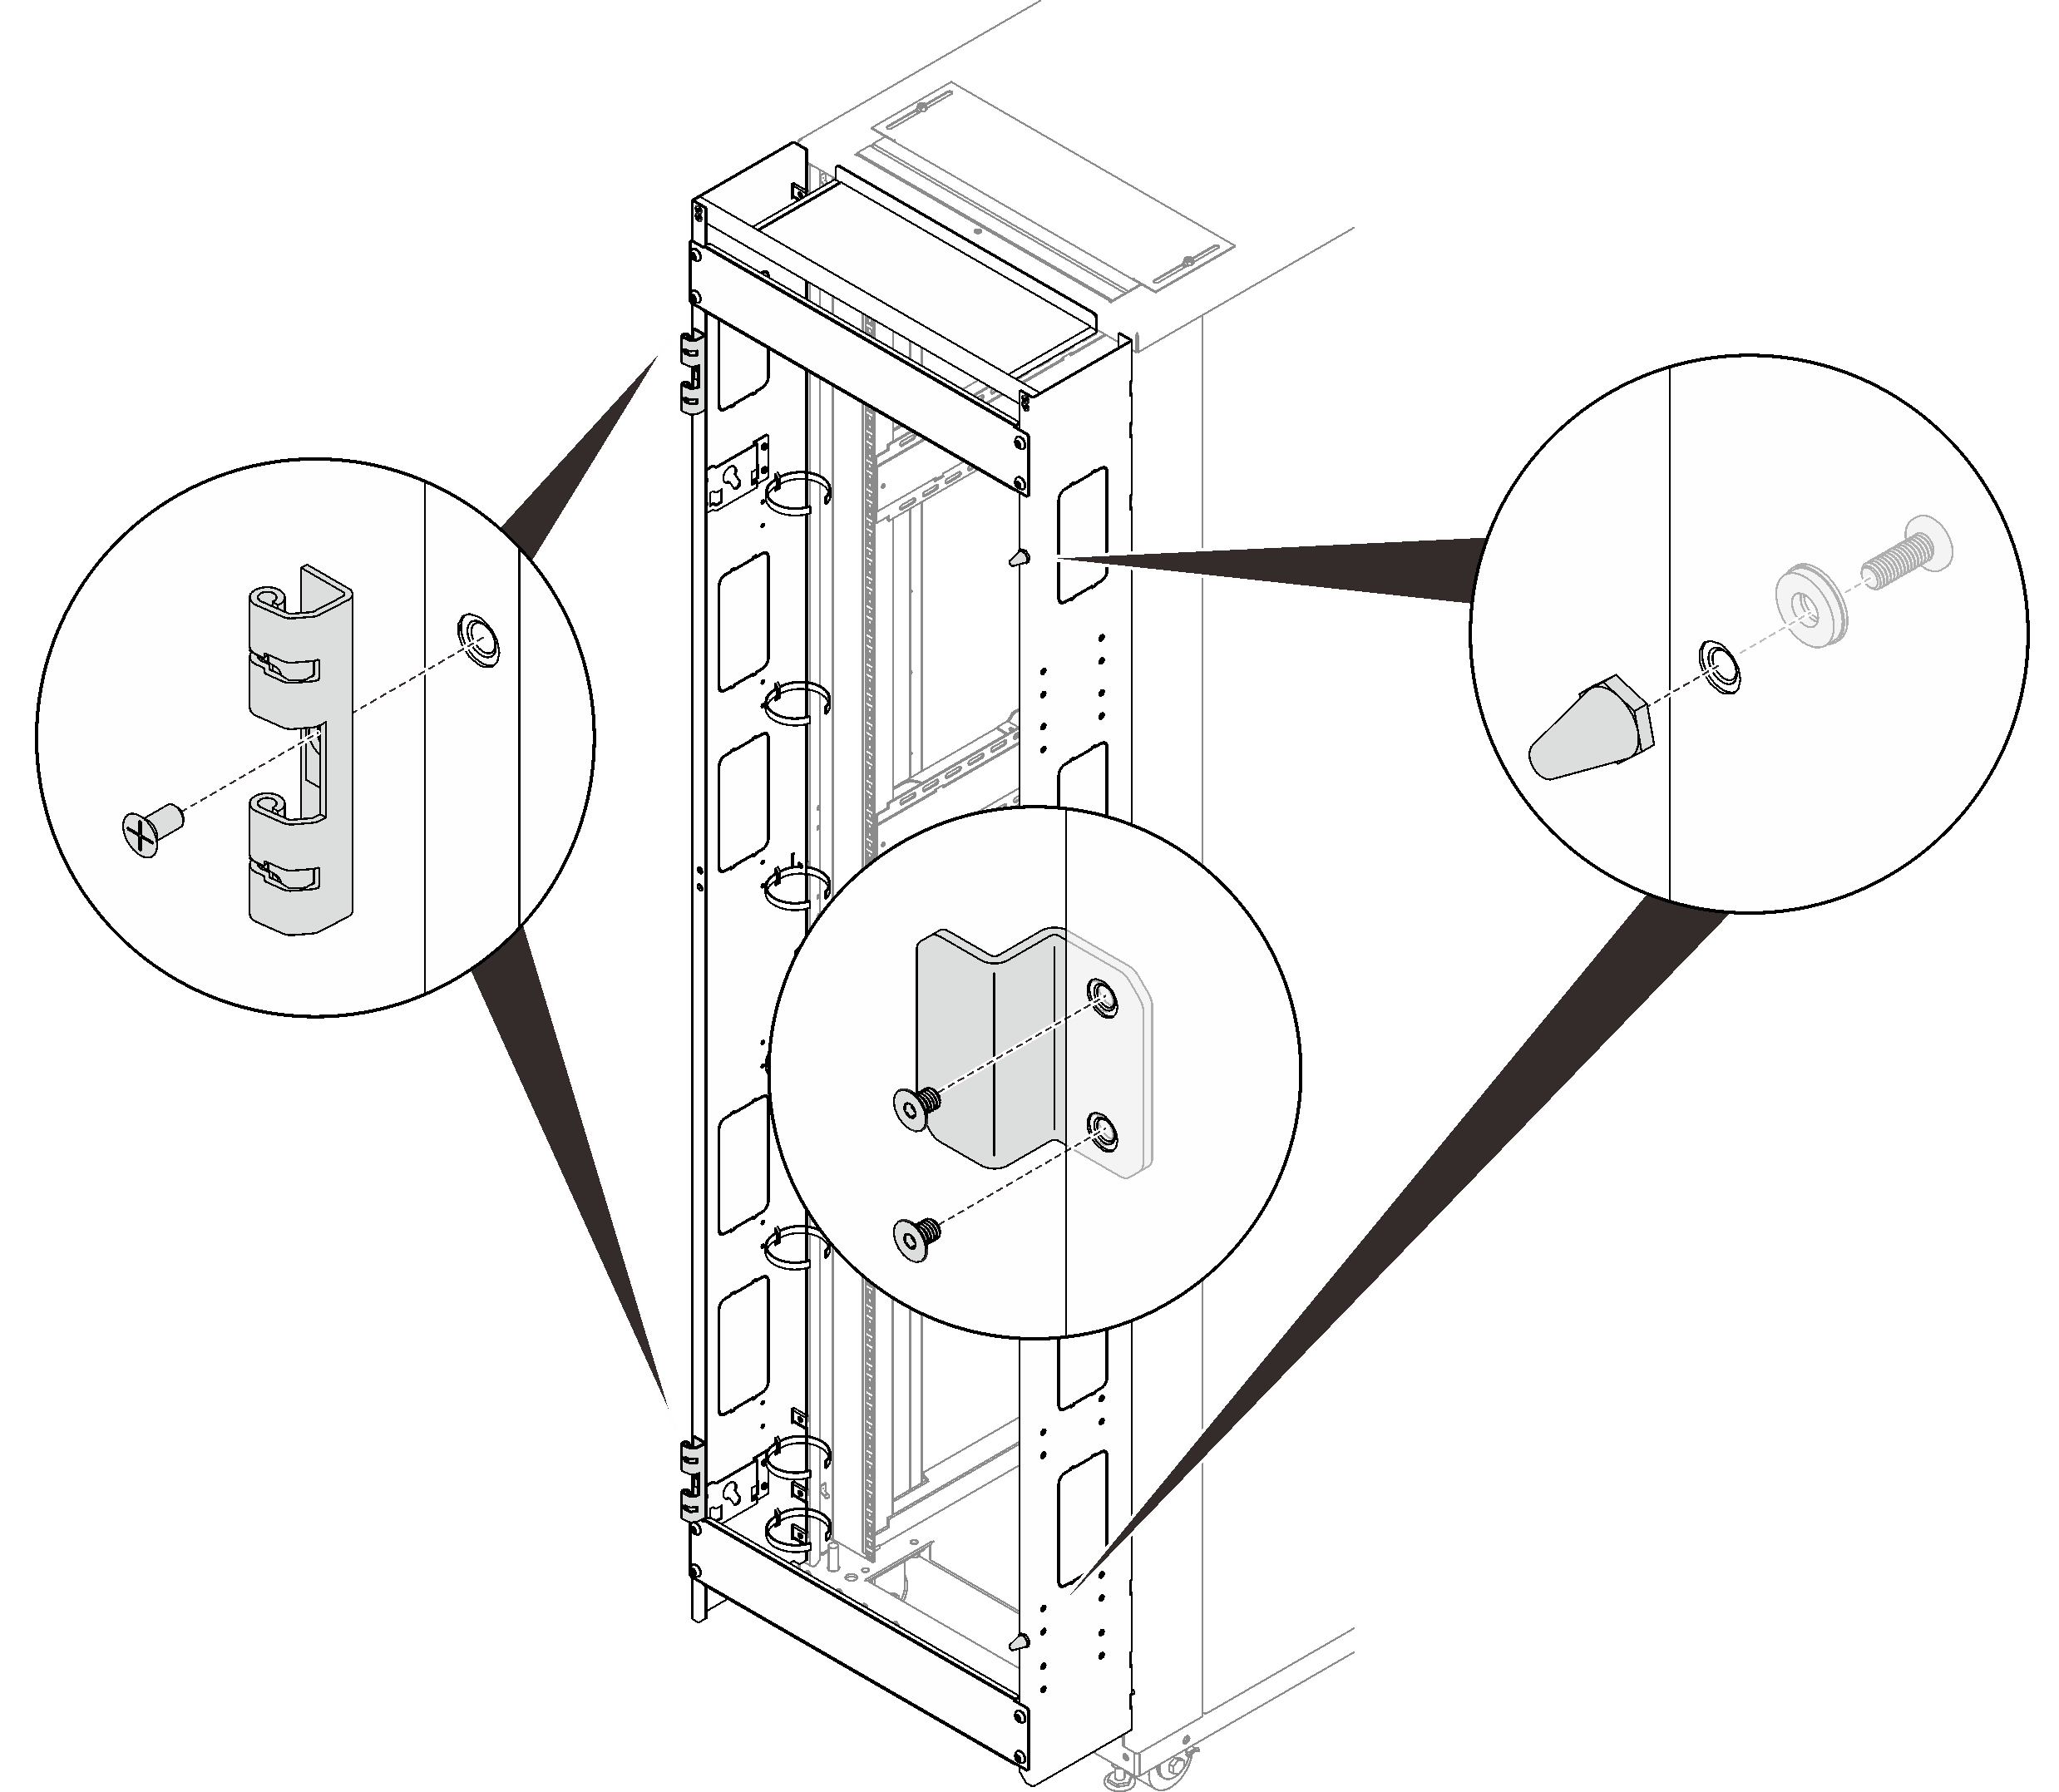
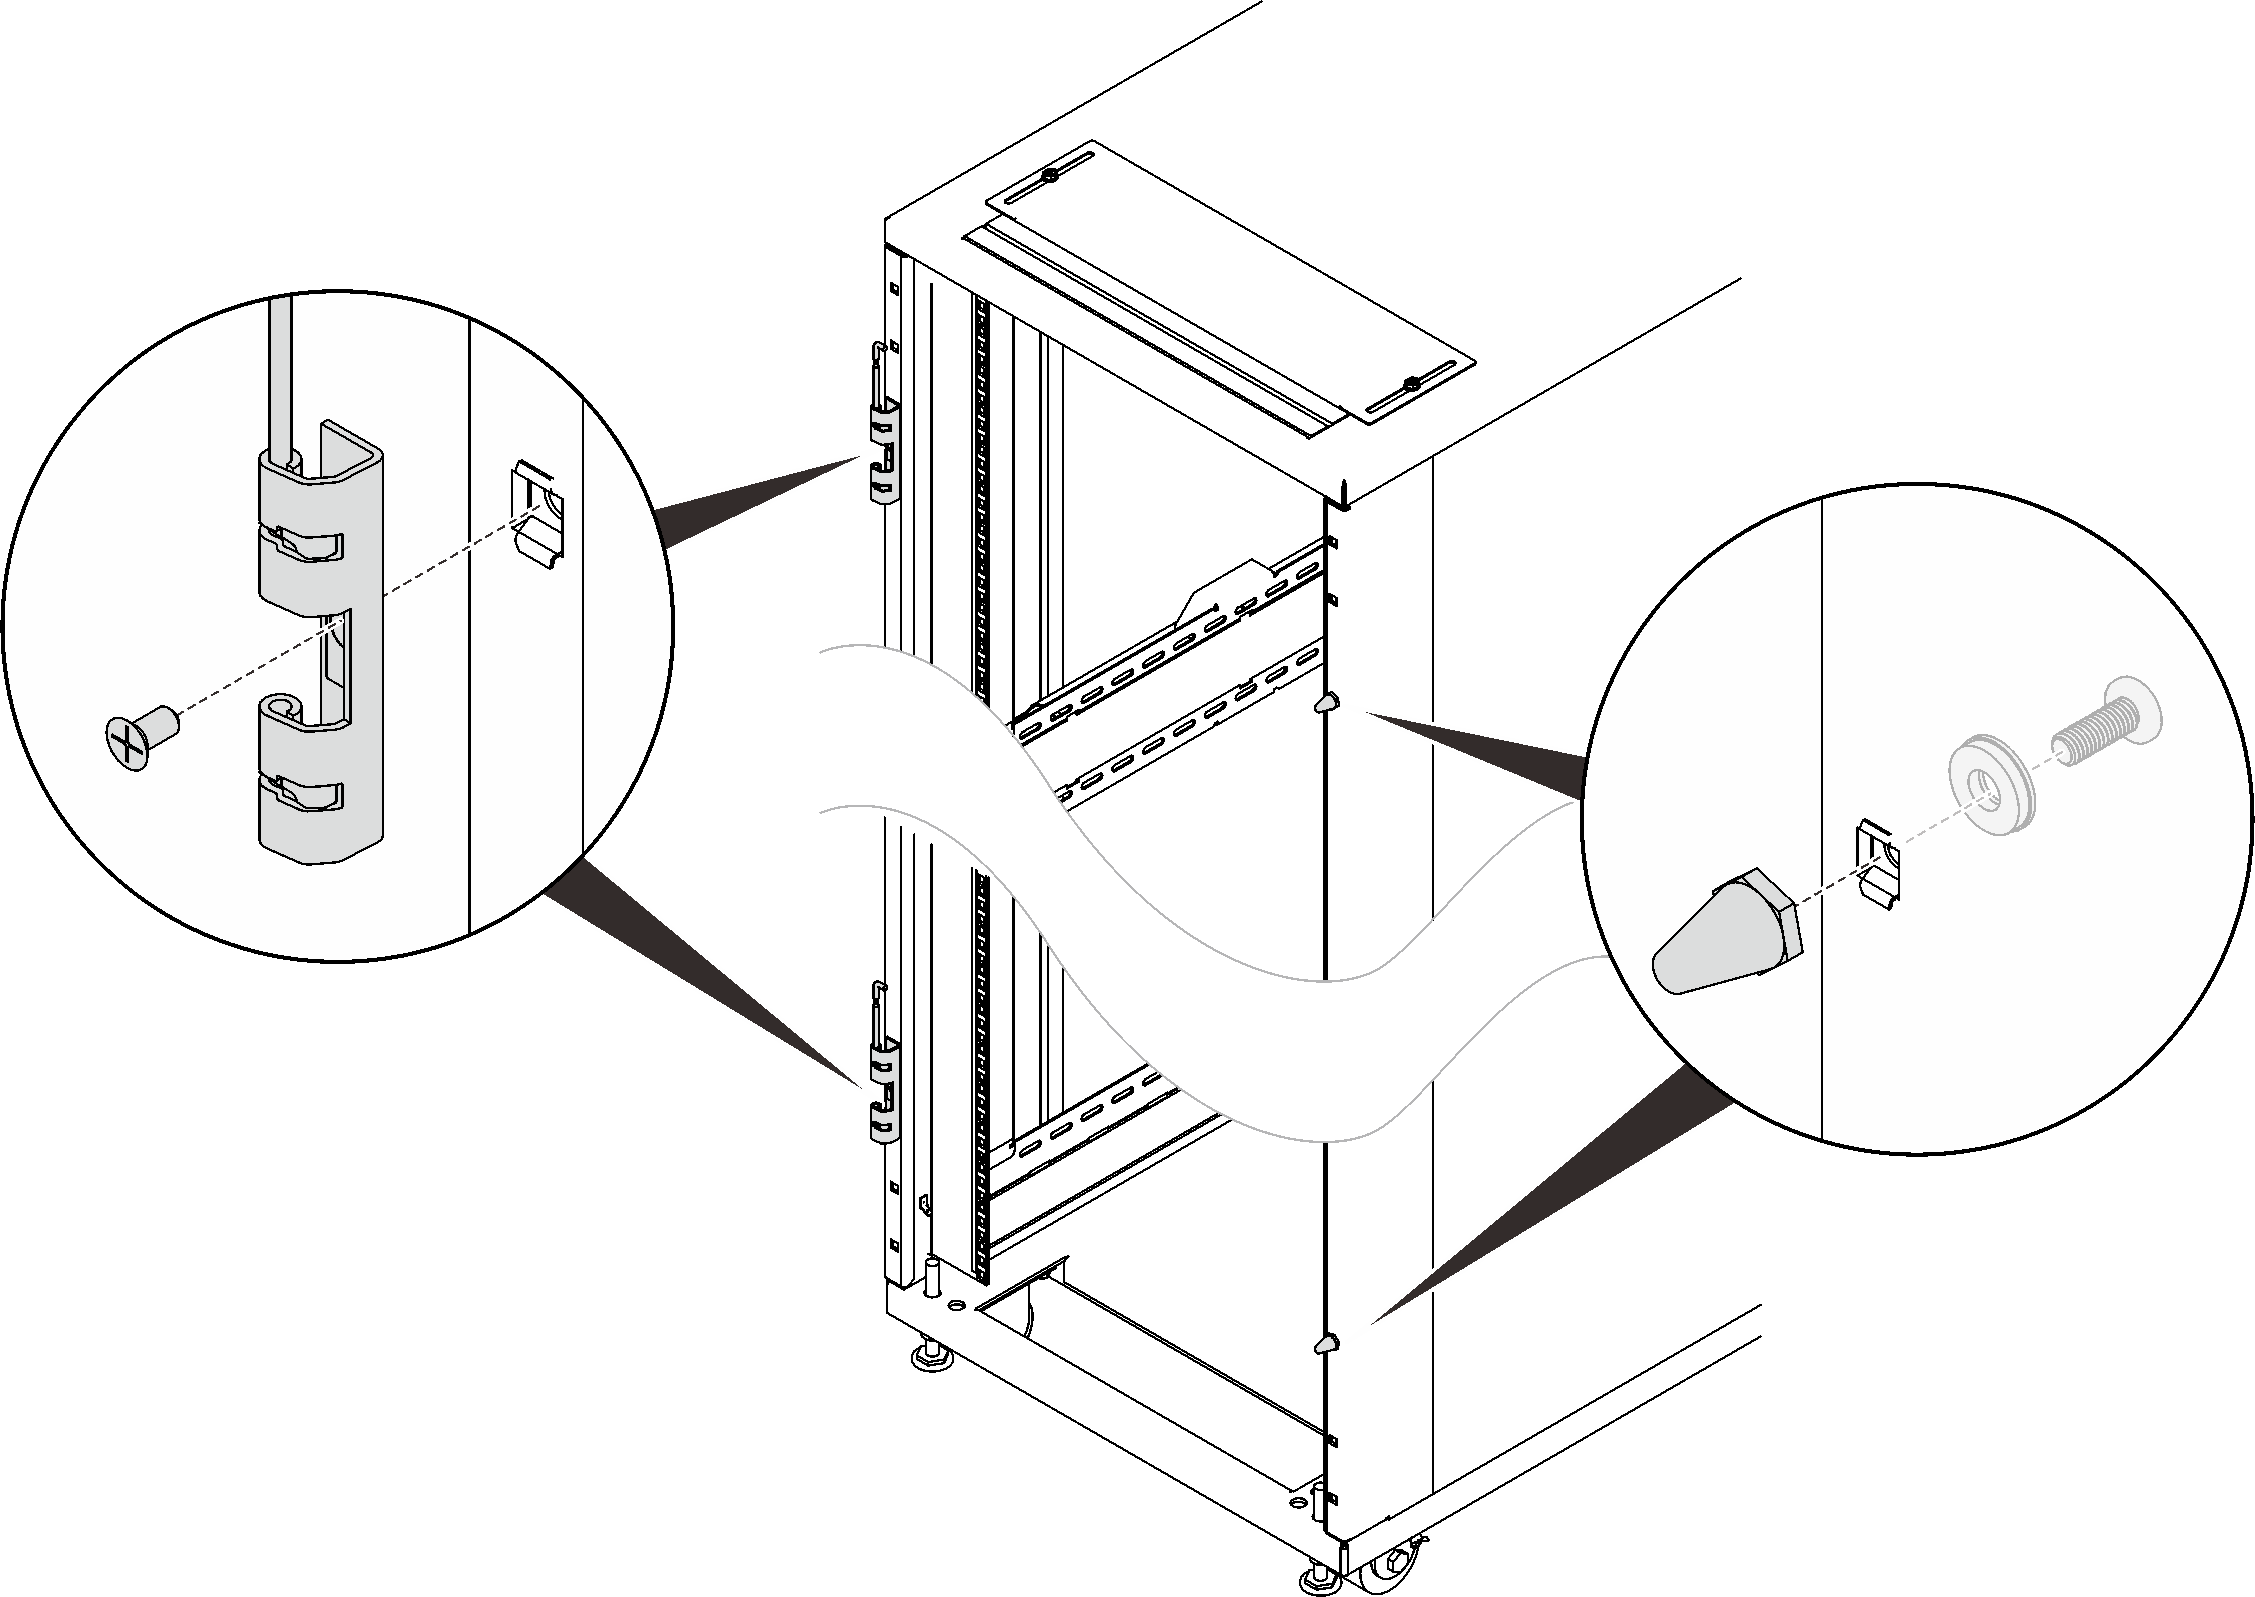
- Remove the two hinges, two door stops, and the door latch if necessary.Figure 1. Removing the door hinges and doorstops
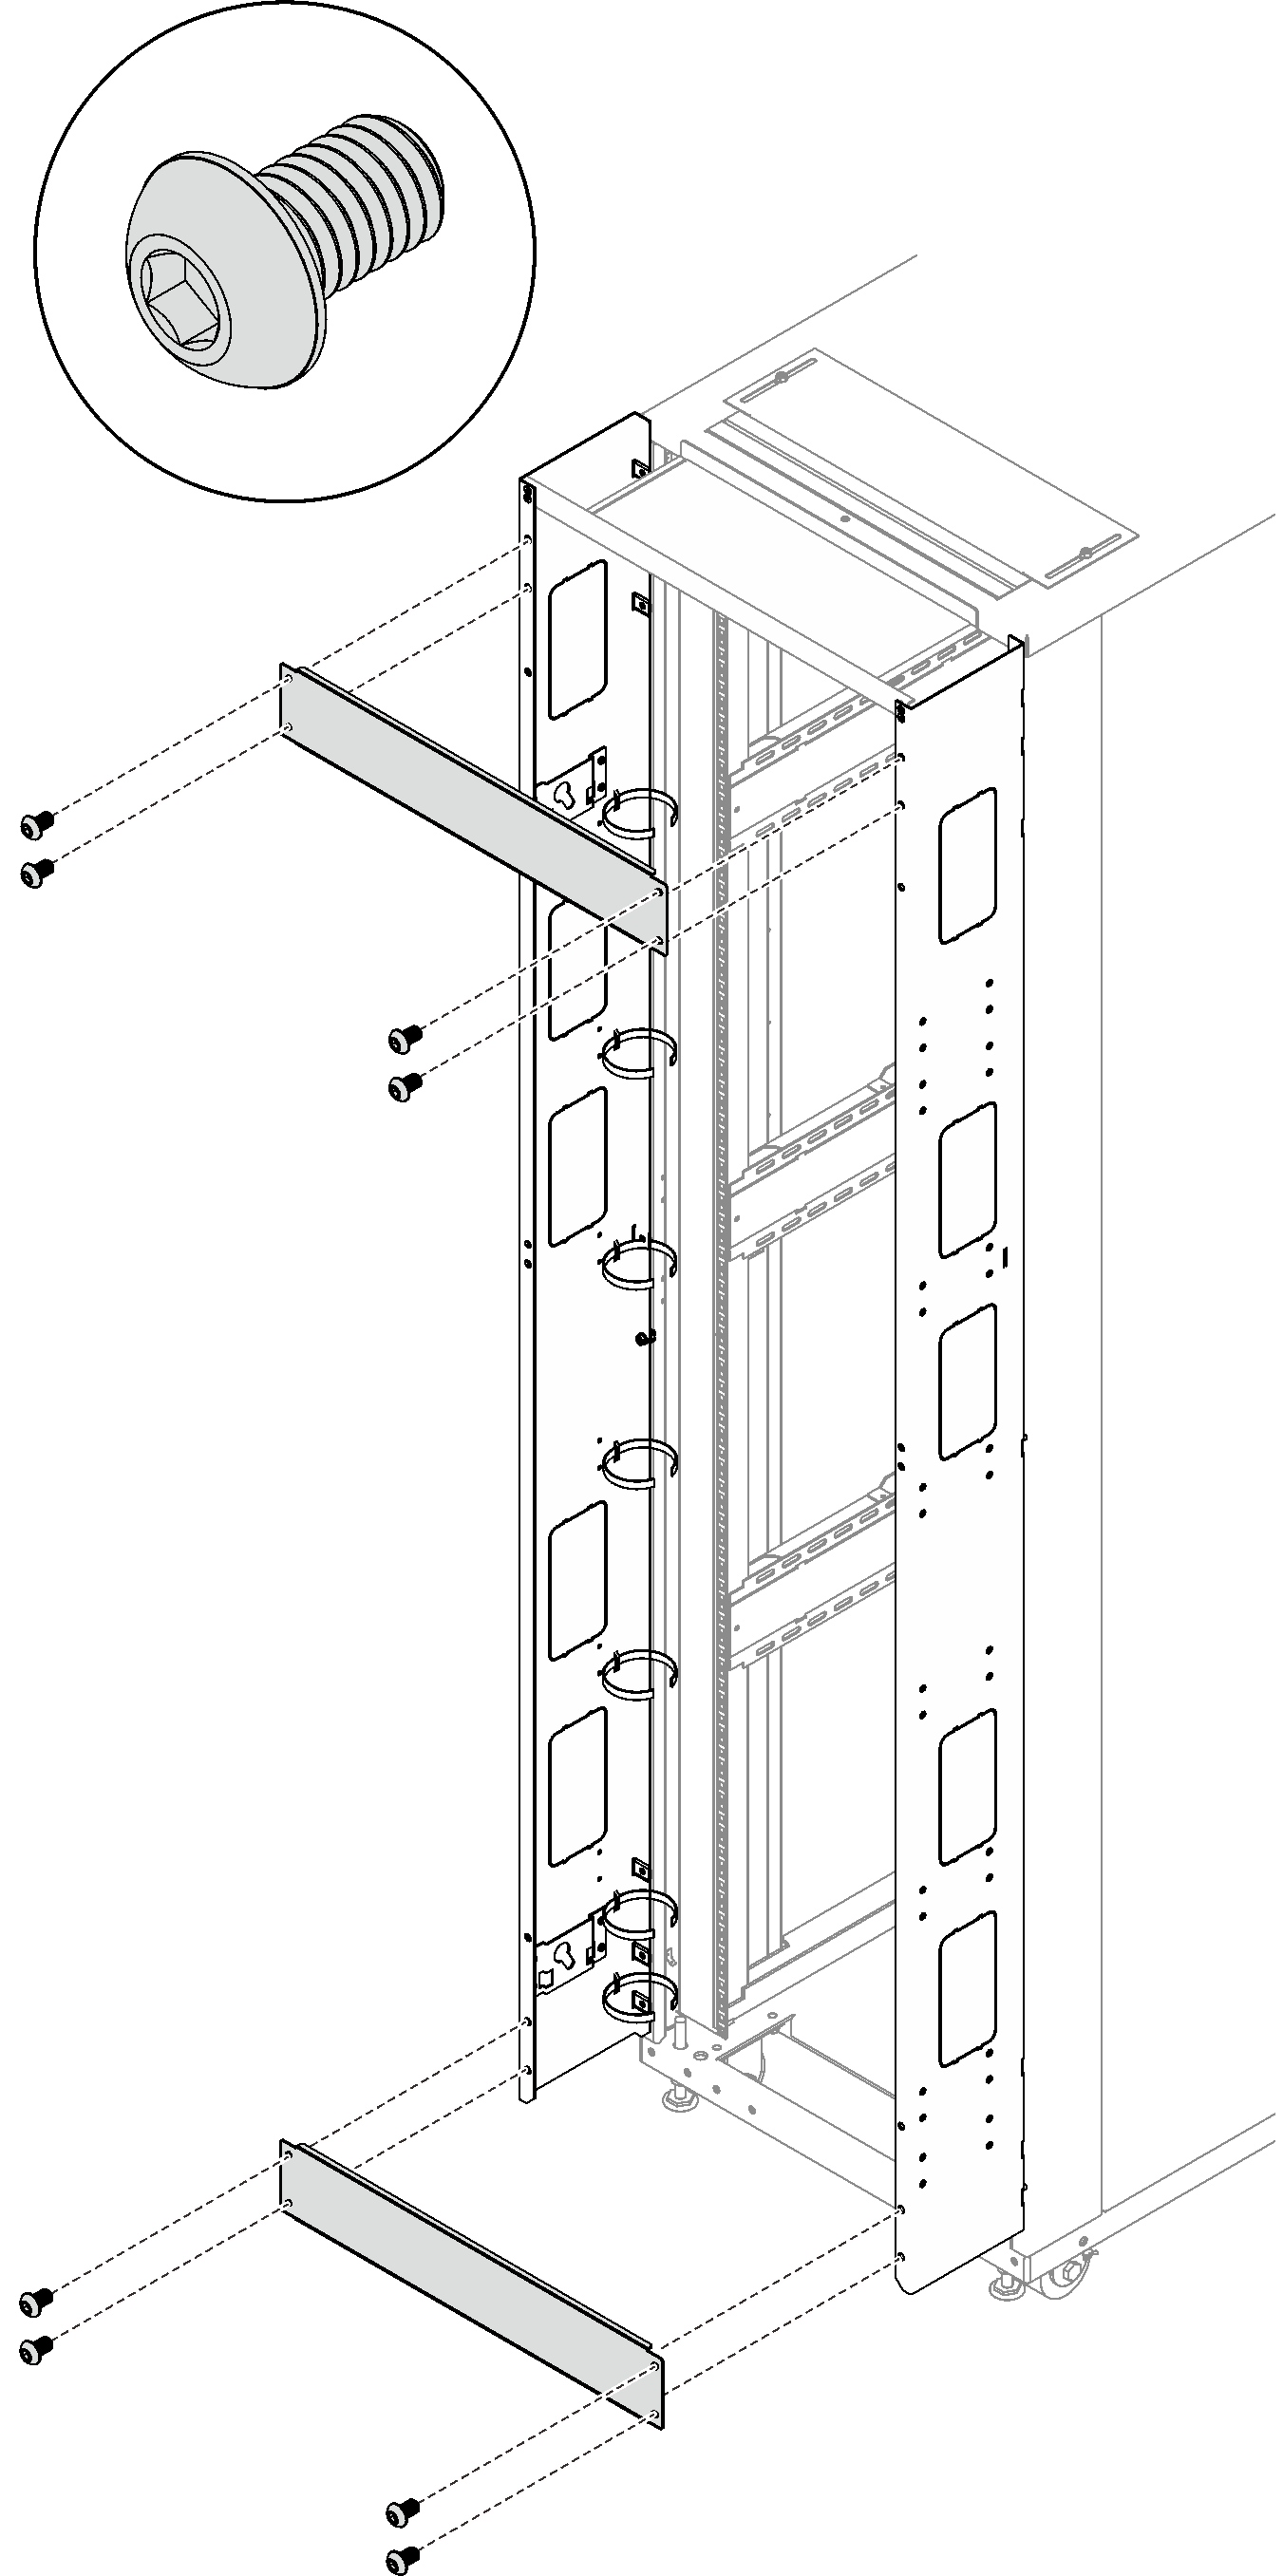
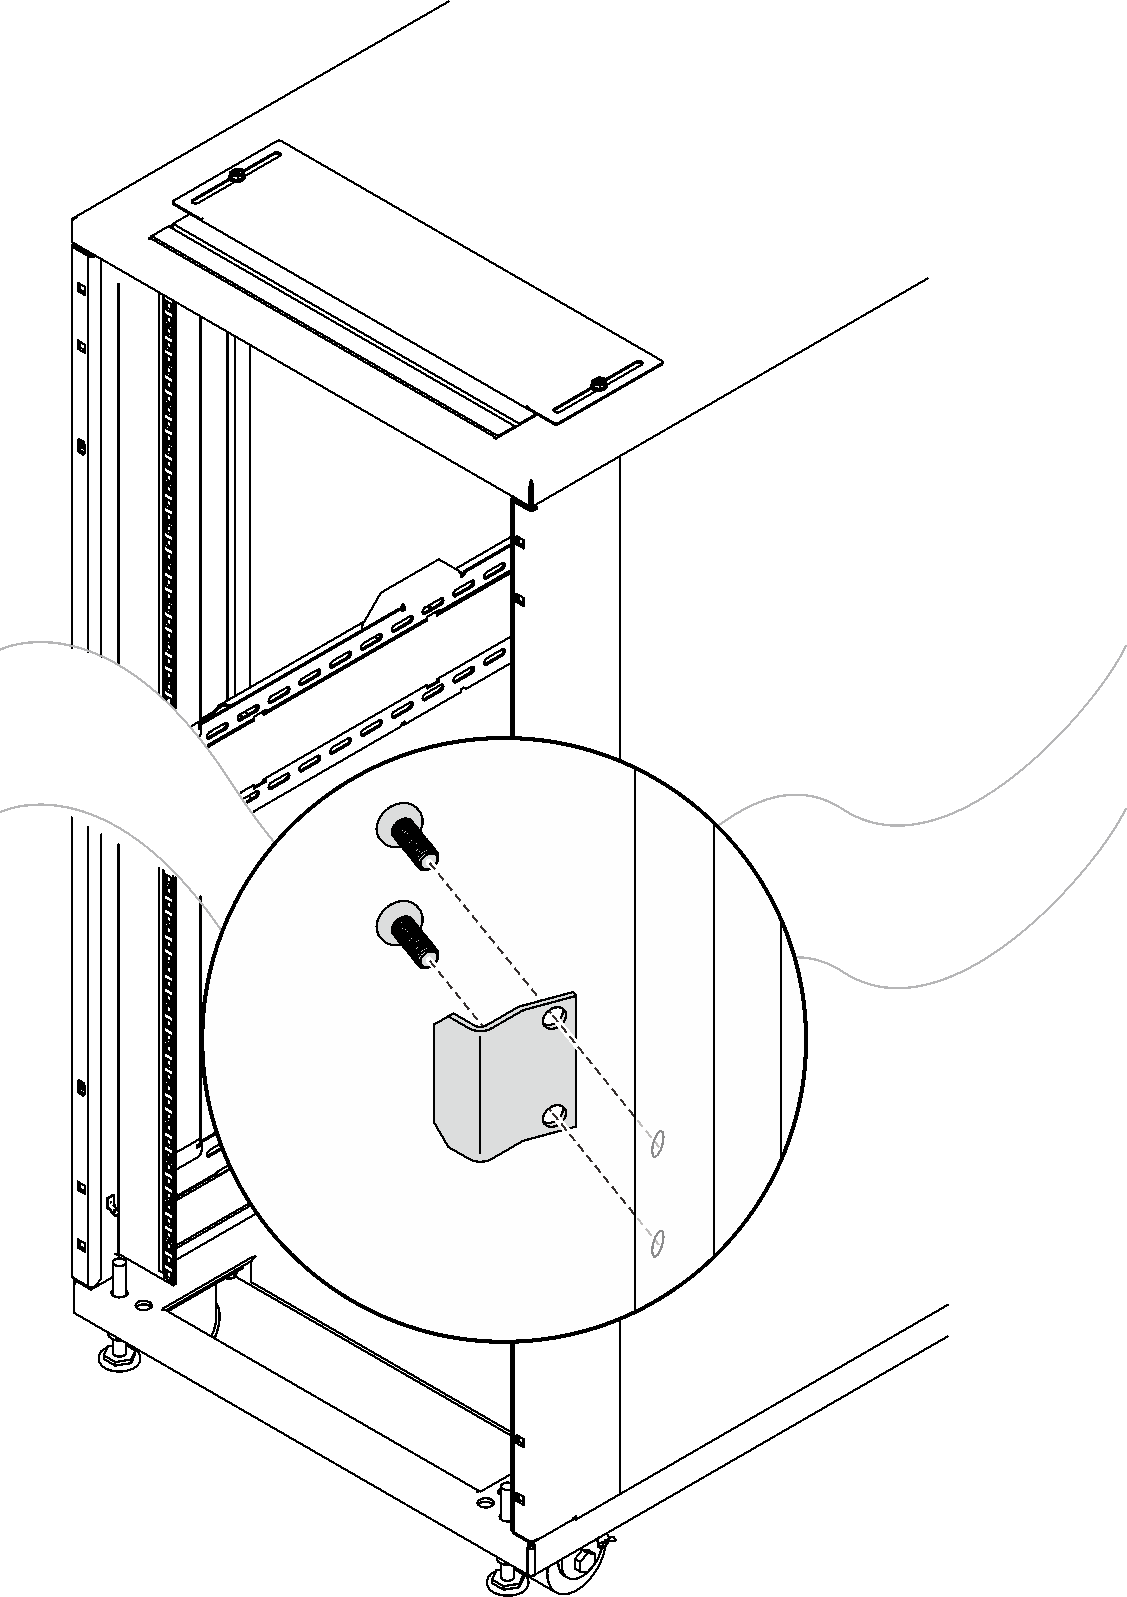
- Remove the four screws that secure each of the two support brackets, and remove the support brackets.Figure 2. Removing the support brackets
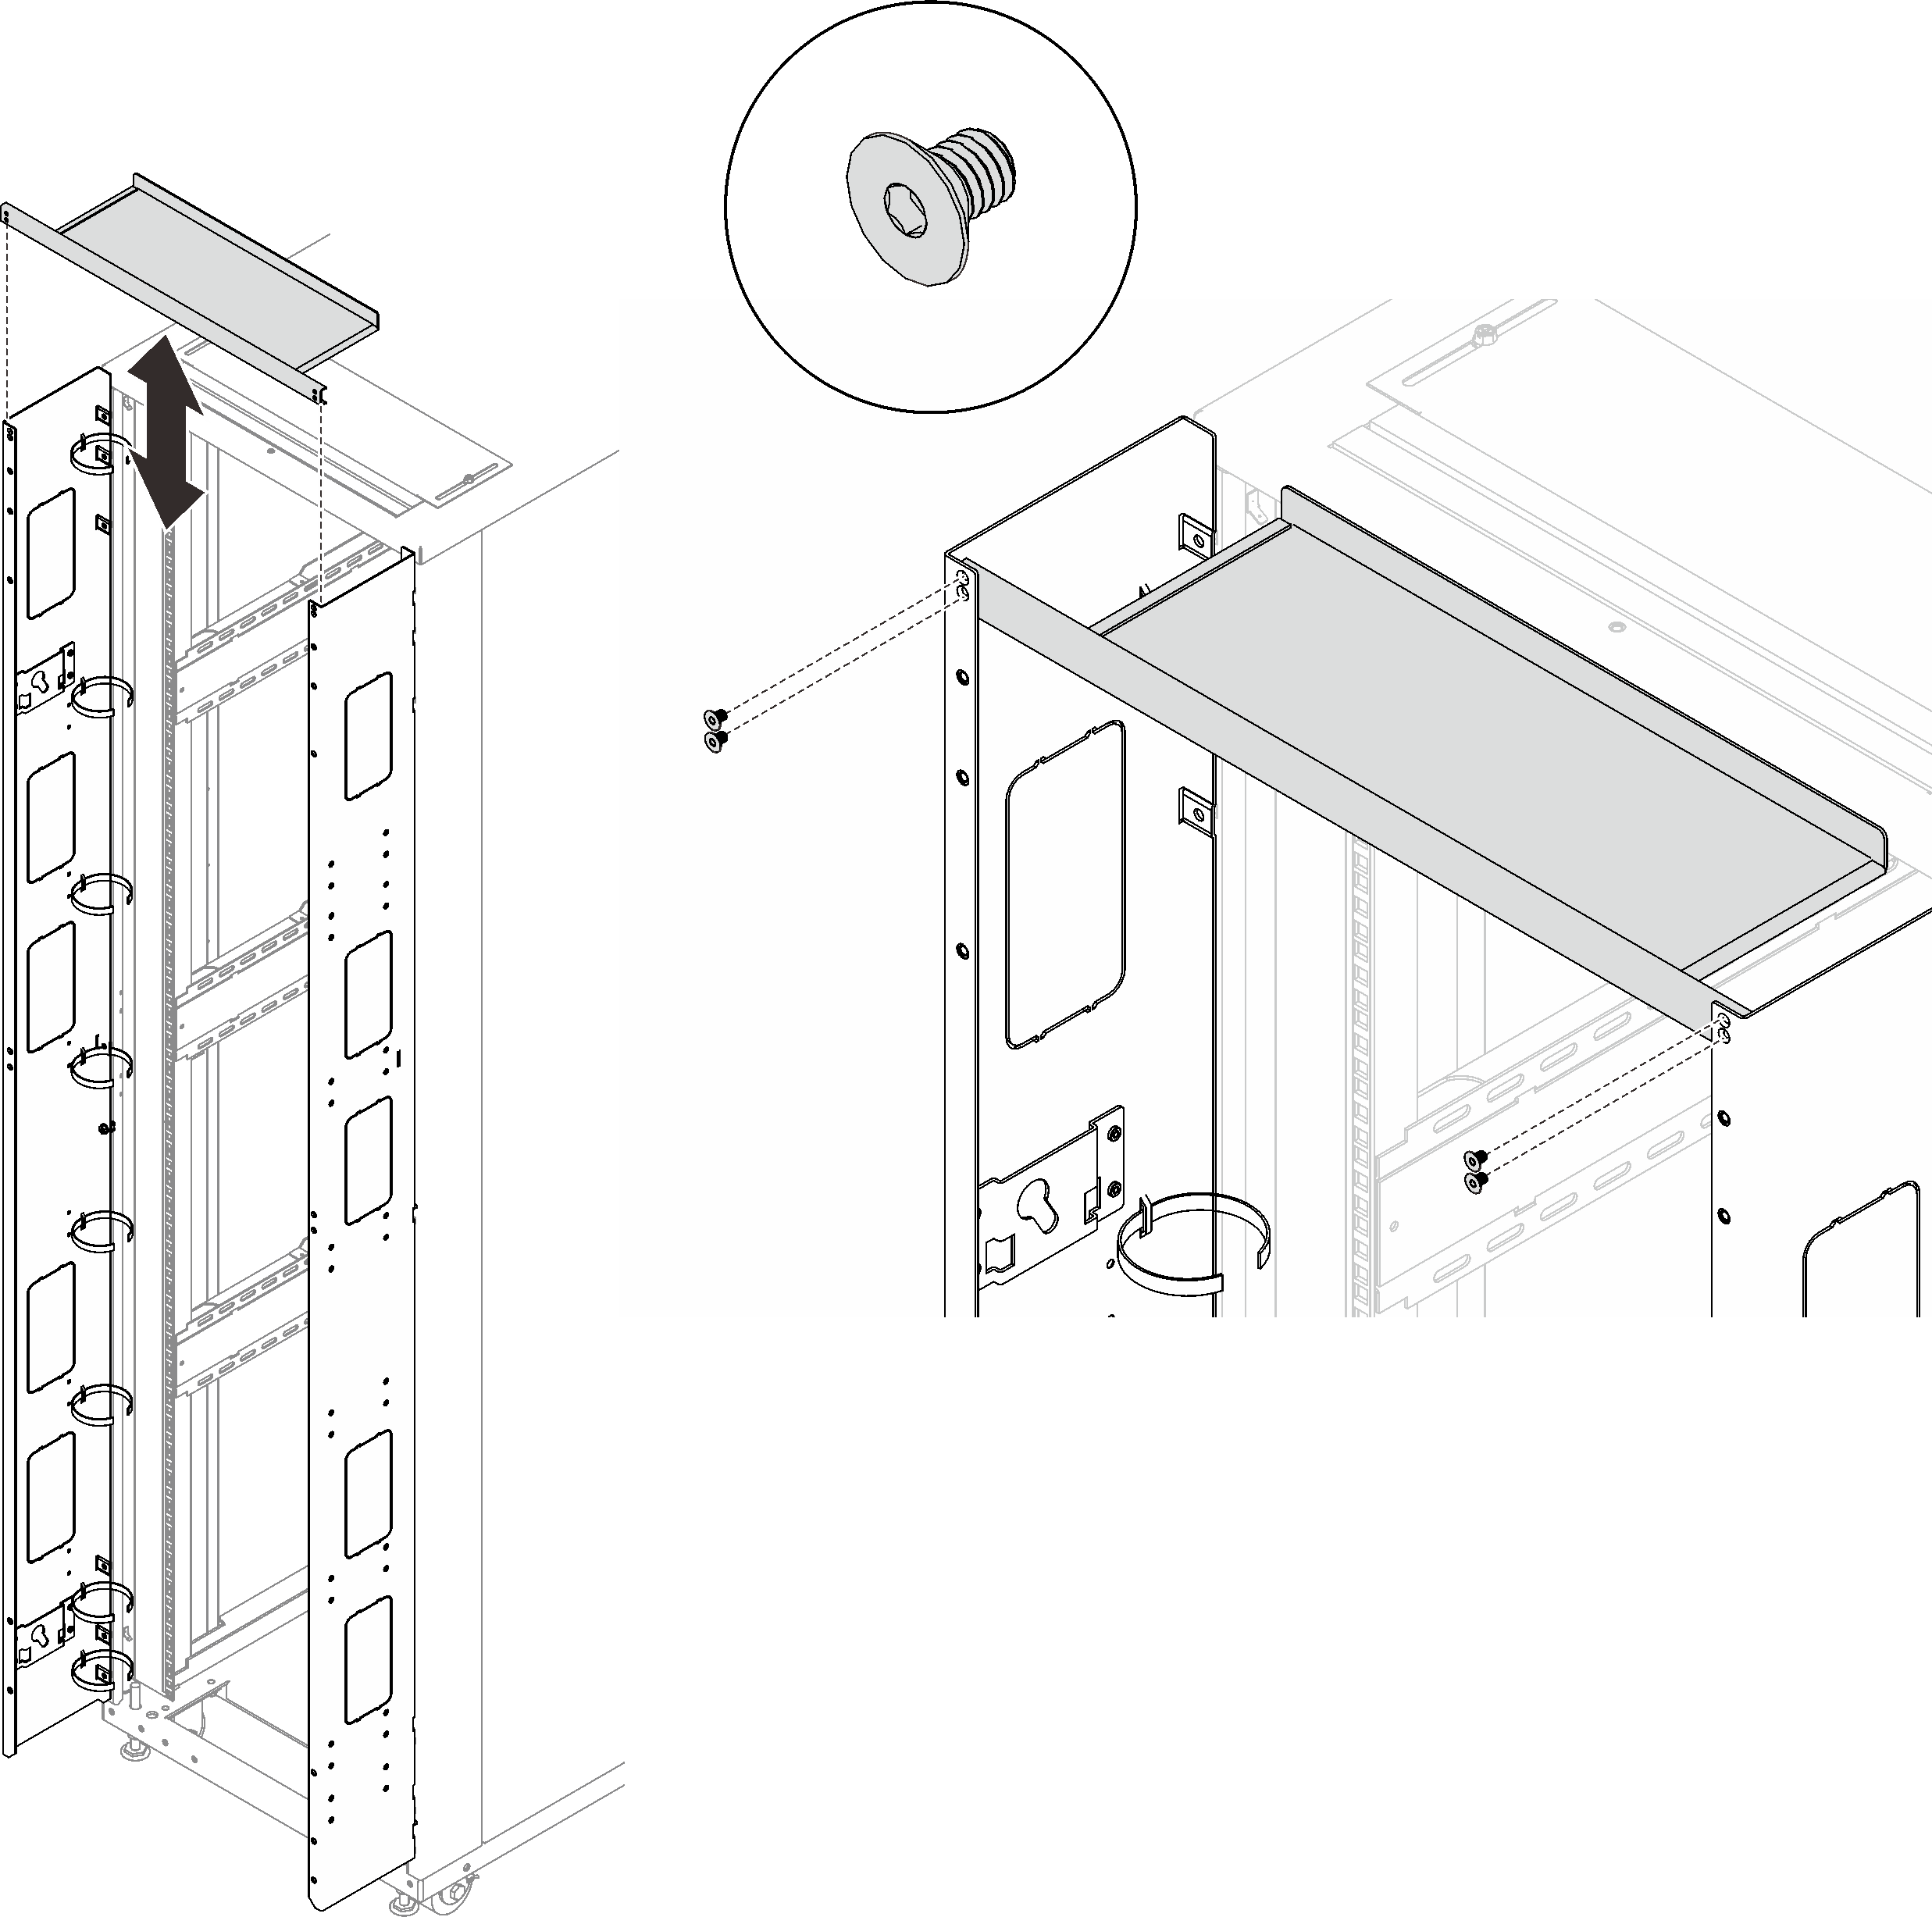
- Remove the four screws that secure the top cover, and remove the cover.Figure 3. Removing the top cover
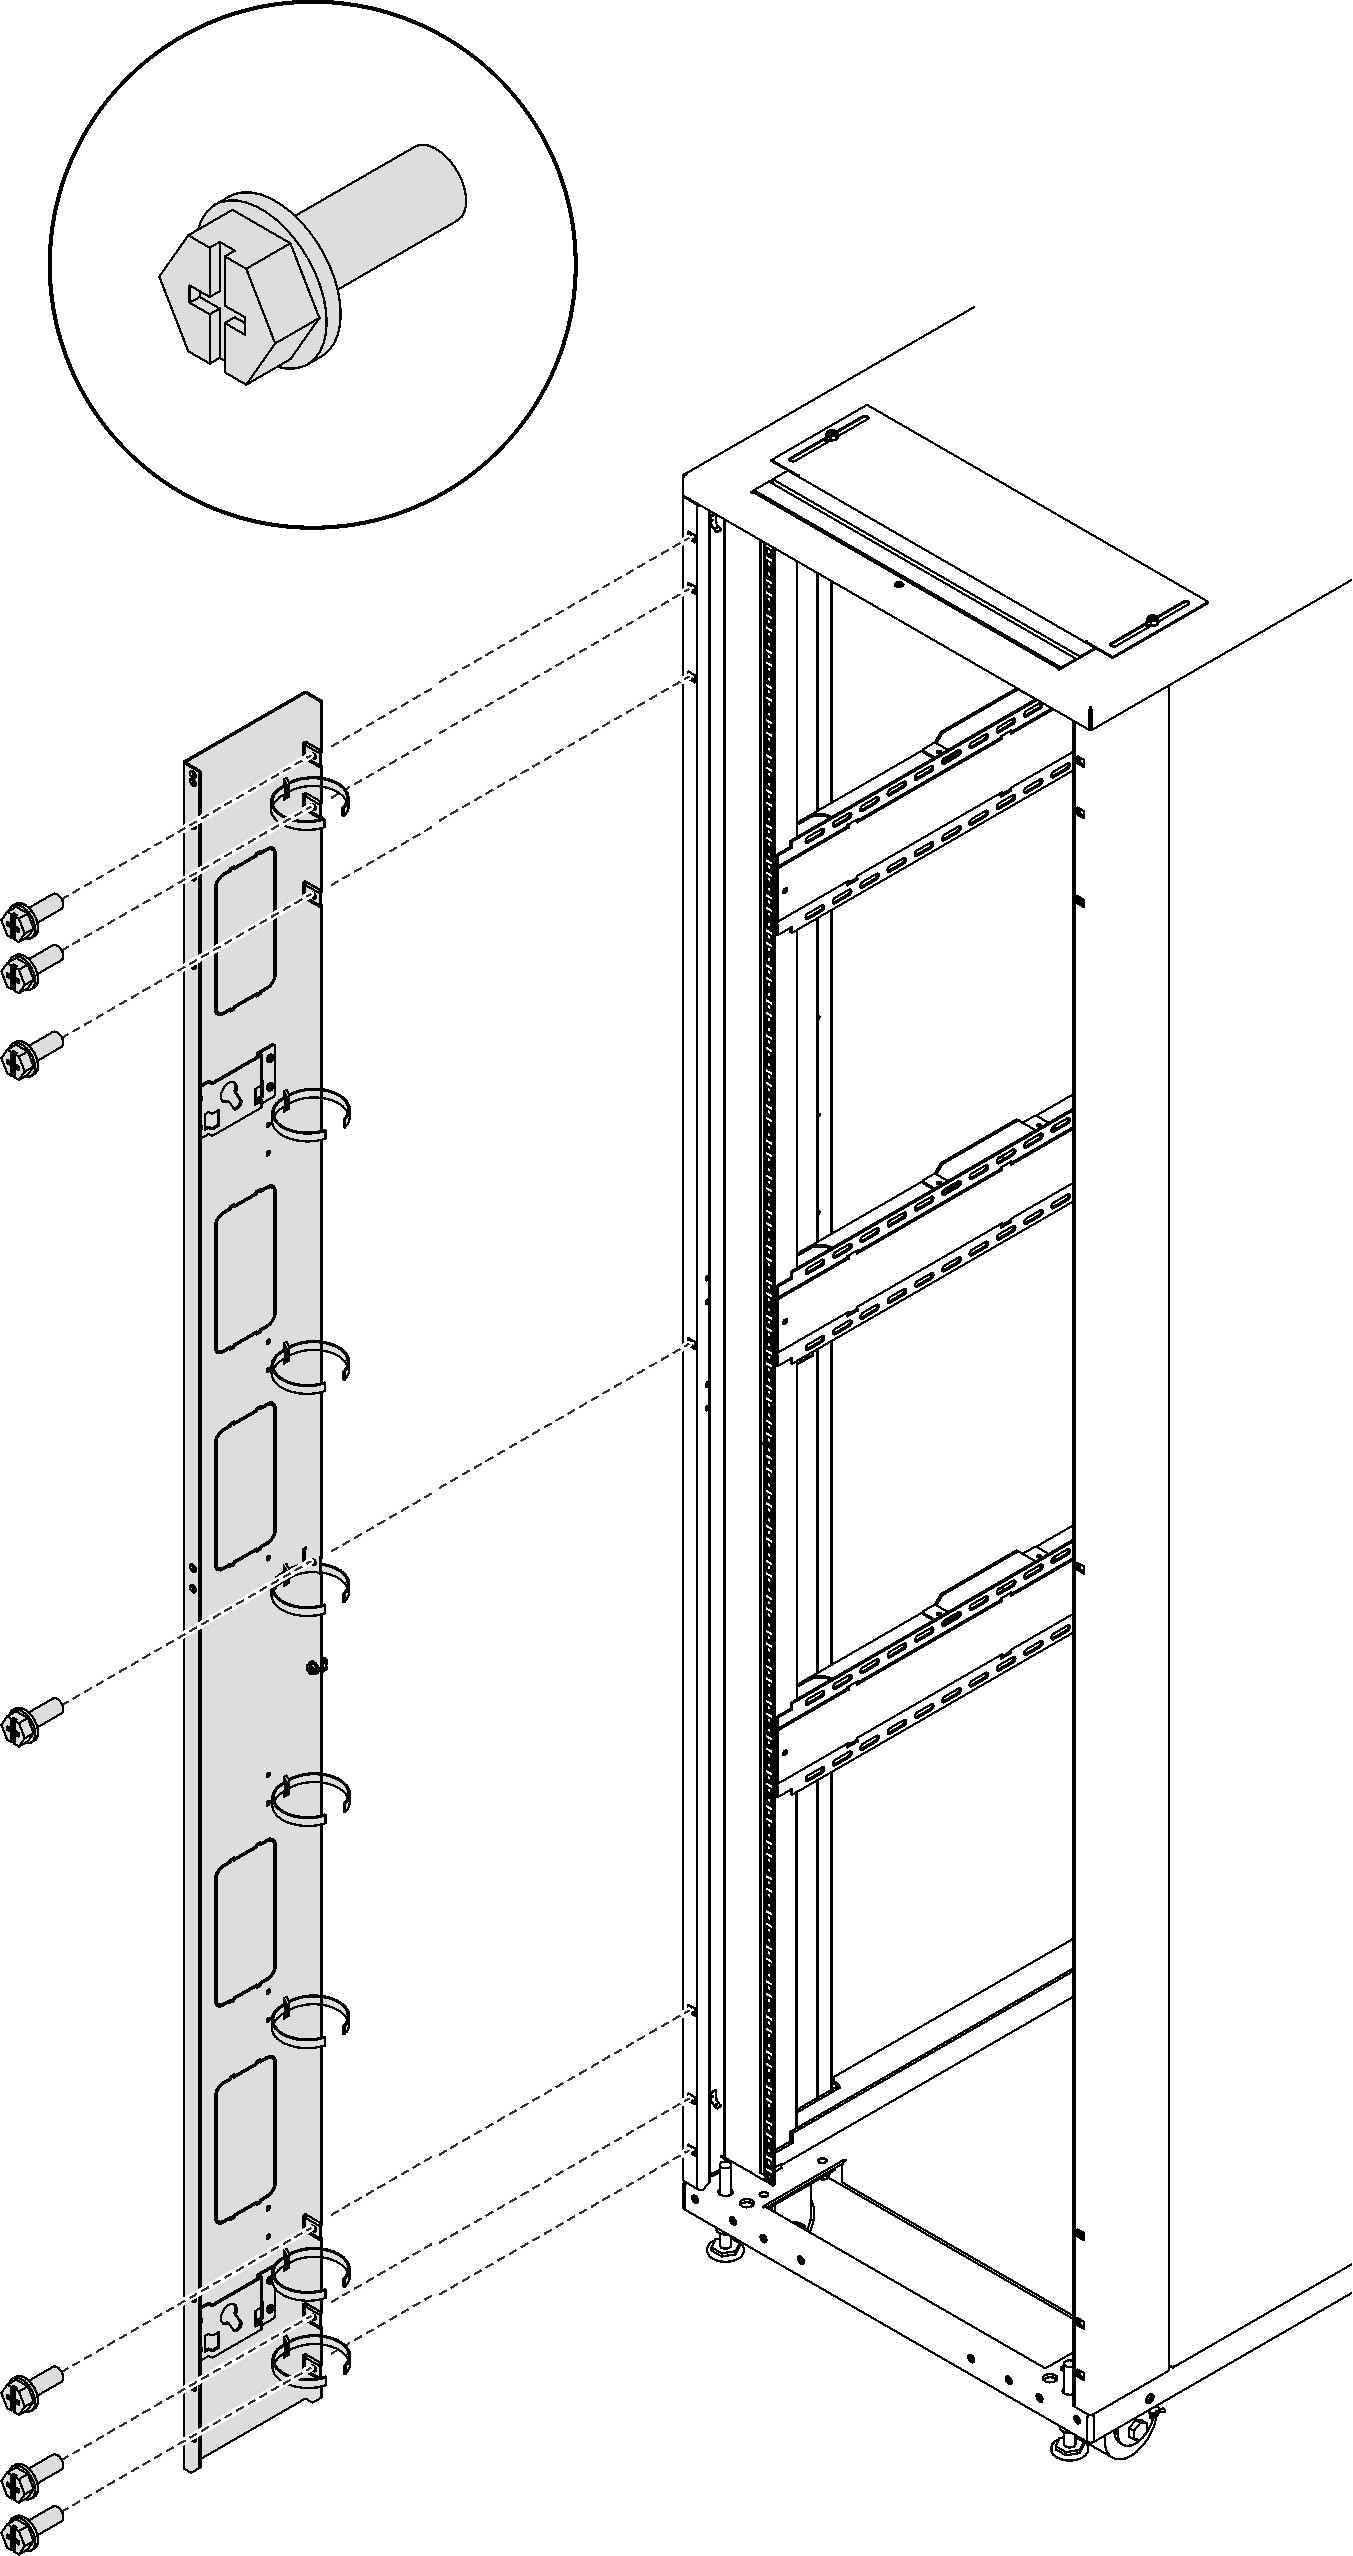
- Remove the seven screws that secure the extension panel, and repeat the step on the other extension panel. Figure 4. Removing an extension panel
After this task is completed
Complete the following steps to install the door back to the rack if necessary.
- Install the door latch.Figure 5. Installing the door latch
- Install the two hinges and the two doorstops.Figure 6. Installing the hinges and doorstops
- Install the door.Figure 7. Installing the door
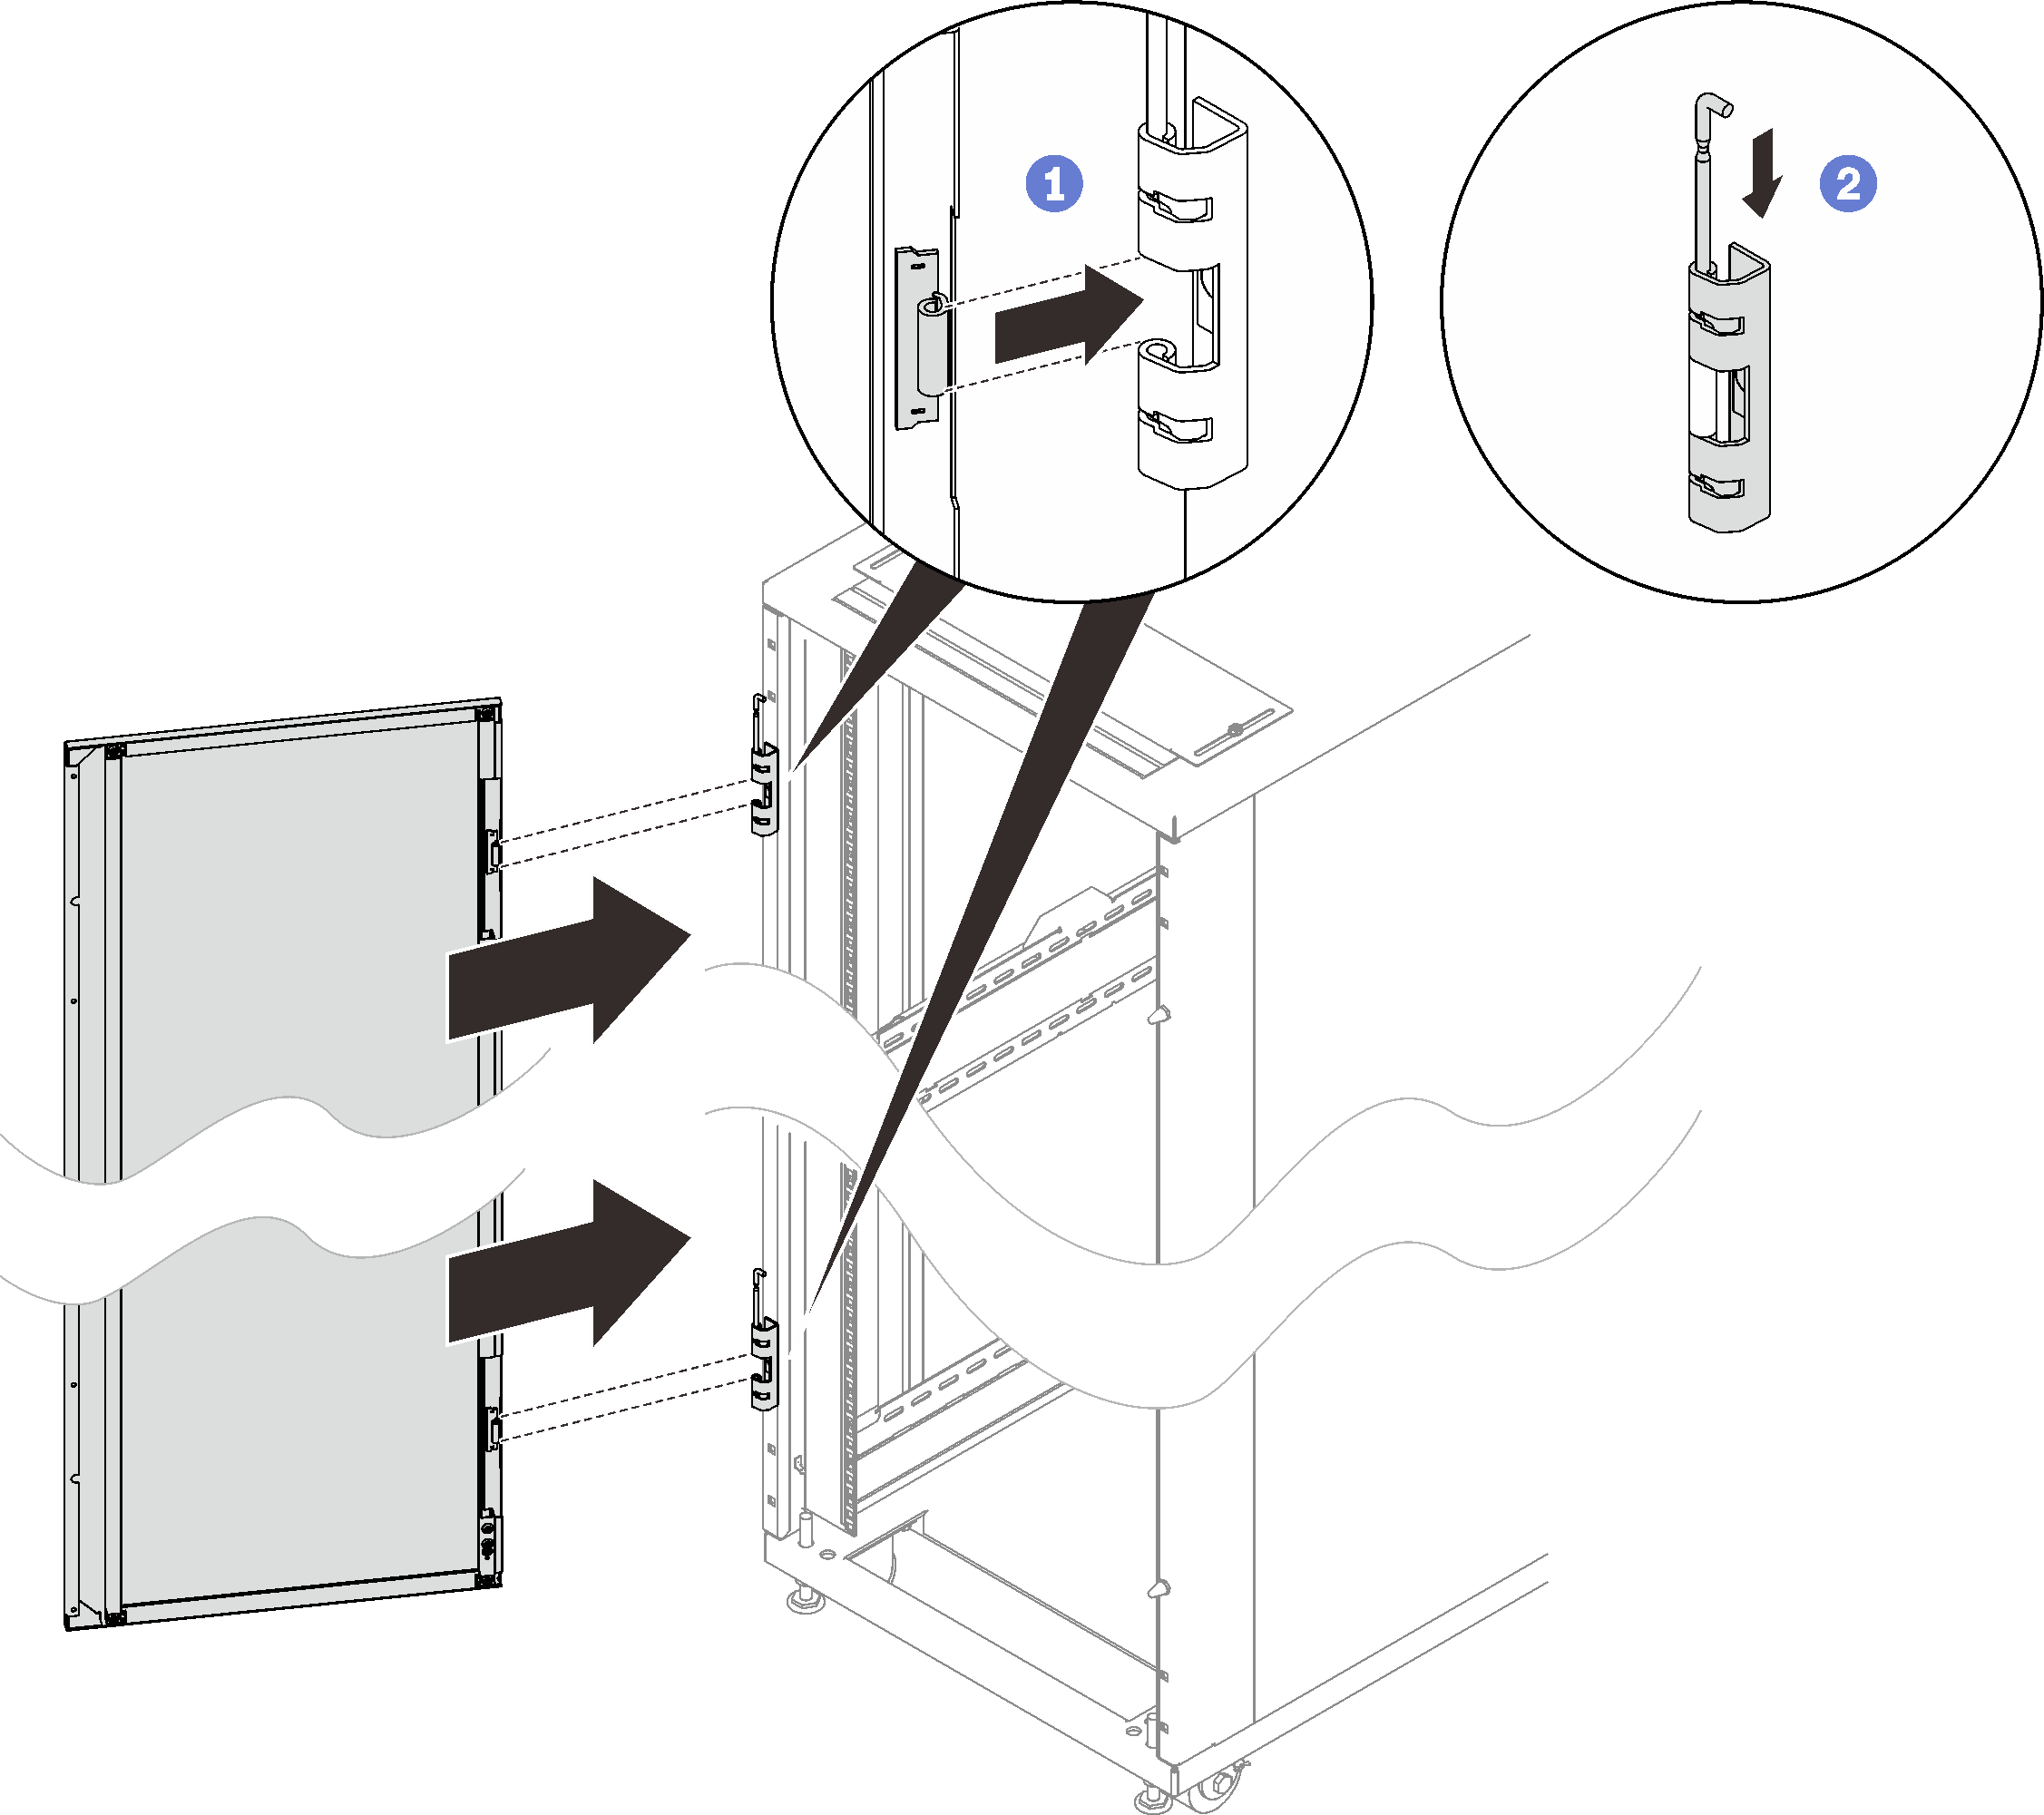
 Align the door with the hinges, and hold the door in place.
 Push the hinge pins down to the closed position so that the door is secured.
Give documentation feedback