
Preparing Configuration Manager

This topic describes how to prepare the target server for the operating system captured inConfiguration Manager.

Procedure

  1. On the target server (in this case, the server that is to be captured), set the variable that contains the location of the operating system to be captured.
    1. Go to the collection with the target reference server.
    2. Right-click the server object, then select the Variables tab.
    3. Set the OSDTargetSystemRoot variable to the system driver, for example: OSDTargetSystemRoot=c:\windows
    Figure 1. Setting the location variable
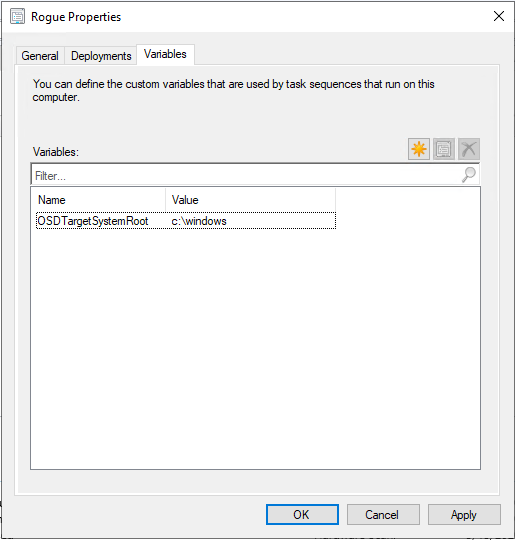
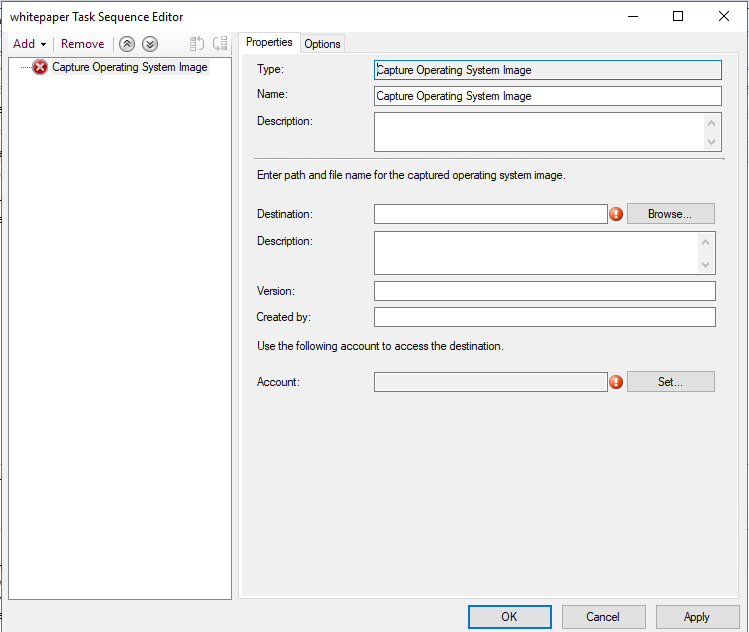
    Setting the location variable
  2. Set up a shared folder on the Configuration Manager site server to store the captured images. For example, create a directory called c:\images. Create a share and assign everyone full control for the share permissions.
  3. Create a task sequence for capturing the image:
    1. Go to the Software Library tab, and then go to Overview > Operating System and right-click on Task Sequences.
    2. Select New and then select Task Sequence.
    3. When the wizard opens, select New custom task sequence and follow the prompts.
      Note
      This action creates an empty task sequence.
    4. Select the Lenovo custom boot image, and make sure that PXE media is selected.
  4. Open the task sequence editor by right-clicking the newly-created task sequence, and select Edit.
  5. From the Add menu, select Images > Capture Operating System Image. A screen similar to the following one opens.
    Figure 2. Capture Operating System Image
    Capture Operating System Image
  6. Enter the destination file name for the image and the access account information and click OK. Make sure the folder is shared with the appropriate permissions so that the image can be accessed by the task sequence.
    You can now use this simple task sequence to capture the operating system from the reference server built earlier.

    Now that a capture task sequence exists, it must be advertised to the reference server. All task sequences in SCCM are advertised to the target or client server so that the appropriate job can be executed against the intended server.

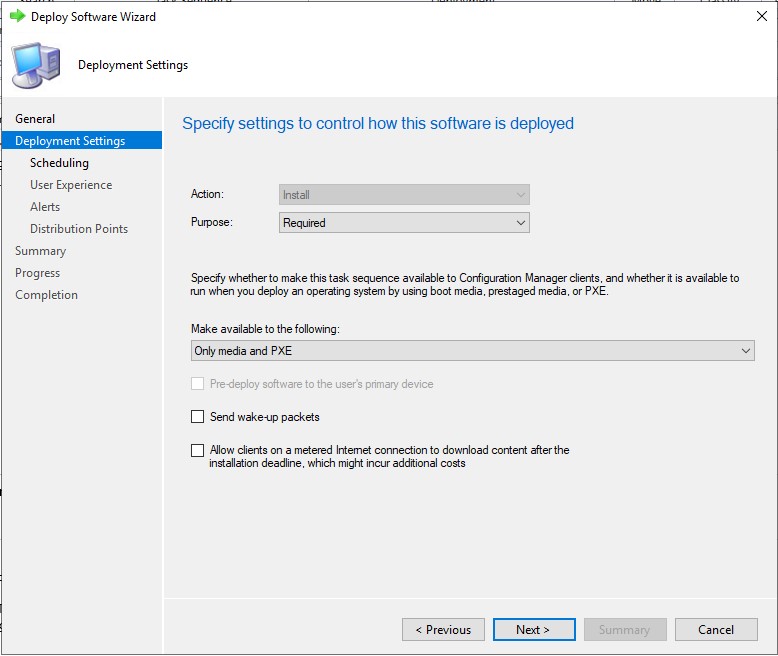
  7. Click Deployment Settings on the left panel. On the right panel, select Required from the Purpose list, and select Only media and PXE from the Make available to the following list, and click Next.
    Figure 3. Select the deployment settings
    Deployment properties, Deployment Settings tab
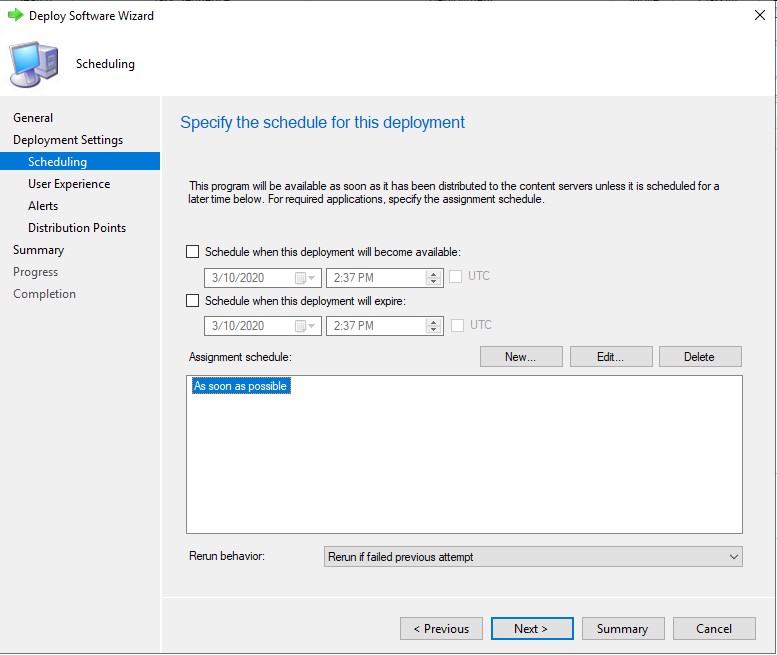
  8. Click Scheduling on the left panel, input As soon as possible in the Assignment schedule field, and click Next.
    Figure 4. Schedule the deployment
    Deployment properties, Scheduling tab
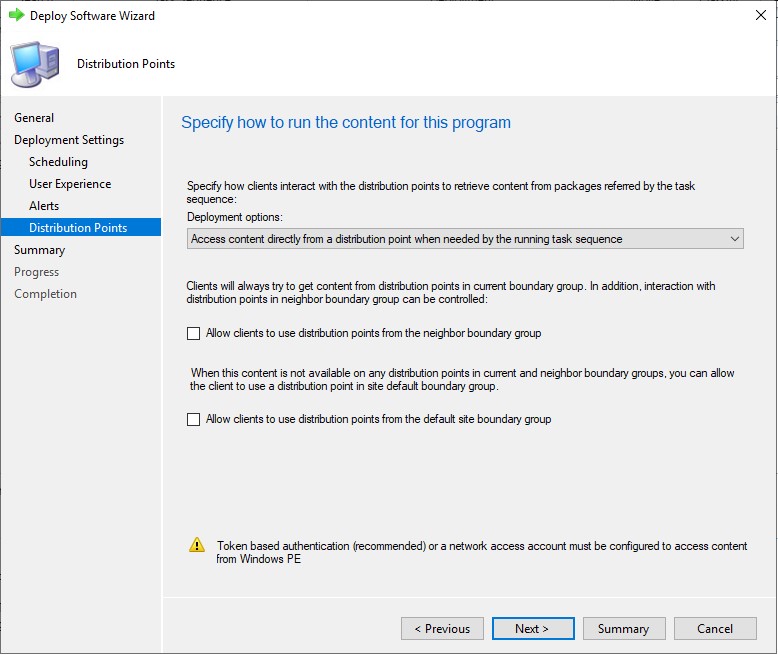
  9. Select Distribution Points on the left panel, select Access content directly from a distribution point when needed by the running task sequence from the Deployment options list.
    Figure 5. Deployment properties, Distribution Points tab
    Deployment properties, Distribution Points tab
  10. Click Next.
  11. Click Finish.