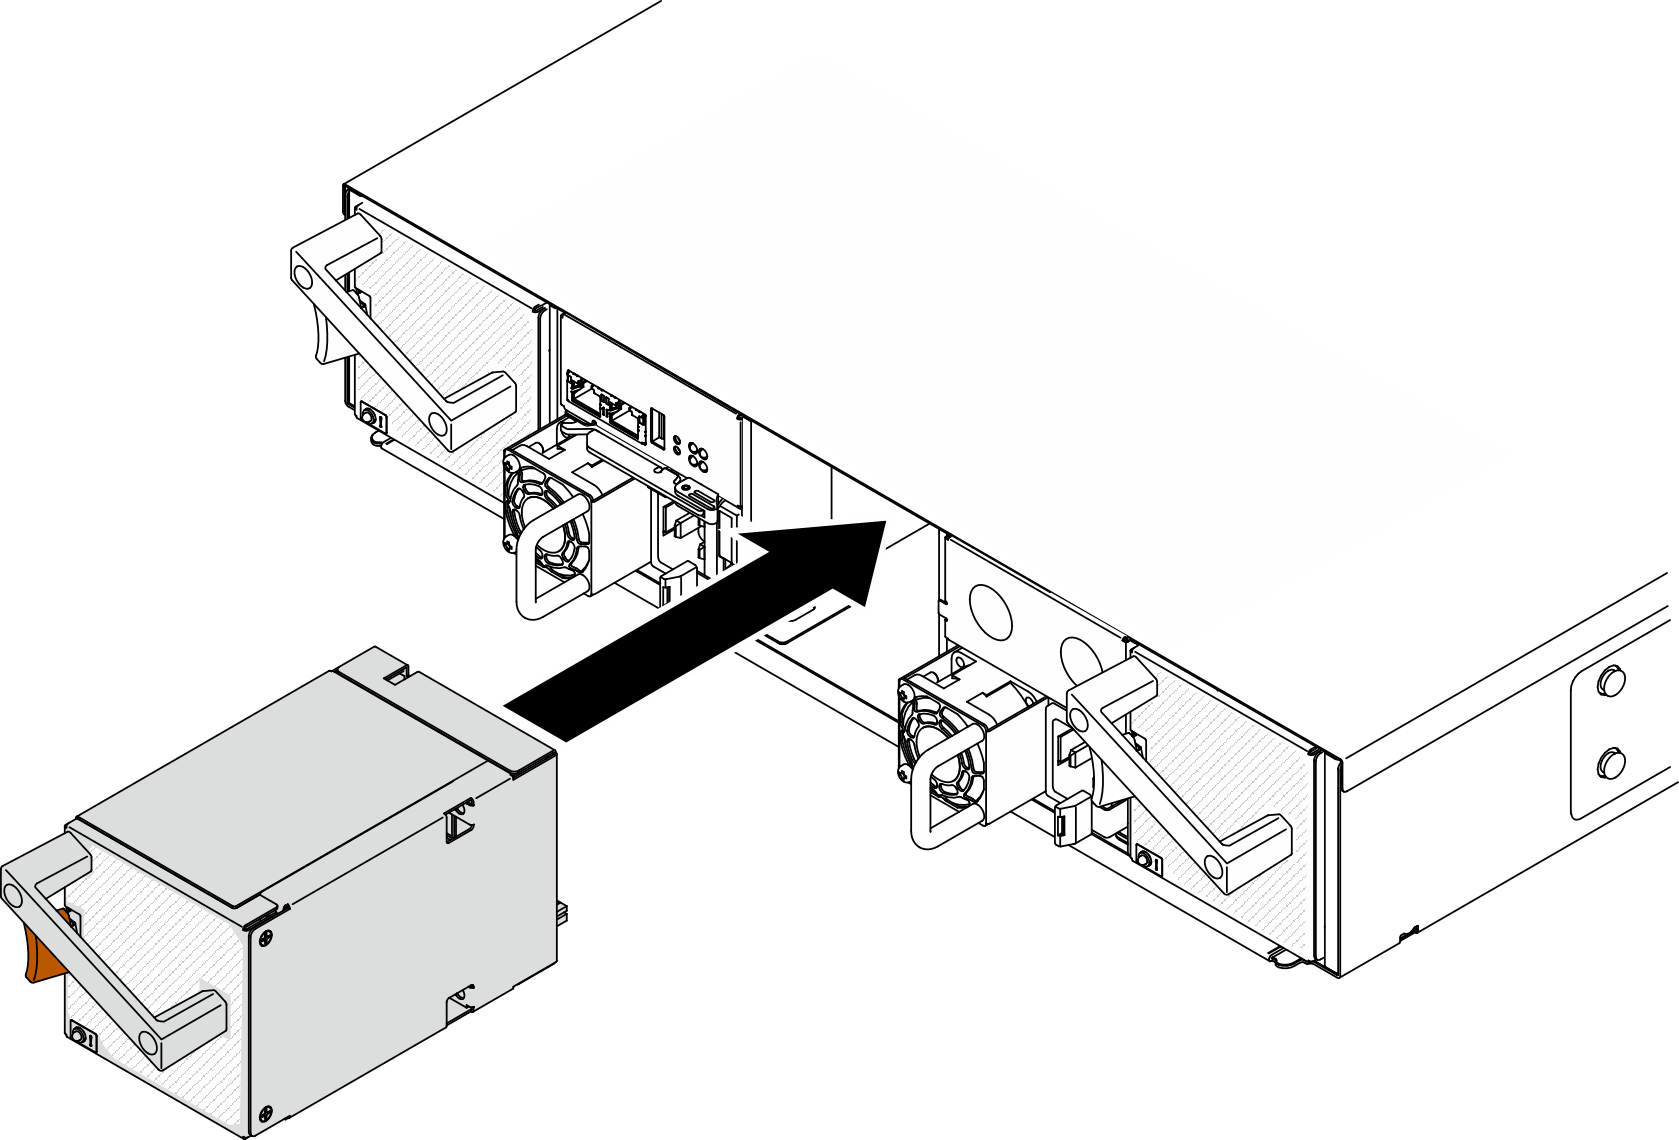
Install a hot-swap fan
Use this information to install a hot-swap fan.
About this task
To avoid possible danger, read and follow the following safety statement.
- S017
 CAUTIONHazardous moving fan blades nearby. Keep fingers and other body parts away.
 - S033
 CAUTION
Hazardous energy present. Voltages with hazardous energy might cause heating when shorted with metal, which might result in spattered metal, burns, or both.
Attention
- Read the Installation Guidelines to ensure that you work safely.
- Static electricity that is released to internal solution components when the solution is powered-on might cause the solution to halt, which might result in the loss of data. To avoid this potential problem, always use an electrostatic-discharge wrist strap or other grounding system when you work inside the solution with the power on.
Procedure
Figure 1. Hot-swap fan installation
After you finish
For DA240 Enclosure, you can further monitor the system fan status in the Cooling section in the SMM2 WebGUI.
Demo video
Give documentation feedback