Remove the drip sensor assembly
Use this information to remove the drip sensor assembly.
S002
CAUTION
The power-control button on the device and the power switch on the power supply do not turn off the electrical current supplied to the device. The device also might have more than one power cord. To remove all electrical current from the device, ensure that all power cords are disconnected from the power source.
Before you remove the drip sensor assembly:
Read the Installation Guidelines to ensure that you work safely.
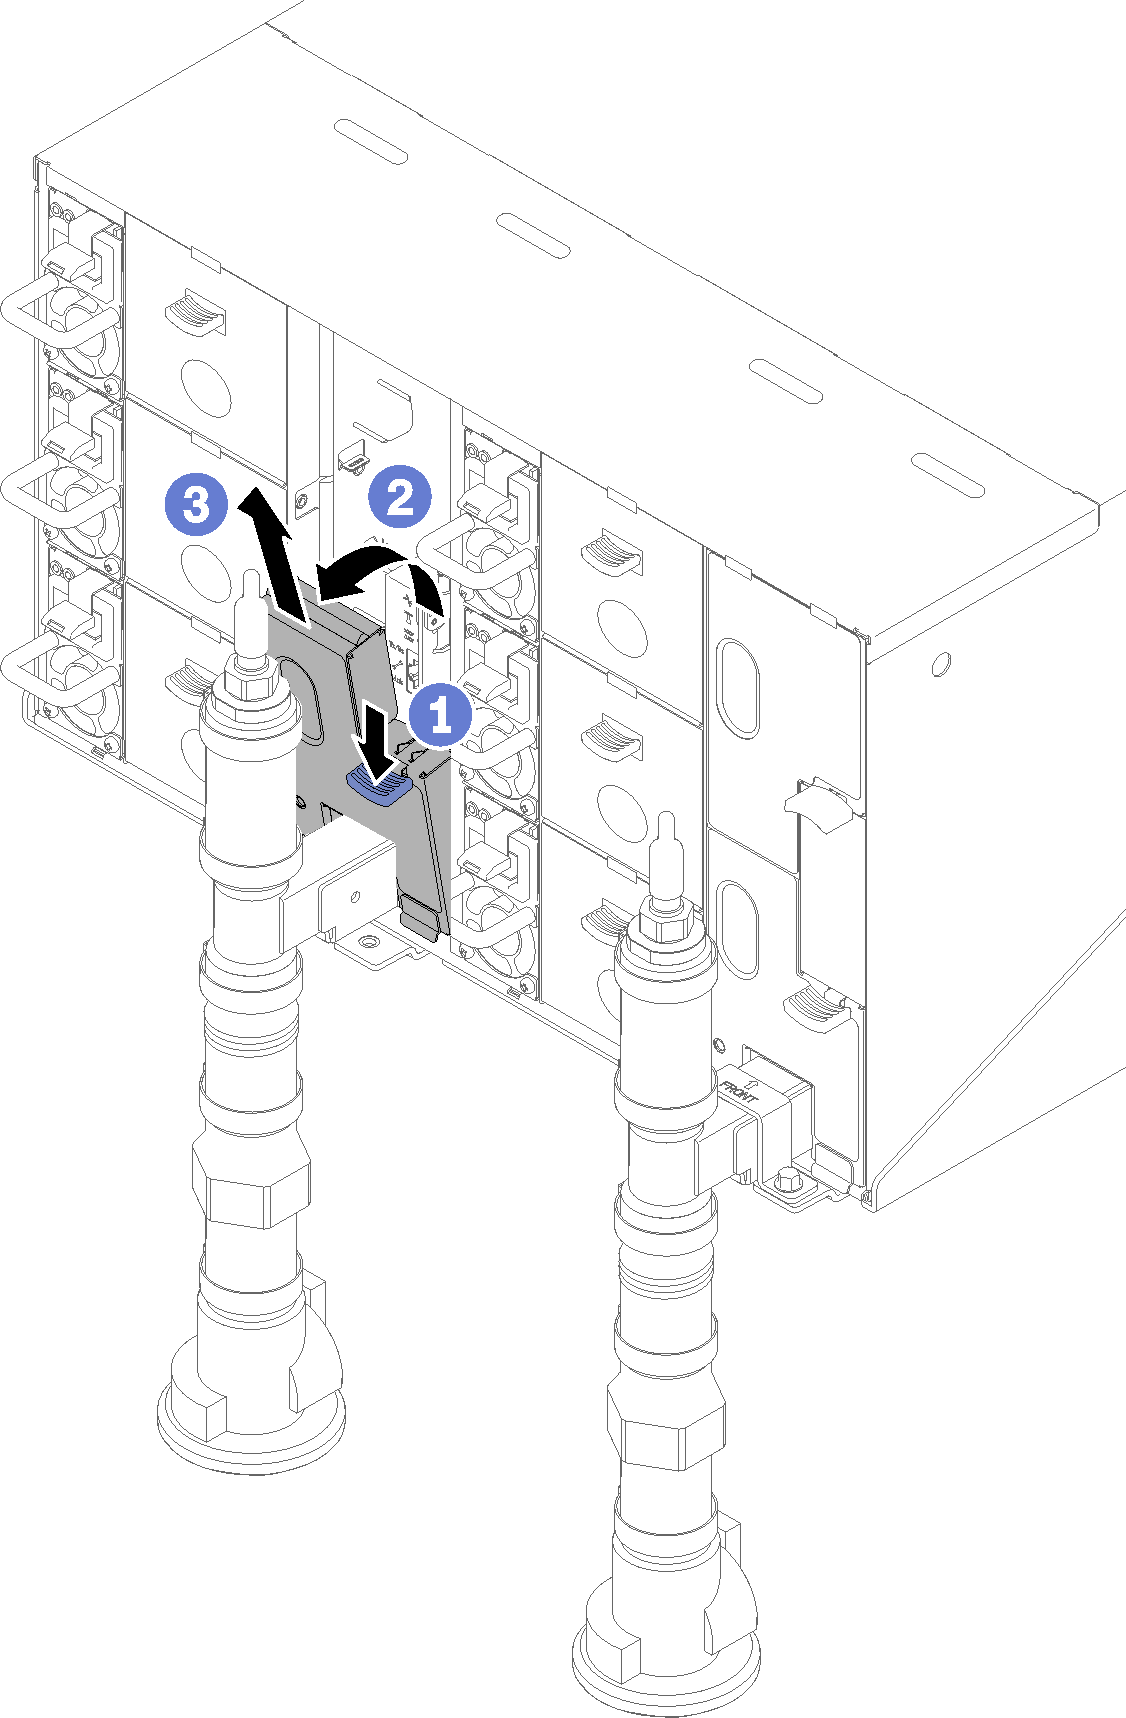
- Press down the blue latch and rotate the top of the shield rearward; then, lift the shield up to clear the manifold pipe that enters the enclosure.Figure 1. Lower left EMC shield removal
 NoteIf there is a manifold vertical pipe in front of the EMC shield, you need to slide it sideways out from underneath the pipe.Figure 2. Lower left EMC shield removal
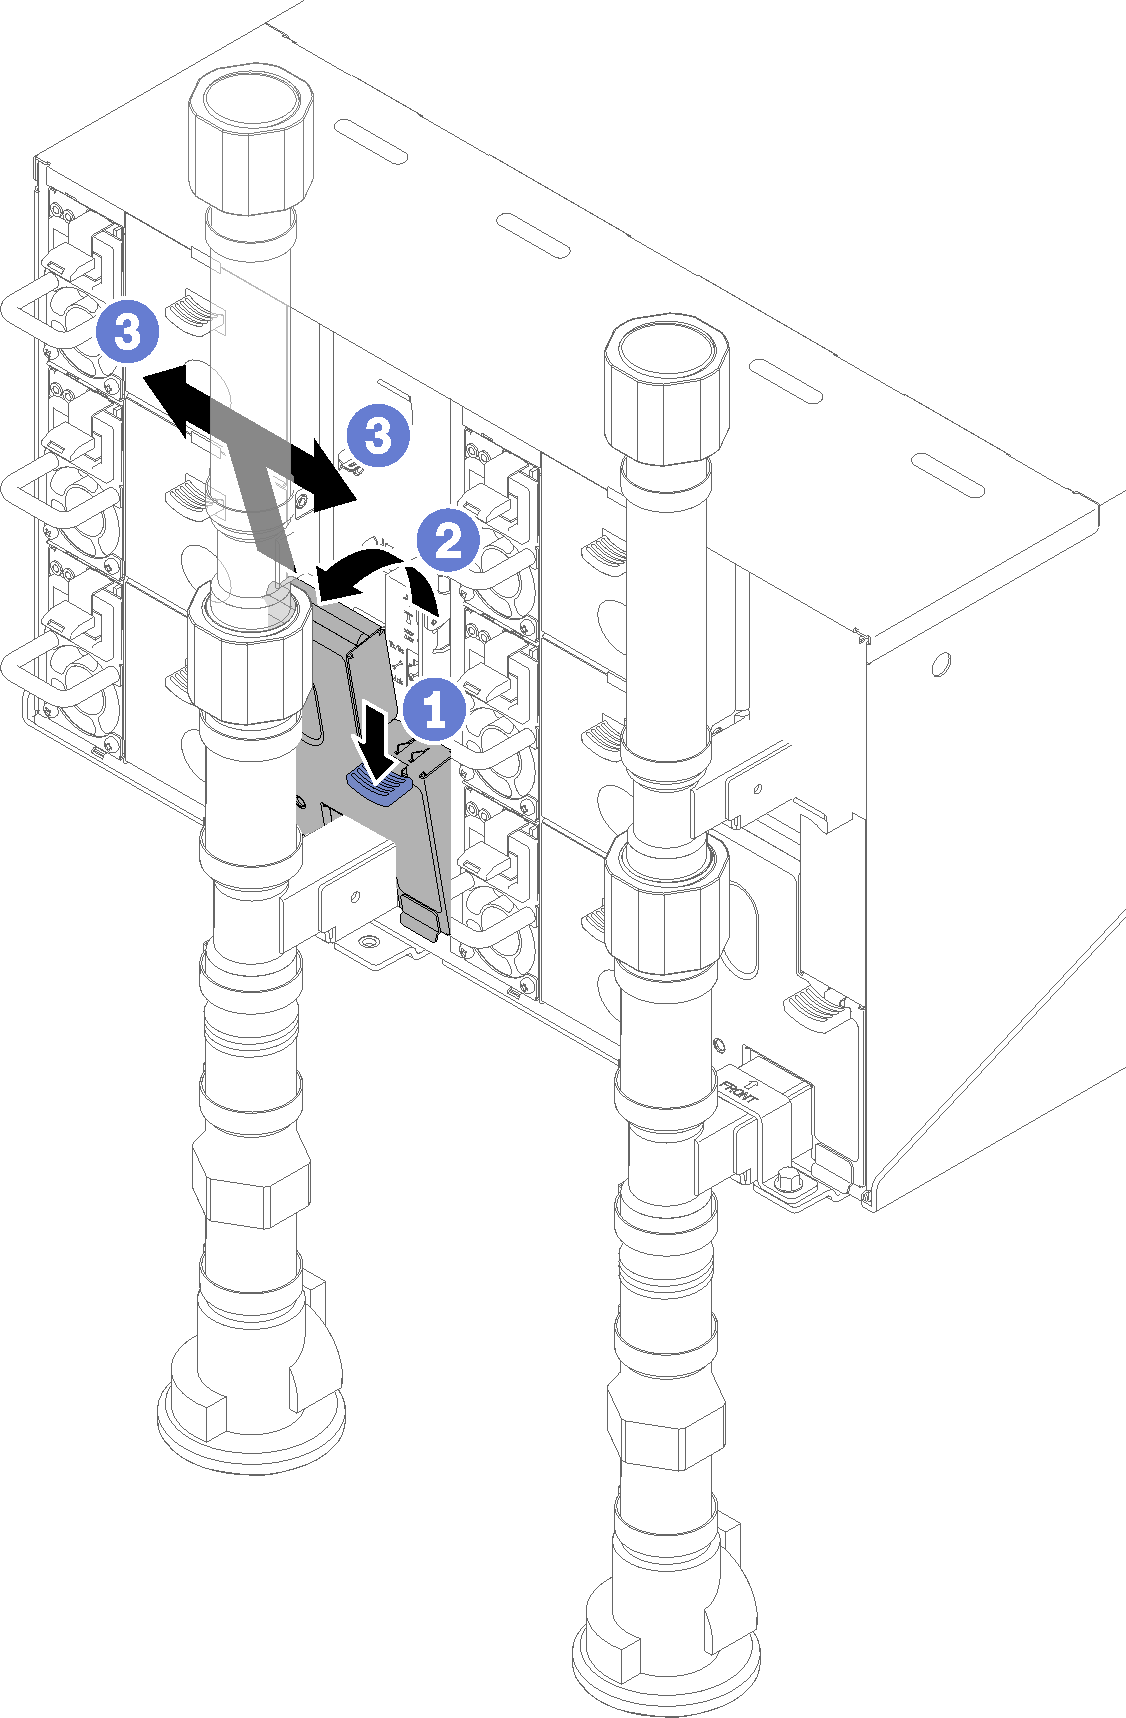
Complete the following steps to remove the drip sensor assembly.
Push the latch up upwards and slide the drip sensor assembly backwards, then; lift the drip sensor assembly up to clear sensor post and pull it out of the enclosure.
Figure 3. Drip sensor assembly removal
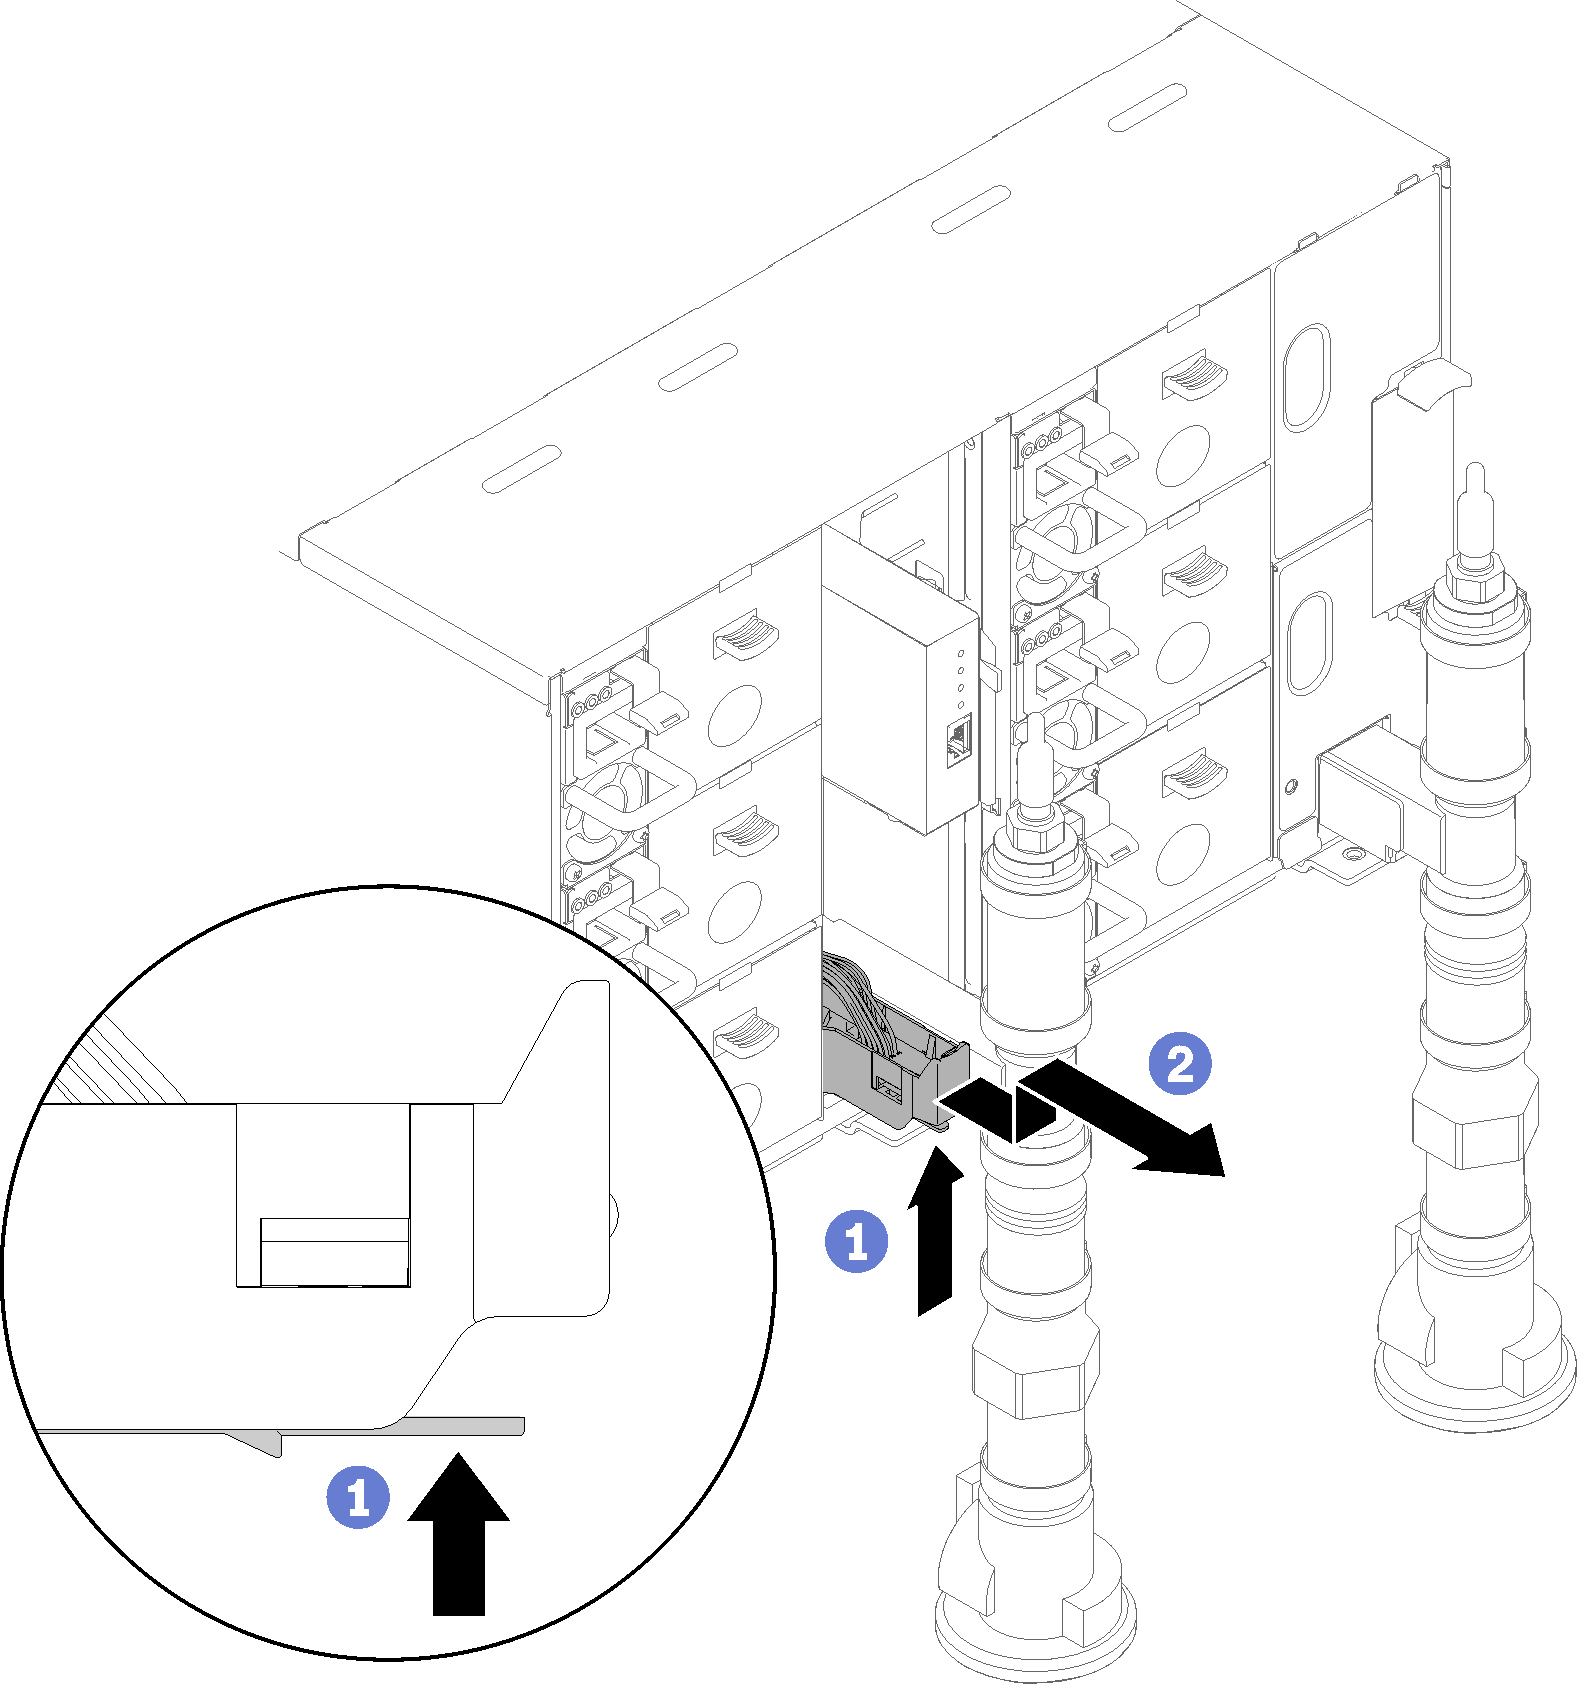
Figure 4. Drip sensor assembly
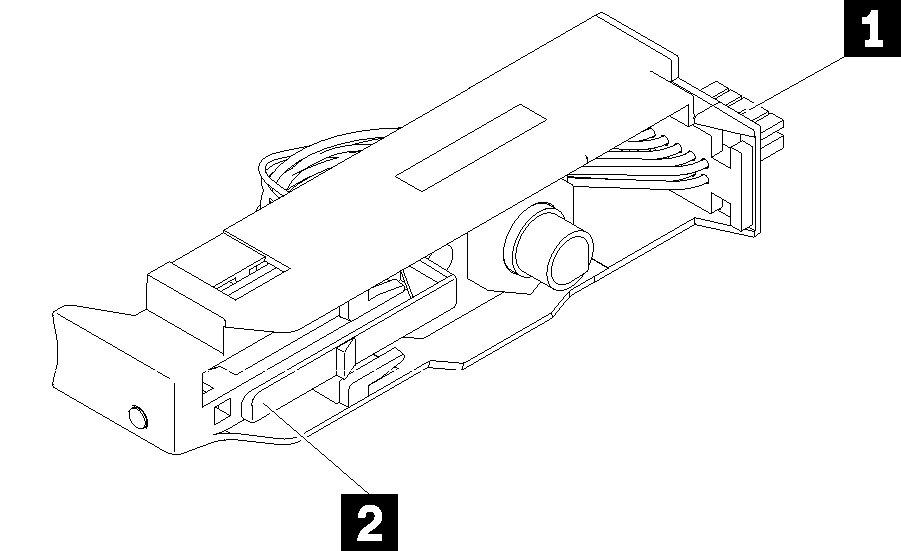
| 1 Connector | 2 Latch |
If you are instructed to return the component or optional device, follow all packaging instructions, and use any packaging materials for shipping that are supplied to you.
Demo video
Give documentation feedback