Remove a fan shroud (Rack mount)
Follow instructions in this section to remove a fan shroud.
About this task
Hazardous energy present. Voltages with hazardous energy might cause heating when shorted with metal, which might result in spattered metal, burns, or both.
Read Installation Guidelines and Safety inspection checklist to ensure that you work safely.
Power off the server and peripheral devices and disconnect the power cords and all external cables. See Power off the server.
If the node is installed in an enclosure or mounted, remove the node from the enclosure or mount. See Configuration guide.
Procedure
- Let the top side of the node facing up.
- Remove the fan shroud.
- Lift up the fan shroud from the node, and place it on a flat clean surface.Figure 1. Removing the fan shroud
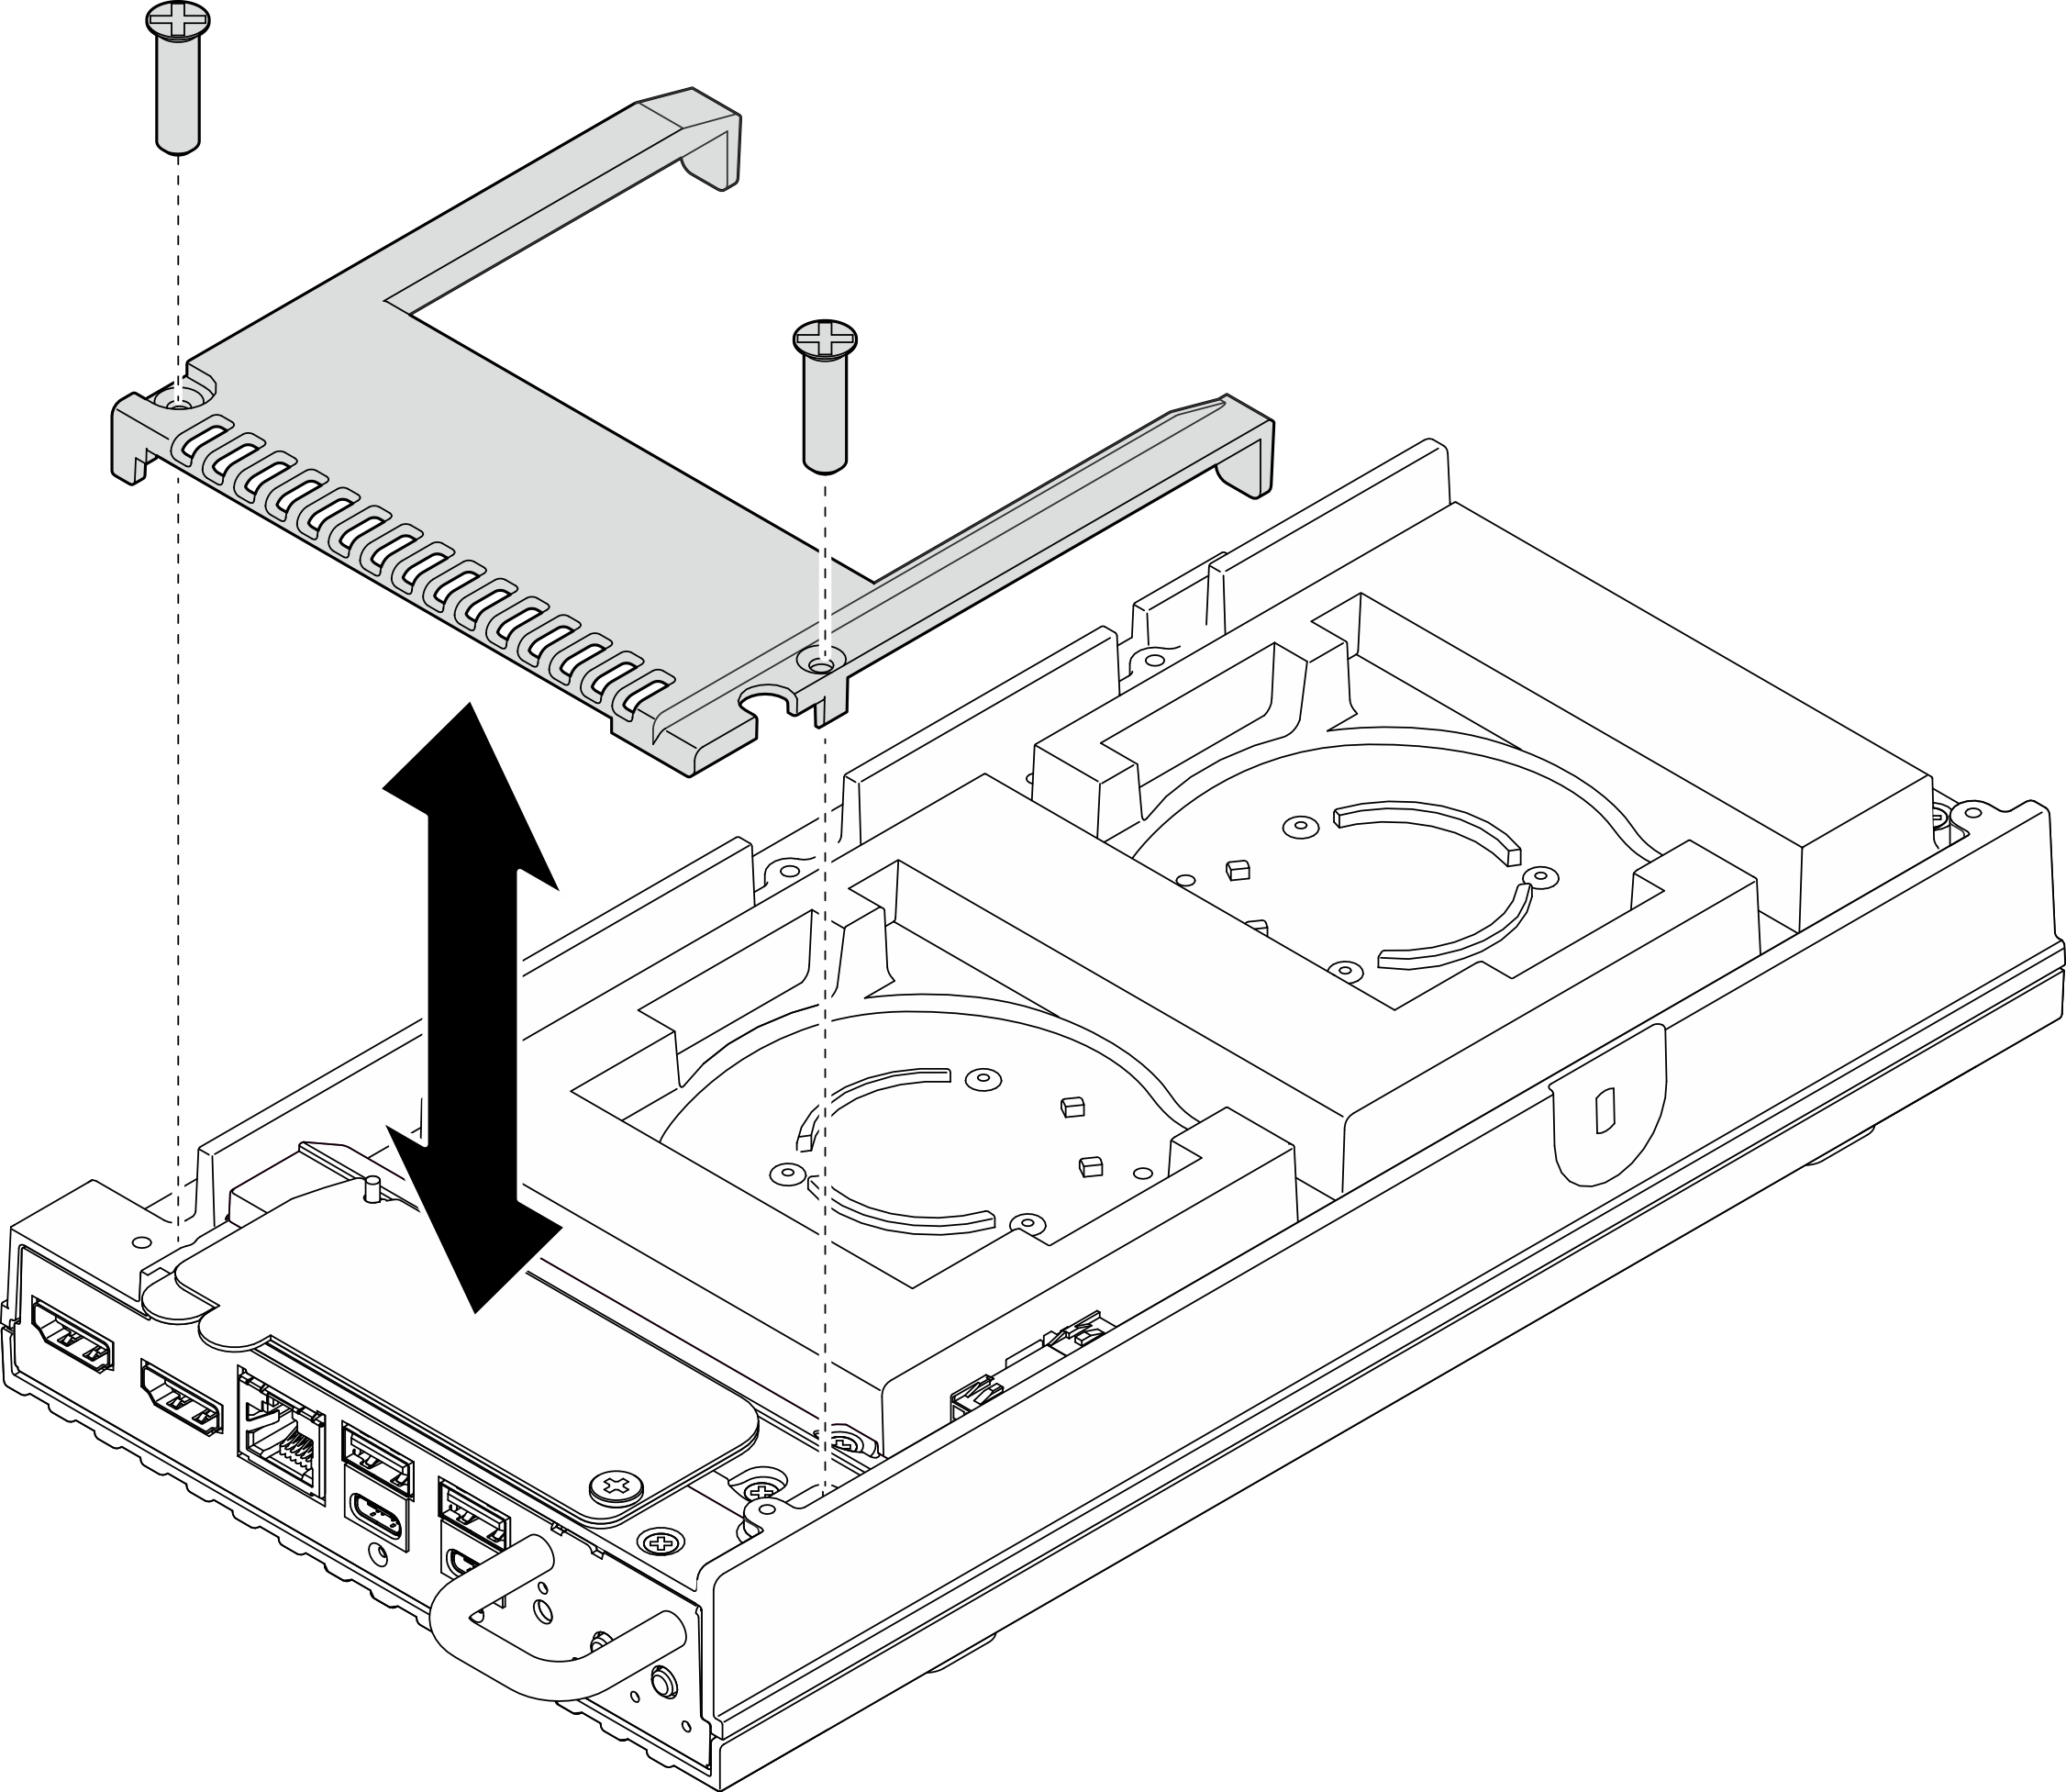
- Lift up the fan shroud from the node, and place it on a flat clean surface.
After you finish
- Install a replacement unit or proceed to the steps below if the node is not to be installed to the enclosure.
- Install a replacement unit. See Install a fan shroud (Rack mount).
- If the server is not to be installed in a enclosure, complete the following steps:
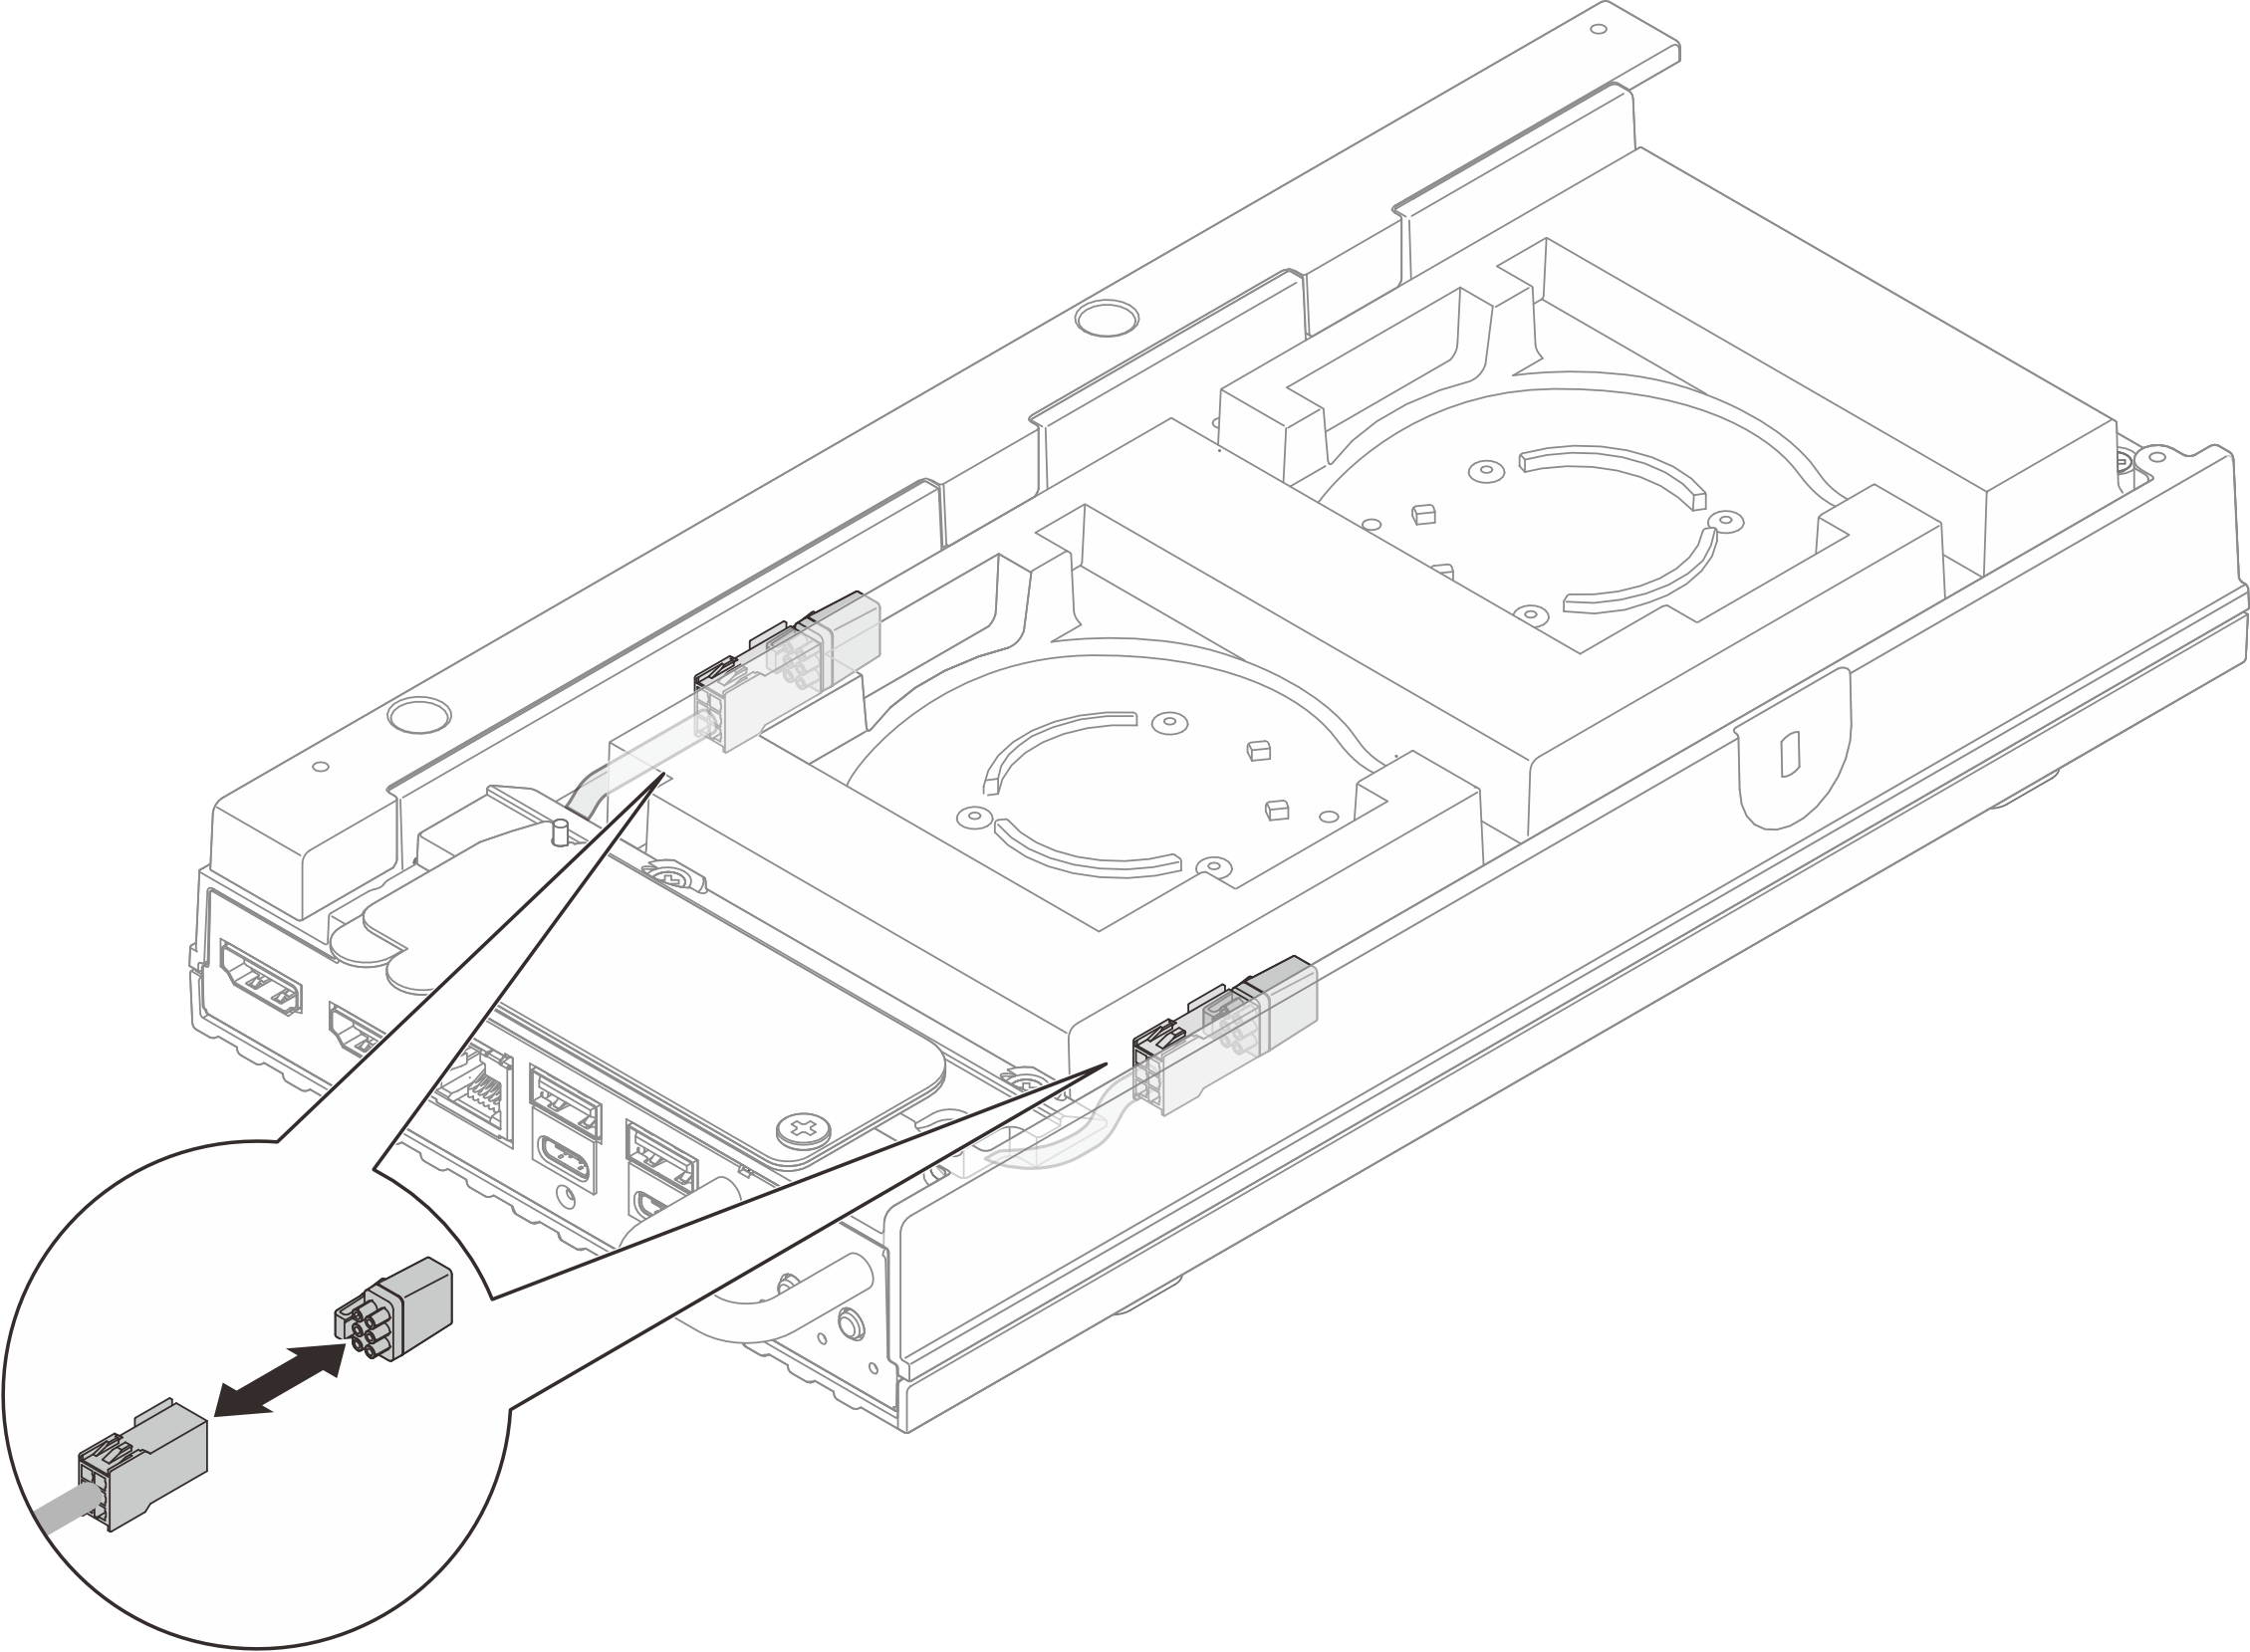
- Remove the fan bridge cable dust filler from the fan bridge cable.Figure 2. Removing the fan bridge cable dust filler
- Install the fan module. See “Install a fan module” in SE100 User Guide.
- Install the desktop mount fan shroud. See “Install a desktop mount fan shroud” in SE100 User Guide.
- Remove the fan bridge cable dust filler from the fan bridge cable.
If you are instructed to return the component or optional device, follow all packaging instructions, and use any packaging materials for shipping that are supplied to you.