Install an M.2 drive on an M.2 data adapter
Use this information to install M.2 drive on an M.2 data adapter.
- Read the following sections to ensure that you work safely.
Turn off the server. Disconnect the power cords and all external cables (see Power off the server).
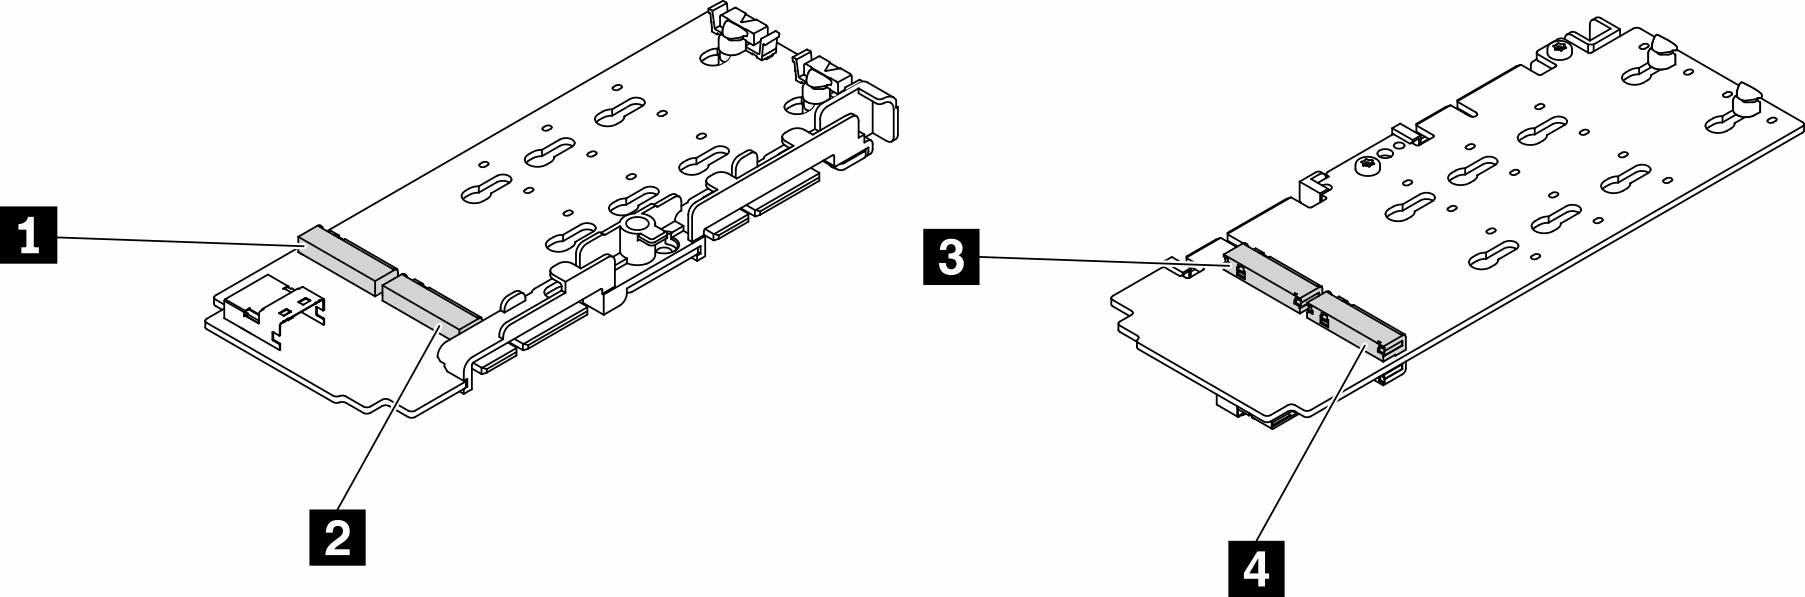
For the data drive adapter and the boot drive adapter, the pairs of M.2 drives on opposite sides of the adapter must be of the same form factor (that is, the same physical length) because they share the same mounting clip.
Drive positions 1 and 4 must be of the same form factor (that is, the same physical length)
Drive positions 2 and 3 must be of the same form factor (that is, the same physical length)
| 1 Drive 2 or 9 | 3 Drive 5 or 6 |
| 2 Drive 4 or 7 | 4 Drive 3 or 8 |
For more details about the M.2 drive and slot numbering, see M.2 drive and slot numbering.
Procedure
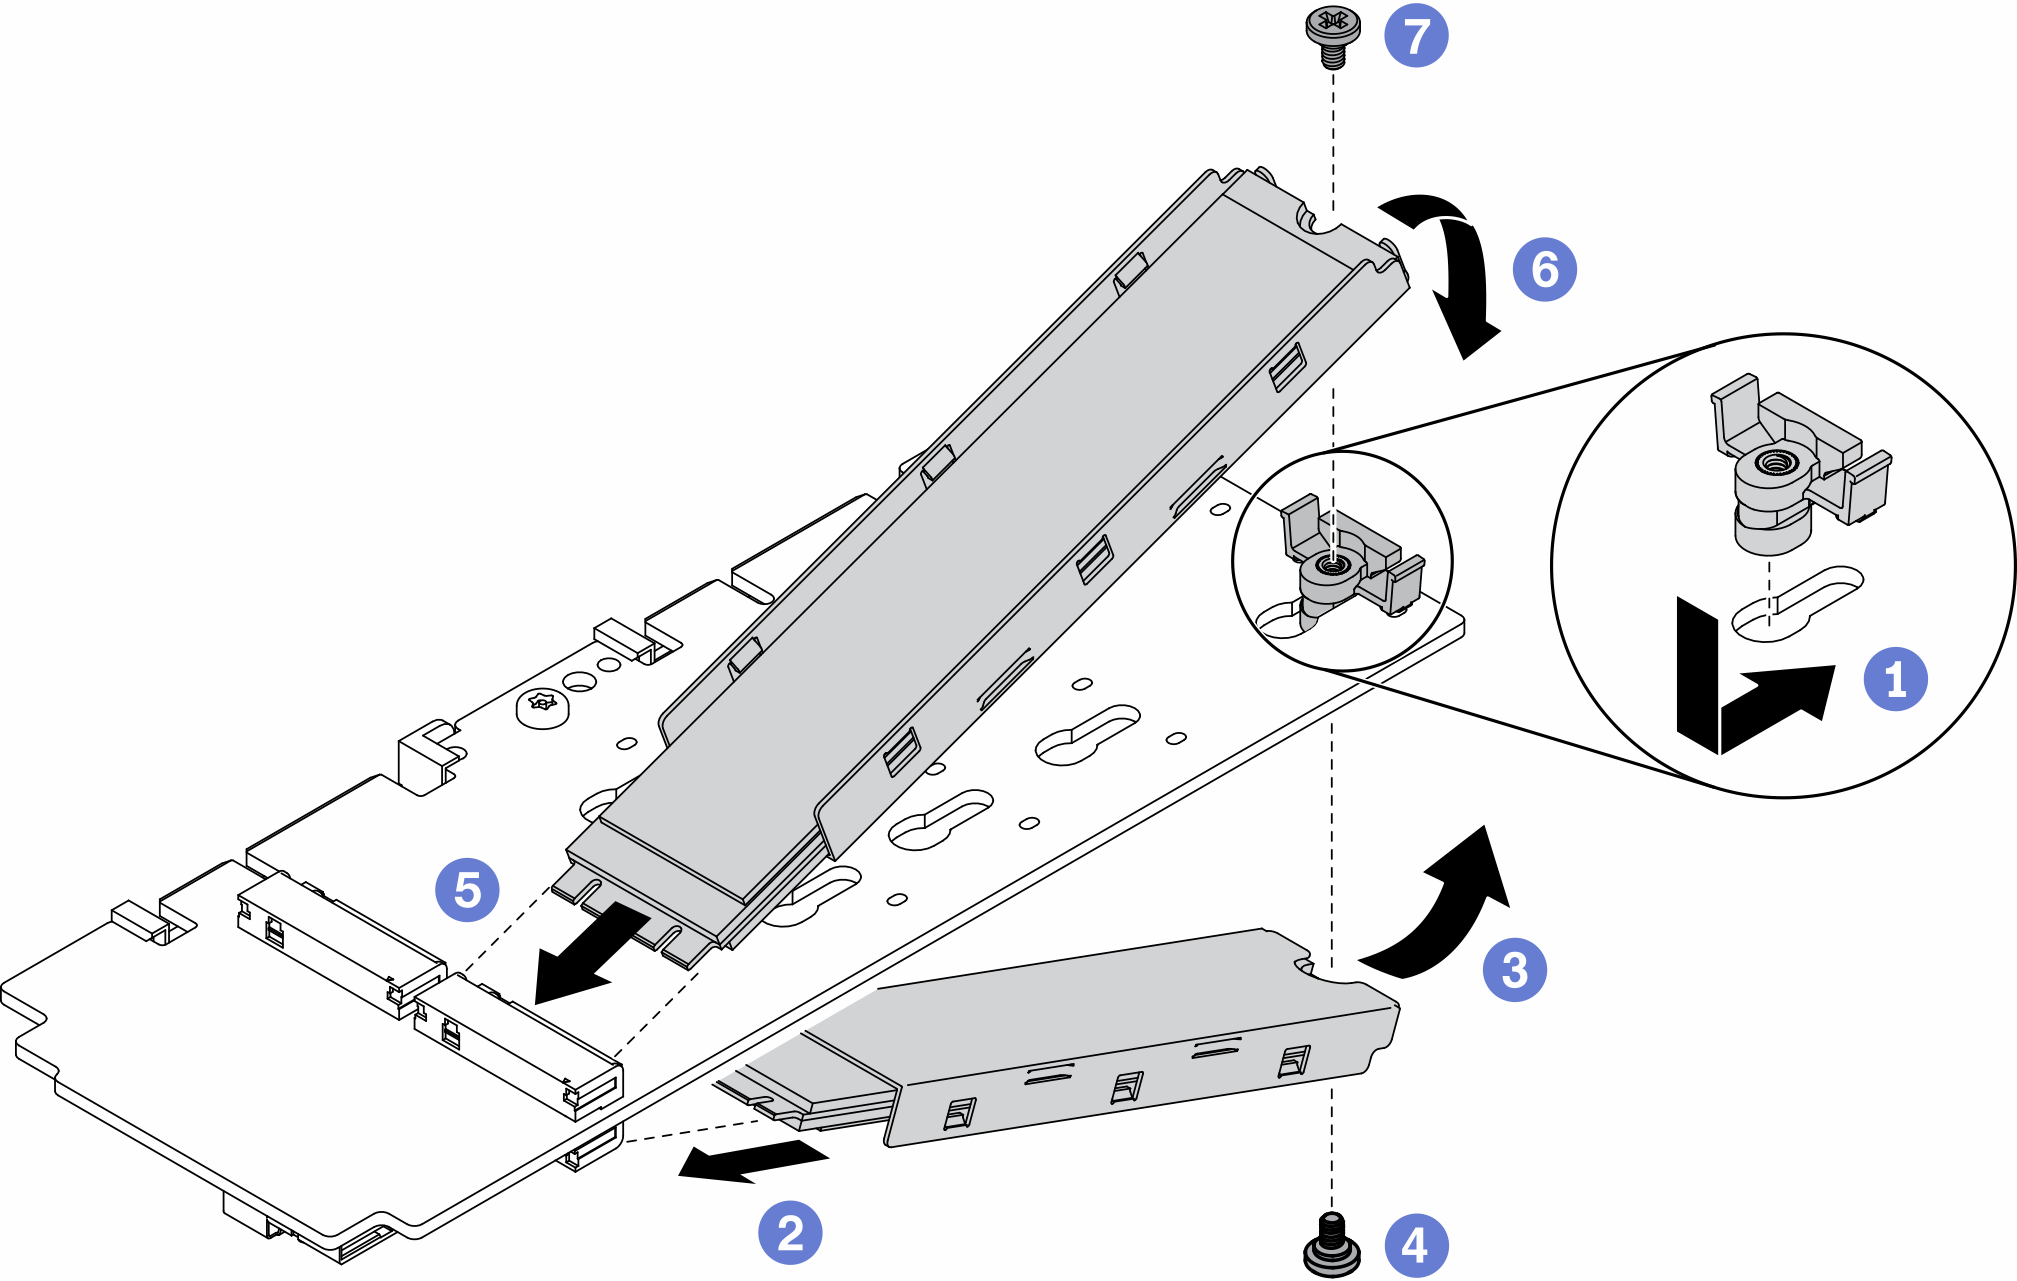
- Insert the retainer into the slot and push it forward to firmly seat it into the slot.
- Insert the M.2 drive on the bottom into the slot with an angle as shown.
- Rotate the M.2 drive on the bottom upward and hold it to against the adapter.
- Install the screw to secure the M.2 drive to the adapter.
- Insert the M.2 drive on the top into the slot with an angle as shown.
- Rotate the M.2 drive on the top downward and hold it to against the adapter.
- Install the screw to secure the M.2 drive to the adapter.
Install the node if needed (see Install a node).
Reconnect power cords and all external cables.
Demo video