Install the M.2 WLAN module
Use this information to install the M.2 WLAN module.
To avoid possible danger, read and follow the following safety statement.
- S012
 CAUTIONHot surface nearby.
Before you install the M.2 WLAN module, complete the following steps:
- Read the following sections to ensure that you work safely.
Turn off the server. Disconnect the power cords and all external cables (see Power off the server).
Procedure
- Remove the protection cover first; then, carefully connect the cables to the connectors on the M.2 WLAN module as shown. Press the cable down until it clicks.Note
Make sure the cables are connected to the right connector. Blue cable connected to
Main
connector, white cable connected toAux
connector.Carefully perform the step without excessive force to prevent the connector from damage.
Make sure the cables are connected to the connectors properly, you should be able to rotate the cable horizontally without it detached easily.
Figure 1. M.2 WLAN module installation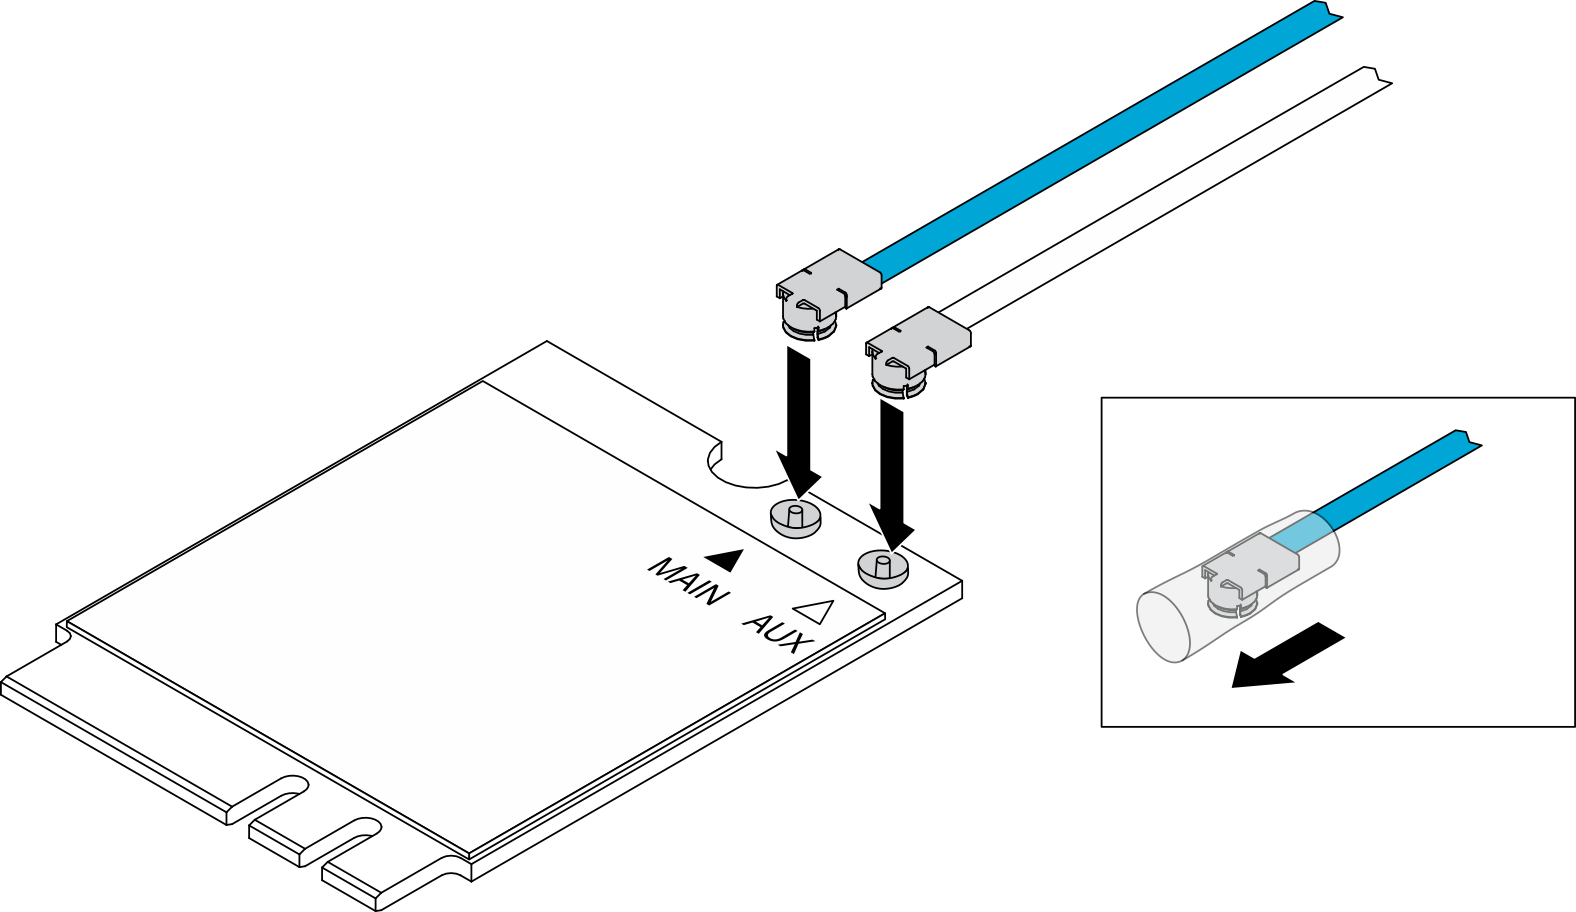
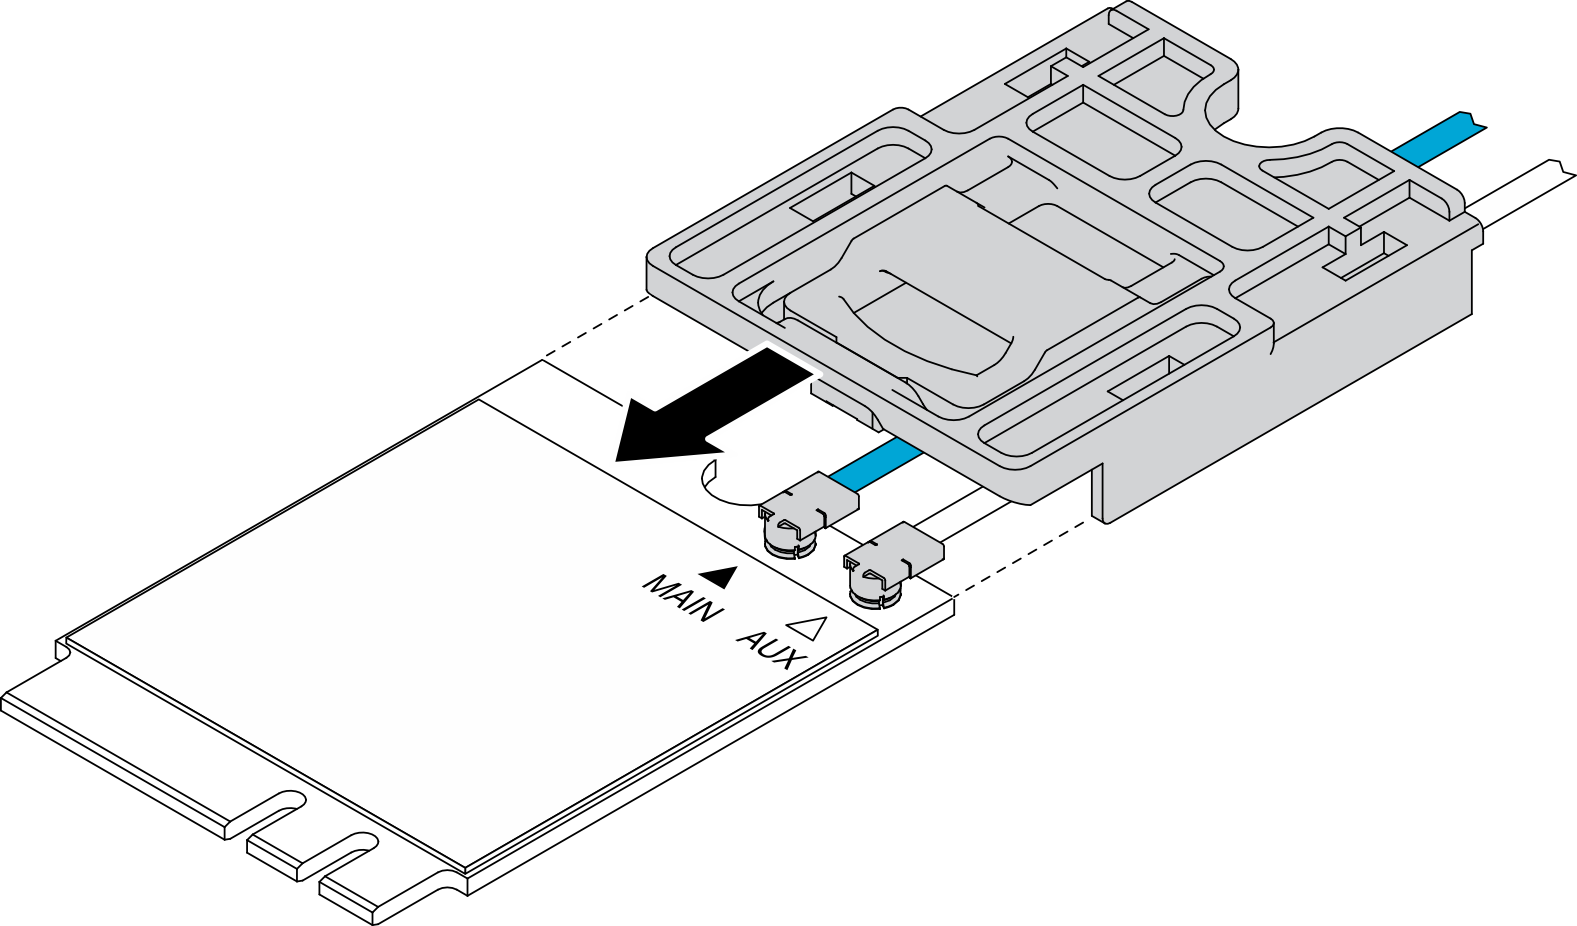
- Align the retainer with the WLAN module; then, slide the cable holder onto the module until it clicks.Figure 2. M.2 WLAN module installation
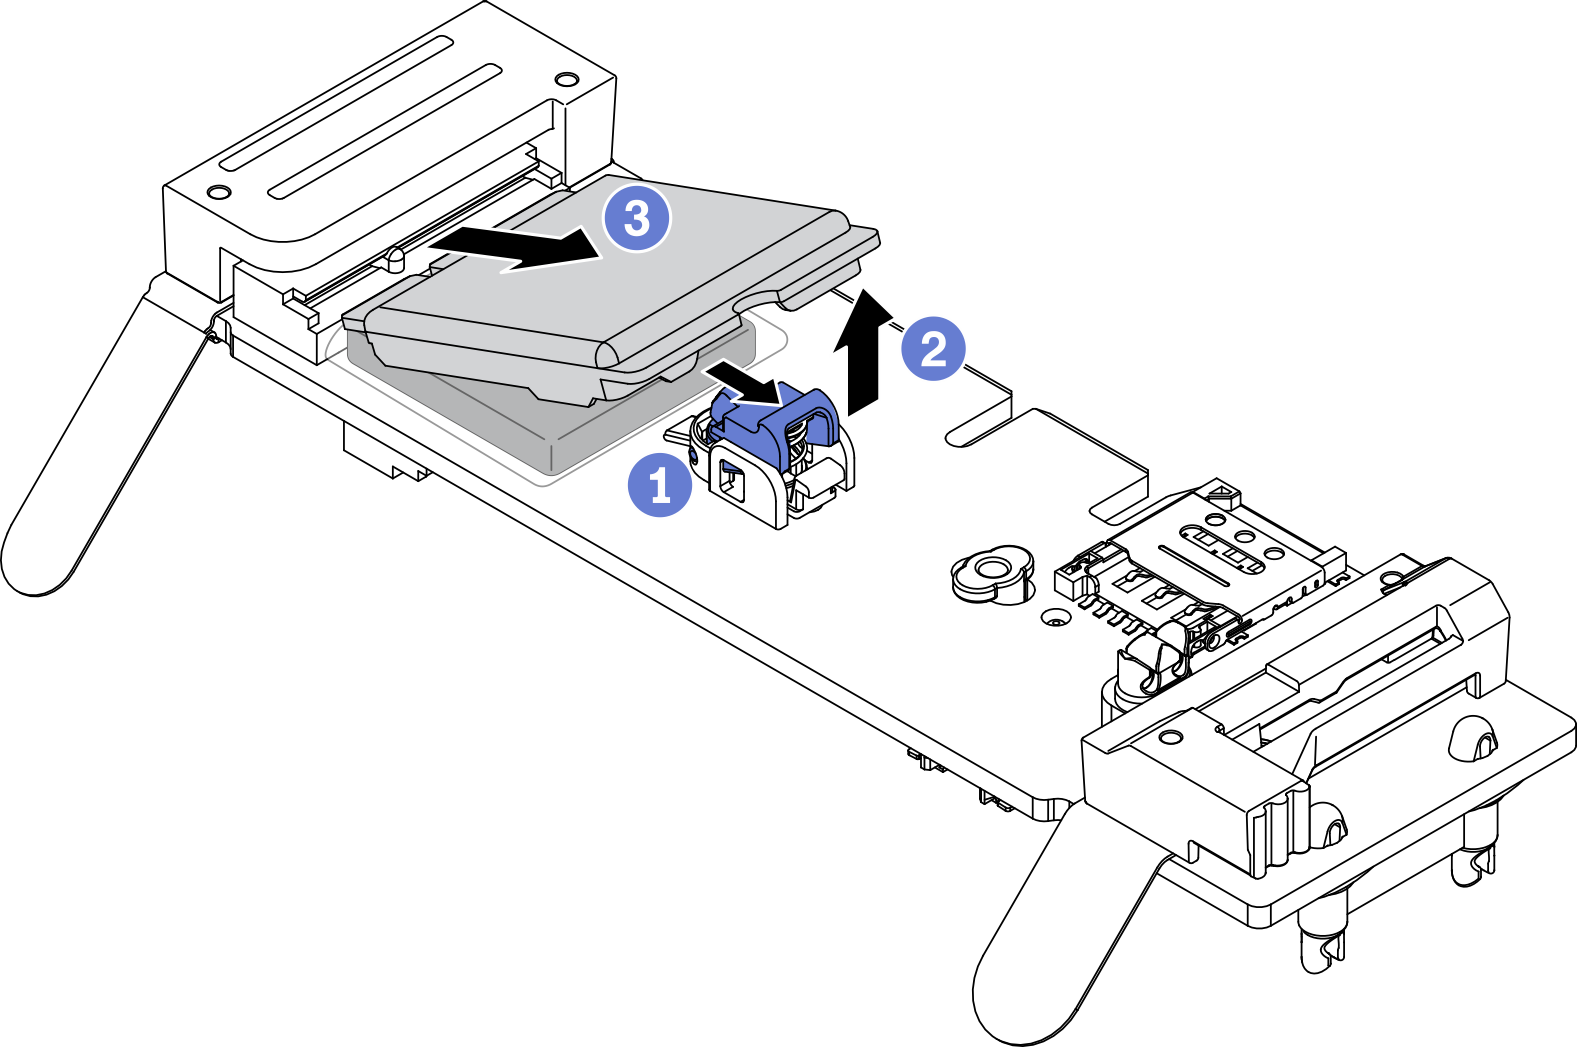
- Press the cover latch; then, rotate the cover up and pull it out from the adapter.Figure 3. M.2 WLAN module installation
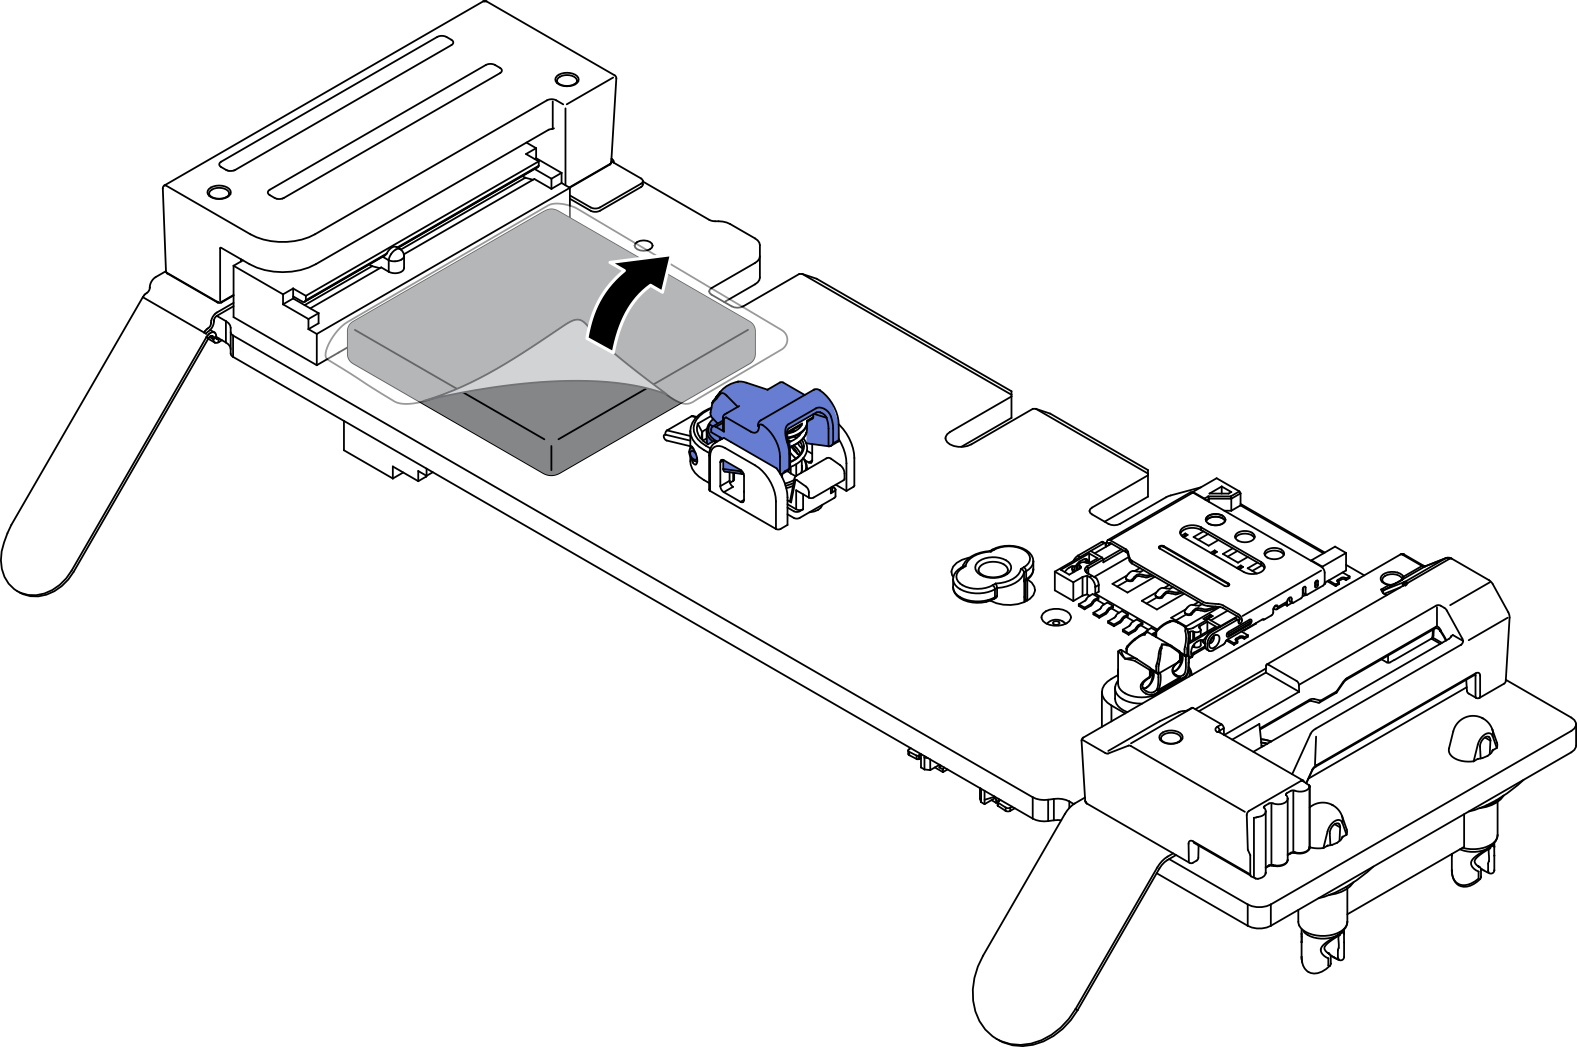
- Remove the film on the heat sink pad.Figure 4. M.2 WLAN module installation
- Insert the M.2 WLAN module into the connector and press it down until it clicks into the place.NoteMake sure the module is firmly seated on the adapter.Figure 5. M.2 WLAN module installation
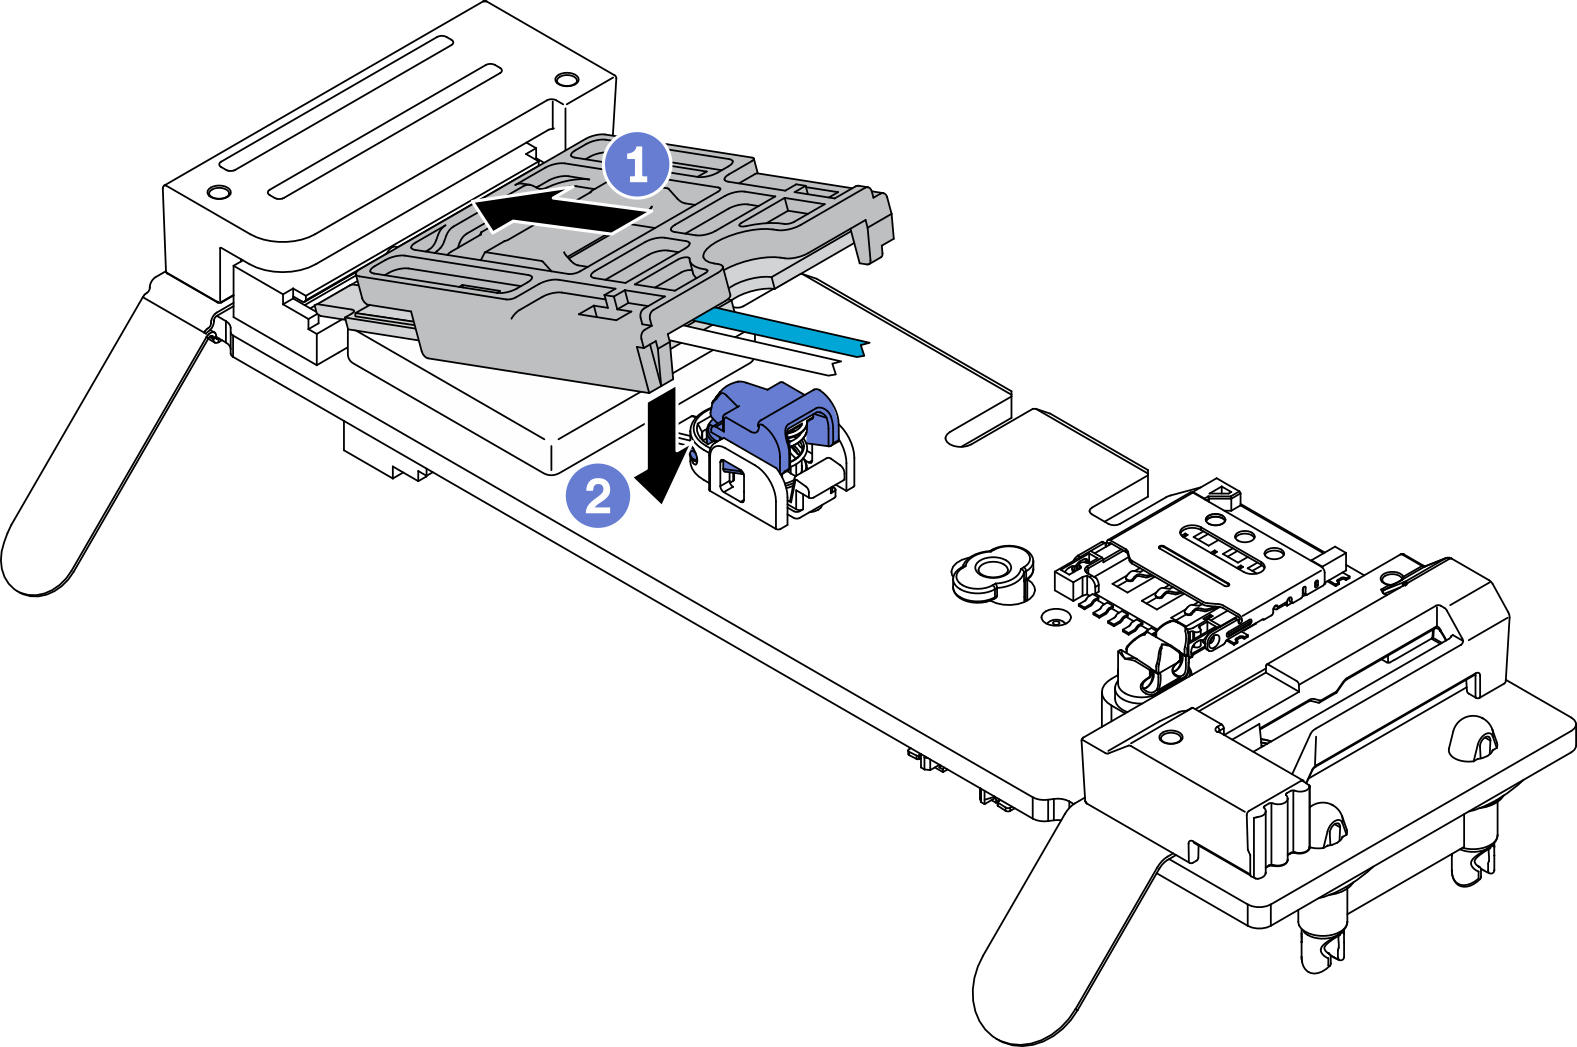
- Route the cables in the clips as shown.Figure 6. M.2 WLAN module installation

- Route the cables to the rear of the server, make sure to route the cable respectively into the right hole as shown. Be careful of the difference between the cable colors.Figure 7. M.2 WLAN module installation
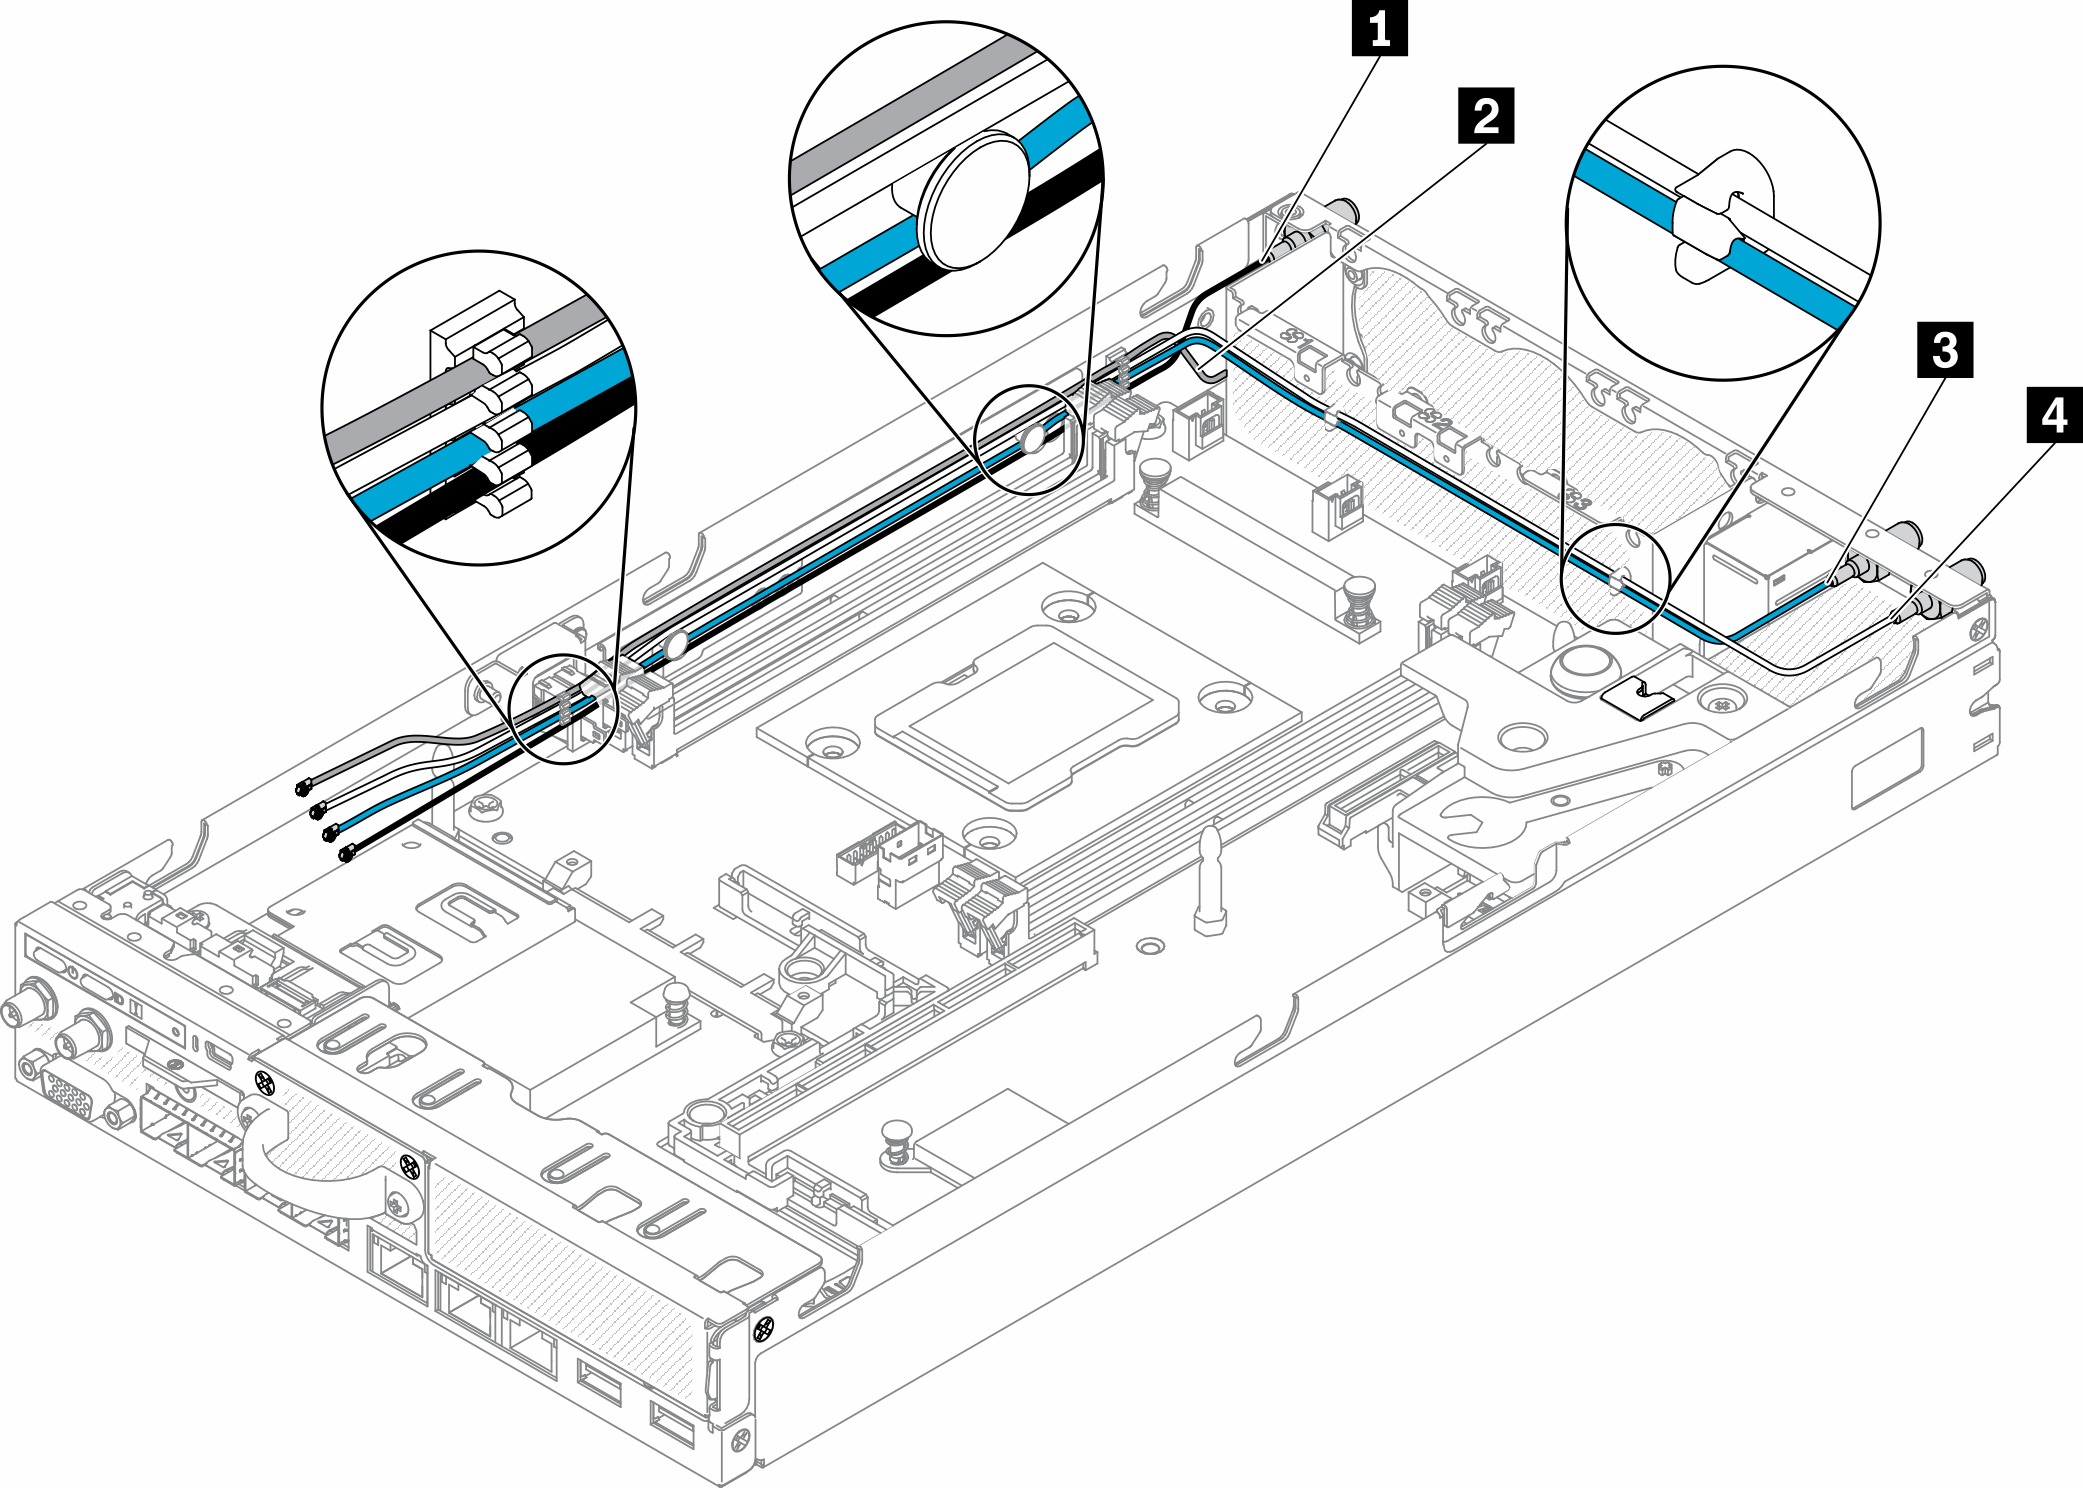
Table 1. M.2 WLAN module installation 1 M.2 LTE module main cable (black cable, on the top) 3 M.2 WLAN module main cable (blue cable) 2 M.2 LTE module AUX cable (gray cable, on the bottom) 4 M.2 WLAN module AUX cable (white cable) - Use screwdriver in the Misc kit to clockwise install the nut, the washer, and the M.2 WLAN module cable on the rear of the server.NoteApply the same method to install both main and AUX cables.Figure 8. M.2 WLAN module installation
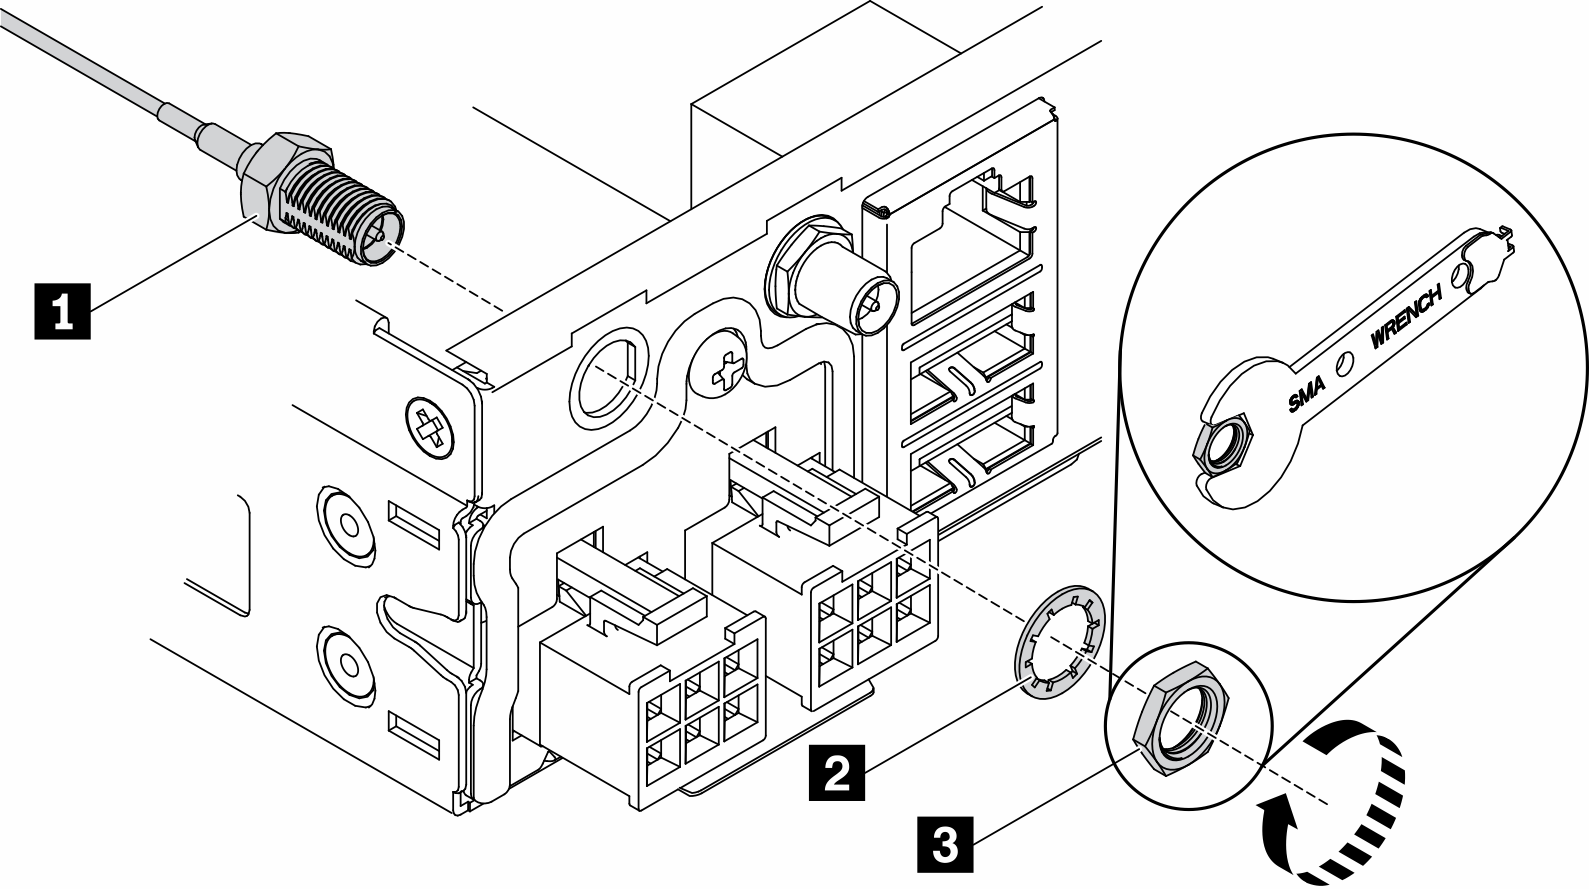
Table 2. M.2 WLAN module installation 1 M.2 WLAN module cable 3 Nut 2 Washer
After you install the M.2 WLAN module, complete the following steps:
Install the node if needed (see Install a node).
Reconnect power cords and all external cables.
Demo video
Give documentation feedback