Install the adapter-retention assembly
Use this information to install the adapter-retention assembly.
About this task
Attention
Read Safety inspection checklist and Installation Guidelines to ensure that you work safely.
Make sure you have a T10 Torx screwdriver available.
Note
The adapter-retention assembly consists of 12 separate parts. You can install only the parts that you choose and save the unused parts for future use.
Procedure
- Carefully place the compute node on its side, making sure the protruding part of the handle is at the top so that the compute node is stable.AttentionIf you place the compute node on its side, with the protruding part of the handle at the bottom, the compute node will not be stable and might fall over.Figure 1. Compute node positioning direction
- Install the adapter-retention assembly.
- Align each part of the adapter-retention assembly with the system board.
- Using a T10 Torx screwdriver, install the screws that secure each part of the adapter-retention assembly that you are installing.
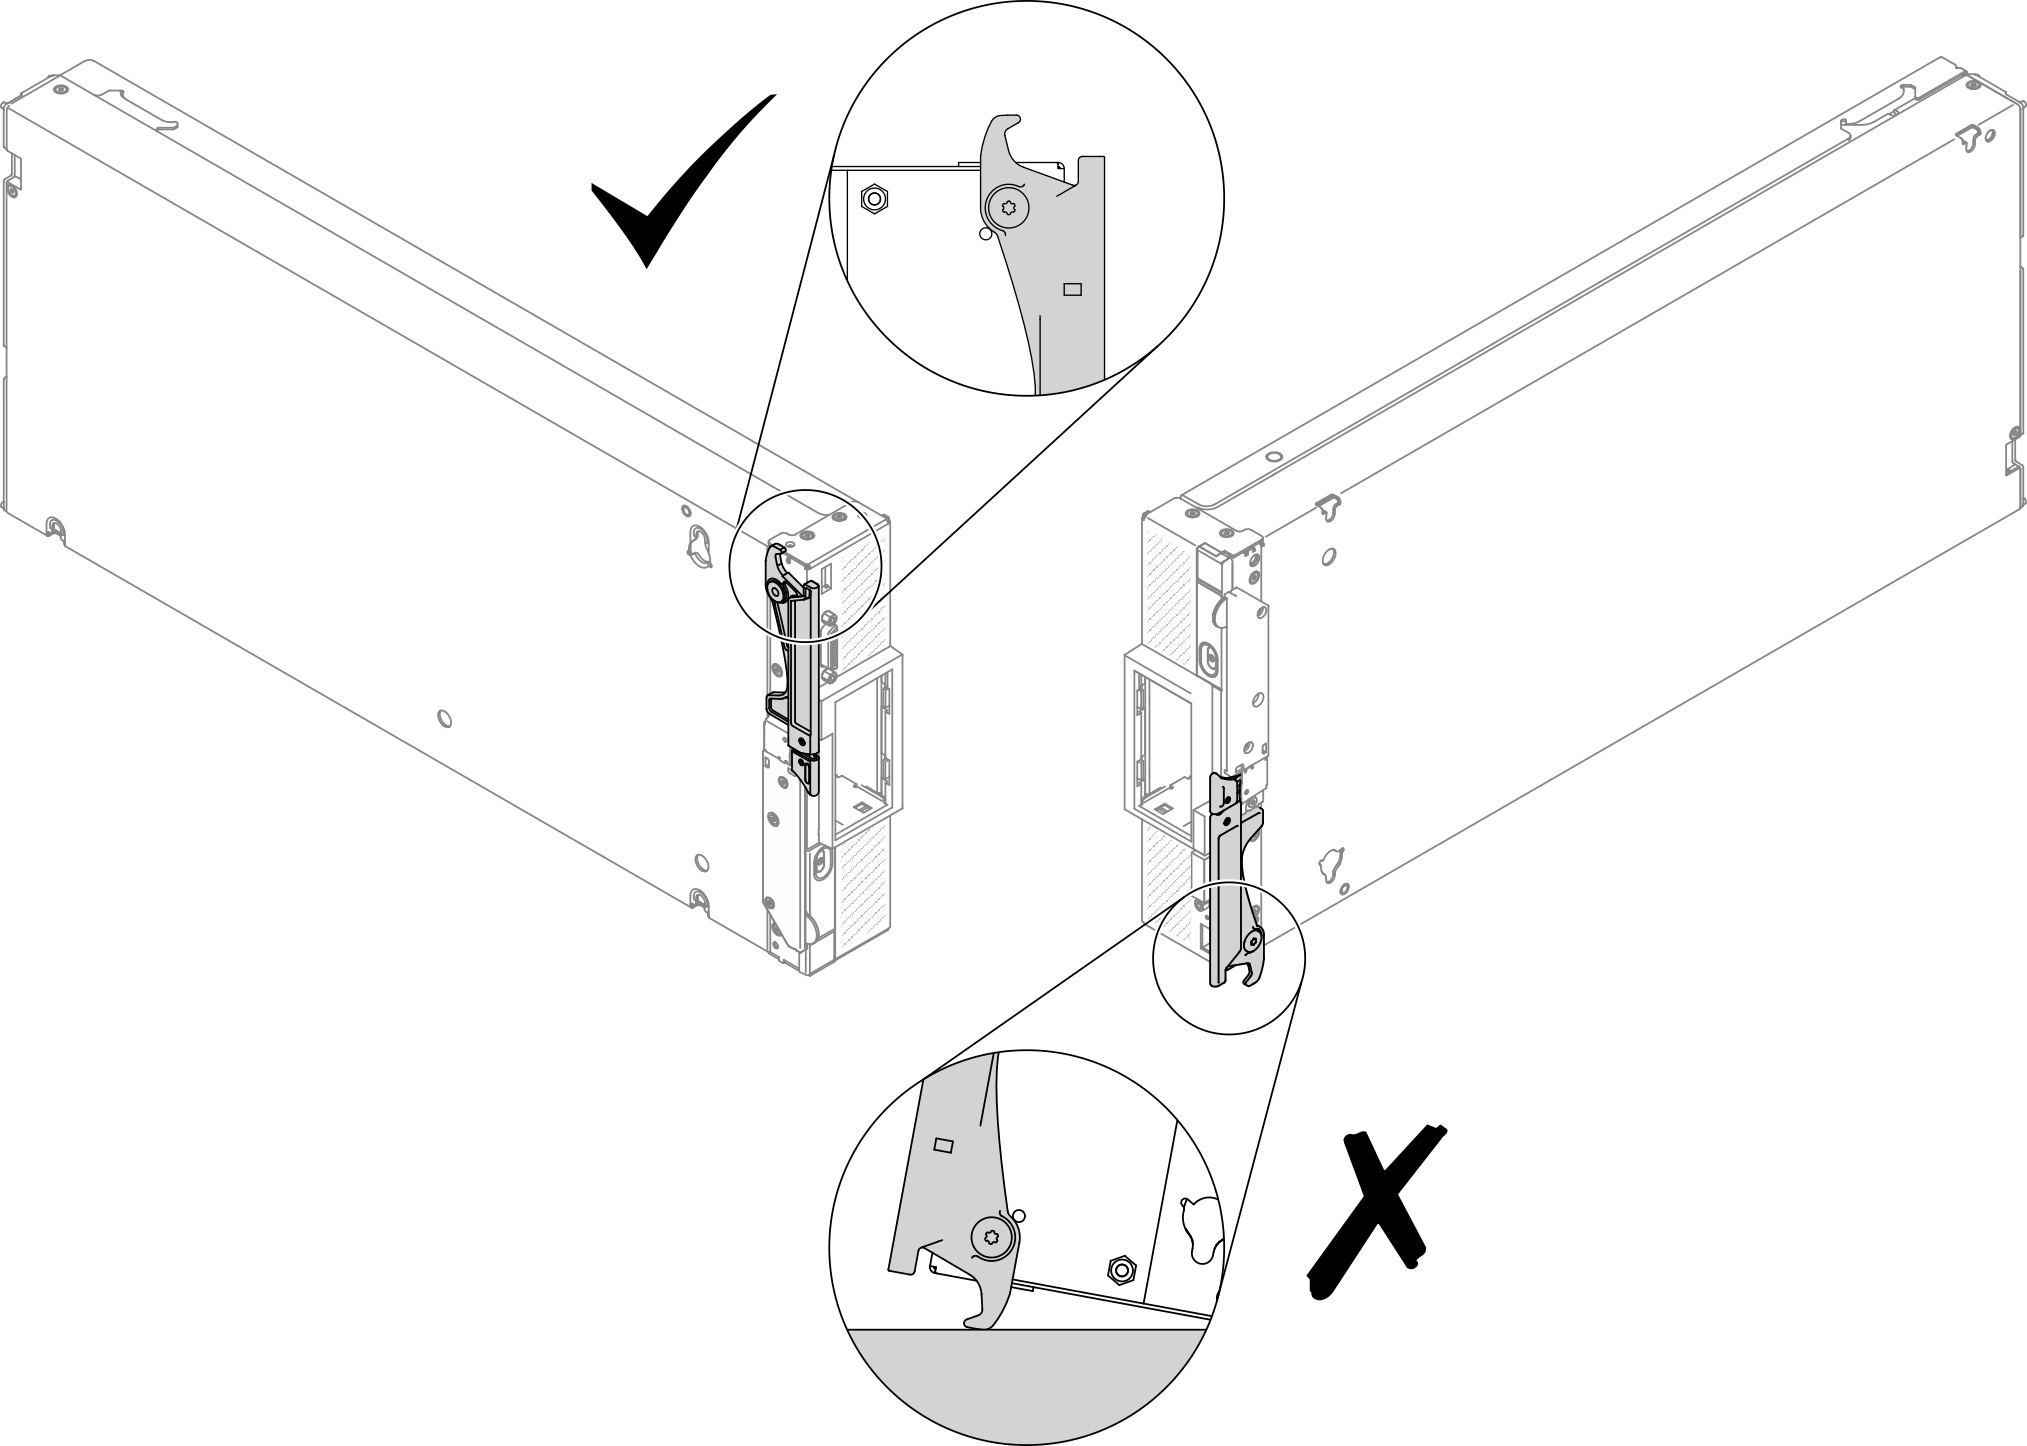
Figure 2. Adapter retention assembly installation NoteAll adapter-attention assembly parts are shown. Replace the parts that are needed and save the unused parts for future use.
After you finish
If necessary, reinstall the M.2 cables to the system board. See Install the M.2 backplane assembly.
If necessary, reinstall the I/O expansion adapters. See Install an I/O expansion adapter.
Proceed to complete the parts replacement. See Complete the parts replacement.
Give documentation feedback