Remove the simple-swap drive backplate
Use this information to remove the simple-swap drive backplate.
Read Safety and Installation Guidelines to ensure that you work safely.
Turn off the server. Disconnect the power cords and all external cables (see Power off the server).
If server is installed in a rack, remove the server from the rack.
Remove the top cover (see Remove the top cover).
Disconnect the cables from the system board and the RAID card (if installed).
AttentionTo avoid damaging the system board, make sure to follow the instructions inInternal cable routing when disconnecting cables from the system board. Pull all the drives and fillers slightly out to disengage them from the backplate.
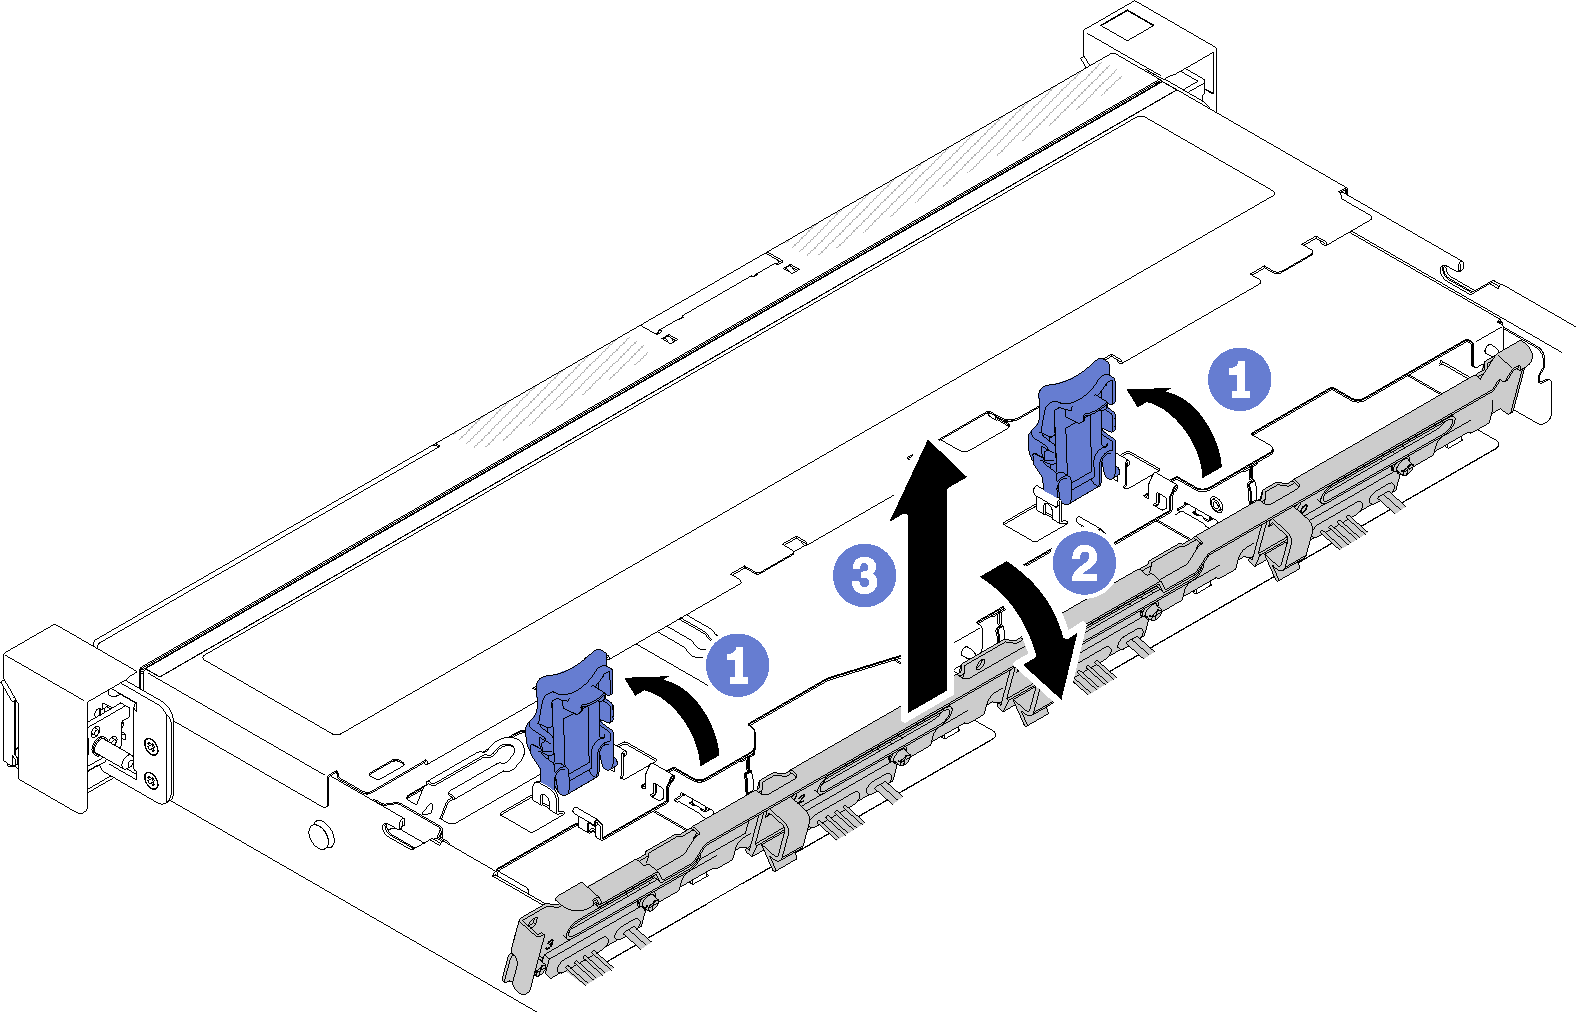
To remove the simple-swap drive backplate, complete the following steps:
Two 3.5-inch drive backplate
Four 3.5-inch drive backplate (connects to onboard connectors)
Four 3.5-inch drive backplate (connects to RAID adapter)

- Open the retaining clips by rotating them up.
- Rotate the backplate down toward the center of the server.
- Lift the backplate out of the server.
If you are instructed to return the component or optional device, follow all packaging instructions, and use any packaging materials for shipping that are supplied to you.