Install the simple-swap drive backplate
Use this information to install the drive backplate.
Before you install a simple-swap drive backplate, complete the following steps:
Read Safety and Installation Guidelines to ensure that you work safely.
To install the simple-swap drive backplate, complete the following steps:
Note
There are three types of backplate supported by the server, all are removed and installed in a similar method.
Two 3.5-inch drive backplate
Four 3.5-inch drive backplate (connects to onboard connectors)
Four 3.5-inch drive backplate (connects to RAID adapter)
Figure 1. Simple-swap drive backplate installation
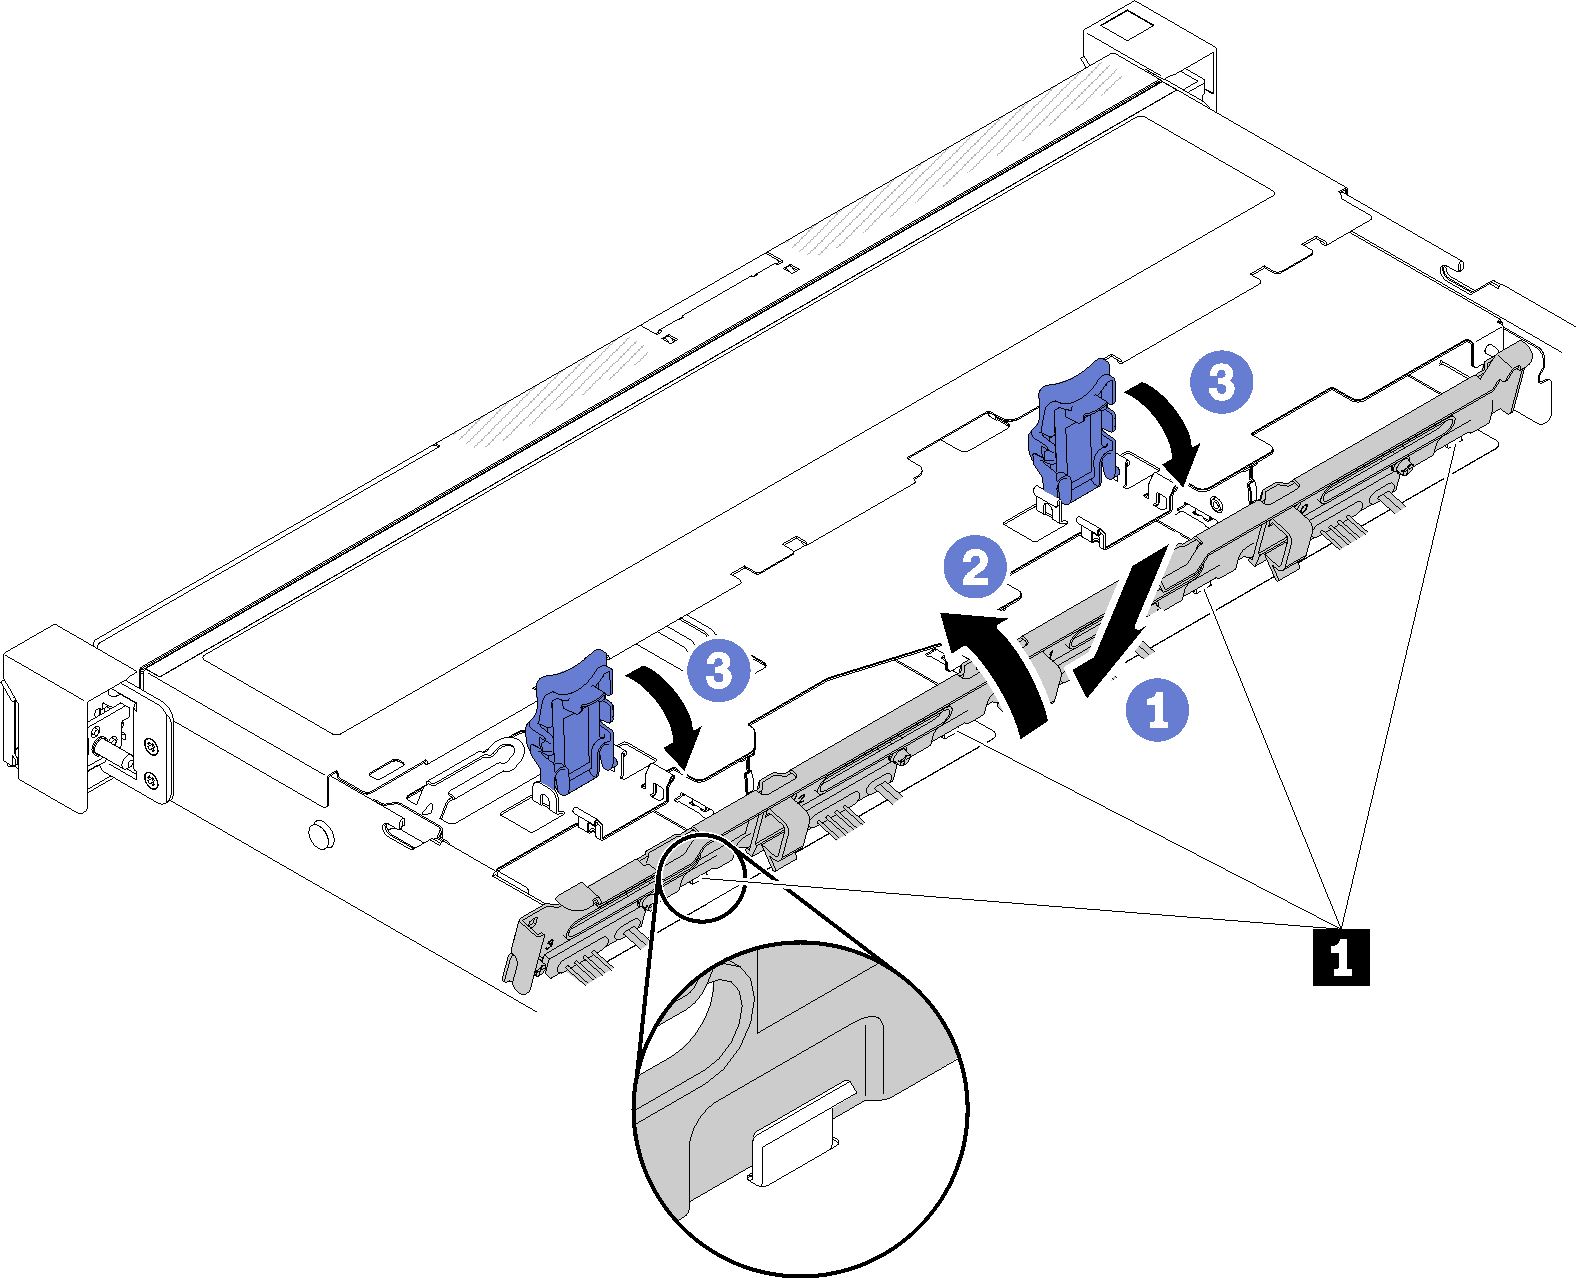
| 1 Pin |
- Insert the backplate into the chassis with an angle as shown. Make sure the pins are against the backplate on the backside.
- Rotate the backplate up toward the front of the server.
- Close the retaining clips to secure the backplate.
- Connect the backplate cables to the system board and the RAID adapter (if installed). See Backplate cables.
After you install the simple-swap drive backplate, complete the following steps:
Install the top cover onto the server (see Install the top cover).
Install the server into the rack if necessary.
Reconnect power cords and all external cables.
Give documentation feedback