Install the processor
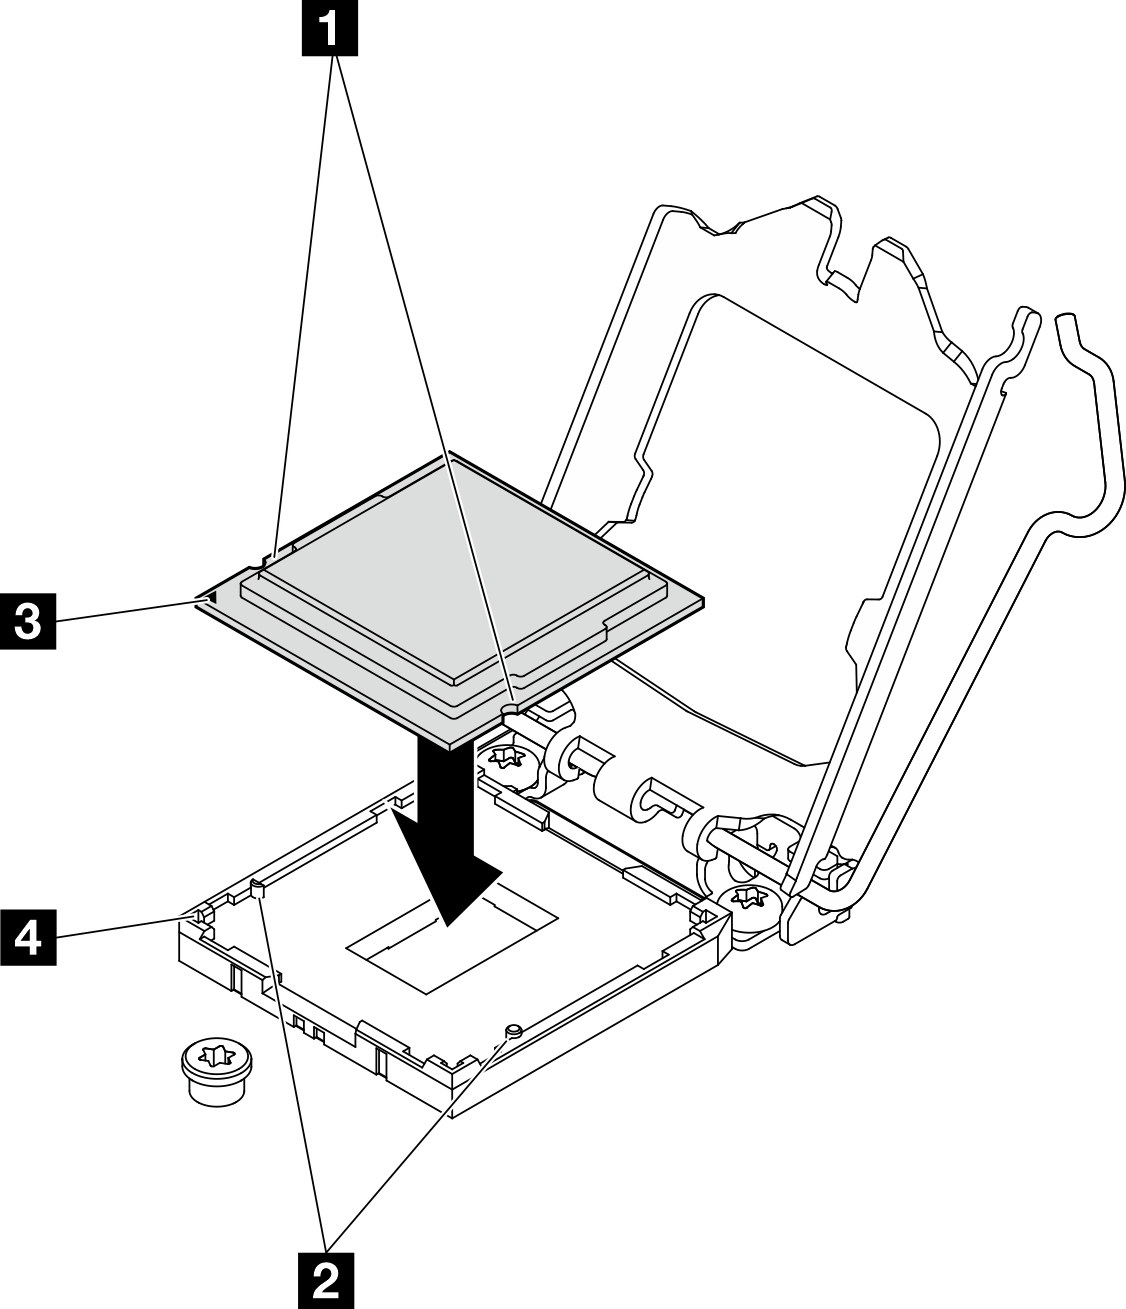
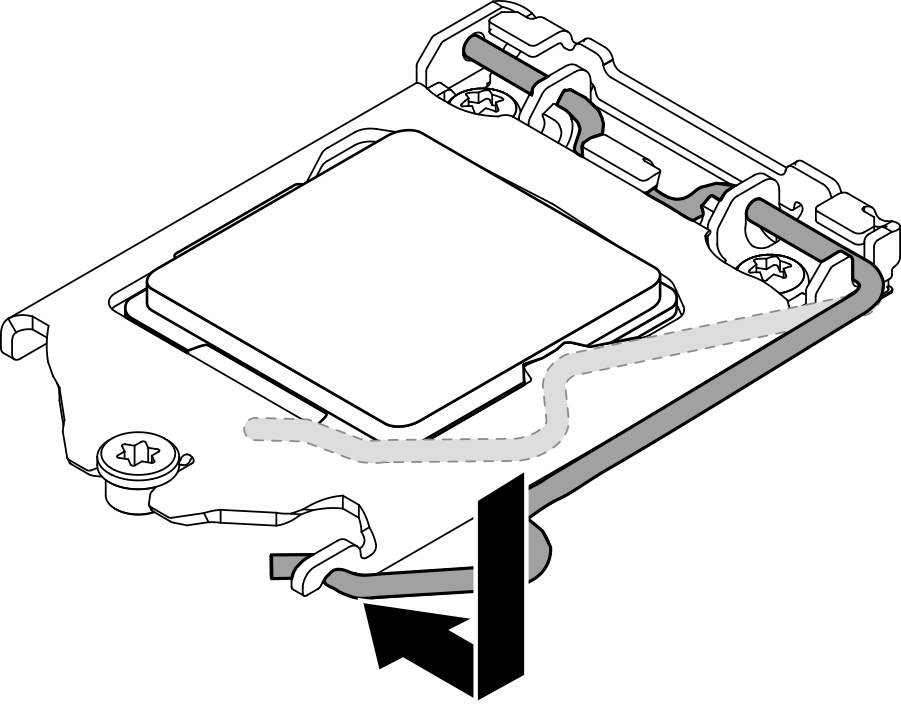
Use this information to install the processor. This procedure must be executed by a trained technician.
About this task
- Read the following section(s) to ensure that you work safely.
Touch the static-protective package that contains the component to any unpainted metal surface on the server; then, remove it from the package and place it on a static-protective surface.
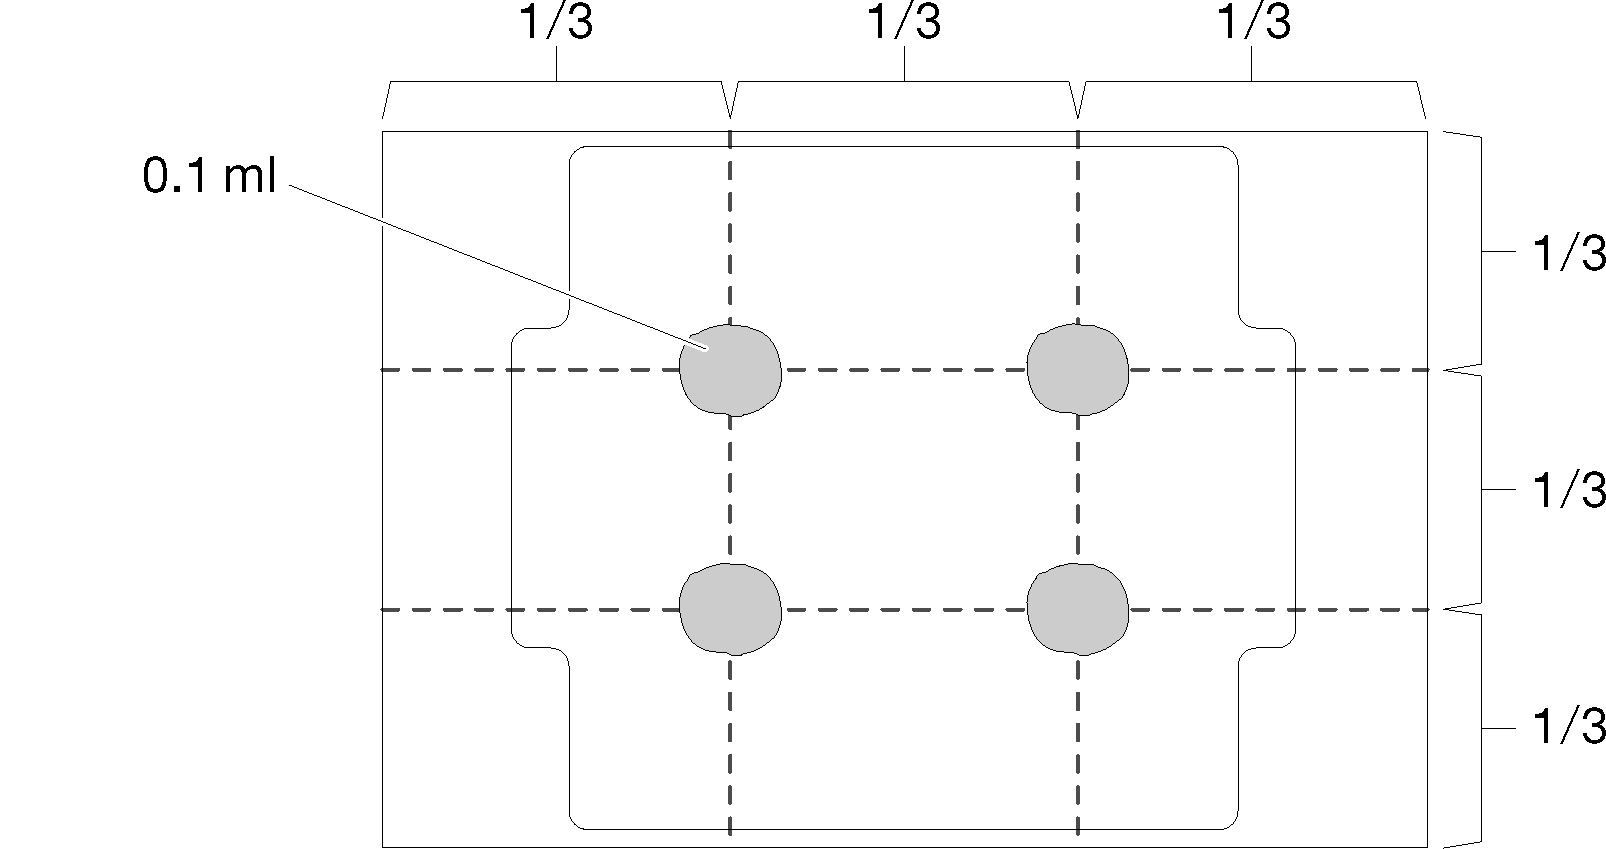
Do not allow the thermal grease on the processor or heat sink to come in contact with anything. Contact with any surface can compromise the thermal grease, rendering it ineffective. Thermal grease can damage components, such as the electrical connectors in the processor socket.
Before reusing a processor that was removed from another system board, wipe the thermal grease from the processor with an alcohol cleaning pad, and dispose of the cleaning pad after all of the thermal grease is removed.
NoteIf you are applying new thermal grease on the top of the processor, make sure to do it after the alcohol has fully evaporated.
Procedure
After you finish
Reinstall the heat sink. See Install the heat sink.
Install the air baffle. See Install the air baffle.
Install the top cover. See Install the top cover.
Complete the parts replacement. See Complete the parts replacement.
Demo video


