M.2 ブート・アダプターの取り付け
M.2 ブート・アダプターを取り付けるには、この情報を使用します。
このタスクについて
重要
- 安全に作業を行うために、以下のセクションをお読みください。
コンポーネントが入っている帯電防止パッケージをサーバーの塗装されていない金属面に接触させてから、コンポーネントをパッケージから取り出し、帯電防止面の上に置きます。
注
図はご使用のハードウェアと多少異なる場合がありますが、取り付け方法は同じです。
手順
- M.2 ブート・アダプターを PCIe アダプターに取り付けます。
 M.2 ブート・アダプターを PCIe アダプター上の T 頭ピンに位置合わせし、図のようにスライドします。
 M.2 ブート・アダプターの脱落防止ねじを締めます。
 ねじを締め、M.2 ブート・アダプターを PCIe アダプターに固定させます。図 1. M.2 ブート・アダプターの取り付け
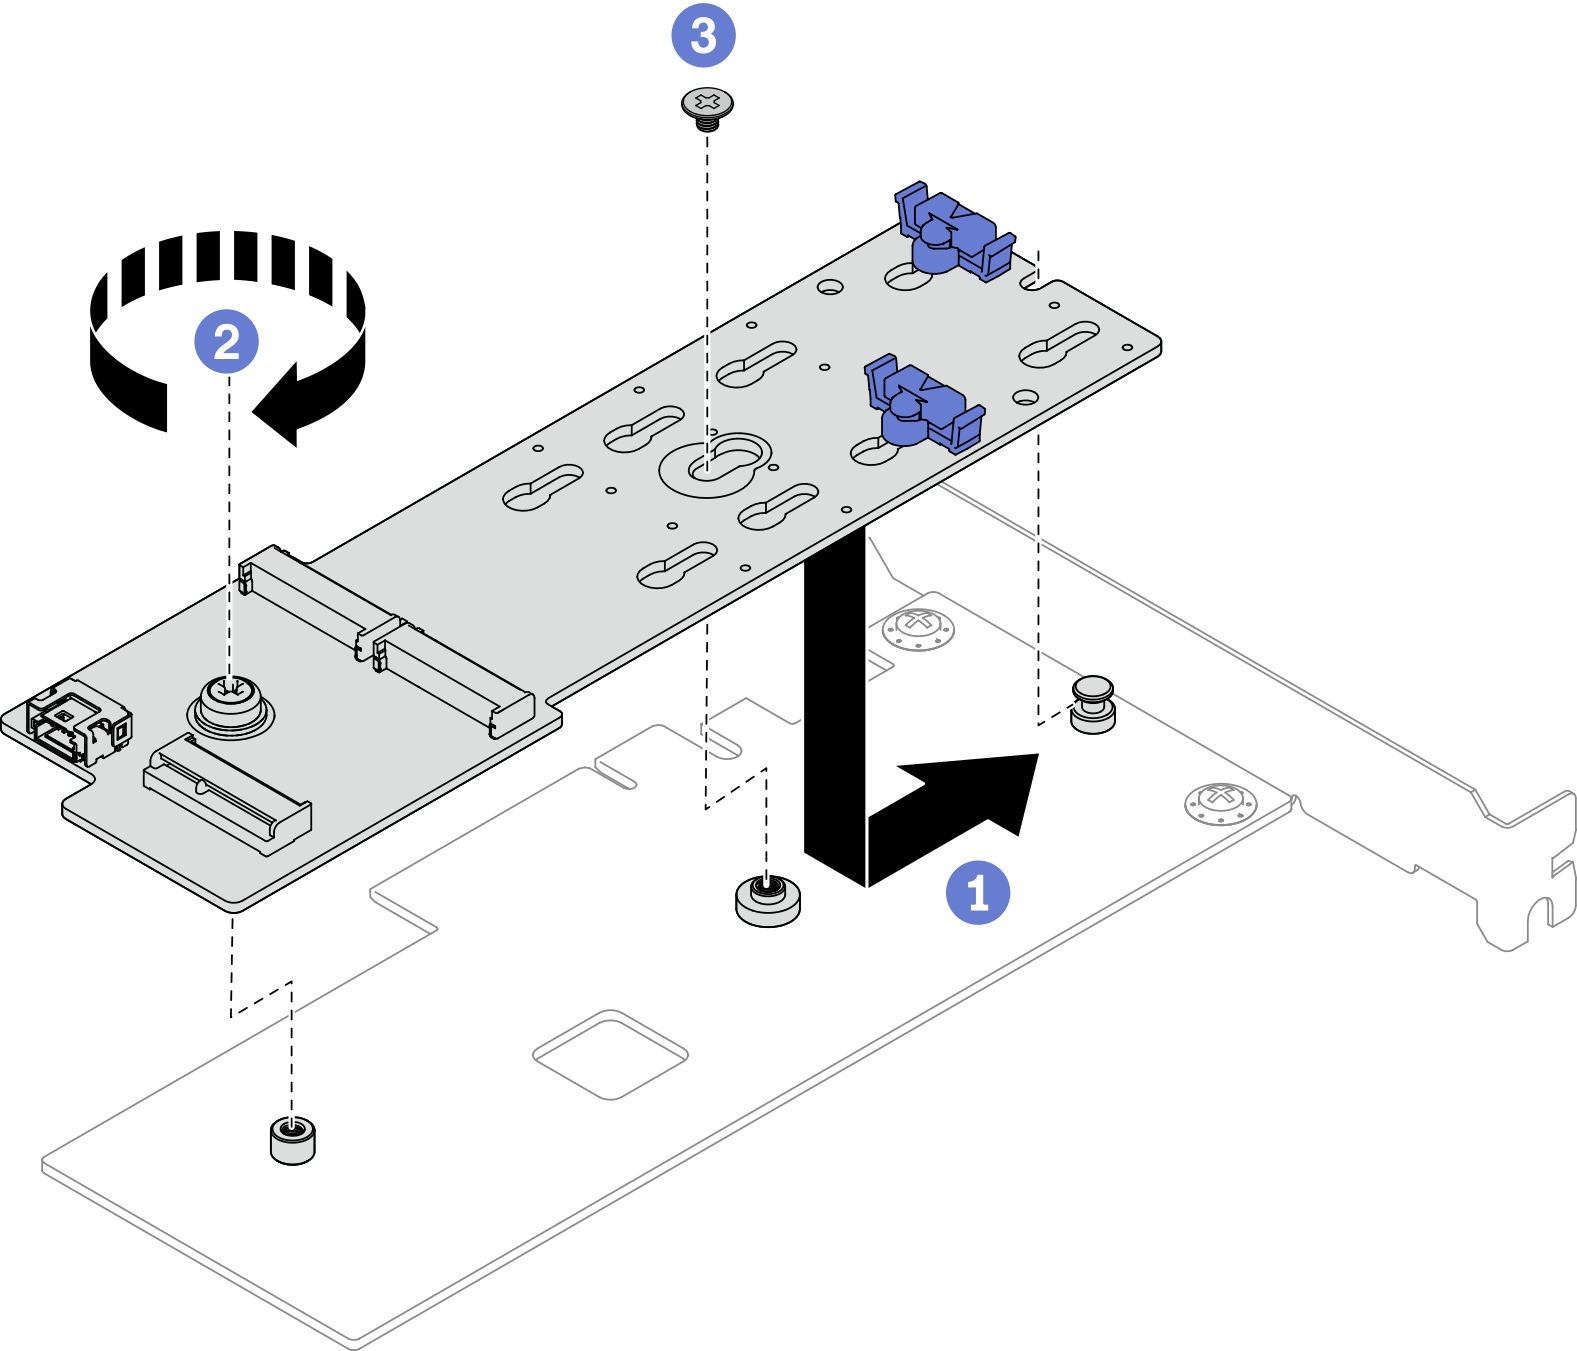
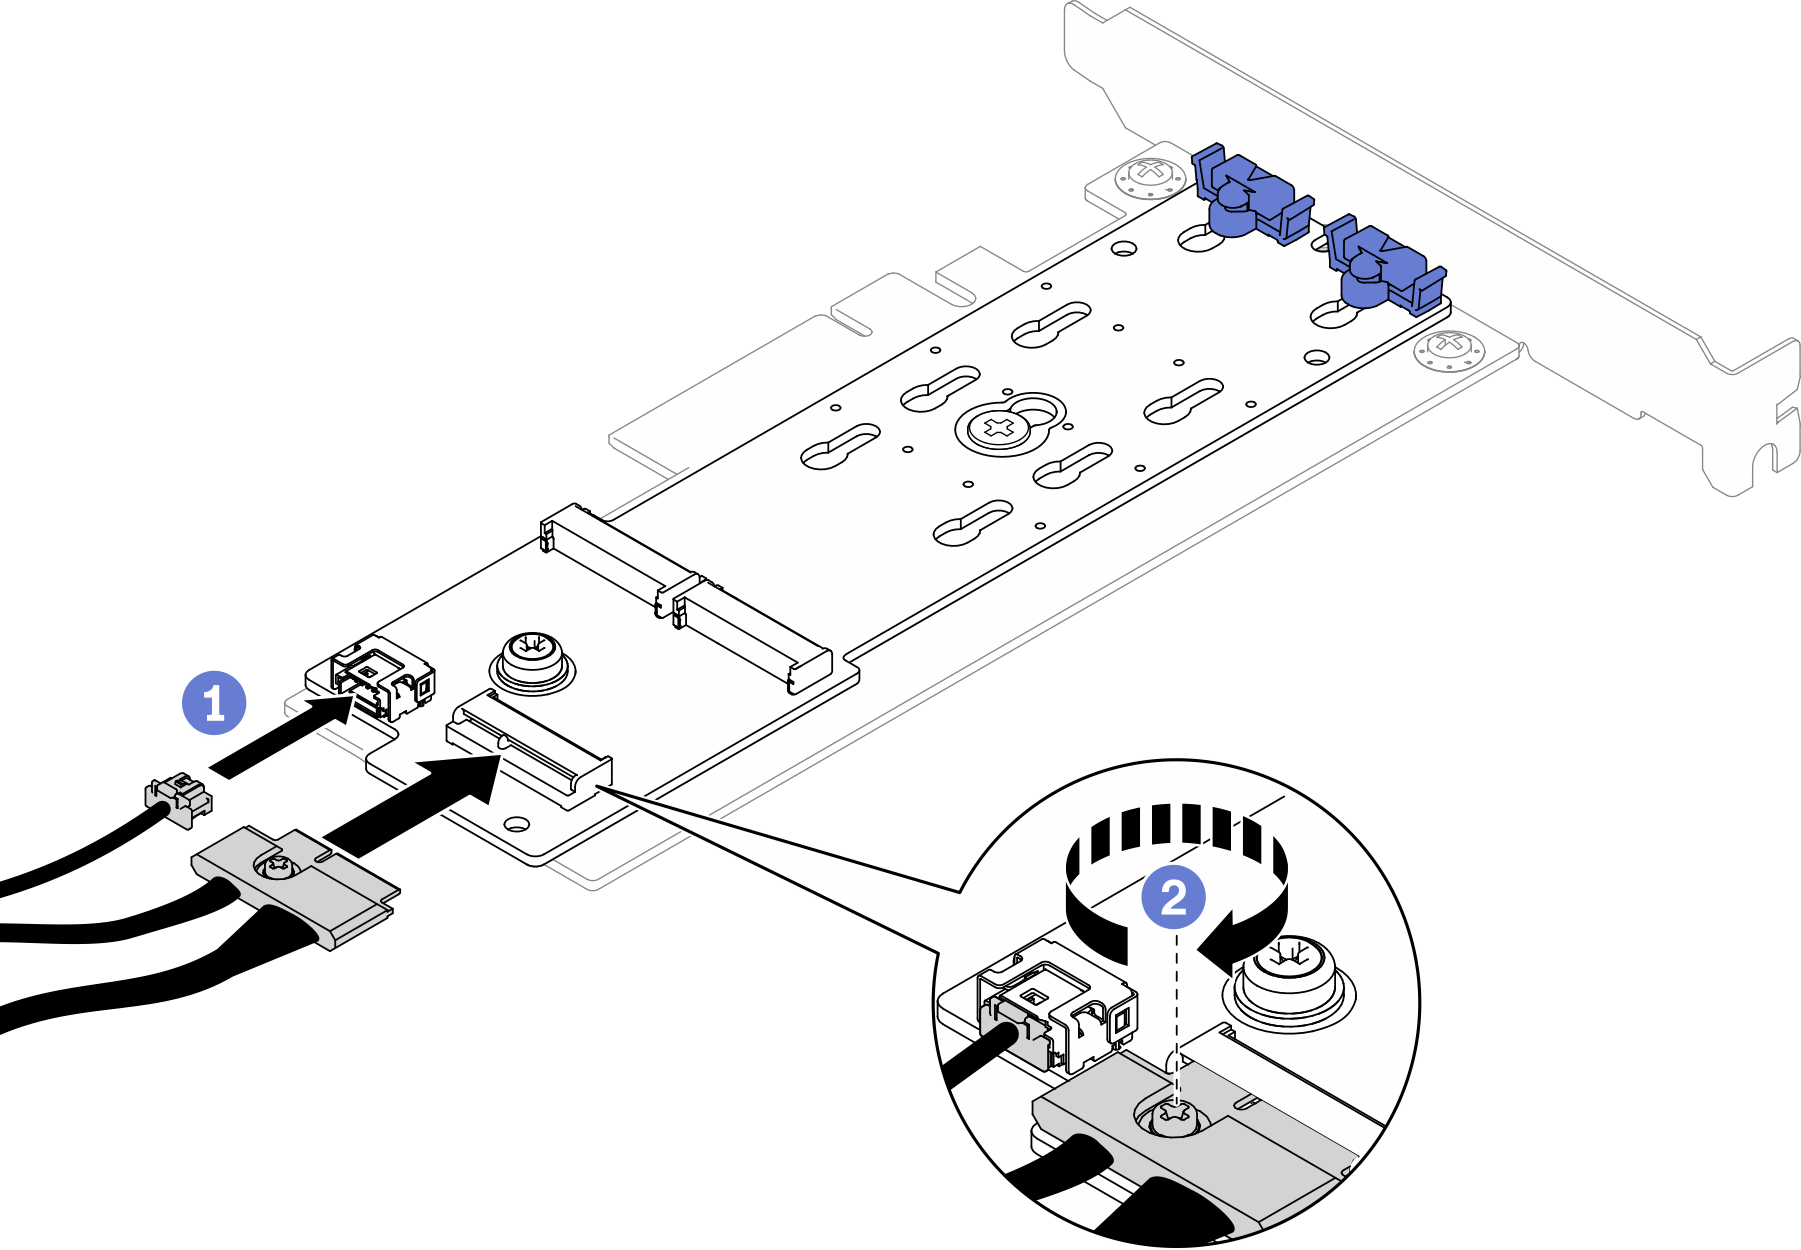
- 電源ケーブルおよび信号ケーブルを M.2 ブート・アダプターに取り付けます。
- 両方のケーブルを接続します。
- M.2 信号ケーブルを M.2 ブート・アダプターに固定するねじを締めます。図 2. 電源および信号ケーブルの接続
終了後
M.2 ドライブを M.2 ブート・アダプターに取り付けます。M.2 ドライブの取り付けを参照してください。
M.2 ブート・アダプター・アセンブリーを PCIe ライザー・アセンブリーまたは PCIe スロット 3 に取り付けます。PCIe アダプターの取り付け (ライザー)または PCIe アダプターの取り付け (スロット 3)を参照してください。
M.2 ブート・アダプター・ケーブルをシステム・ボードに接続します。M.2 ブート・アダプターのケーブル配線を参照してください。
トップ・カバーを取り付けます。トップ・カバーの取り付けを参照してください。
部品交換を完了します。部品交換の完了を参照してください。
デモ・ビデオ
フィードバックを送る