Install the rack latches
Use this information to install the rack latches.


Before installing the rack latches, touch the static-protective package that contains the new rack latch to any unpainted surface on the outside of the server. Then, take the new rack latch out of the package and place it on a static-protective surface.
To install the rack latches, complete the following steps:
Watch the procedure
A video of this procedure is available at YouTube.
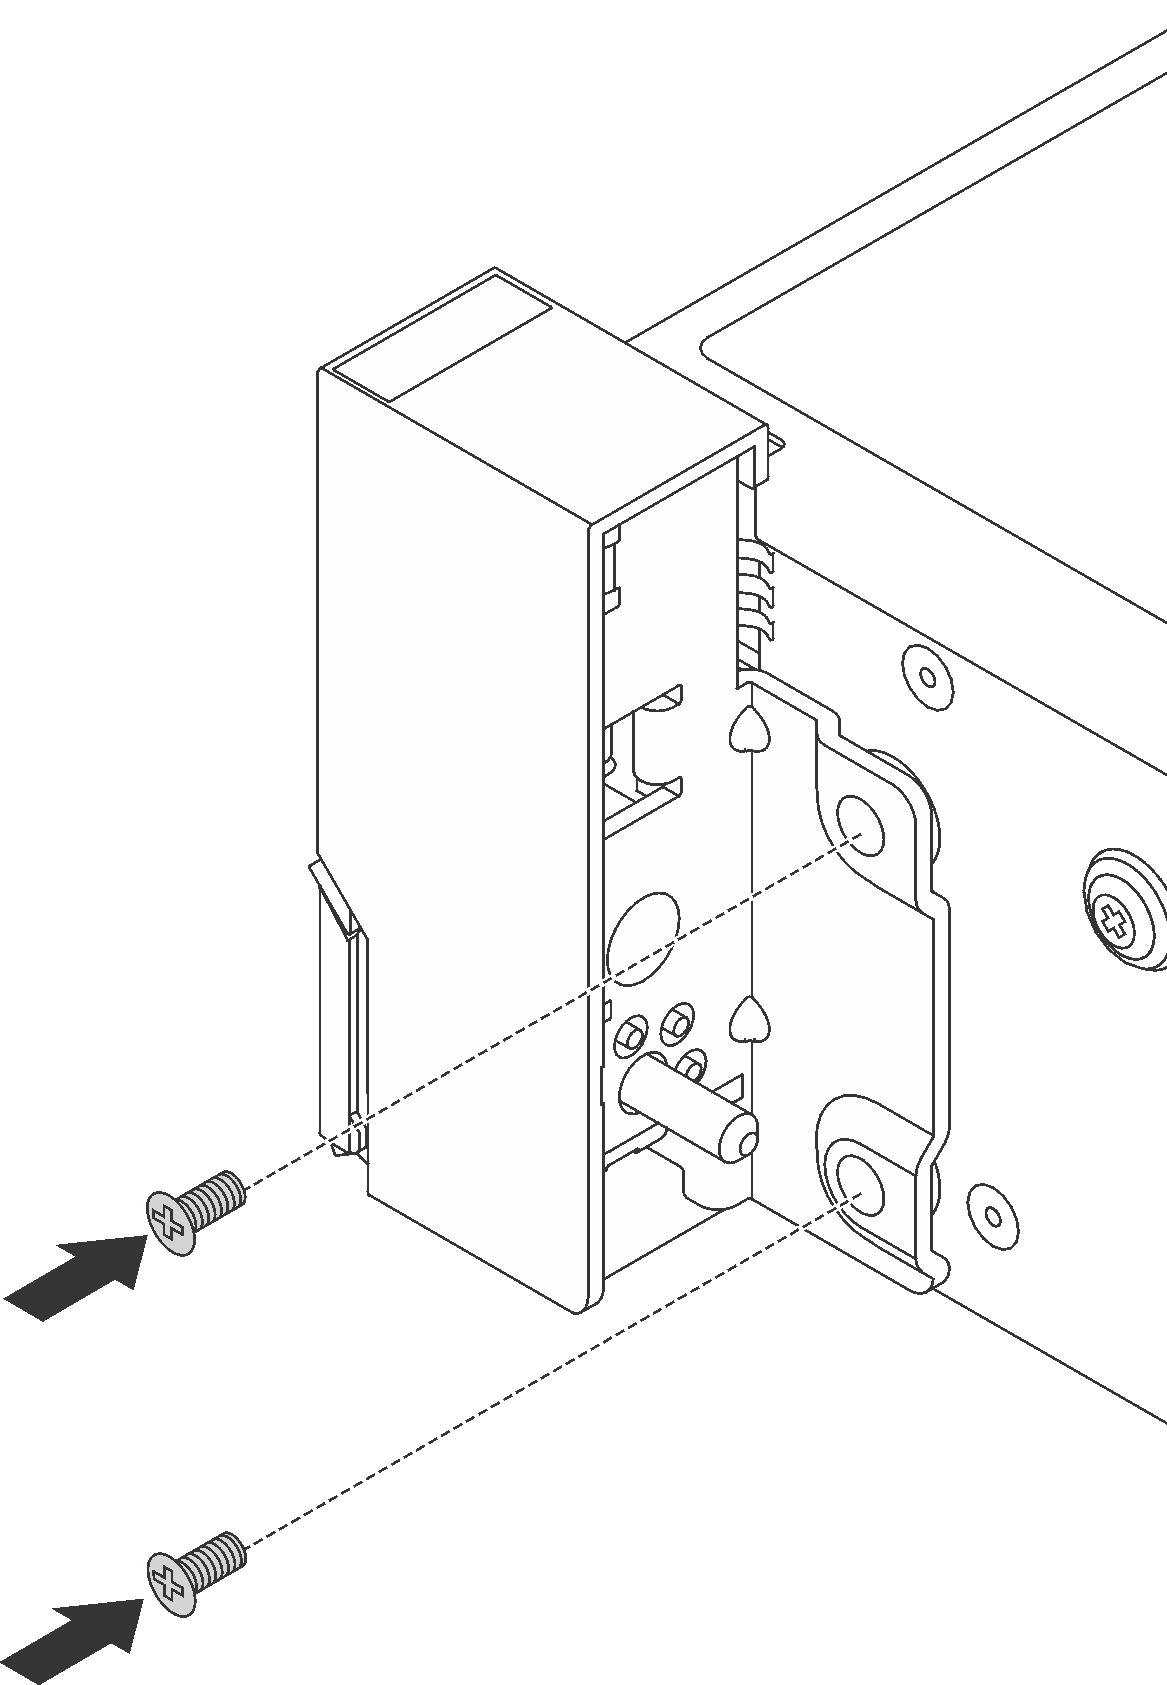
- On each side of the server, align the rack latch with the pin on the chassis. Then, press the rack latch onto the chassis and slightly slide it to the direction as shown.Figure 1. Rack latch installation

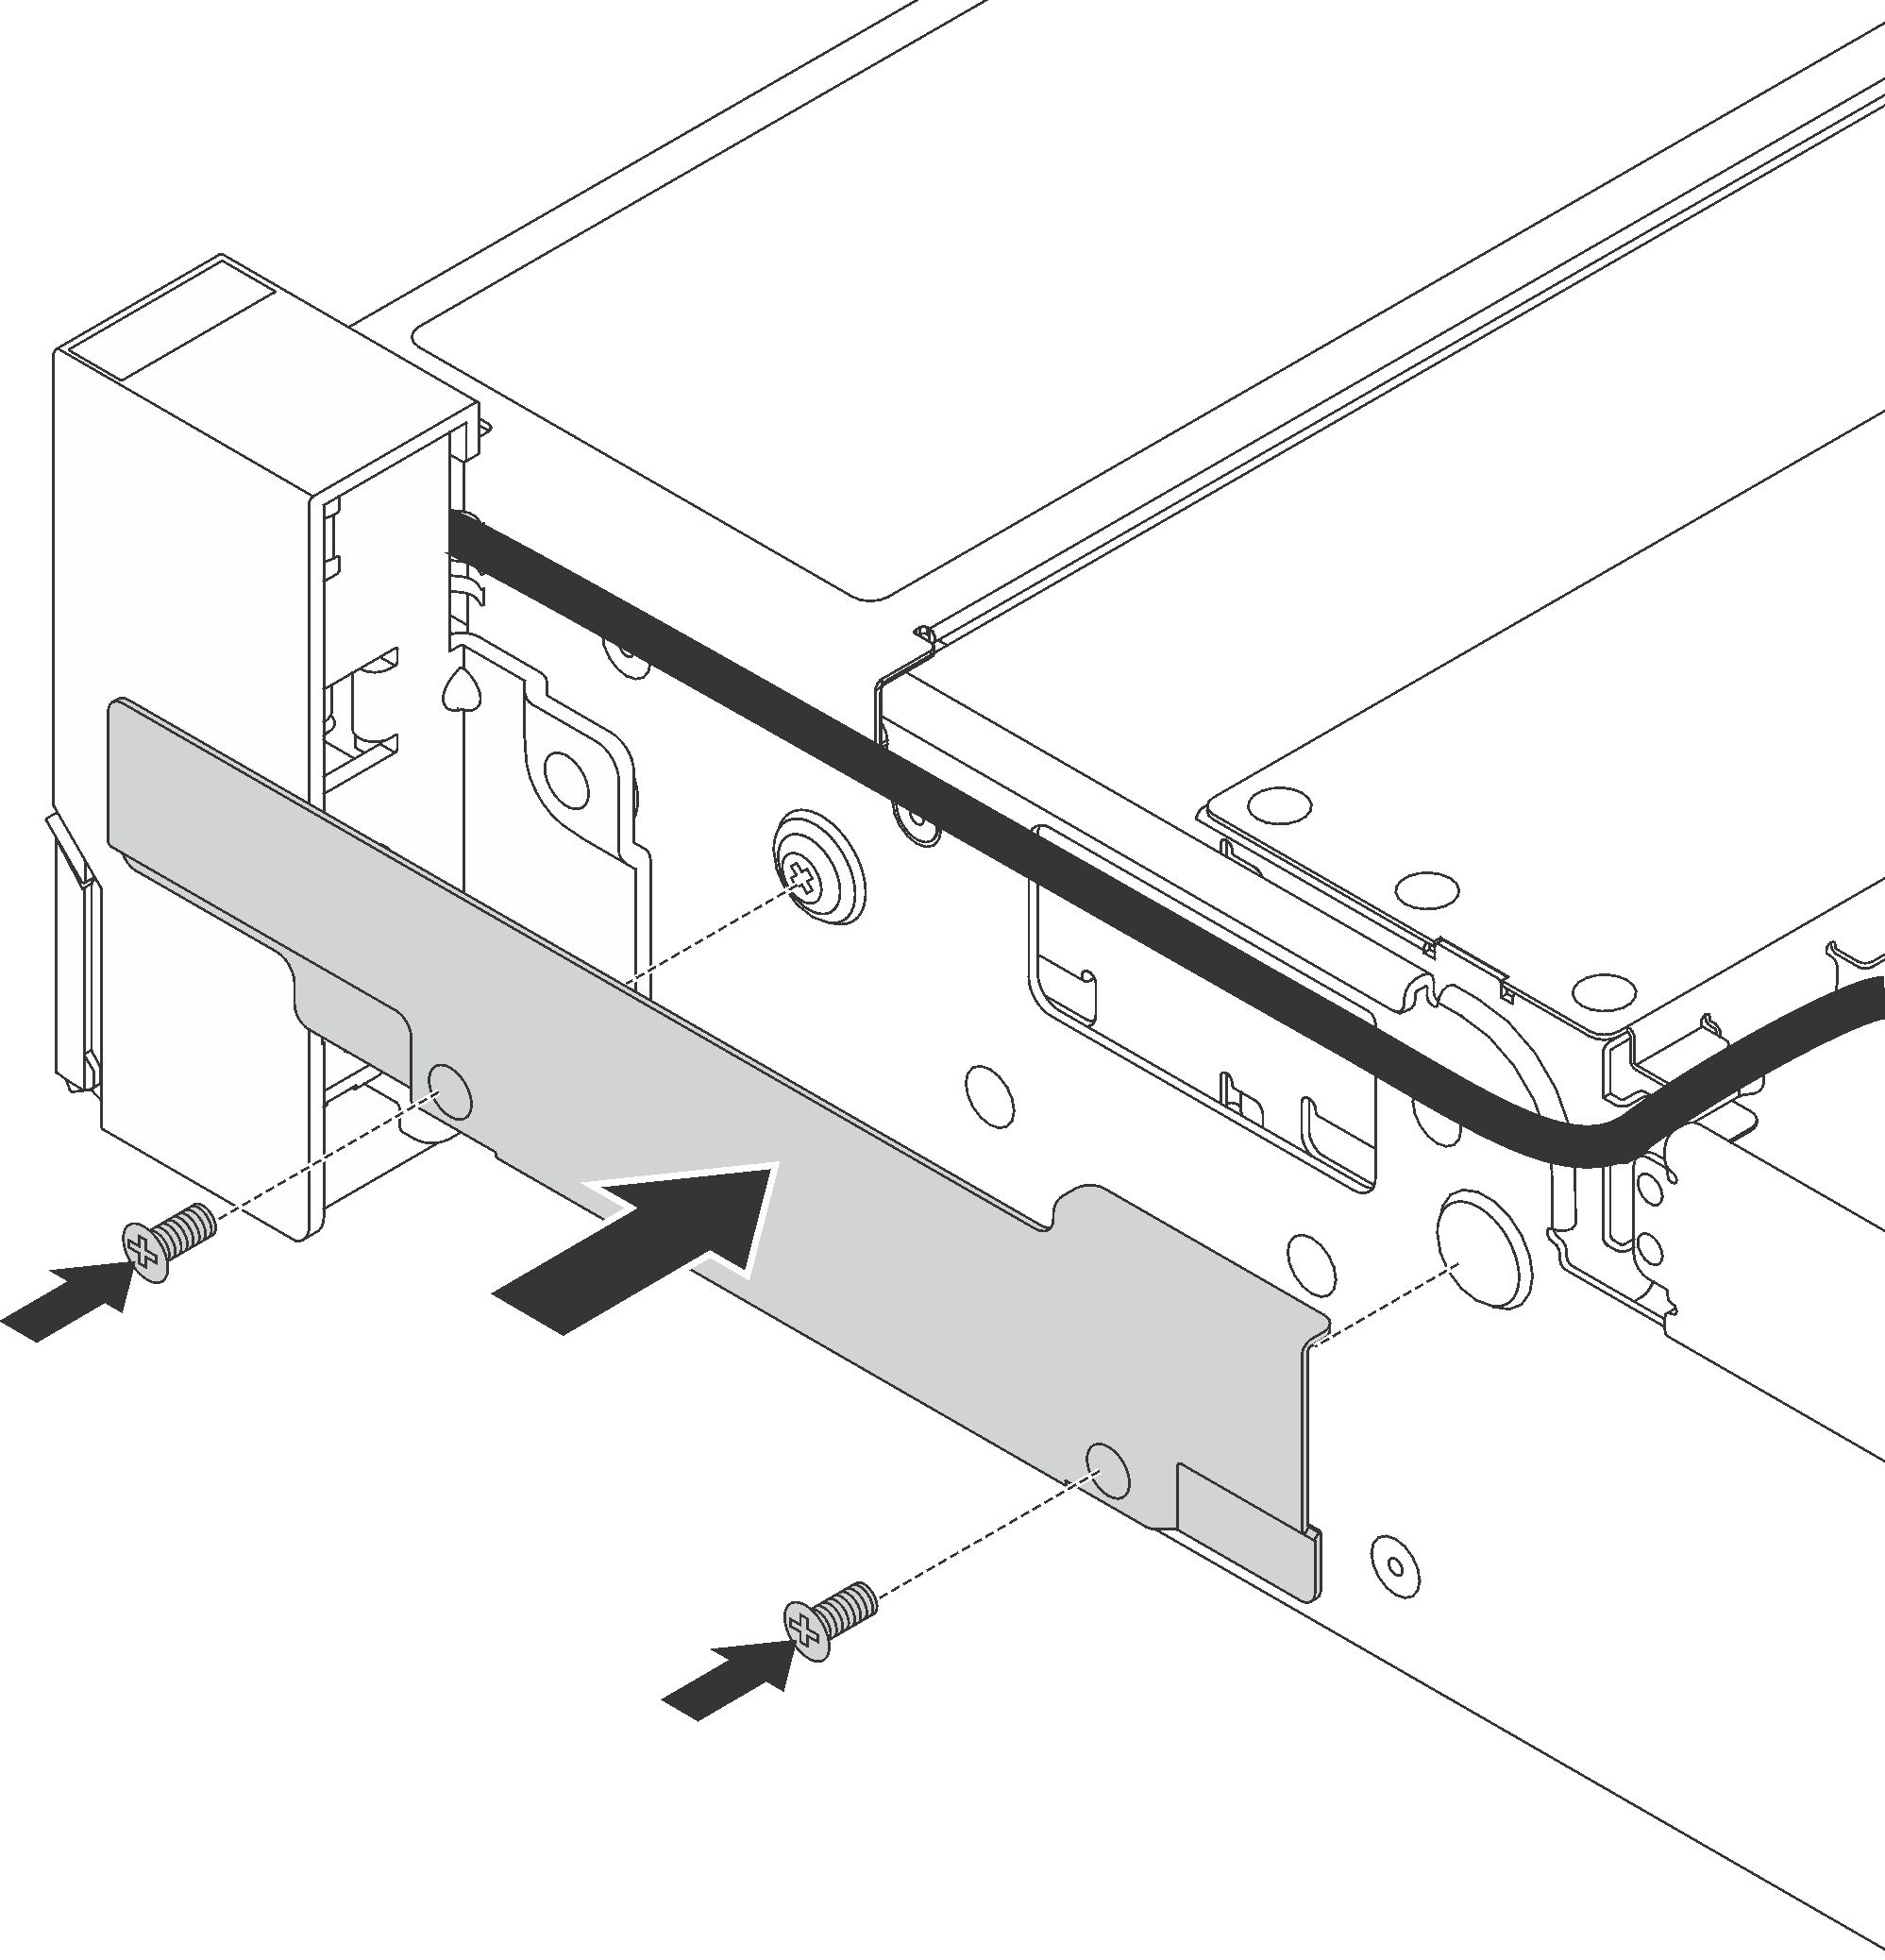
- Install the screws to secure the rack latch on each side of the server.Figure 2. Screws installation
- If necessary, route the VGA cable, the front-information-panel cable, the front USB cable, or all cables along with the chassis as shown. Then, install the screws to secure the cable retainer.Figure 3. Cable retainer installation
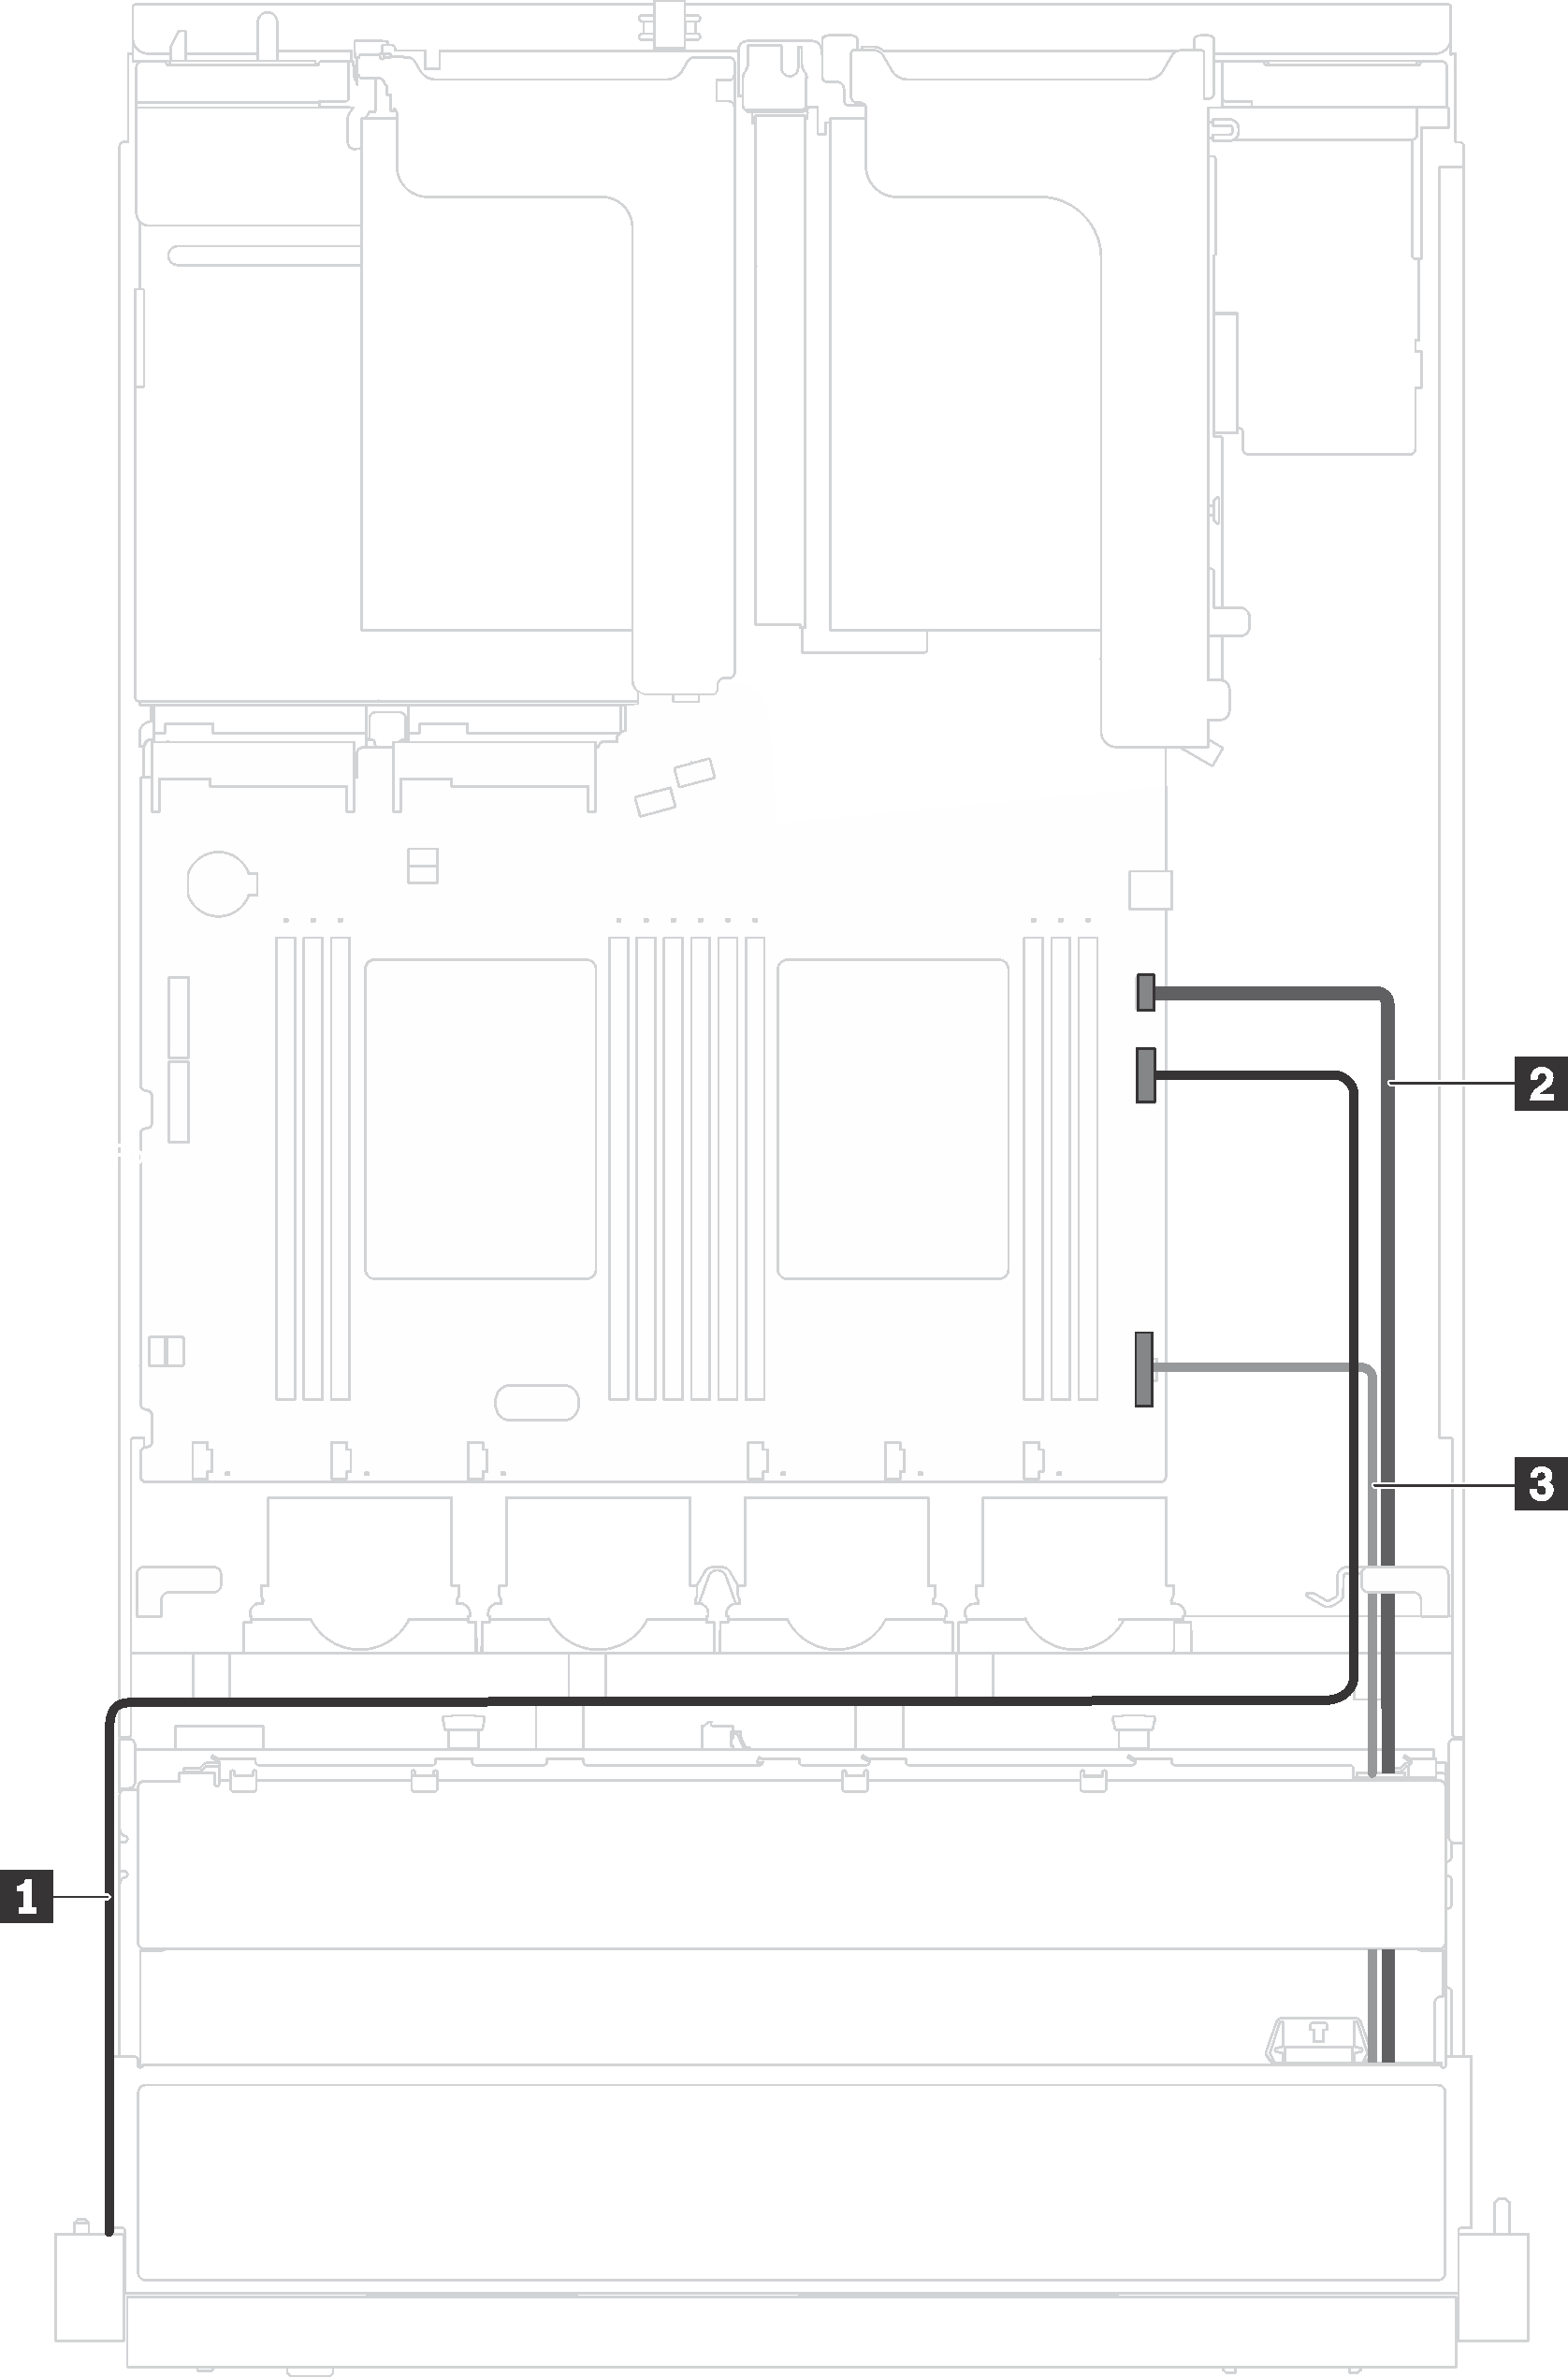
- If necessary, connect the VGA cable 1, the front USB cable 2 and the operator-information-panel cable 3, or all cables to the system board.Figure 4. Cable connection for the VGA connector and front I/O assembly on rack latches
After installing the rack latches:
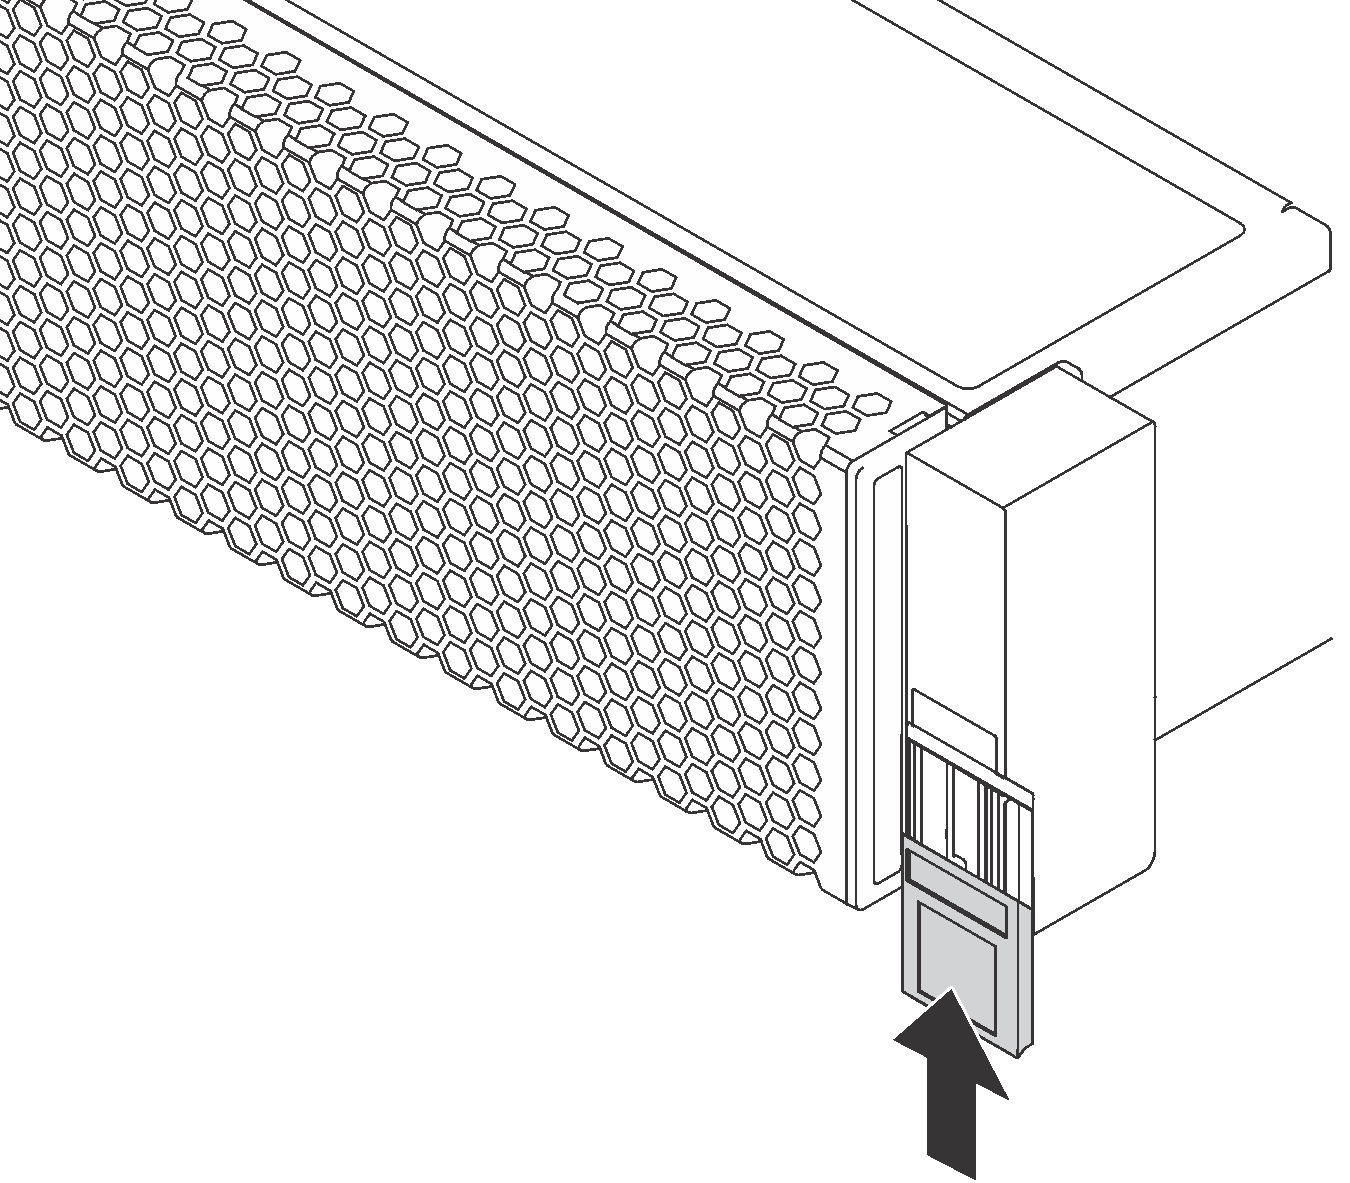
- Install the ID label plate to the right rack latch as shown.Figure 5. ID label plate installation
Complete the parts replacement. See Complete the parts replacement.
Give documentation feedback