Remove the rack latches
Use this information to remove the rack latches.
Before removing the rack latches:


If you have installed the security bezel, remove it. See Remove the security bezel.
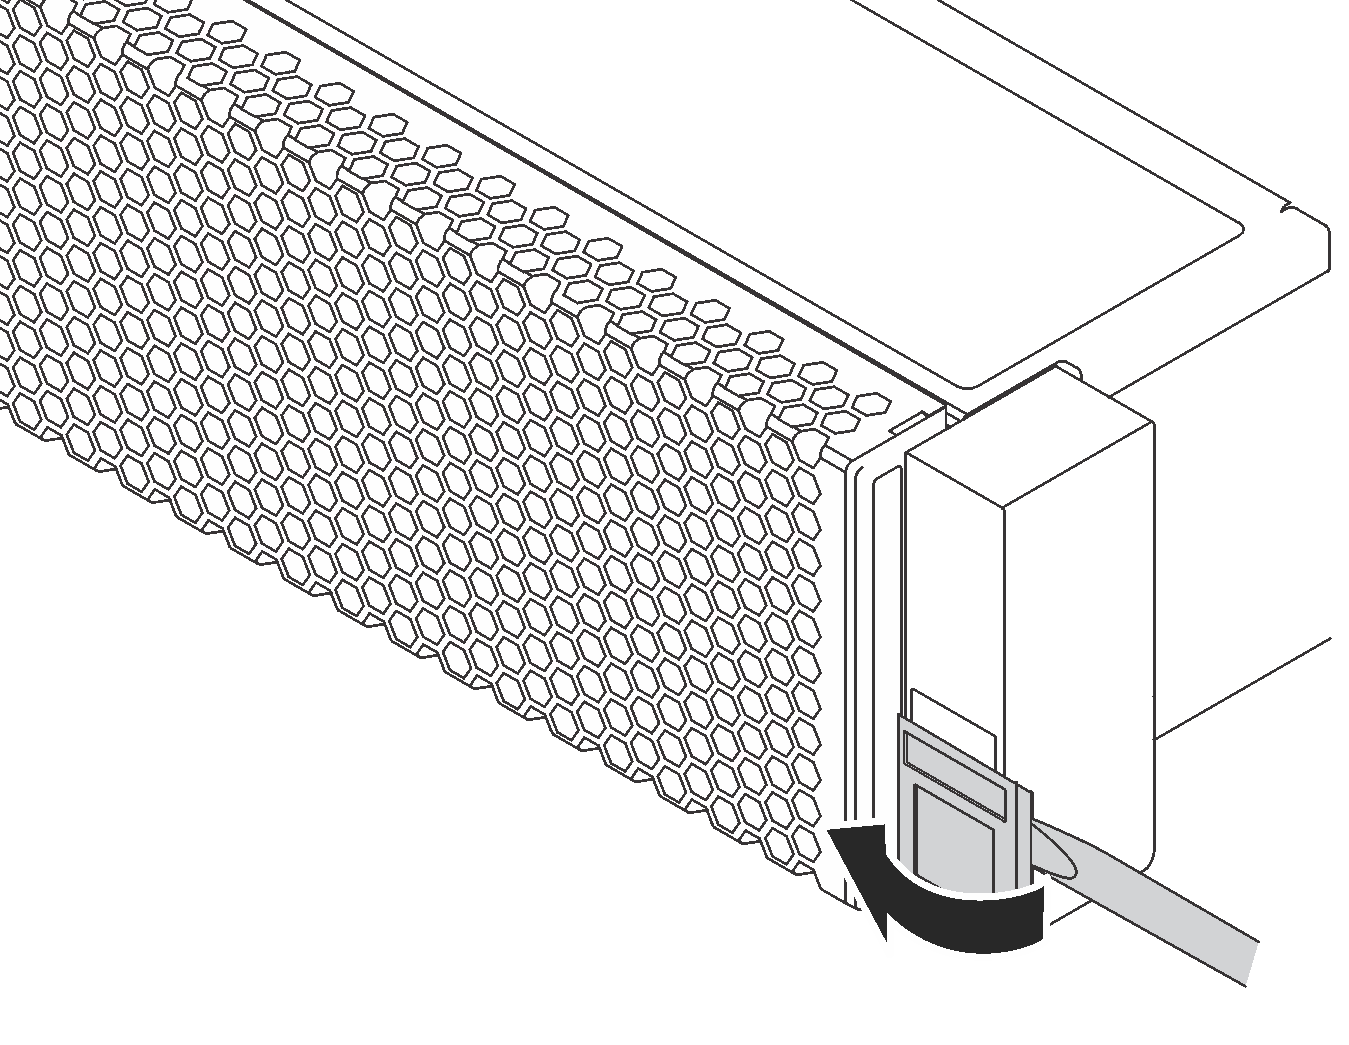
- Use a flat-blade screwdriver to remove the ID label plate on the right rack latch and place it in a safe place.Figure 1. ID label plate removal
To remove the rack latches, complete the following steps:
Watch the procedure
A video of this procedure is available at YouTube.
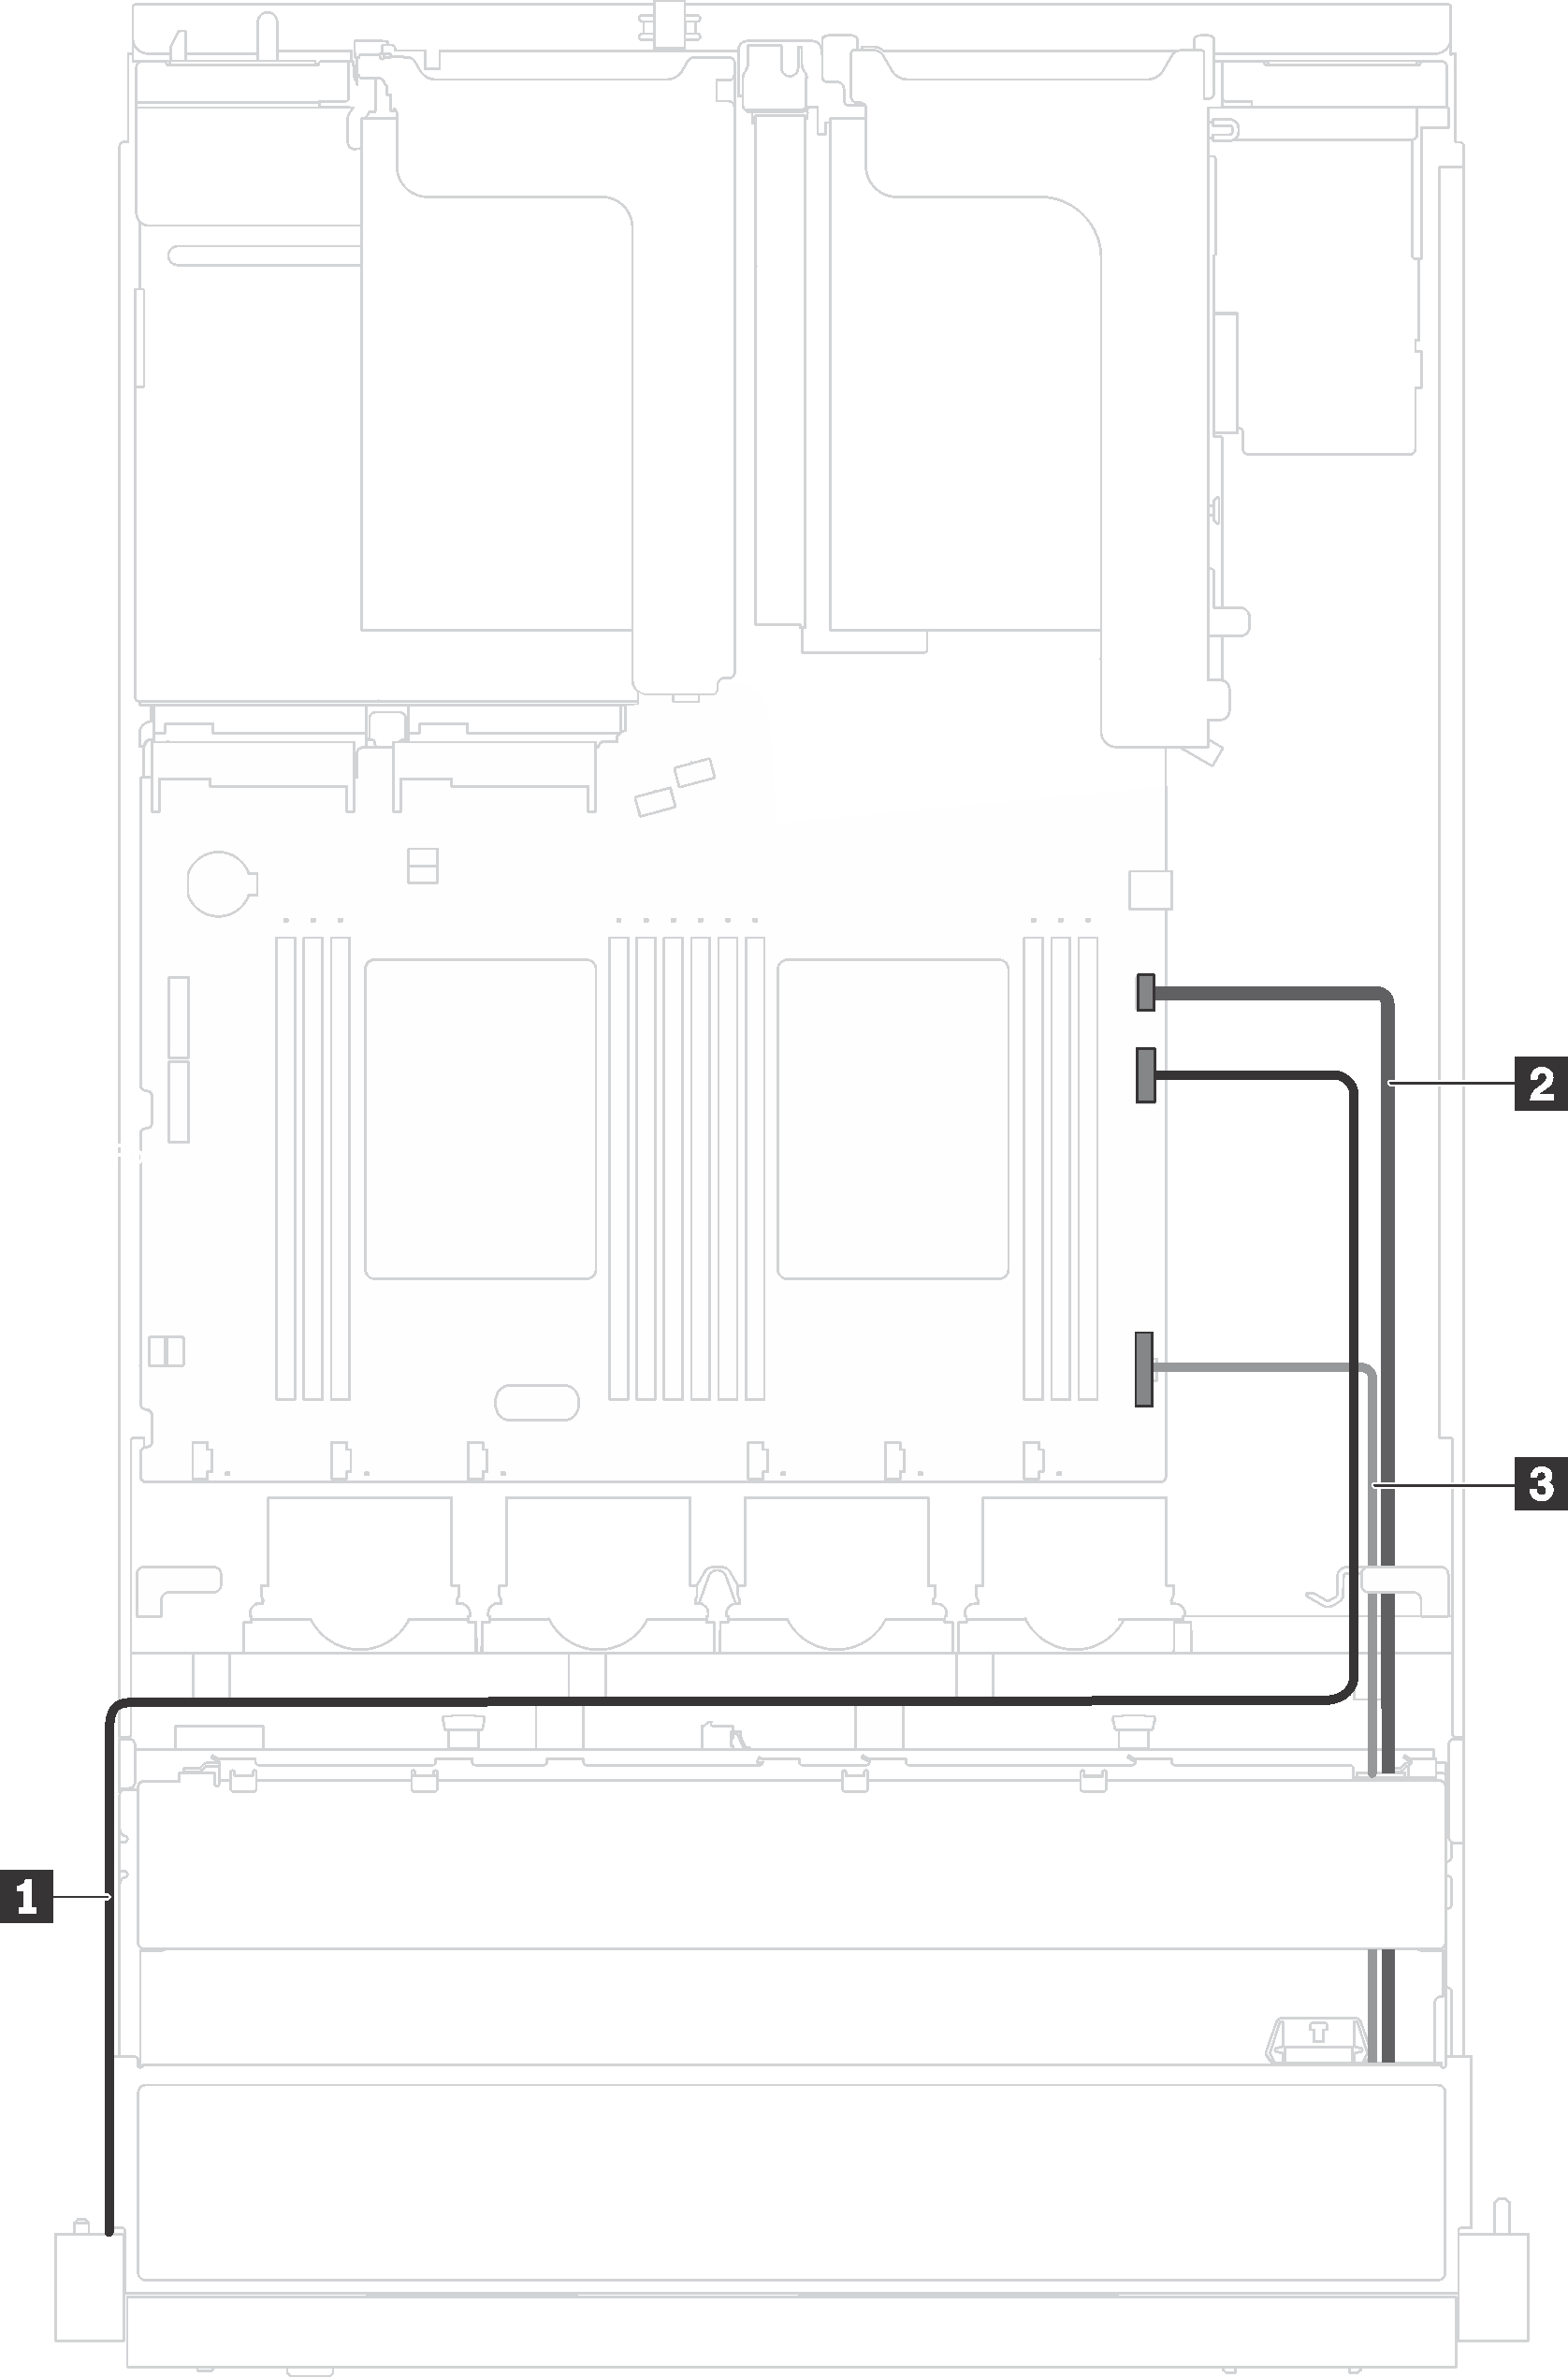
- If you are removing rack latches on the server models with twelve 3.5-inch hot-swap drives, disconnect the VGA cable 1, the front USB cable 2 and the operator-information-panel cable 3, or all cables from the system board.Figure 2. Cable connection for the VGA connector, the front USB connectors, and the operator information panel on rack latches
- If you are removing a rack latch with the front VGA connector on it, remove the screws that secure the cable retainer on the side of the server and then remove the cable retainer from the chassis.Figure 3. Cable retainer removal
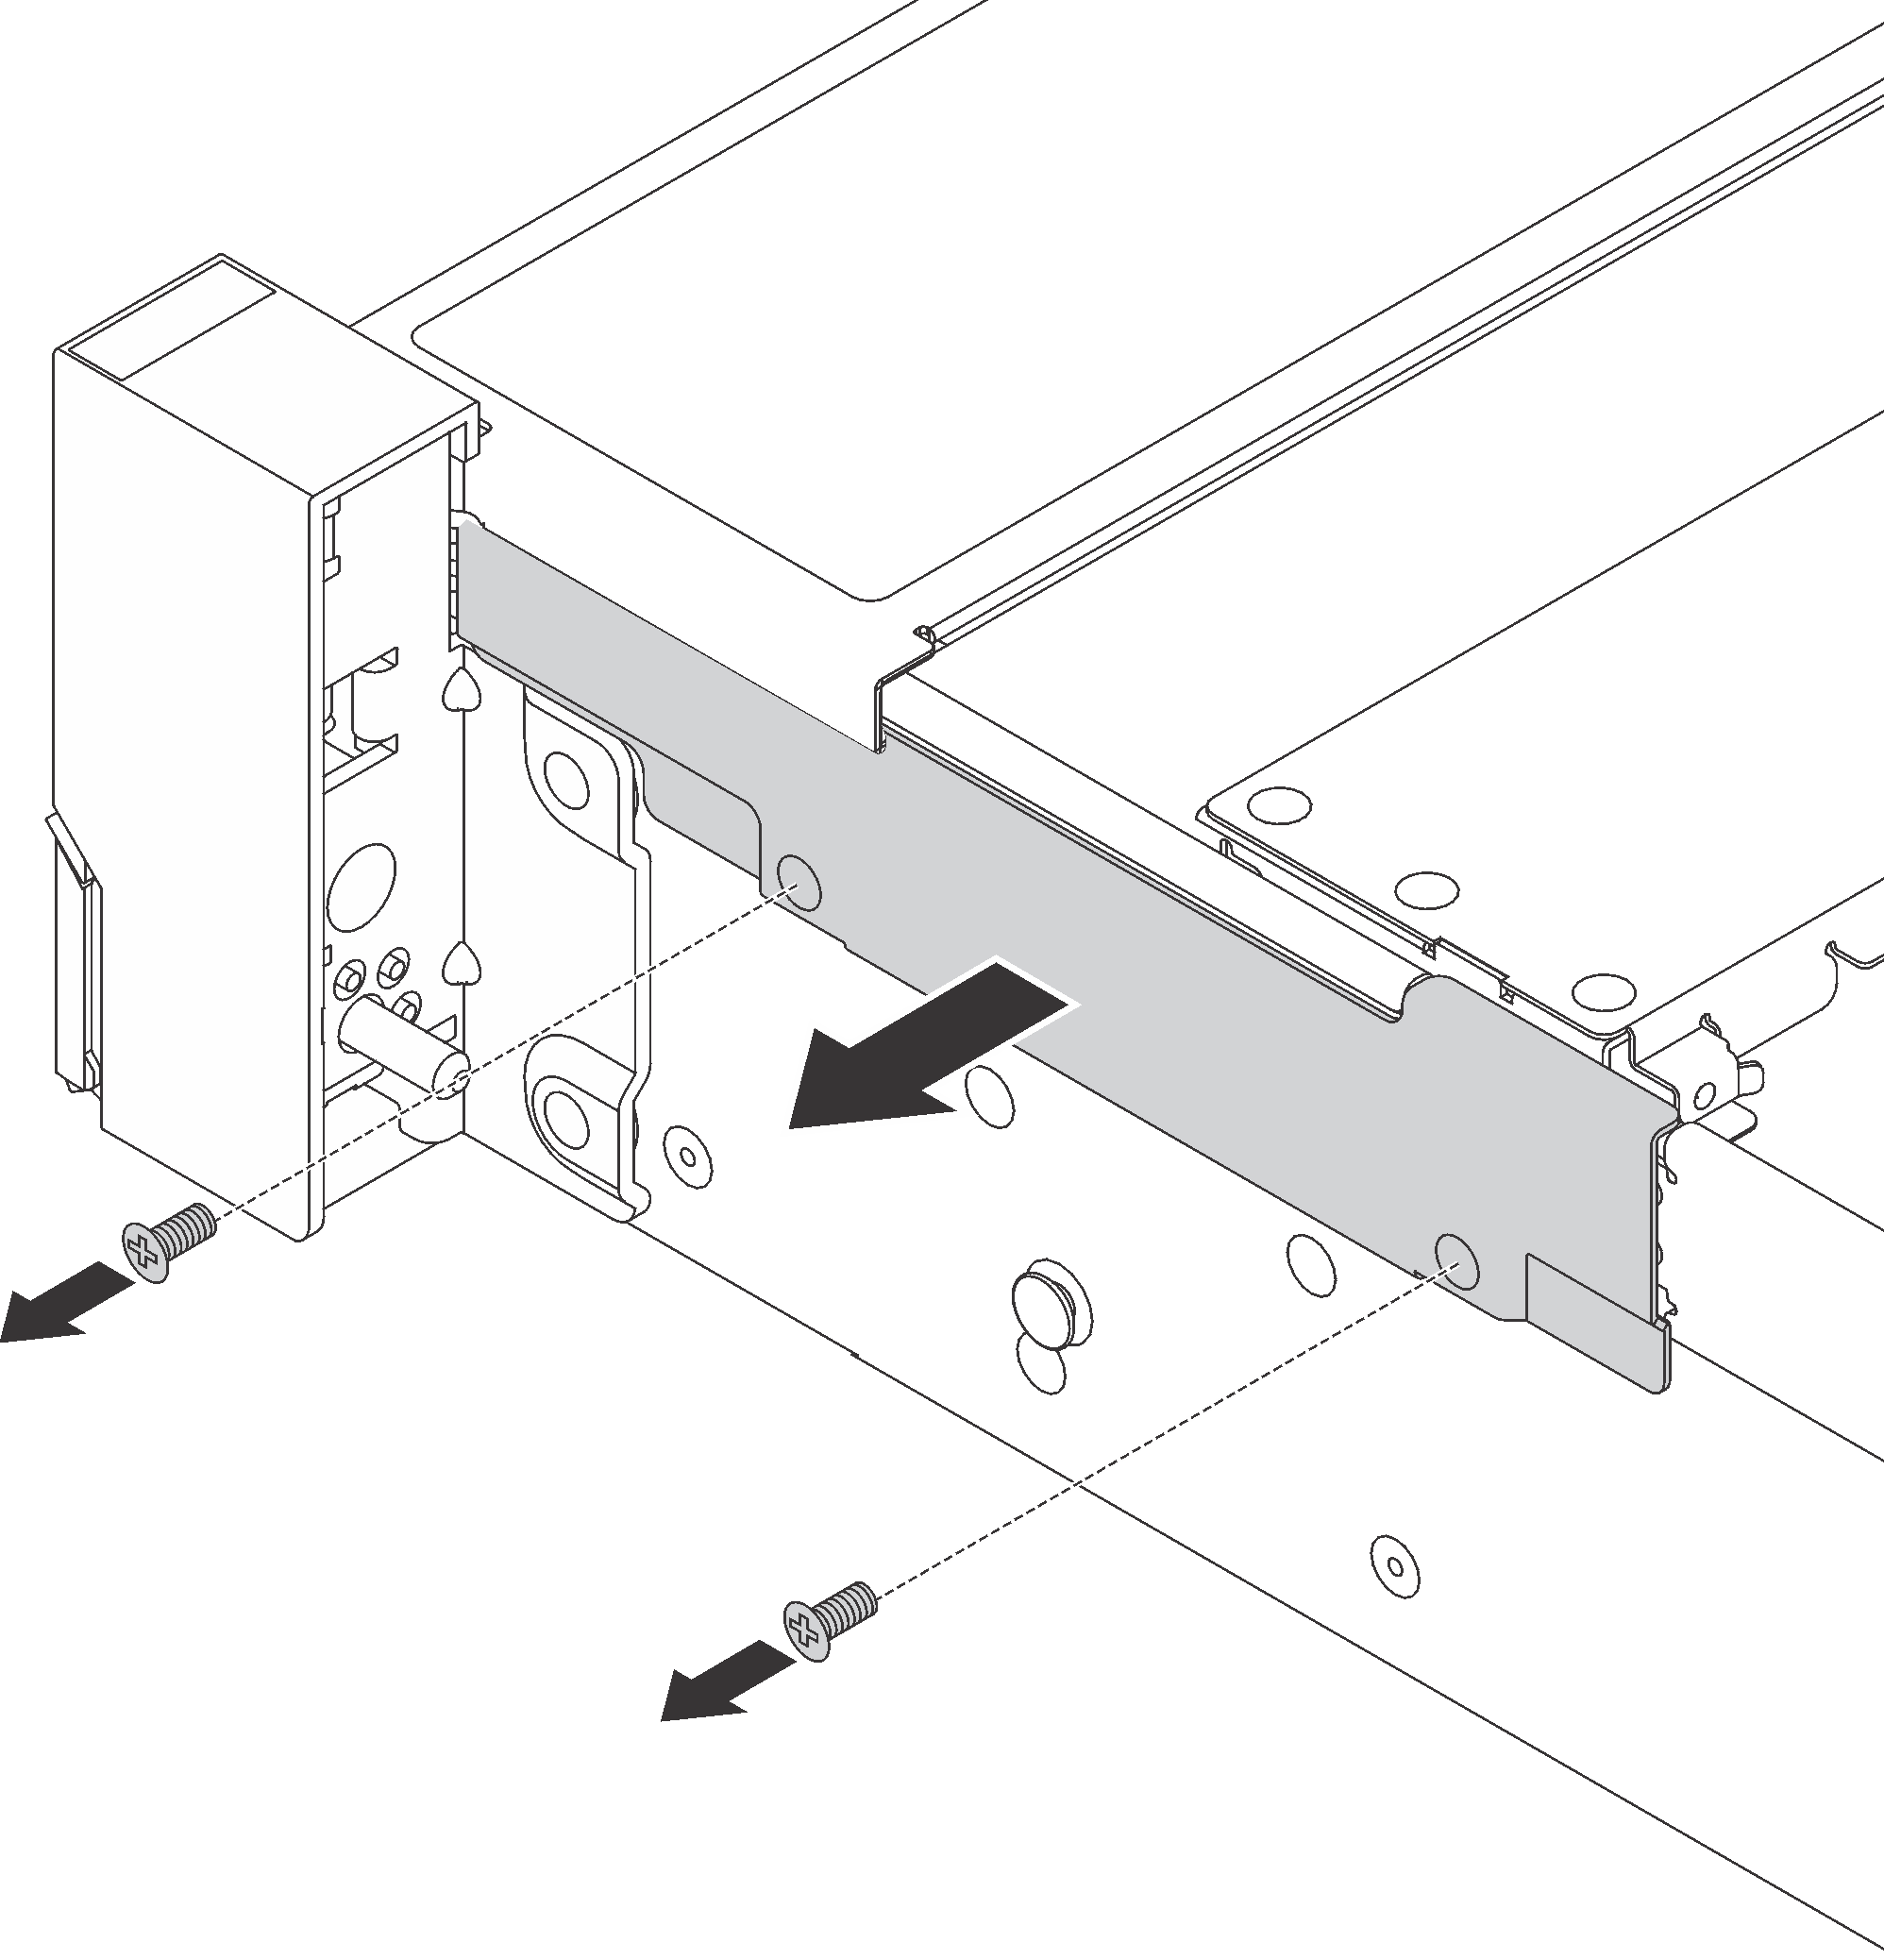
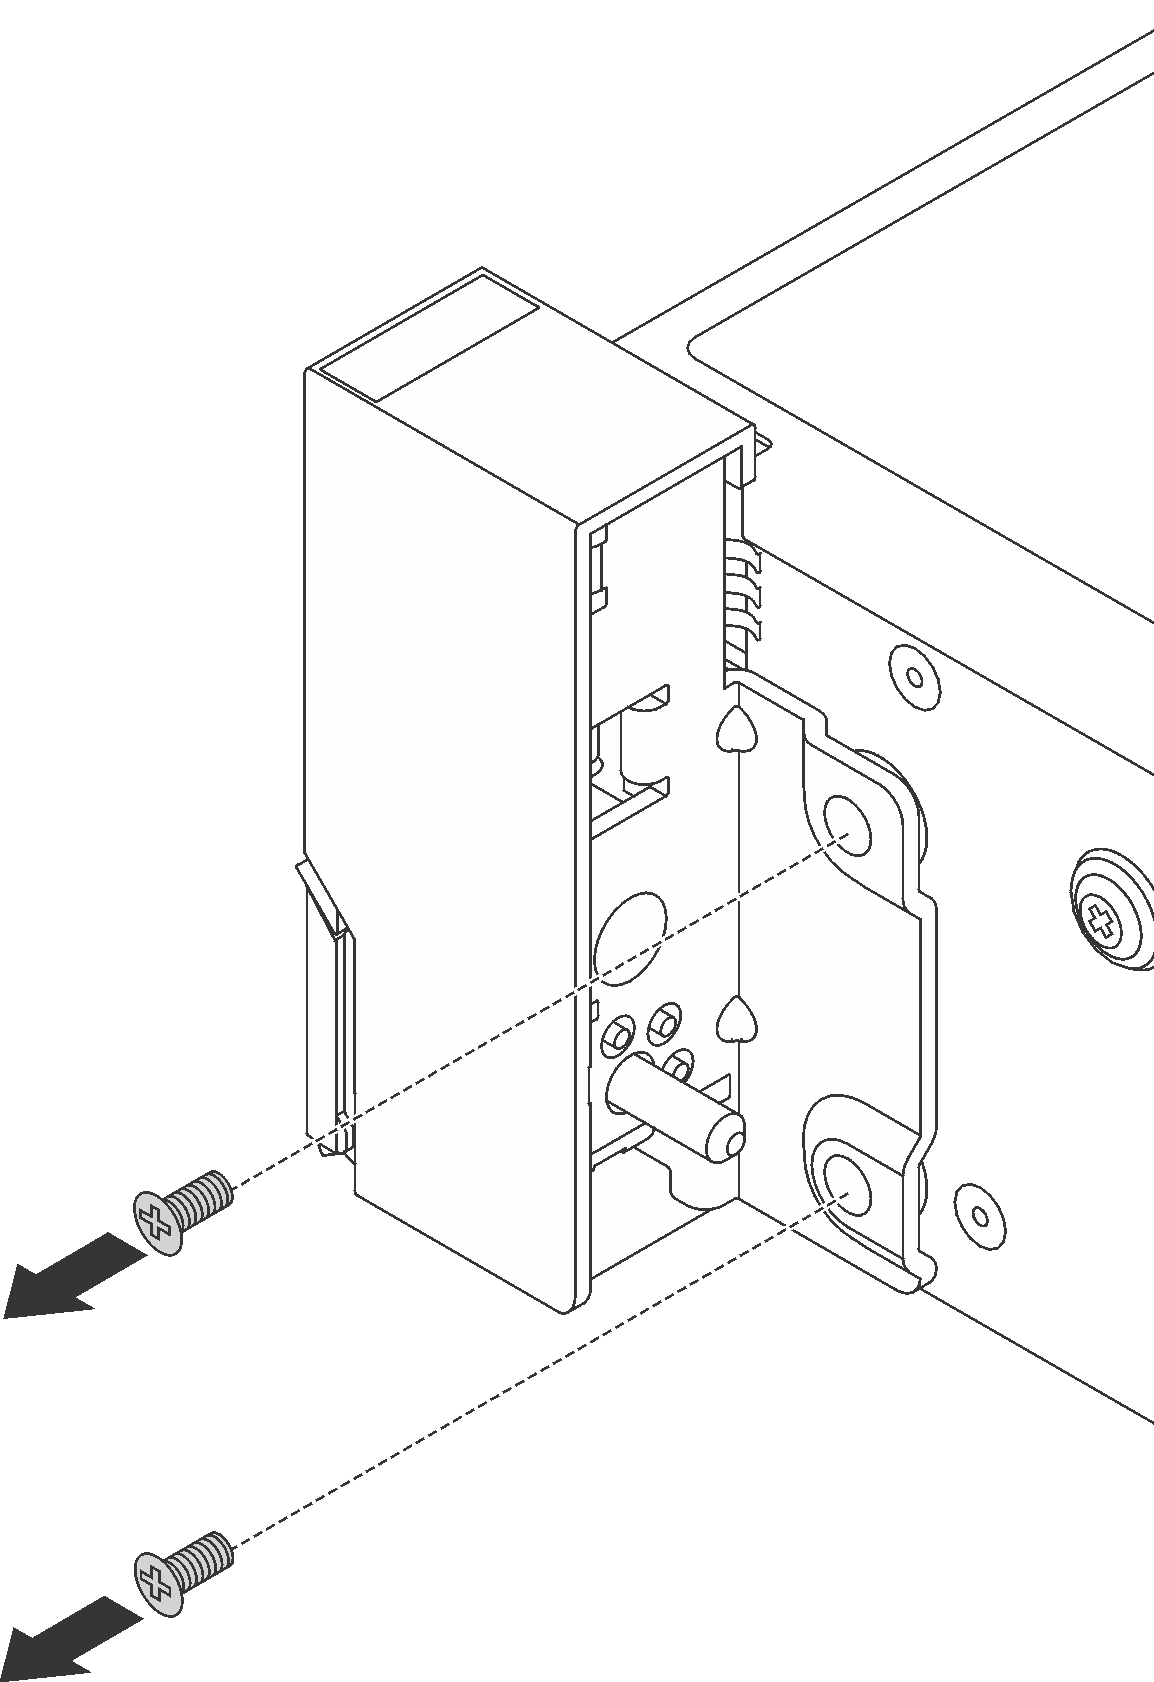
- On each side of the server, remove the screws that secure the rack latch.Figure 4. Screws removal
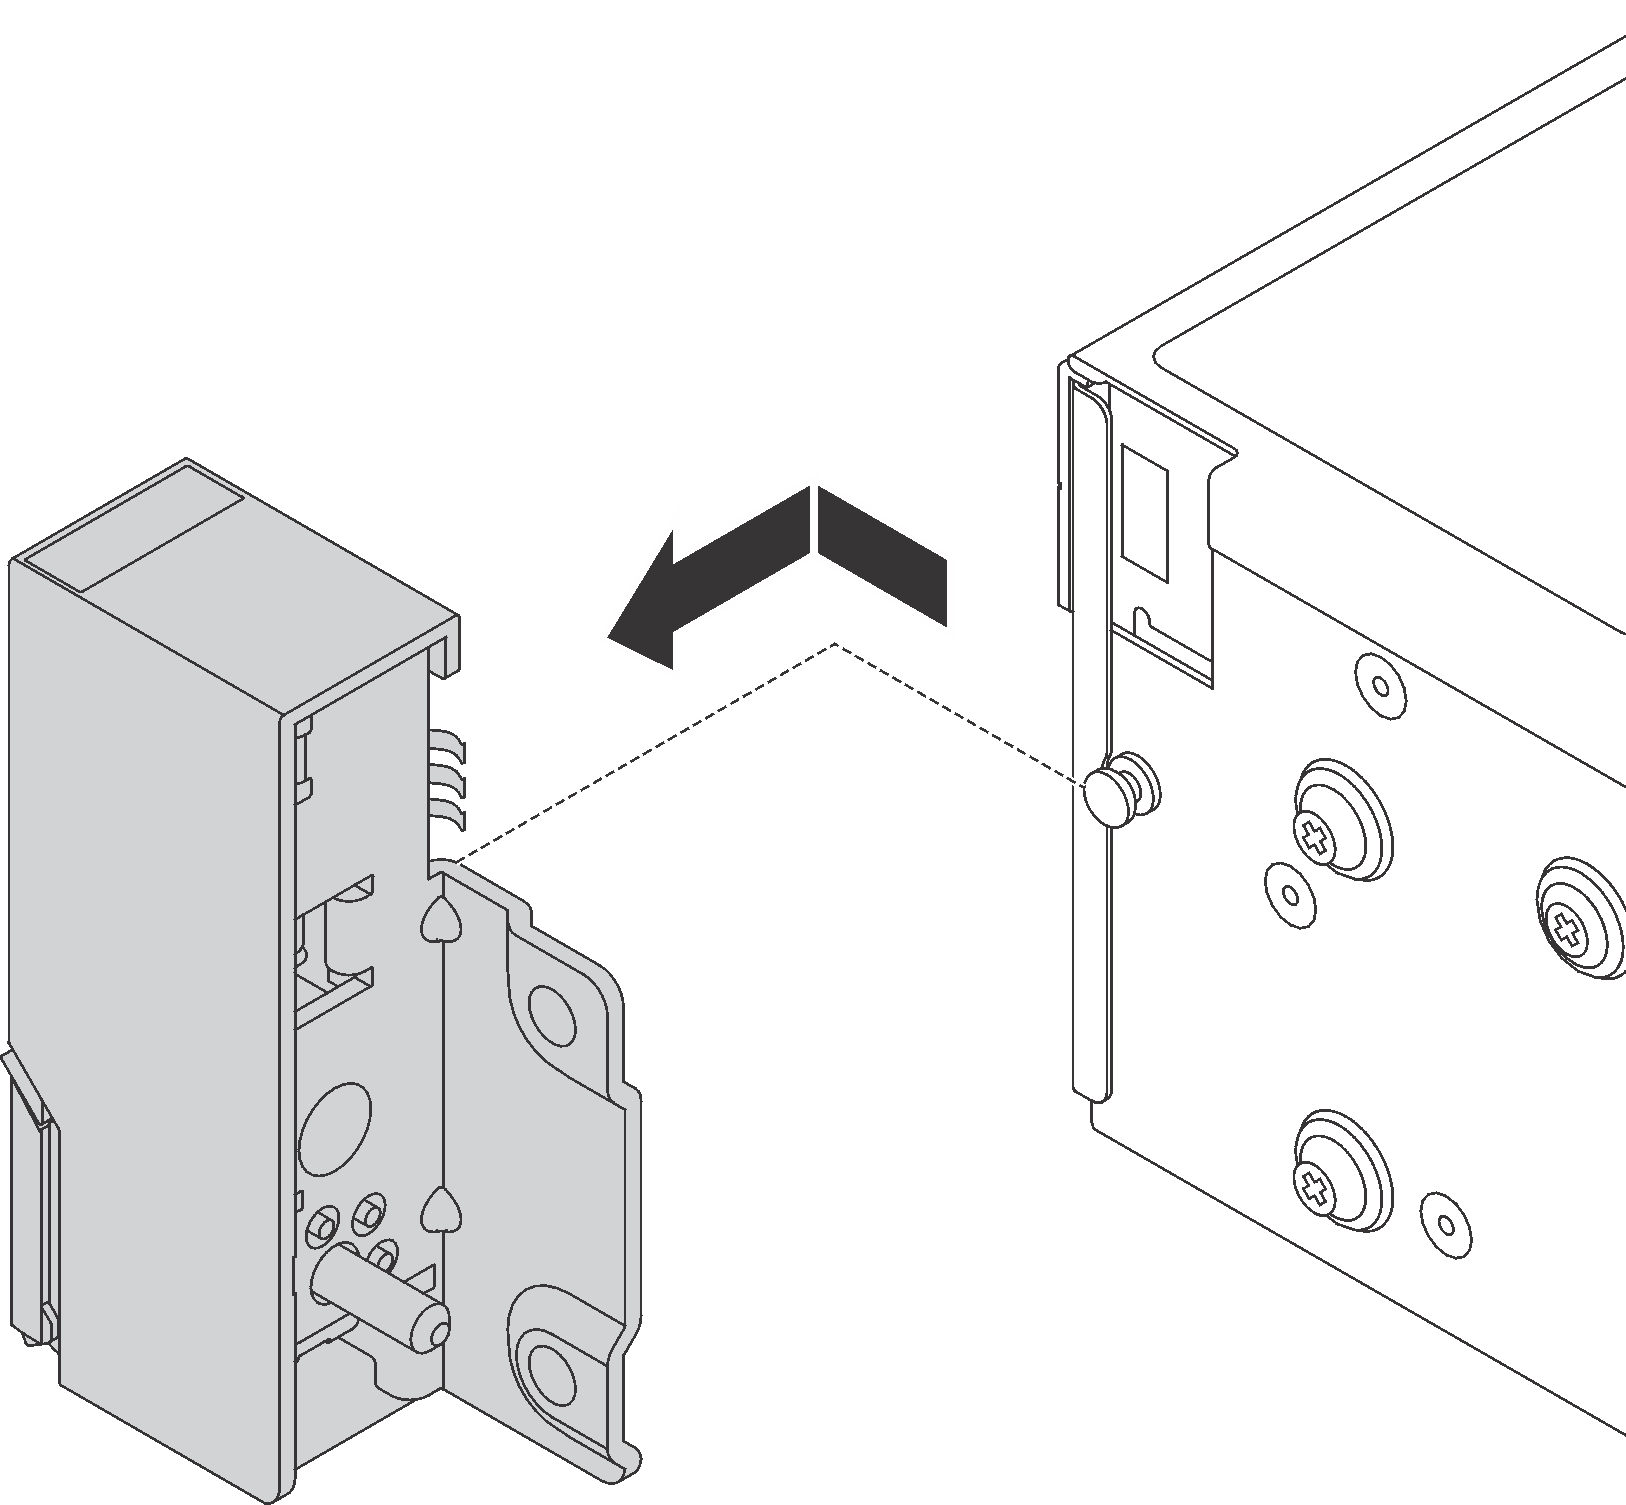
- On each side of the server, slide the rack latch forward slightly and then remove the rack latch from the chassis.Figure 5. Rack latch removal
If you are instructed to return the old rack latches, follow all packaging instructions and use any packaging materials that are provided.
Give documentation feedback