Remove the 3.5-inch simple-swap-drive backplate assembly
Use this information to remove the 3.5-inch simple-swap-drive backplate assembly.


Before removing the 3.5-inch simple-swap-drive backplate assembly:
Remove the top cover. See Remove the top cover.
Remove all the installed drives and drive fillers (if any) from the drive bays. See Remove a simple-swap drive.
Disconnect the cables from the system board. See Server models with eight 3.5-inch simple-swap drives. Then, remove the corresponding cables from the cable clips.
To remove the 3.5-inch simple-swap-drive backplate assembly, complete the following steps:
Watch the procedure
A video of this procedure is available at YouTube.
Figure 1. 3.5-inch simple-swap-drive backplate assembly removal
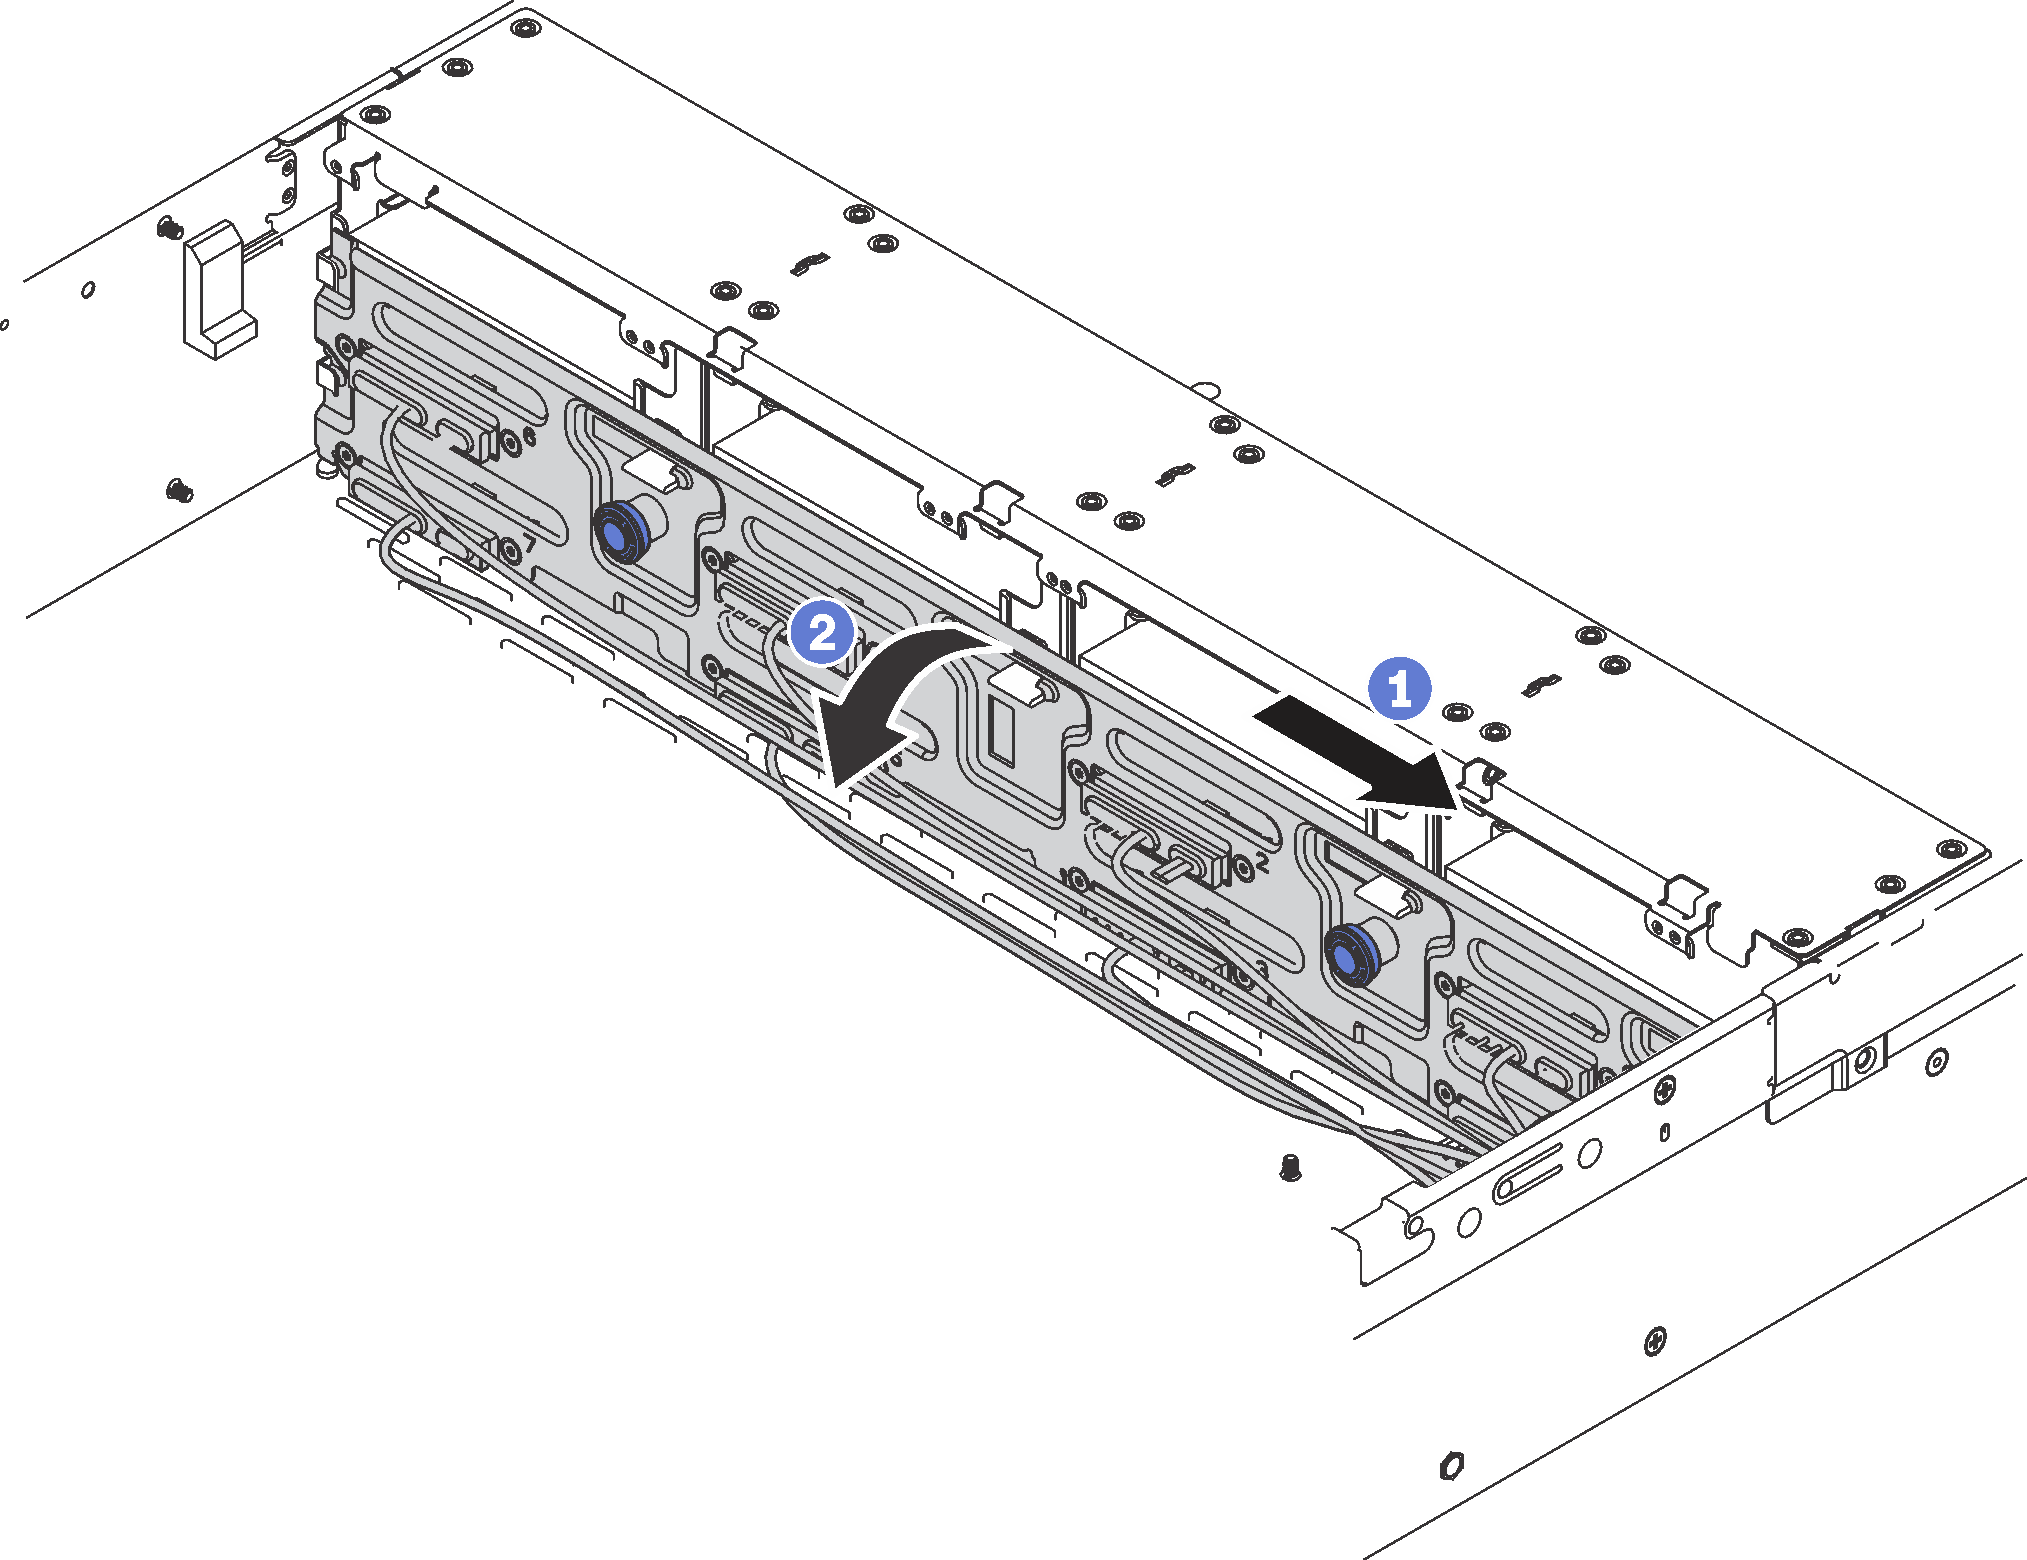
- Pull the release pins and carefully slide the backplate assembly in the direction as shown.
- Pivot the backplate assembly backward slightly to release it from the four hooks on the chassis. Then, carefully lift the backplate assembly out of the chassis.
If you are instructed to return the old simple-swap-drive backplate assembly, follow all packaging instructions and use any packaging materials that are provided.
Give documentation feedback