Remove the front I/O assembly
Use this information to remove the front I/O assembly.
Before removing the front I/O assembly:
Remove the top cover. See Remove the top cover.
If the security bezel is installed, remove it. See Remove the security bezel.
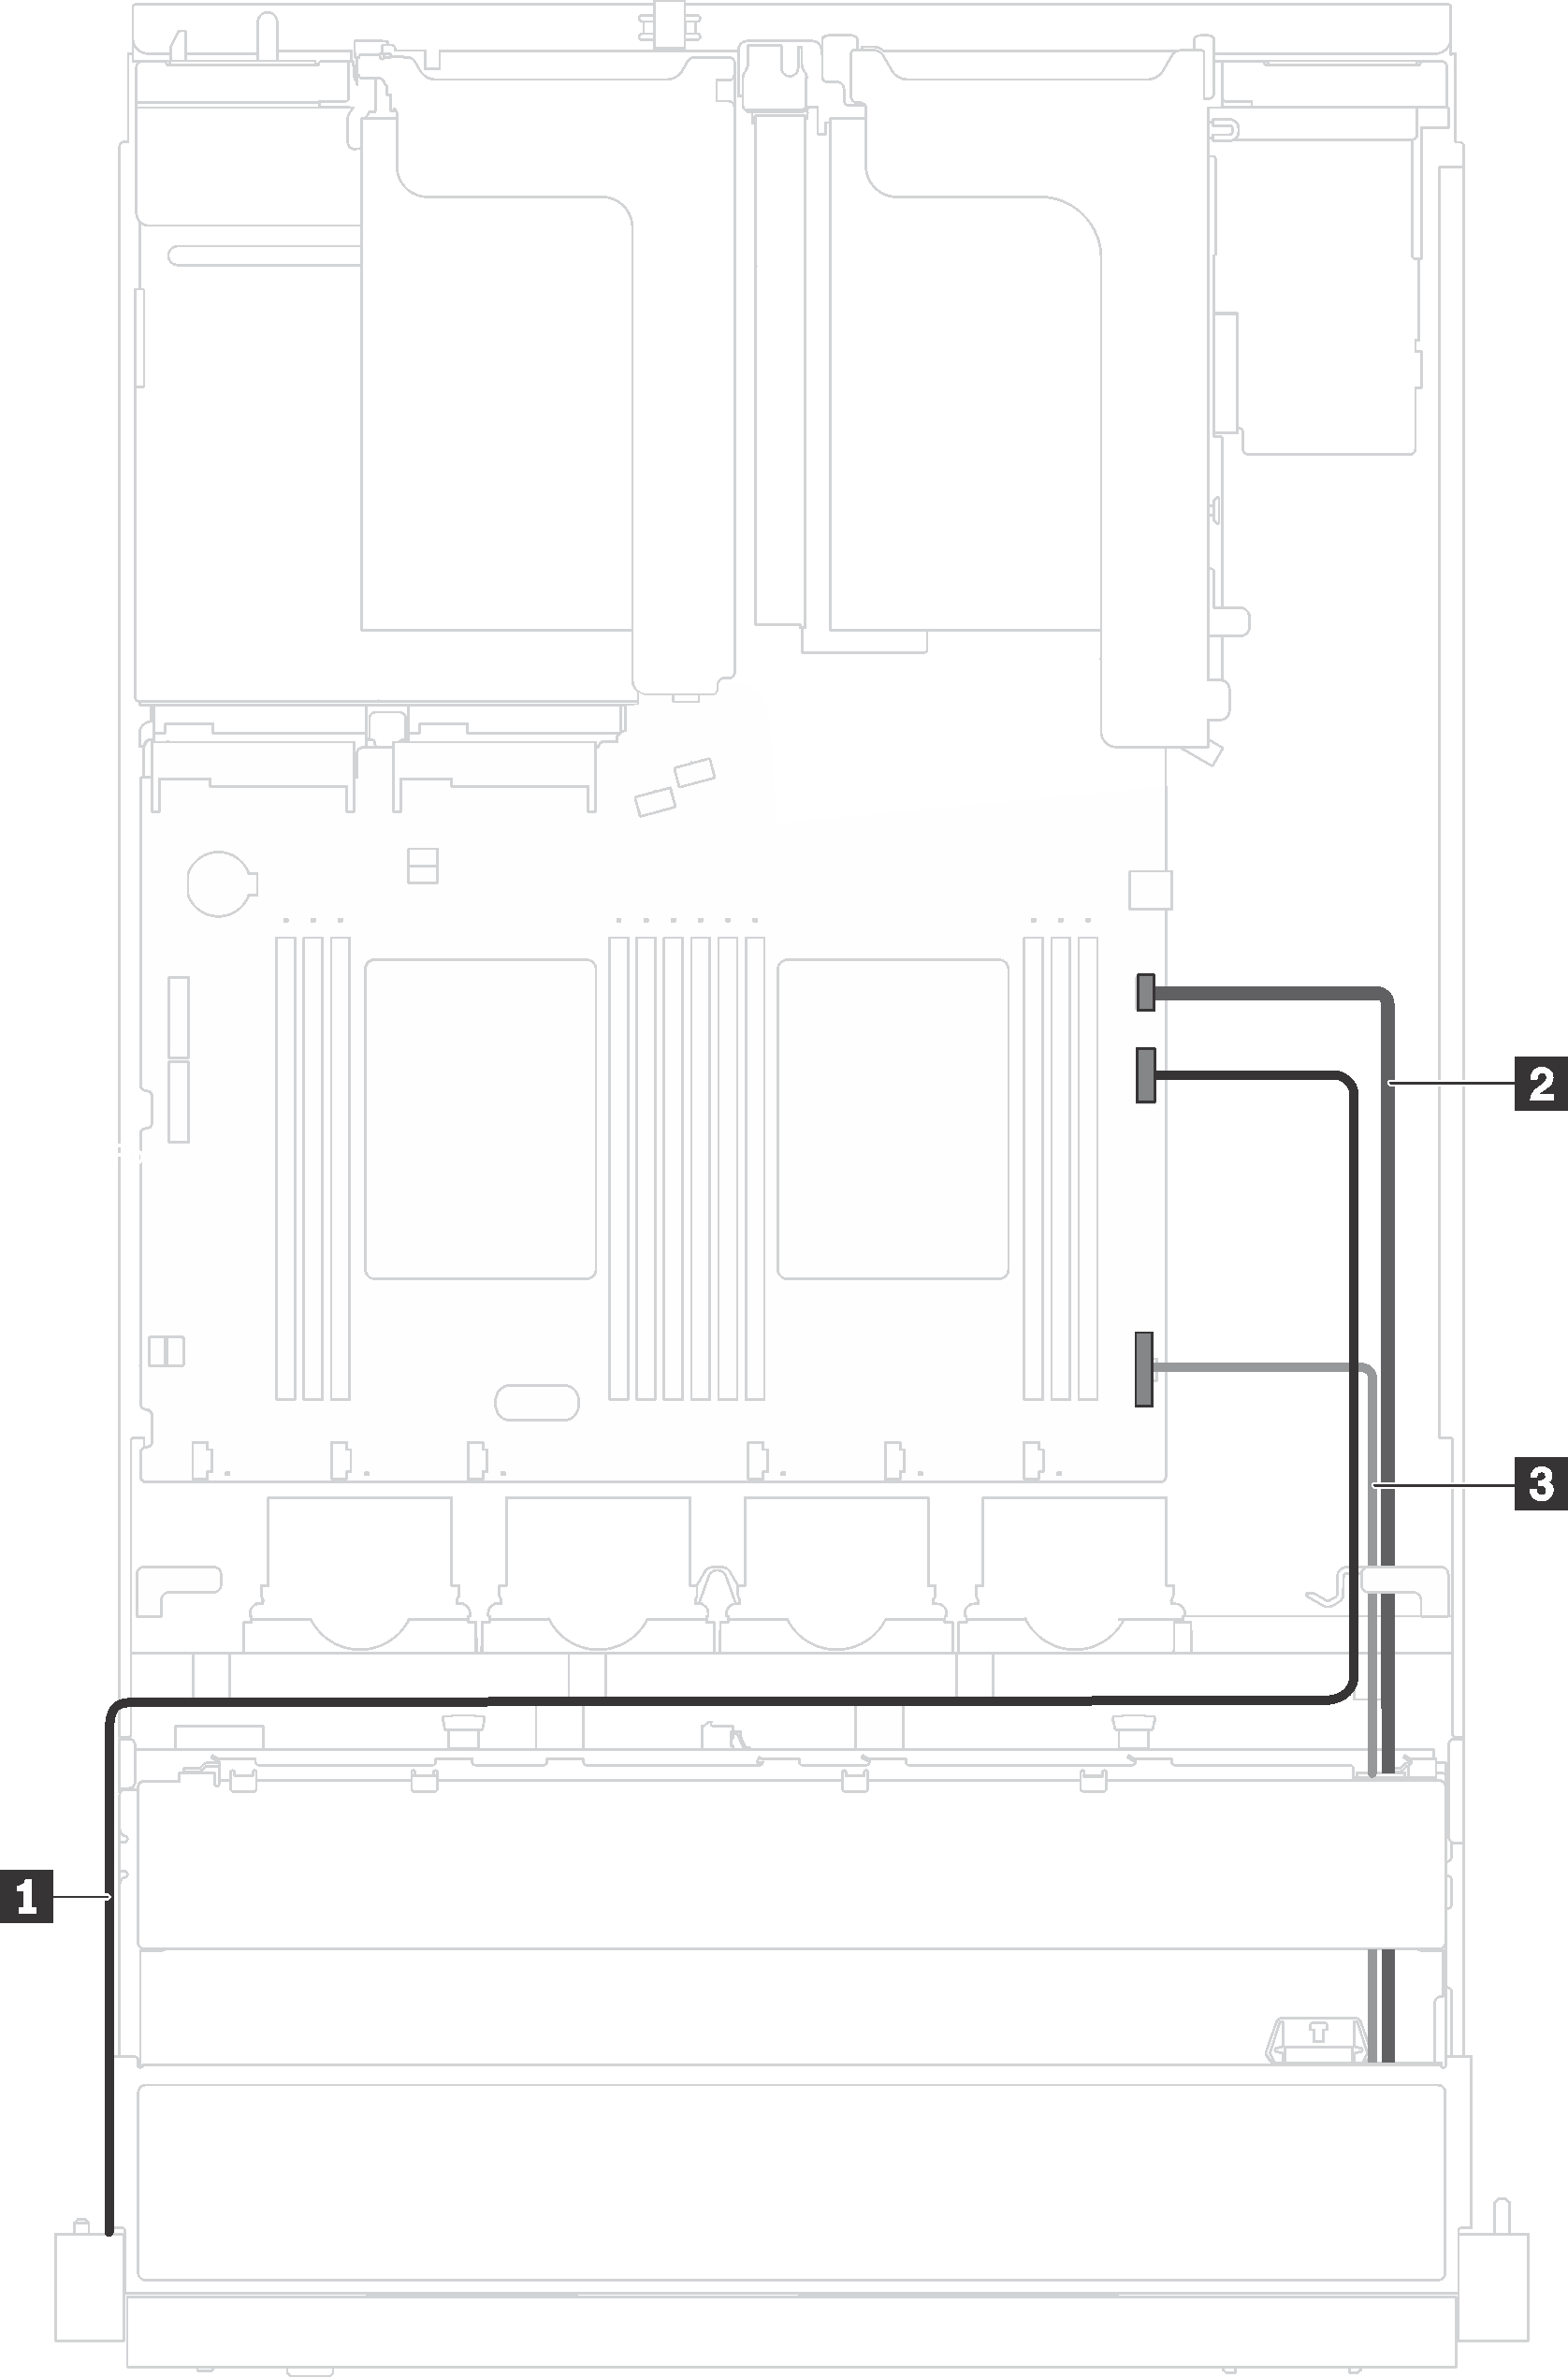
- Disconnect the front VGA cable 1, the USB cable 2, and the operator-information-panel cable 3 from the system board.AttentionTo avoid damaging the system board, make sure to follow the instructions in
Internal cable routing when disconnecting cables from the system board. Figure 1. Front I/O assembly cable connection
To remove the front I/O assembly, complete the following steps:
Watch the procedure
A video of this procedure is available at YouTube.
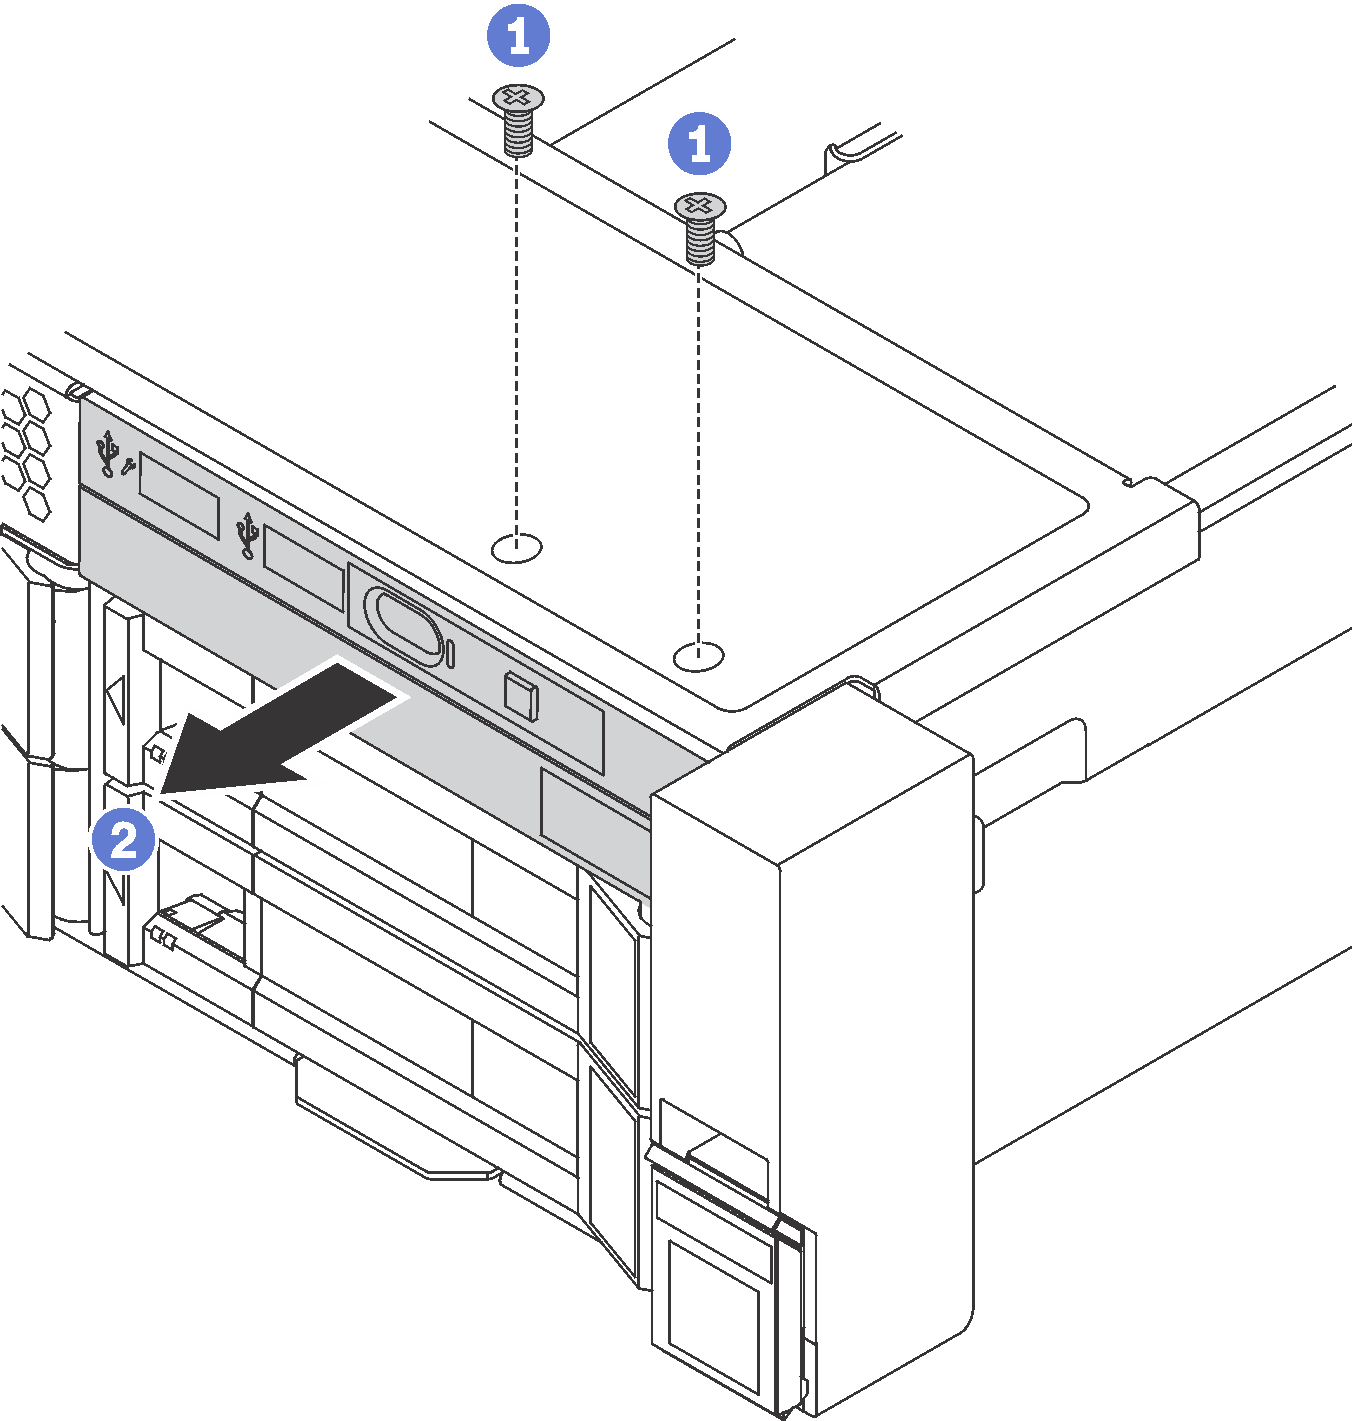
Figure 2. Front I/O assembly removal


- Remove the two screws that secure the front I/O assembly.
- Remove the front I/O assembly from the chassis.
If you are instructed to return the old front I/O assembly, follow all packaging instructions and use any packaging materials that are provided.
Give documentation feedback


