Install the simple-swap drive backplate assembly
Use this information to install the simple-swap drive backplate assembly.


Before installing the simple-swap drive backplate assembly, touch the static-protective package that contains the new backplate assembly to any unpainted surface on the outside of the server. Then, take the new backplate assembly out of the package and place it on a static-protective surface.
To install the simple-swap drive backplate assembly, complete the following steps:
Watch the procedure
A video of this procedure is available at YouTube.
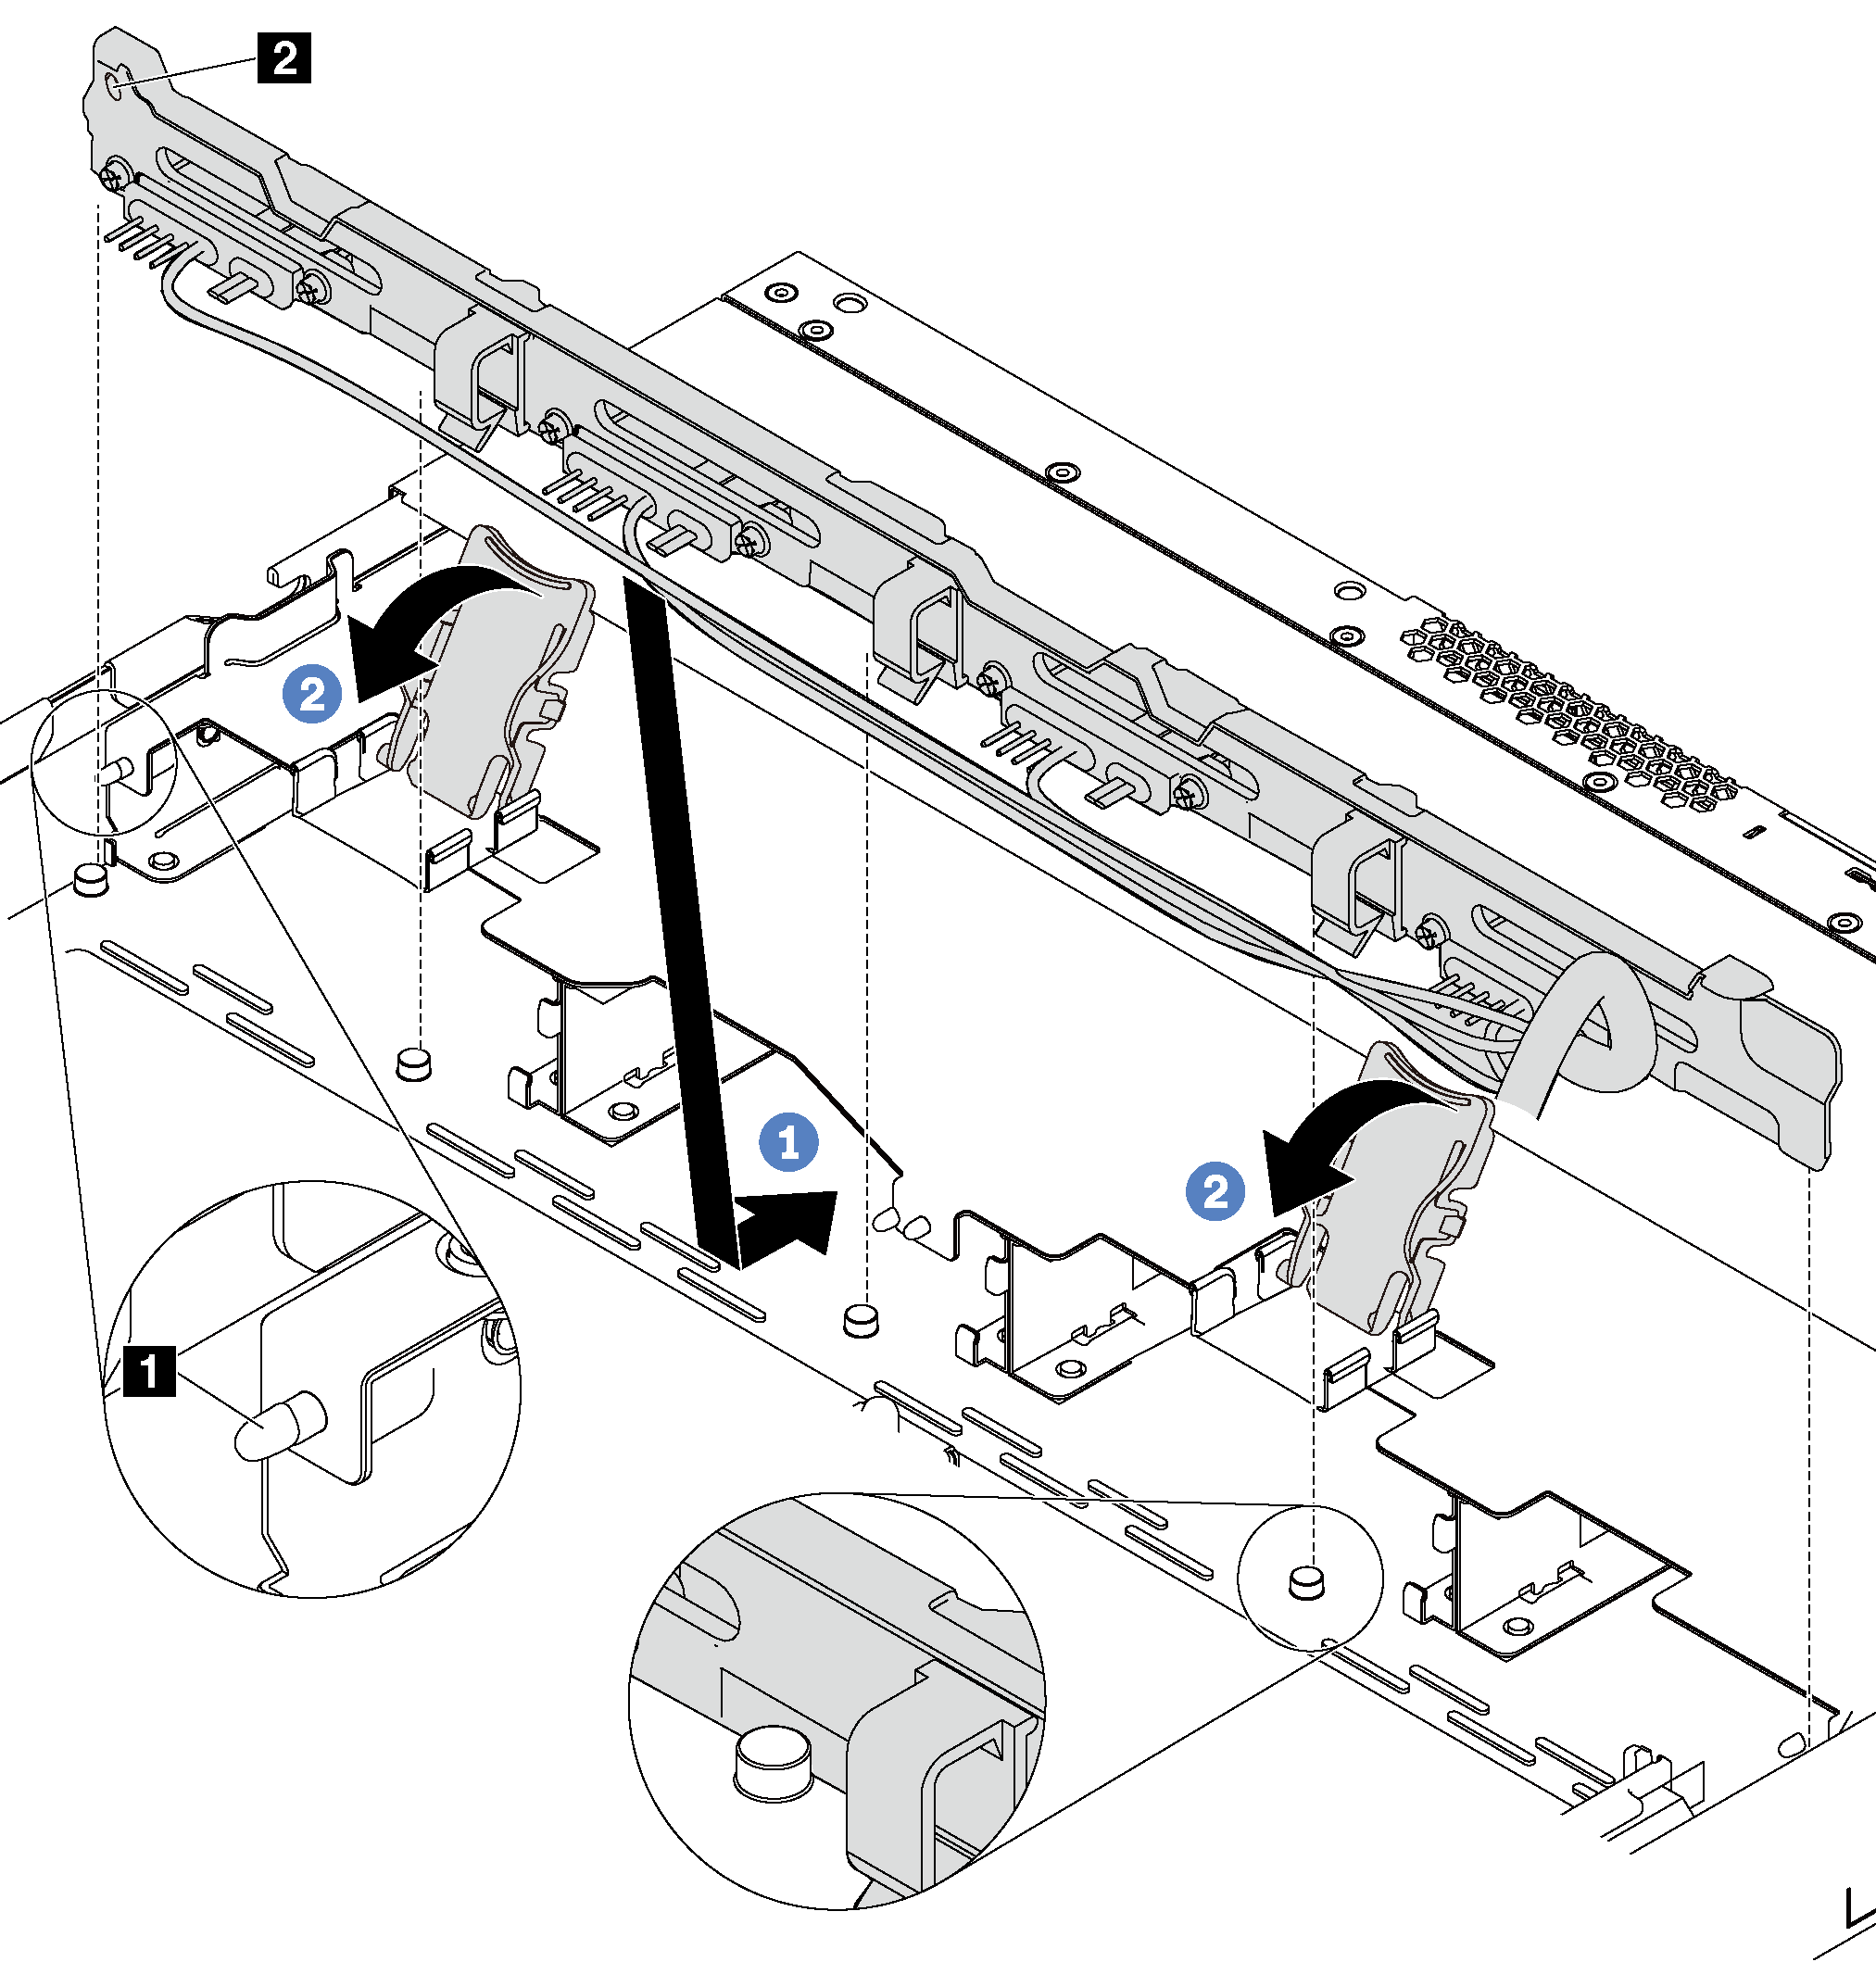
- Put the simple-swap drive backplate assembly under the front I/O assembly cables, align it with the chassis, and lower it into the chassis. Put the assembly into place with it leaning backward slightly so that the three pins 1 on the chassis pass through the three holes 2 in the assembly.
- Close the release latches to secure the simple-swap drive backplate assembly in place.
Connect cables of the simple-swap drive backplate assembly to the system board. See Backplate for four 3.5-inch simple-swap drives.
Reinstall all the drives and drive fillers that you removed. See Install a simple-swap drive.
Complete the parts replacement. See Complete the parts replacement.