Remove the simple-swap drive backplate assembly
Use this information to remove the simple-swap drive backplate assembly.
Before removing the simple-swap drive backplate assembly:
Remove the top cover. See Remove the top cover.
Remove all the installed drives and drive fillers from the drive bays. See Remove a simple-swap drive.
Disconnect the cables of the simple-swap drive backplate assembly from the system board.
To remove the simple-swap drive backplate assembly, complete the following steps:
Watch the procedure
A video of this procedure is available at YouTube.
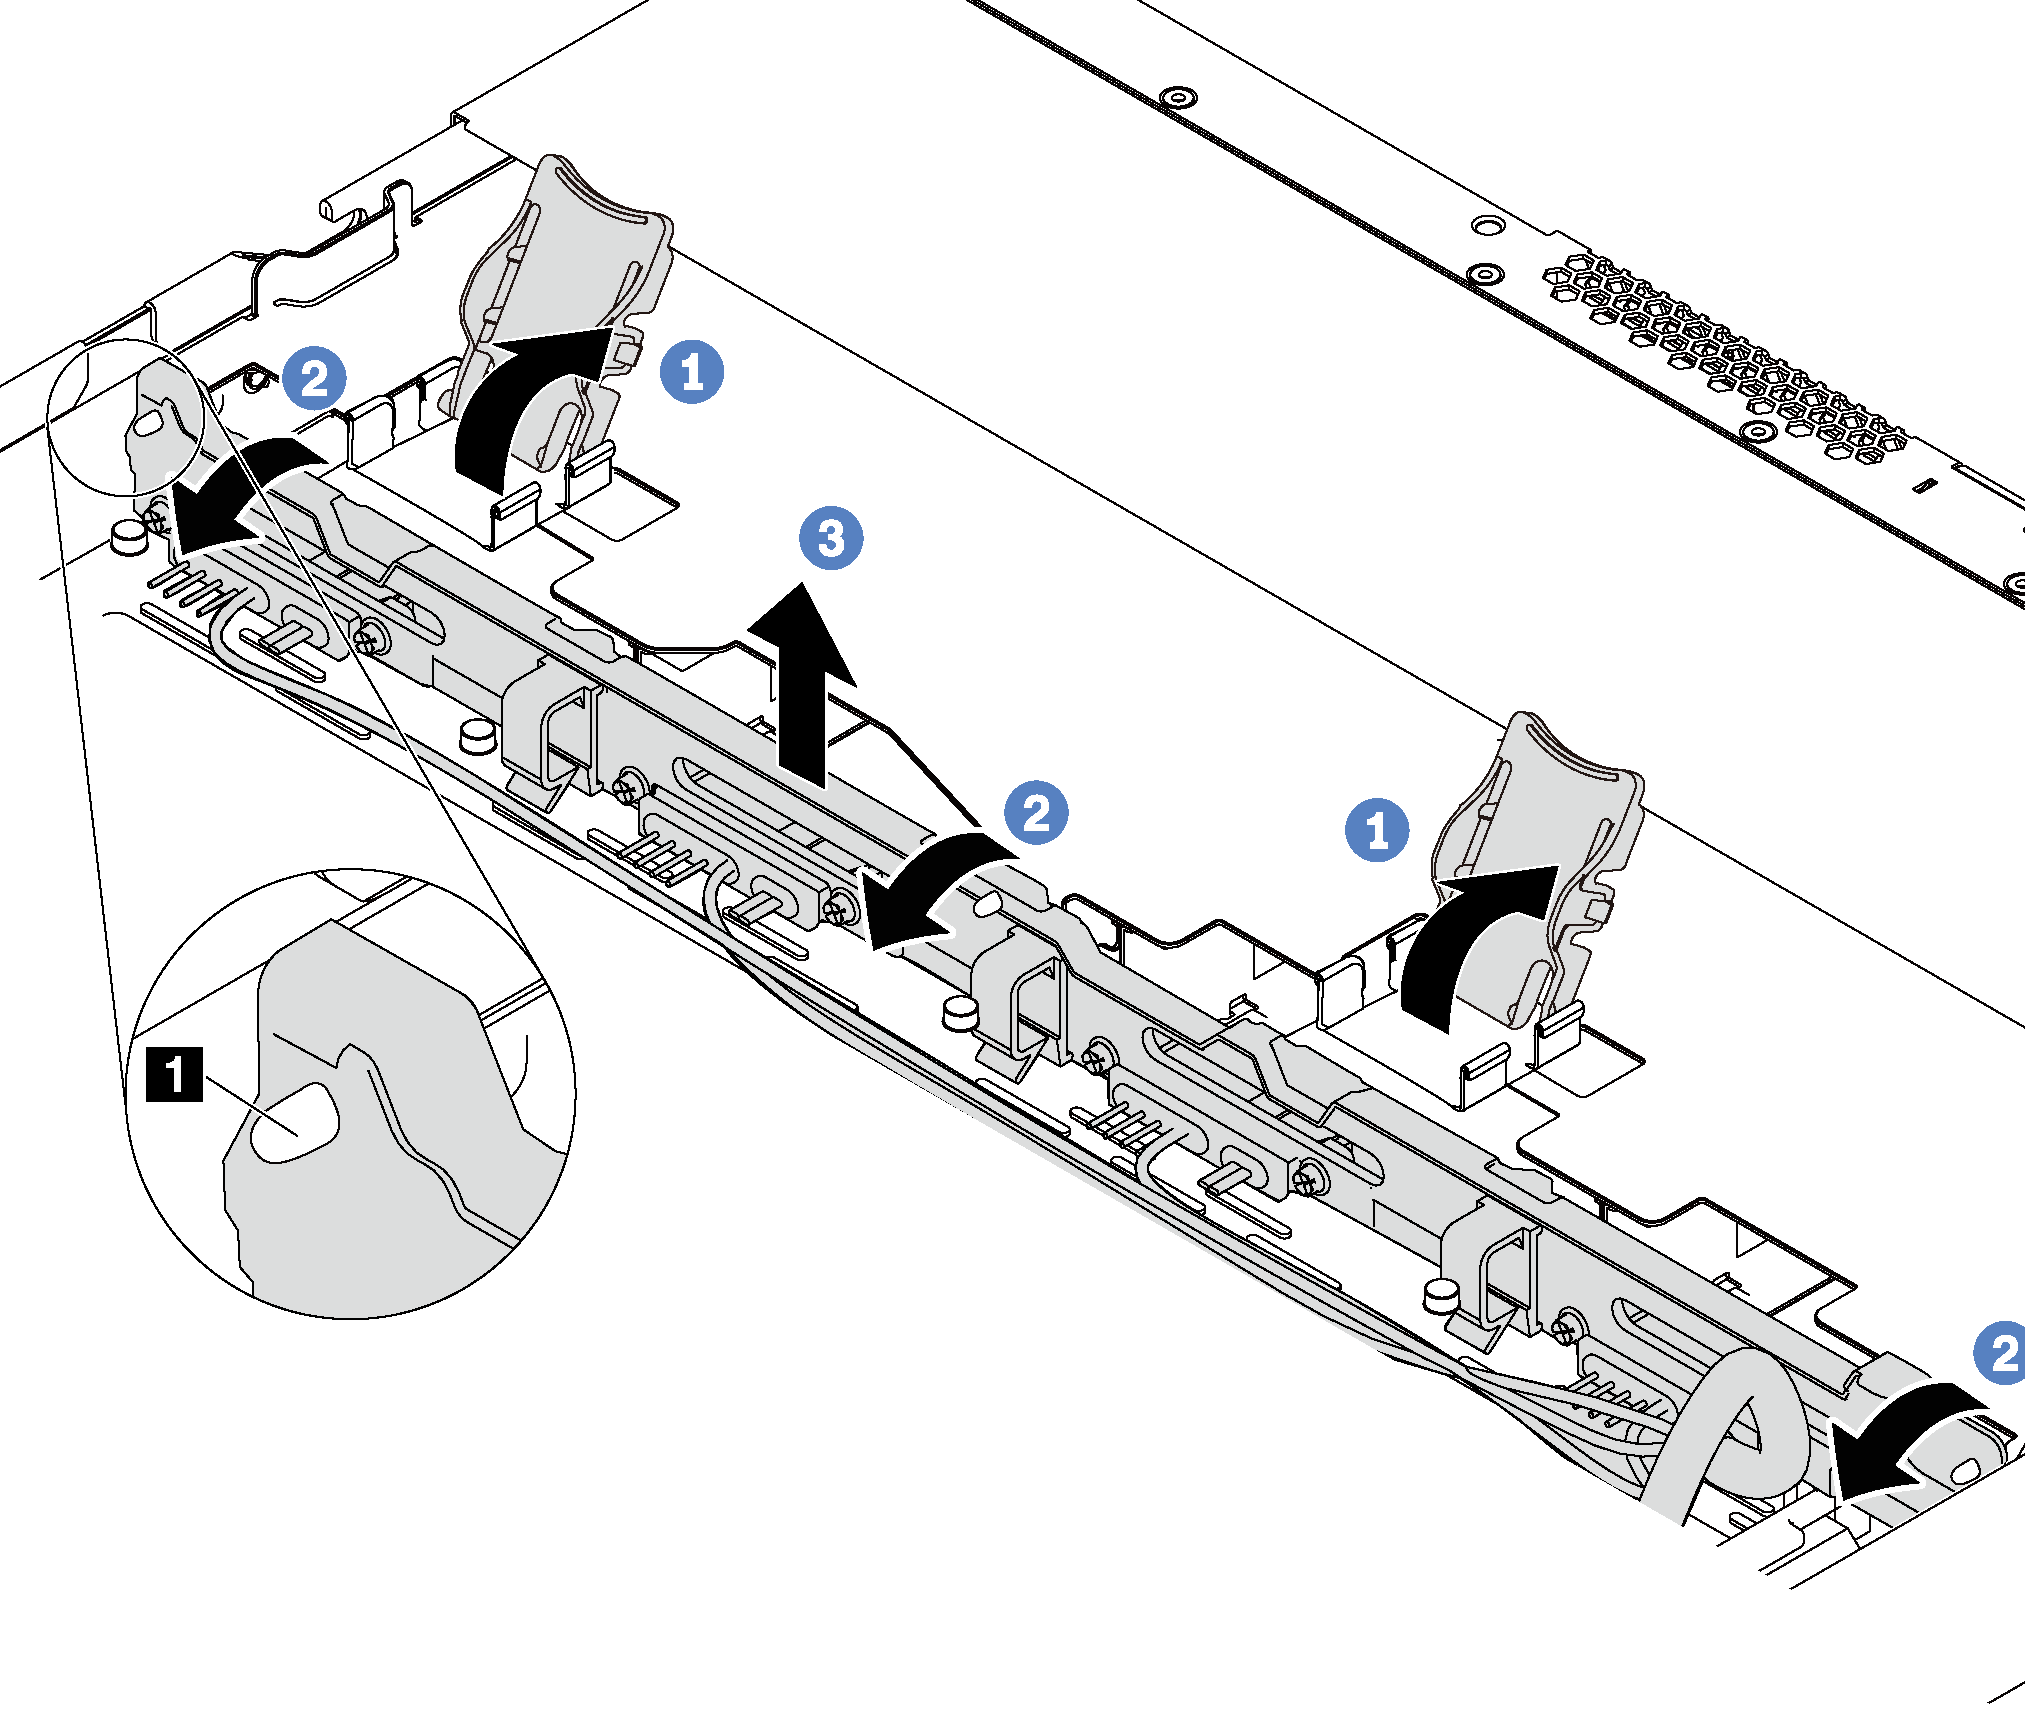
Figure 1. Simple-swap drive backplate assembly removal


- Open the release latches that secure the simple-swap drive backplate assembly.
- Pivot the simple-swap drive backplate assembly backward slightly to release it from the three pins 1 on the chassis.
- Carefully remove the simple-swap drive backplate assembly out of the chassis from under the front I/O assembly cables.
If you are instructed to return the old simple-swap drive backplate assembly, follow all packaging instructions and use any packaging materials that are provided.
Give documentation feedback


